2020 LINCOLN CONTINENTAL instrument panel
[x] Cancel search: instrument panelPage 85 of 609

Stopping the Decklid Movement
Note:
Do not apply sudden excessive force
to the decklid while it is in motion. This could
damage the power decklid and its
components.
You can stop the decklid movement by doing
any of the following:
• Pressing the decklid control button.
• Pressing the remote control button twice.
• Pressing the button on the instrument
panel.
• Moving your foot under and away from
the center rear bumper in a single-kick
motion. *
* This method only works for vehicles with the
hands-free decklid feature.
Resetting the Power Decklid
The decklid may not operate correctly and
you may need to reset it if:
• The vehicle battery charge is low.
• You disconnect the battery.
• You manually close the decklid and leave
it unlatched. 1. Disconnect the battery for 20 seconds
then reconnect the battery.
2. Manually close the decklid making sure it is fully closed.
3. Power open the decklid using the remote
control or instrument panel button.
Obstacle Detection
When Closing
The system stops when it detects an
obstacle. A tone sounds and the system
reverses to open. Once you remove the
obstacle, you can power close the decklid.
Note: Entering your vehicle while the decklid
is closing can cause your vehicle to bounce
and activate obstacle detection. To prevent
this, let the power decklid close completely
before you enter your vehicle. Before driving
your vehicle, check the instrument cluster
for a trunk ajar or door ajar message or
warning indicator. Failure to do this could
result in unintentionally leaving the decklid
open while driving. When Opening
The system stops when it detects an
obstacle and a tone sounds. Once you
remove the obstacle, you can continue to
operate the decklid.
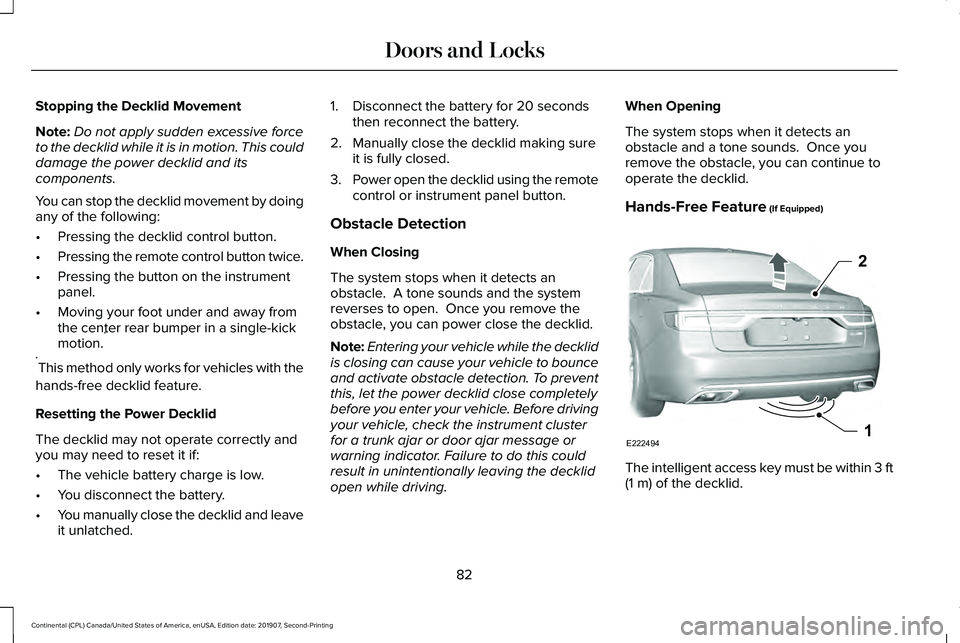
Hands-Free Feature (If Equipped)
The intelligent access key must be within 3 ft
(1 m)
of the decklid.
82
Continental (CPL) Canada/United States of America, enUSA, Edition date: 201907, Second-Printing Doors and LocksE222494
2
1
Page 100 of 609

GENERAL INFORMATION
Condensation in the Exterior Front
Lamps and Rear Lamps
Exterior front lamps and rear lamps have
vents to accommodate normal changes in
air pressure.
Condensation can be a natural by-product
of this design. When moist air enters the
lamp assembly through the vents, there is a
possibility that condensation can occur when
the temperature is cold. When normal
condensation occurs, a fine mist can form on
the interior of the lens. The fine mist
eventually clears and exits through the vents
during normal operation.
Clearing time may take as long as 48 hours
under dry weather conditions.
Examples of acceptable condensation are:
•
The presence of a fine mist (no streaks,
drip marks or large droplets).
• A fine mist covers less than 50% of the
lens. Examples of unacceptable condensation are:
•
A water puddle inside the lamp.
• Streaks, drip marks or large droplets
present on the interior of the lens.
If you see any unacceptable condensation,
have your vehicle checked by an authorized
dealer. LIGHTING CONTROL Lamps off.
A
Parking lamps, instrument panel
lamps, license plate lamps and tail
lamps.
B
Headlamp low beam.
C
97
Continental (CPL) Canada/United States of America, enUSA, Edition date: 201907, Second-Printing LightingE142449
Page 151 of 609

AUTOMATIC CLIMATE CONTROL
Note:
Depending on your vehicle option
package, the controls may look different
from what you see here.
Note: You can switch temperature units
between Fahrenheit and Celsius.
Directing Air to the Instrument Panel
Air Vents Press and release the button to
direct airflow to instrument panel
air vents. Directing Air to the Footwell Air Vents Press and release the button to
direct airflow to footwell air vents.
Setting the Blower Motor Speed Turn the control to adjust the
volume of air circulated in the
vehicle.
Setting the Temperature
Press the toggle button on the left-hand side
of the climate control upward or downward
to set the left-hand temperature.
Note: This control also adjusts the right-hand
side temperature when you switch off dual
zone mode.
Press the toggle button on the right-hand
side of the climate control upward or
downward to set the right-hand temperature. Switching Auto Mode On and Off Press and release the button to
switch on automatic operation.
Repeatedly press the button to
adjust auto mode.
The system adjusts the blower motor speed,
air distribution, air conditioning operation,
and outside or recirculated air to reach and
maintain the temperature you have set.
Note: The system starts at the previous
setting when you switch on AUTO mode.
Note: You can also switch off dual zone
mode by pressing and holding the button for
more than two seconds.
148
Continental (CPL) Canada/United States of America, enUSA, Edition date: 201907, Second-Printing Climate ControlE287753
Page 152 of 609

Auto Mode Indicator Status
Description
Auto Mode Indicator Status
One indicator illuminated. •The blower motor speed is reduced.
•Use this setting to minimize the amount of noise from the blower motor.
• This setting increases the time taken to cool the interior.
Two indicators illuminated. •The blower motor speed is moderate.
Three indicators illuminated. •The blower motor speed is increased.
•This setting increases the amount of noise from the blower motor.
• Use this setting to reduce the time taken to cool the interior.
Switching Defrost On and Off Press and release the button to
distribute air through the
windshield air vents and de-mister.
Air directed to the instrument panel and
footwell air vents turns off. You can also use
this setting to defog and clear the windshield
of a thin covering of ice. Switching the Air Conditioning On and
Off Press and release the button.
Use air conditioning with recirculated air to
improve cooling performance and efficiency. Note:
In certain conditions, for example,
maximum defrost, the air conditioning
compressor may continue to operate even
though you switch off the air conditioning.
Switching the Climate Control On and
Off Press and release the button.
149
Continental (CPL) Canada/United States of America, enUSA, Edition date: 201907, Second-Printing Climate Control
Page 153 of 609

Switching Dual Zone Mode On and Off
Press and release the button to
switch on temperature control for
the right-hand side of the vehicle.
Switching Maximum Air Conditioning
On and Off Press and release the button for
maximum cooling.
The left-hand and right-hand settings set to
LO, recirculated air flows through the
instrument panel air vents, air conditioning
turns on and the blower motor adjusts to the
highest speed.
Switching Maximum Defrost On and
Off Press and release the button for
maximum defrosting.
The left-hand and right-hand settings set to
HI, air flows through the windshield air vents,
and the blower motor adjusts to the highest
speed. You can also use this setting to defog and
clear the windshield of a thin covering of ice.
Note:
To prevent window fogging, you
cannot select recirculated air when
maximum defrost is on.
Note: The heated rear window also turns on
when you select maximum defrost.
Switching Recirculated Air On and Off Press and release the button to
switch between outside air and
recirculated air.
The air currently in the passenger
compartment recirculates. This may reduce
the time needed to cool the interior, when
used with A/C, and reduce unwanted odors
from entering your vehicle.
Note: Recirculated air may turn off, or
prevent you from switching on, in all air flow
modes except MAX A/C to reduce the risk
of fogging. Recirculation may also turn on
and off in various air distribution control
combinations during hot weather to improve
cooling efficiency. HINTS ON CONTROLLING THE
INTERIOR CLIMATE
General Hints
Note:
Prolonged use of recirculated air may
cause the windows to fog up.
Note: You may feel a small amount of air
from the footwell air vents regardless of the
air distribution setting.
Note: To reduce humidity build-up inside
your vehicle, do not drive with the system
switched off or with recirculated air always
switched on.
Note: Do not place objects under the front
seats as this may interfere with the airflow
to the rear seats.
Note: Remove any snow, ice or leaves from
the air intake area at the base of the
windshield.
Note: To improve the time to reach a
comfortable temperature in hot weather,
drive with the windows open until you feel
cold air through the air vents.
150
Continental (CPL) Canada/United States of America, enUSA, Edition date: 201907, Second-Printing Climate ControlE265280
Page 154 of 609

Automatic Climate Control
Note:
Adjusting the settings when your
vehicle interior is extremely hot or cold is not
necessary. Automatic mode is best
recommended to maintain set temperature.
Note: The system adjusts to heat or cool the
interior to the temperature you select as
quickly as possible.
Note: For the system to function efficiently,
the instrument panel and side air vents
should be fully open.
Note: If you select AUTO during cold outside
temperatures, the system directs air flow to
the windshield and side window air vents. In
addition, the blower motor may run at a
slower speed until the engine warms up.
Note: If you select
AUTO during hot
temperatures and the inside of the vehicle
is hot, the system uses recirculated air to
maximize interior cooling. Blower motor
speed may also reduce until the air cools.
Quickly Heating the Interior
1. Press and release
AUTO. 2. Adjust the temperature function to the
setting you prefer.
Recommended Settings for Heating
1. Press and release
AUTO.
2. Adjust the temperature function to the setting you prefer. Use
72°F (22°C) as a
starting point, then adjust the setting as
necessary.
Quickly Cooling the Interior
1. Press and release
MAX A/C.
Recommended Settings for Cooling
1. Press and release
AUTO.
2. Adjust the temperature function to the setting you prefer. Use
72°F (22°C) as a
starting point, then adjust the setting as
necessary.
Defogging the Side Windows in Cold
Weather
1. Press and release defrost or maximum defrost. 2. Adjust the temperature control to the
setting you prefer. Use
72°F (22°C) as a
starting point, then adjust the setting as
necessary.
REAR PASSENGER CLIMATE
CONTROLS
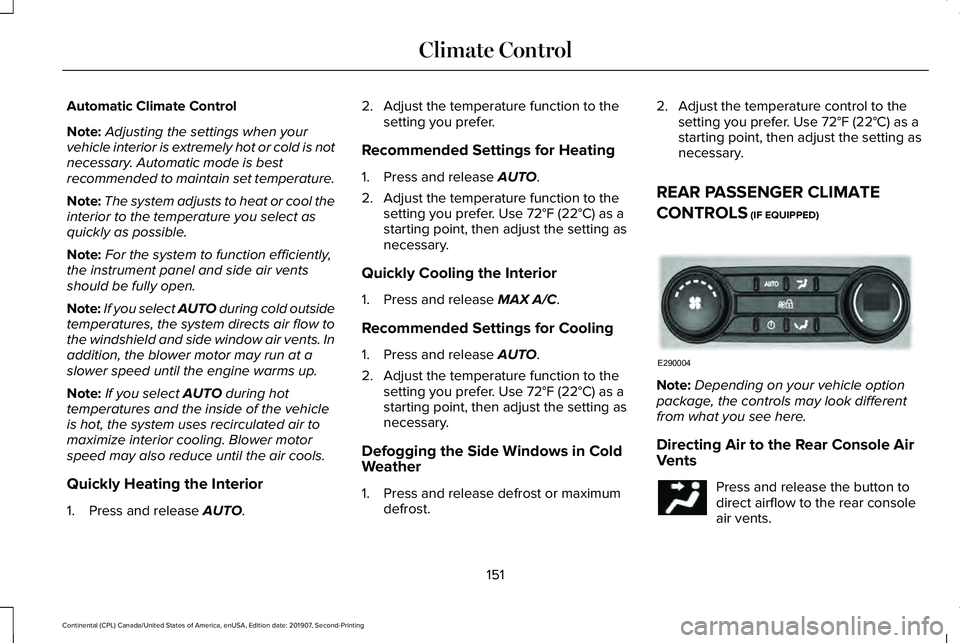
(IF EQUIPPED) Note:
Depending on your vehicle option
package, the controls may look different
from what you see here.
Directing Air to the Rear Console Air
Vents Press and release the button to
direct airflow to the rear console
air vents.
151
Continental (CPL) Canada/United States of America, enUSA, Edition date: 201907, Second-Printing Climate ControlE290004
Page 179 of 609

12 VDC Power Point
WARNING:
Do not plug optional
electrical accessories into the cigar lighter
socket. Incorrect use of the cigar lighter
can cause damage not covered by the
vehicle warranty, and can result in fire or
serious injury.
Note: When you switch the ignition on, you
can use the socket to power 12 V appliances
with a maximum current rating of
15 A.
Note: Do not hang any accessory from the
accessory plug.
Note: Do not use the power point over the
vehicle capacity of
12 V DC 15 A or a fuse
may blow.
Note: Always keep the power point caps
closed when not in use.
Do not insert objects other than an accessory
plug into the power point. This damages the
power point and may blow the fuse. Run the
vehicle for full capacity use of the power
point. To prevent the battery from running out of
charge:
•
Do not use the power point longer than
necessary when the vehicle is not
running.
• Do not leave devices plugged in
overnight or when you park your vehicle
for extended periods.
Locations
Power points may be in the following
locations:
• On the instrument panel.
• Inside the center console.
• On the rear of the center console. 110 V
AC Power Point WARNING:
Do not keep electrical
devices plugged in the power point
whenever the device is not in use. Do not
use any extension cord with the 110 volt
AC power point, since it will defeat the
safety protection design. Doing so may
cause the power point to overload due to
powering multiple devices that can reach
beyond the 150 watt load limit and could
result in fire or serious injury.
Note: The power point turns off when you
switch the ignition off, or when the battery
voltage drops below 11 volts.
You can use the power point for electric
devices that require up to 150 watts. It is on
the rear of the center console.
176
Continental (CPL) Canada/United States of America, enUSA, Edition date: 201907, Second-Printing Auxiliary Power Points
Page 200 of 609

AUTOMATIC TRANSMISSION
WARNING: Always fully apply the
parking brake and make sure you shift into
park (P). Failure to follow this instruction
could result in personal injury or death. WARNING:
Do not apply the brake
pedal and accelerator pedal
simultaneously. Applying both pedals
simultaneously for more than a few
seconds will limit engine performance,
which may result in difficulty maintaining
speed in traffic and could lead to serious
injury.
Note: You may not be able to shift out of
park (P) unless the intelligent access key is
inside your vehicle.
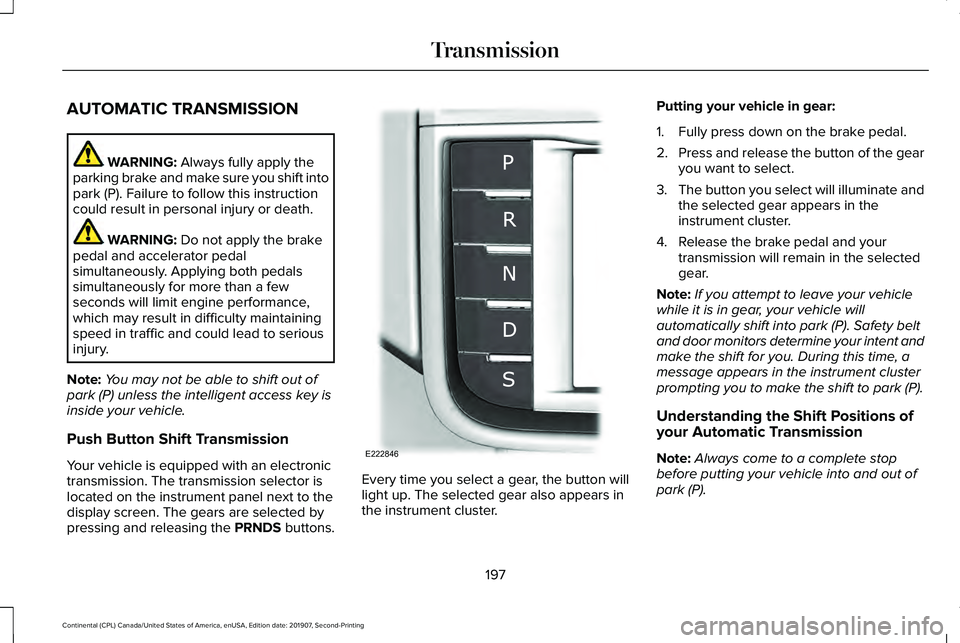
Push Button Shift Transmission
Your vehicle is equipped with an electronic
transmission. The transmission selector is
located on the instrument panel next to the
display screen. The gears are selected by
pressing and releasing the PRNDS buttons. Every time you select a gear, the button will
light up. The selected gear also appears in
the instrument cluster.Putting your vehicle in gear:
1. Fully press down on the brake pedal.
2.
Press and release the button of the gear
you want to select.
3. The button you select will illuminate and
the selected gear appears in the
instrument cluster.
4. Release the brake pedal and your transmission will remain in the selected
gear.
Note: If you attempt to leave your vehicle
while it is in gear, your vehicle will
automatically shift into park (P). Safety belt
and door monitors determine your intent and
make the shift for you. During this time, a
message appears in the instrument cluster
prompting you to make the shift to park (P).
Understanding the Shift Positions of
your Automatic Transmission
Note: Always come to a complete stop
before putting your vehicle into and out of
park (P).
197
Continental (CPL) Canada/United States of America, enUSA, Edition date: 201907, Second-Printing TransmissionE222846