Page 300 of 390

2987-2. Steps to take in an emergency
1Hold the hook and lift up the lug-
gage mat.
2
Secure the luggage mat using the
hook. 3
Remove the tool tray.
4
Take out the jack.
1
For tightening
2
For loosening
If the jack is too tightly installed to be
removed by hand, insert a tool, such as the
screwdriver included wi th the vehicle, into
the hole of the jack (portion ) and
loosen the jack.
1Secure the luggage mat using the
hook. ( P.298)
WARNING
●Do not raise the vehicle while some-
one is inside.
●When raising the vehicle, do not put an
object on or under the jack.
●Do not raise the vehicle to a height
greater than that required to replace
the tire.
●Use a jack stand if it is necessary to get
under the vehicle.
●When lowering the vehicle, make sure
that there is no-one near the vehicle. If
there are people nearby, warn them
vocally before lowering.
Taking out the jack
NOTICE
■To prevent damage to luggage mat
When closing the trunk lid, do not leave
the luggage mat lever hooked on the
edge of the trunk.
Taking out the spare tire
A
Page 301 of 390

2997-2. Steps to take in an emergency
7
When trouble arises
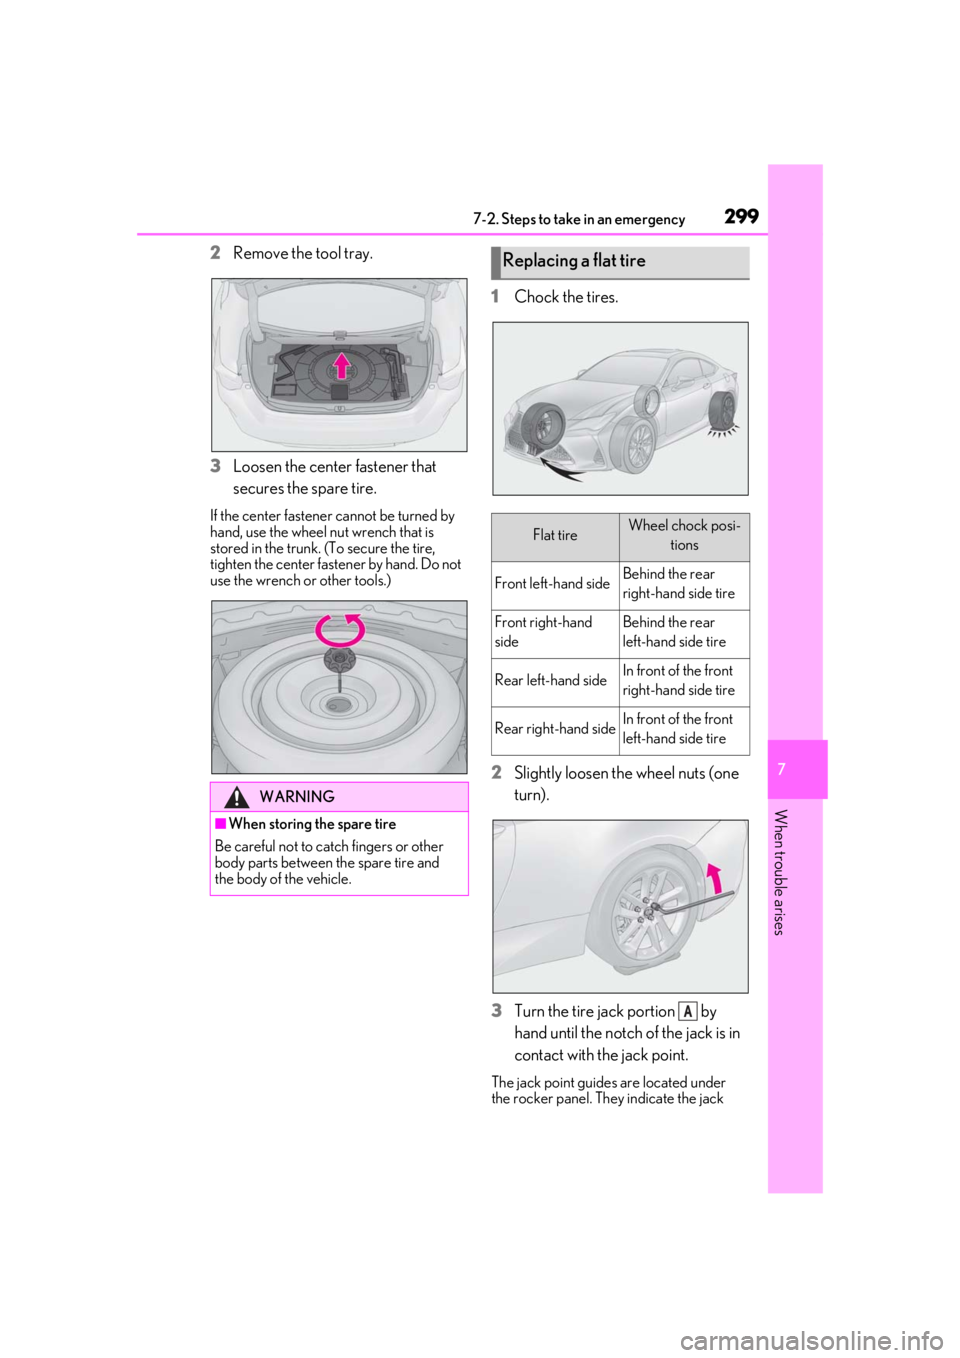
2Remove the tool tray.
3
Loosen the center fastener that
secures the spare tire.
If the center fastener cannot be turned by
hand, use the wheel nut wrench that is
stored in the trunk. (To secure the tire,
tighten the center fastener by hand. Do not
use the wrench or other tools.)
1Chock the tires.
2
Slightly loosen the wheel nuts (one
turn).
3
Turn the tire jack portion by
hand until the notch of the jack is in
contact with the jack point.
The jack point guides are located under
the rocker panel. They indicate the jack
WARNING
■When storing the spare tire
Be careful not to catch fingers or other
body parts between the spare tire and
the body of the vehicle.
Replacing a flat tire
Flat tireWheel chock posi- tions
Front left-hand sideBehind the rear
right-hand side tire
Front right-hand
sideBehind the rear
left-hand side tire
Rear left-hand sideIn front of the front
right-hand side tire
Rear right-hand sideIn front of the front
left-hand side tire
A
Page 304 of 390

3027-2. Steps to take in an emergency
■When the spare tire is equipped
The vehicle becomes lower when driving
with the spare tire compared to when driv-
ing with standard tires.
■If you have a flat rear tire on a road cov-
ered with snow or ice (vehicles with
front and rear tires of the same size
except for vehicles with LDH and
19-inch tires)
Install the spare tire on one of the front
wheels of the vehicle. Perform the following
steps and fit tire chains to the rear tires:
1
Replace a front tire with the spare tire.
2
Replace the flat rear tire with the tire
removed from the front of the vehicle.
3
Fit tire chains to the rear tires.
WARNING
■When using the spare tire
●Remember that the spare tire provided
is specifically desi gned for use with
your vehicle. Do not use your spare
tire on another vehicle.
●Do not use more than one spare tire
simultaneously.
●Replace the spare tire with a standard
tire as soon as possible.
●Avoid sudden acceleration, abrupt
steering, sudden braking and shifting
operations that cause sudden engine
braking.
■When the spare tire is attached
The vehicle speed may not be correctly
detected, and the following systems may
not operate correctly:
• ABS & Brake assist
• VSC
• TRAC
• Dynamic radar cruise control
• PCS
• EPS
• Adaptive Variable Suspension System (if equipped)
• LDA (Lane Departure Alert with steering control)
• VGRS (if equipped)
• LDH (Lexus Dynamic Handling sys- tem) (if equipped)
• DRS (Dynamic Rear Steering) (if equipped)
• VDIM (Vehicle Dynamics Integrated Management)
• Tire pressure warning system
• Lexus parking assist monitor
• Intuitive parking assist (if equipped)
• Navigation system (if equipped)
Also, not only can the following system
not be utilized fully, bu t it may even nega-
tively affect the drive-train components:
• AWD system (if equipped)
■Speed limit when using the spare tire
Do not drive at speeds in excess of 50
mph (80 km/h) when a spare tire is
installed on the vehicle.
The spare tire is not designed for driving
at high speeds. Failure to observe this
precaution may lead to an accident caus-
ing death or serious injury.
■After using the tools and jack
Before driving, make sure all the tools
and jack are securely in place in their
storage location to reduce the possibility
of personal injury during a collision or
sudden braking.
Page 341 of 390

3398-1. Specifications
8
Vehicle specifications
*: Table 1 - Occupant loading and distribution for vehicle normal load for various desig-
nated seating capacities
Radial ply tire
A pneumatic tire in which the ply cords that extend
to the beads are laid at su bstantially 90 degrees to
the centerline of the tread
Reinforced tire
A tire designed to operat e at higher loads and at
higher inflation pressures than the corresponding
standard tire
Section width
The linear distance between the exteriors of the
sidewalls of an inflated tire, excluding elevations
due to labeling, decoration, or protective bands
SidewallThat portion of a tire between the tread and bead
Sidewall separationThe parting of the rubber compound from the cord
material in the sidewall
Snow tire
A tire that attains a traction index equal to or
greater than 110, compared to the ASTM E-1136
Standard Referenc e Test Tire, when using the snow
traction test as described in ASTM F-1805-00,
Standard Test Method fo r Single Wheel Driving
Traction in a Straight Line on Snow-and Ice-Cov-
ered Surfaces, and which is marked with an Alpine
Symbol ( ) on at least one sidewall
Test rimThe rim on which a tire is fitted for testing, and may
be any rim listed as appropriate for use with that tire
TreadThat portion of a tire that comes into contact with
the road
Tread ribA tread section running ci rcumferentially around a
tire
Tread separationPulling away of the tread from the tire carcass
Treadwear indicators (TWI)
The projections within the principal grooves
designed to give a visual indication of the degrees
of wear of the tread
Wheel-holding fixtureThe fixture used to hold the wheel and tire assembly
securely during testing
Tire related termMeaning
Page 346 of 390
3448-2. Customization
■Smart access system with push-button start and wireless remote control
( P.86, 89)
■Smart access system with push-button start ( P.86, 89, 93)
Automatic door unlockShifting the shift
lever to POff
O—ODriver’s door is opened
Locking/unlocking of the
trunk when both side doors
are locked/unlocked
OnOff——O
FunctionDefault settingCustomized settingABC
FunctionDefault settingCustomized setting
Operation buzzer volume5OffO—O1 to 7
Operation signal (Emer-
gency flashers)OnOffO—O
Time elapsed before auto-
matic door lock function is
activated if door is not
opened after being unlocked
60 seconds
Off
O—O30 seconds
120 seconds
Open door warning buzzerOnOff——O
Welcome light illumination
controlOnOffO—O
ABC
FunctionDefault settingCustomized setting
Smart access system with
push-button startOnOff——O
Smart door unlockingDriver’s doorBoth side doorsO—O
Number of consecutive door
lock operations2 timesAs many as desired——O
ABC
Page 364 of 390

3629-1. For owners
9-1.For owners
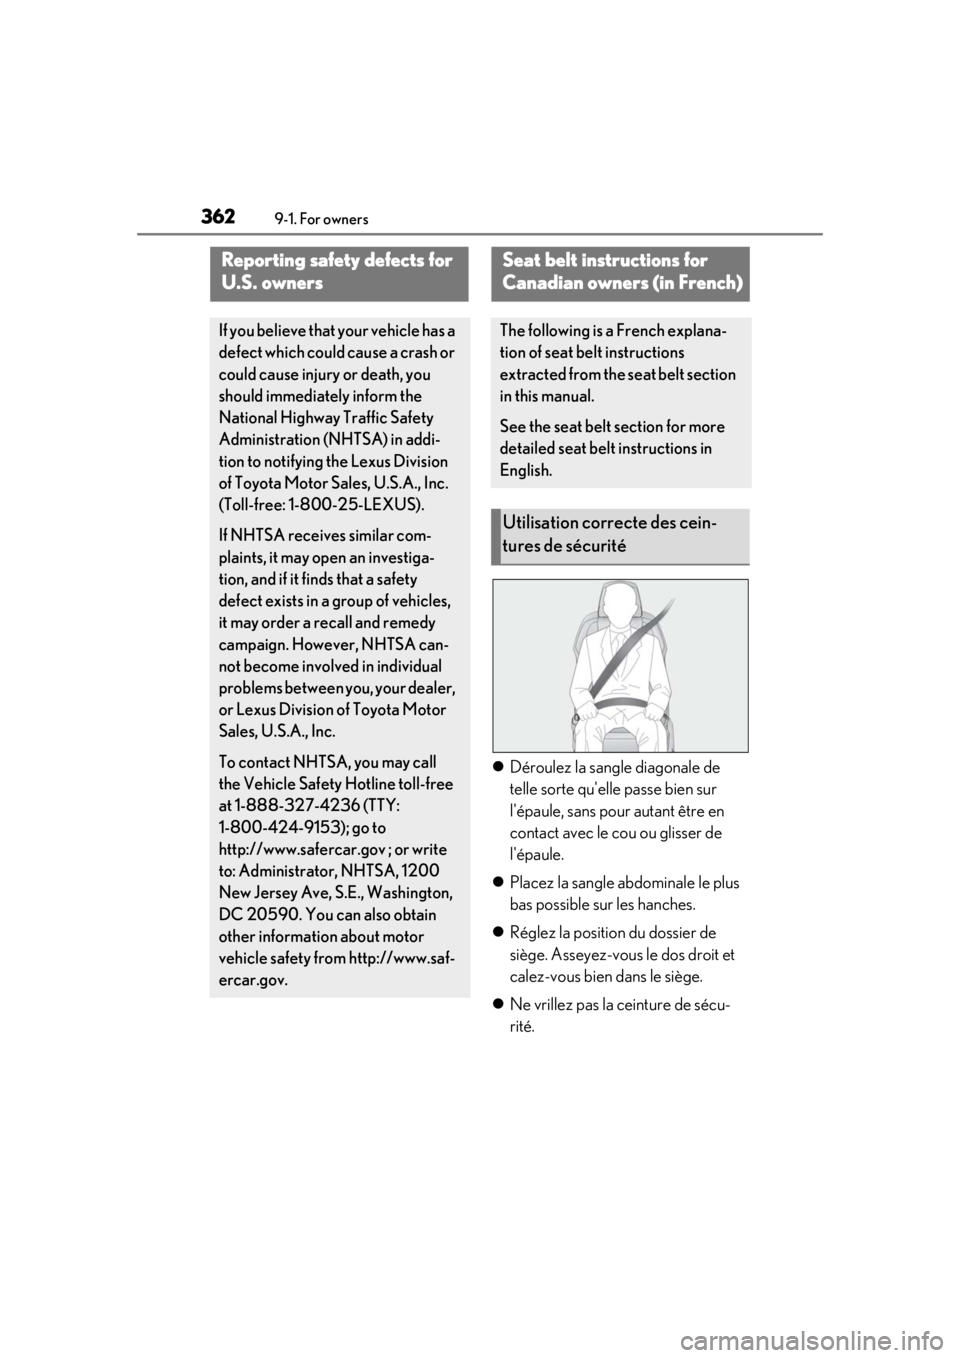
Déroulez la sangle diagonale de
telle sorte qu'elle passe bien sur
l'épaule, sans pour autant être en
contact avec le cou ou glisser de
l'épaule.
Placez la sangle abdominale le plus
bas possible sur les hanches.
Réglez la position du dossier de
siège. Asseyez-vous le dos droit et
calez-vous bien dans le siège.
Ne vrillez pas la ceinture de sécu-
rité.
Reporting safety defects for
U.S. owners
If you believe that your vehicle has a
defect which could cause a crash or
could cause injury or death, you
should immediately inform the
National Highway Traffic Safety
Administration (NHTSA) in addi-
tion to notifying the Lexus Division
of Toyota Motor Sa les, U.S.A., Inc.
(Toll-free: 1-800-25-LEXUS).
If NHTSA receives similar com-
plaints, it may open an investiga-
tion, and if it finds that a safety
defect exists in a group of vehicles,
it may order a recall and remedy
campaign. However, NHTSA can-
not become involved in individual
problems between you, your dealer,
or Lexus Division of Toyota Motor
Sales, U.S.A., Inc.
To contact NHTS A, you may call
the Vehicle Safety Hotline toll-free
at 1-888-327-4236 (TTY:
1-800-424-9153); go to
http://www.safercar.gov ; or write
to: Administrator, NHTSA, 1200
New Jersey Ave, S.E., Washington,
DC 20590. You can also obtain
other information about motor
vehicle safety from http://www.saf-
ercar.gov.
Seat belt instructions for
Canadian owners (in French)
The following is a French explana-
tion of seat belt instructions
extracted from the seat belt section
in this manual.
See the seat belt section for more
detailed seat belt instructions in
English.
Utilisation correcte des cein-
tures de sécurité
Page 365 of 390
3639-1. For owners
9
For owners
Non vrillée
Vrillée
■Traitement des ceintures de sécu-
rité
Nettoyez avec un chiffon ou une
éponge humidifiés avec de l'eau savon-
neuse tiède. Vérifiez régulièrement
que les ceintures ne sont pas usées,
effilochées ou entaillées excessive-
ment.
Entretien et soin
AVERTISSEMENT
■Détérioration et usure des ceintures
de sécurité
Inspectez le système de ceintures de
sécurité régulière ment. Contrôlez
l'absence de coupures, d'effilochages et
de pièces desserrées. N'utilisez pas une
ceinture de sécurité endommagée avant
qu'elle ne soit remplacée. Une ceinture
de sécurité endommagée ne permet pas
de protéger un occupant de blessures
graves ou mortelles.
A
B
Page 367 of 390

3659-1. For owners
9
For owners
• Peut contribuer à empêcher les occupants d’être éjectés du véhicule en cas de tonneau
■Composants du système de coussins gonflables SRSSystème de classification de l'occupant du siège passager avant (ECU et cap-
teurs)
Capteurs d'impact latéral (porte avant)
Coussins gonflables de genoux
Coussin gonflable passager avant
Coussins gonflables rideaux
Témoins indicateurs “AIR BAG ON” et “AIR BAG OFF”
Prétensionneurs de ceintures de sécurité et limiteurs de force
Capteurs d'impact latéral (avant)
Coussins gonflables latéraux avant
Témoin d'avertissement SRS
Coussin gonflable conducteur
Capteurs d'impact latéral (arrière)
Capteur de position du siège conducteur
Contact de boucle de ceinture de sécurité conducteur
Ensemble de capteurs de coussins gonflables
Capteurs d'impact avant
Votre véhicule est équipé de CO USSINS GONFLABLES INTELLIGENTS
conçus selon les normes de sécurité américaines applicables aux véhicules à
moteur (FMVSS208). L'ensemble de cap teurs de coussins gonflables (ECU)
A
B
C
D
E
F
G
H
I
J
K
L
M
N
O
P