Page 477 of 611

631
What to do in an emergency
Distributing the sealant
11. Immediately drive approximately7 ~ 10 km (4 ~ 6 miles or, about
10 min) to evenly distribute the
sealant in the tire.
Do not exceed a speed of 80 km/h
(50 mph). If possible, do not fall
below a speed of 20 km/h (12 mph).
While driving, if you experience any
unusual vibration, ride disturbance or
noise, reduce your speed and drive
with caution until you can safely pull
off of the side of the road.
Call for road side service or towing.
When you use the Tire Mobility Kit,
the tire pressure sensors and wheel
may be stained by sealant.
Therefore, remove the tire pressure
sensors and wheel stained by
sealant and we recommend that
inspect at an authorized Kia dealer.
Checking the tire inflation
pressure
1. After driving approximately 7 ~ 10 km (4 ~ 6 miles or about 10 min),
stop at a safe location.
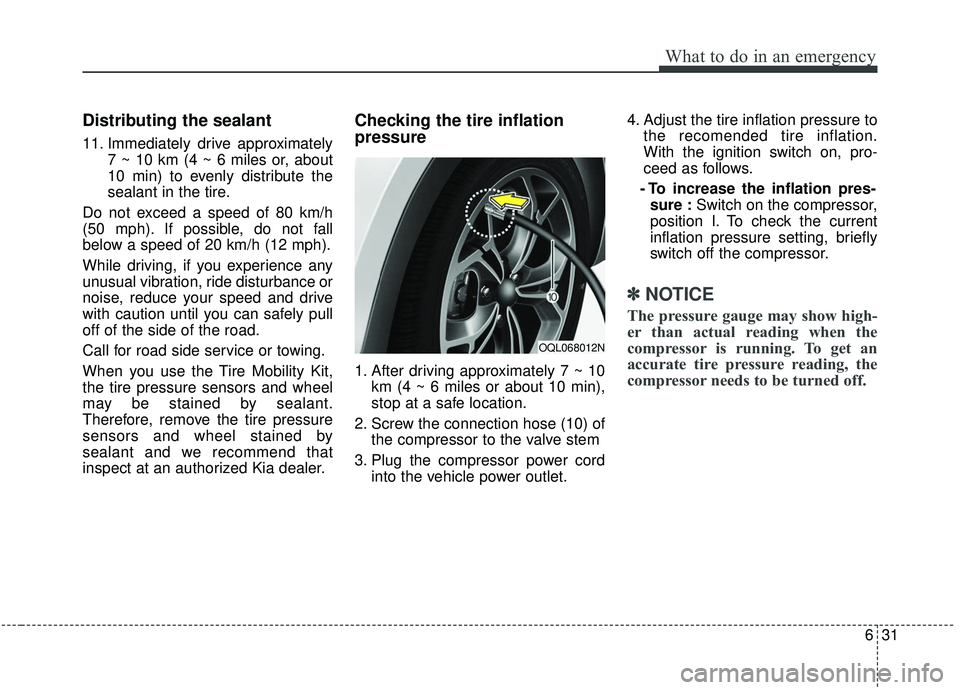
2. Screw the connection hose (10) of the compressor to the valve stem
3. Plug the compressor power cord into the vehicle power outlet. 4. Adjust the tire inflation pressure to
the recomended tire inflation.
With the ignition switch on, pro-
ceed as follows.
- To increase the inflation pres- sure : Switch on the compressor,
position I. To check the current
inflation pressure setting, briefly
switch off the compressor.
✽ ✽ NOTICE
The pressure gauge may show high-
er than actual reading when the
compressor is running. To get an
accurate tire pressure reading, the
compressor needs to be turned off.
OQL068012N
Page 478 of 611

What to do in an emergency
32
6
- To reduce the inflation pressure:
Press the button (9) on the com-
pressor.Technical Data
System voltage: DC 12 V
Working voltage: DC 10 - 15 V
Amperage rating: max. 15 A
Suitable for use at temperatures:
-30 ~ +70°C (-22 ~ +158°F)
Max. working pressure: 6 bar (87 psi)
Size
Compressor: 168 x 150 x 68 mm (6.6 x 5.9 x 2.7 in. )
Sealant bottle: 104 x ø 85 mm (4.1 x ø 3.3 in.)
Compressor weight: 1.05 kg (2.31 lbs)
Sealant volume: 300 ml (18.3 cu. in.) ❈
Sealant and spare parts can be
obtained and replaced at an
authorized vehicle or tire dealer.
Empty sealant bottles may be dis-
posed of at home. Liquid residue
from the sealant should be dis-
posed of by your vehicle or tire
dealer or in accordance with local
waste disposal regulations.
CAUTION - Tire pressure
sensor
When you use the Tire MobilityKit including sealant notapproved by Kia, the tire pres-sure sensors may be damagedby sealant. The sealant on thetire pressure sensor and wheelshould be removed when youreplace the tire with a new oneand inspect the tire pressuresensors at an authorized dealer.
Page 479 of 611

633
What to do in an emergency
TOWING
Towing service
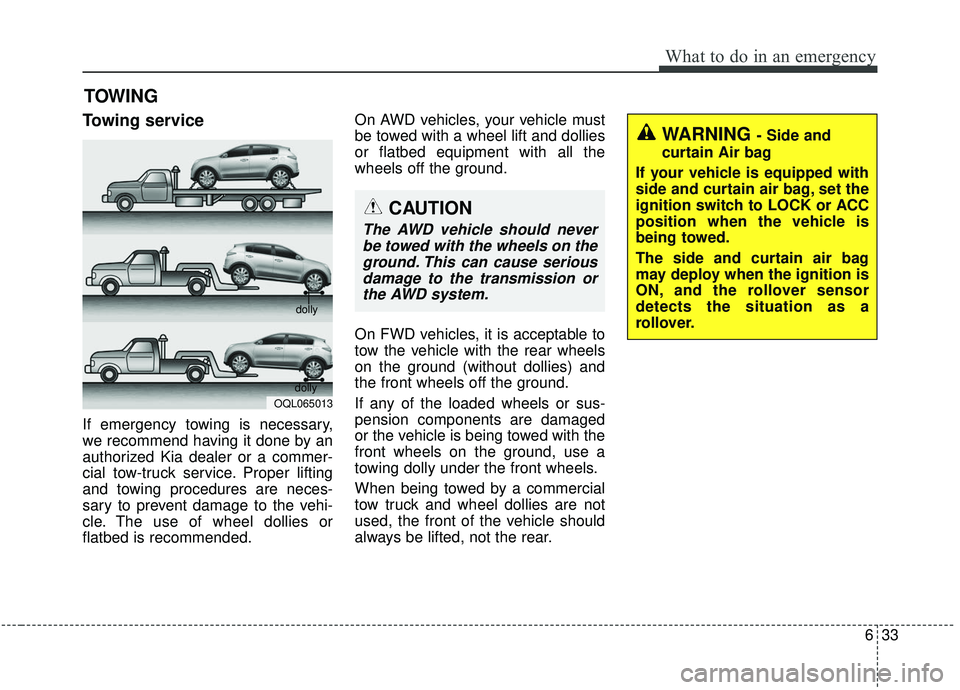
If emergency towing is necessary,
we recommend having it done by an
authorized Kia dealer or a commer-
cial tow-truck service. Proper lifting
and towing procedures are neces-
sary to prevent damage to the vehi-
cle. The use of wheel dollies or
flatbed is recommended.On AWD vehicles, your vehicle must
be towed with a wheel lift and dollies
or flatbed equipment with all the
wheels off the ground.
On FWD vehicles, it is acceptable to
tow the vehicle with the rear wheels
on the ground (without dollies) and
the front wheels off the ground.
If any of the loaded wheels or sus-
pension components are damaged
or the vehicle is being towed with the
front wheels on the ground, use a
towing dolly under the front wheels.
When being towed by a commercial
tow truck and wheel dollies are not
used, the front of the vehicle should
always be lifted, not the rear.
OQL065013
dolly
dolly
WARNING - Side and
curtain Air bag
If your vehicle is equipped with
side and curtain air bag, set the
ignition switch to LOCK or ACC
position when the vehicle is
being towed.
The side and curtain air bag
may deploy when the ignition is
ON, and the rollover sensor
detects the situation as a
rollover.
CAUTION
The AWD vehicle should never be towed with the wheels on theground. This can cause seriousdamage to the transmission orthe AWD system.
Page 520 of 611
737
Maintenance
4. Pull up the lever (1) to the LOCKposition.
5. Rise up the cover (2) until the hooks on the cover are securely
fastened into the latches (3).
6. Check if the cover is firmly installed. Replace the filter according to the
Maintenance Schedule.
If the vehicle is operated in extreme-
ly dusty or sandy areas, replace theelement more often than the usualrecommended intervals. (Refer to“Maintenance under severe usageconditions” in this chapter.)
CAUTION - Air filter
maintenance
Do not drive with the air clean- er removed; this will result inexcessive engine wear.
When removing the air cleaner filter, be careful that dust ordirt does not enter the airintake, or damage may result.
Use a Kia genuine part. Use of a non-genuine part coulddamage the air flow sensor.OQL075057
Page 554 of 611
771
Maintenance
Fuse NameFuse ratingCircuit Protected
POWER OUTLET20AFront Power Outlet #1 (Front Cigarette Lighter)
S/HEATERREAR20ARear Seat Warmer Control Module
DOOR LOCK20ADoor Lock/Unlock Relay
4WD20AAWD ECM
MODULE 710AHazard Switch, Driver/Passenger Smart Key Outside Handle, AEB Sensor
AMP25AAMP
SAFETY
P/ WINDOW (DRV)25ADriver’s seat Safety Power Window Module
HEATED
MIRROR10ADriver/Passenger Power Outside Mirror, A/C Control Module
P/SEAT (DRV)30ADriver Seat Manual Switch
MODULE 1010ABCM
SAFETY
P/WINDOW (PASS)25APassenger’s seat Safety Power Window Module
Page 558 of 611
775
Maintenance
Fuse NameFuse ratingCircuit Protected
FUSE
BATTERY
MANAGEMENT10ABattery Sensor
SENSOR 210AOil Control Valve, Purge Control Solenoid Valve, Variable Intake Solenoid Valve, RCV Control Solenoid
SENSOR 115AOxygen Sensor (Up/Down)
ECU 2 20AIgnition Coil #1/#2/#3/#4
ECU 415APCM
SENSOR 310AE/R Junction Block (Cooling Fan 1 Relay), Canister Close Valve, E/R Junction Block (Air Control Unit
MODULE 210AE/R Junction Block (Fuel Pump Relay)
VACUUM PUMP 120AVacuum Pump
DEICER15AE/R Junction Block (Deicer Relay)
FUEL PUMP20AFuel Pump Relay
MODULE 17.5AStop Lamp Switch
B/ALARM HORN15AE/R Junction Block (B/Alarm Horn Relay)
H/LAMP HI10ABI-Function H/LP Relay
Page 559 of 611
Maintenance
76
7
Fuse NameFuse ratingCircuit Protected
FUSE
FCA10AForward Collision-avoidance Assist (FCA) Sensor
ABS 310AESC Module
VACUUM
PUMP 215AVacuum Pump, Vacuum Switch
POWER
OUTLET 120AFront Power Outlet #2
ECU 610APCM
TCU 215ATransmission Range Switch
B/UP LAMP10ARear Bumper Lamp LH/RH, Electro Chromic Mirror
POWER
OUTLET 220ARear Power Outlet
ECU 130AEngine Control Relay
Page 578 of 611

795
Maintenance
High-pressure washing
When using high-pressure wash-ers, make sure to maintain suffi-
cient distance from the vehicle.
Insufficient clearance or excessive
pressure can lead to component
damage or water penetration.
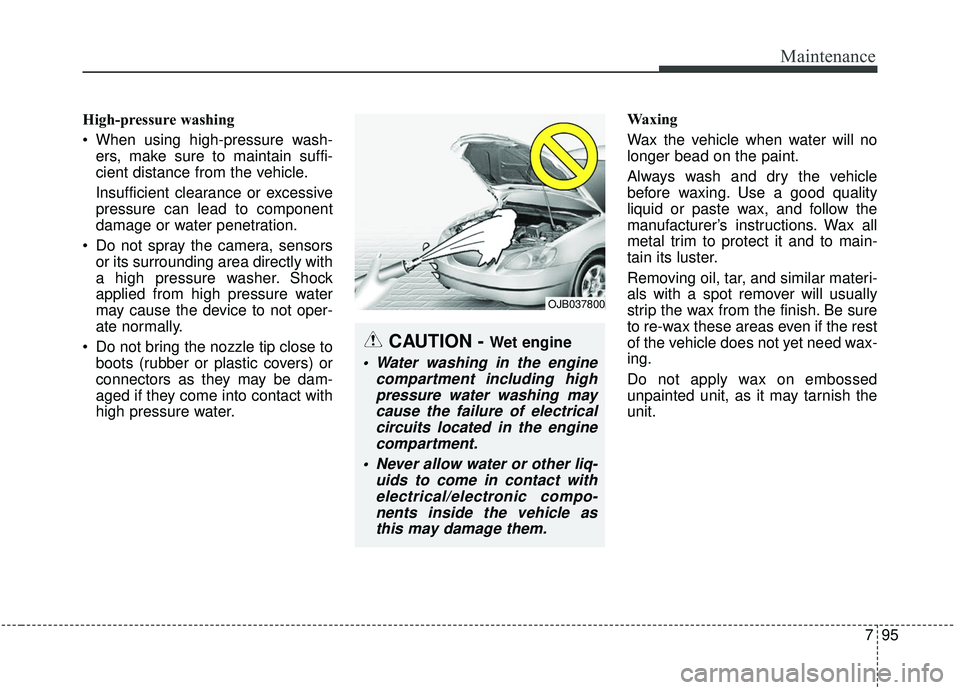
Do not spray the camera, sensors or its surrounding area directly with
a high pressure washer. Shock
applied from high pressure water
may cause the device to not oper-
ate normally.
Do not bring the nozzle tip close to boots (rubber or plastic covers) or
connectors as they may be dam-
aged if they come into contact with
high pressure water. Waxing
Wax the vehicle when water will no
longer bead on the paint.
Always wash and dry the vehicle
before waxing. Use a good quality
liquid or paste wax, and follow the
manufacturer’s instructions. Wax all
metal trim to protect it and to main-
tain its luster.
Removing oil, tar, and similar materi-
als with a spot remover will usually
strip the wax from the finish. Be sure
to re-wax these areas even if the rest
of the vehicle does not yet need wax-
ing.
Do not apply wax on embossed
unpainted unit, as it may tarnish the
unit.
OJB037800
CAUTION - Wet engine
Water washing in the engine
compartment including highpressure water washing maycause the failure of electricalcircuits located in the enginecompartment.
Never allow water or other liq- uids to come in contact withelectrical/electronic compo-nents inside the vehicle asthis may damage them.