Page 13 of 480
1-2
E EX
XT
TE
ER
RI
IO
OR
R
O
OV
VE
ER
RV
VI
IE
EW
W
Your vehicle at a glance
1. Hood ......................................................3-35
2. Headlamp ....................................3-81, 7-67
3. Daytime running light (DRL) ........3-88, 7-67
4. Turn signal lamp ....................................7-675. Tires and wheels ..................................7-37
6. Side view mirror ....................................3-25
7. Wide sunroof ........................................3-31
8. Wiper blade ..........................................7-31
9. Windows ................................................3-27
OJS018001N
■ ■
Front view
The actual shape may differ from the illustration.
Page 15 of 480
1-4
Your vehicle at a glance
I
IN
N T
TE
ER
R I
IO
O R
R
O
O V
VE
ER
R V
V I
IE
E W
W
1. Inside door handle ................................3-16
2. Steering wheel ......................................3-21
3. Side view mirror control ........................3-25
4. Central door lock switch ........................3-17
5. Power window lock switch......................3-30
6. Power window switches ........................3-27
7. Seat..........................................................2-3
8. Instrument panel illumination
control button ........................................3-42
9. Blind-spot Collision Warning (BCW) system ..................................................5-56
10. Head-up display button ........................3-79
11. Lane keeping assist (LKA) system ......5-88
12. Hood release lever ..............................3-35
13. Steering wheel tilt/telescopic lever ......3-22
OJS018003N
The actual shape may differ from the illustration.
Page 85 of 480
3-85
Convenient features of your vehicle
3
Do not attempt to disassem-
ble the front view camera
without the assistance of an
authorized HYUNDAI dealer
technician. If camera is
removed for any reason, the
system may need to be re-cal-
ibrated. Have the system
inspected by an authorized
HYUNDAI dealer.
If the windshield of your vehi-
cle is replaced, most likely the
front view camera will need to
be re-calibrated. If this
occurs, have your vehicle
inspected and have the sys-
tem re-calibrated by an
authorized HYUNDAI dealer.
Be careful that water doesn’t
get into the High Beam Assist
(HBA) unit and do not remove
or damage related parts of the
High Beam Assist (HBA) sys-
tem.
WARNING When the vehicle is driven on
a narrow curved road or rough
road
When the vehicle is driven on
an uphill road or downhill
road
When only part of the vehicle in
front is visible on a crossroad
or curved road
When there is a traffic light,
reflecting sign, flashing sign or
mirror
When the road conditions are
bad such as being wet or cov-
ered with snow
When a vehicle suddenly
appears from a curve
When the vehicle is tilted from
a flat tire or being towed
When the Lane Keeping Assist
(LKA) system warning light
illuminates
When the light from the on-
coming or front vehicle is not
detected because of exhaust
fume, smoke, fog, snow, etc.
When the front window is cov-
ered with foreign matters such
as ice, dust, fog, or is damaged
3) When the forward visibility is
poor. Such examples may
include:
When the headlamps of an on-
coming vehicle or a vehicle in
front is not detected due to
poor outside visibility (smog,
smoke, dust, fog, heavy rain,
snow, etc.)
When the windshield visibility
is poor
Page 86 of 480
3-86
Convenient features of your vehicle
Turn signals and lane change
signals
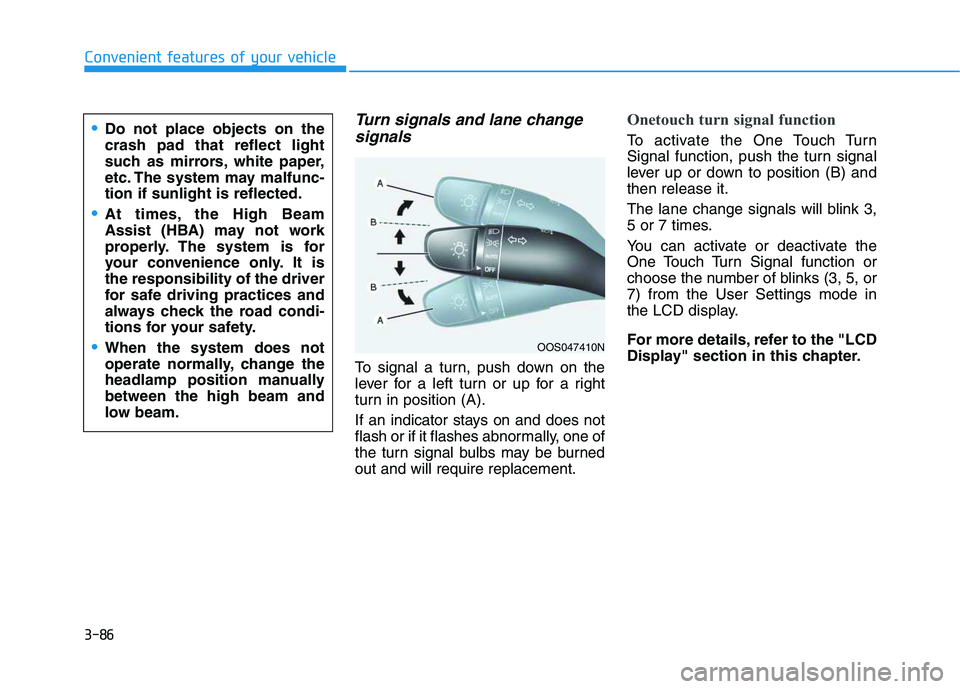
To signal a turn, push down on the
lever for a left turn or up for a right
turn in position (A).
If an indicator stays on and does not
flash or if it flashes abnormally, one of
the turn signal bulbs may be burned
out and will require replacement.
Onetouch turn signal function
To activate the One Touch Turn
Signal function, push the turn signal
lever up or down to position (B) and
then release it.
The lane change signals will blink 3,
5 or 7 times.
You can activate or deactivate the
One Touch Turn Signal function or
choose the number of blinks (3, 5, or
7) from the User Settings mode in
the LCD display.
For more details, refer to the "LCD
Display" section in this chapter.
OOS047410N
Do not place objects on the
crash pad that reflect light
such as mirrors, white paper,
etc. The system may malfunc-
tion if sunlight is reflected.
At times, the High Beam
Assist (HBA) may not work
properly. The system is for
your convenience only. It is
the responsibility of the driver
for safe driving practices and
always check the road condi-
tions for your safety.
When the system does not
operate normally, change the
headlamp position manually
between the high beam and
low beam.
Page 90 of 480
3-90
Convenient features of your vehicle
Luggage compartment lamp
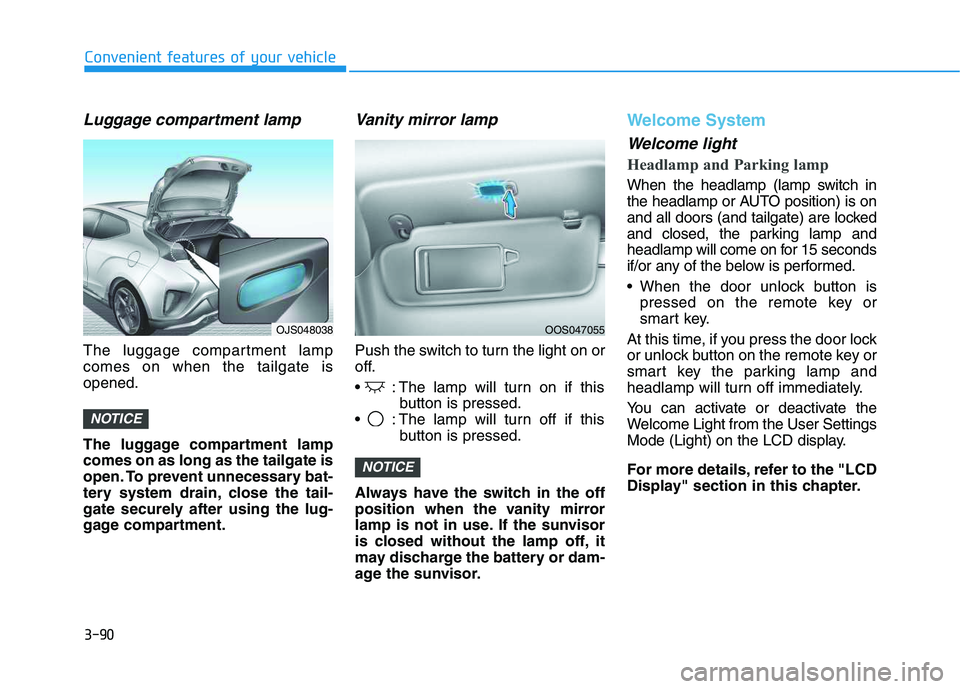
The luggage compartment lamp
comes on when the tailgate is
opened.
The luggage compartment lamp
comes on as long as the tailgate is
open. To prevent unnecessary bat-
tery system drain, close the tail-
gate securely after using the lug-
gage compartment.
Vanity mirror lamp
Push the switch to turn the light on or
off.
: The lamp will turn on if this
button is pressed.
: The lamp will turn off if this
button is pressed.
Always have the switch in the off
position when the vanity mirror
lamp is not in use. If the sunvisor
is closed without the lamp off, it
may discharge the battery or dam-
age the sunvisor.
Welcome System
Welcome light
Headlamp and Parking lamp
When the headlamp (lamp switch in
the headlamp or AUTO position) is on
and all doors (and tailgate) are locked
and closed, the parking lamp and
headlamp will come on for 15 seconds
if/or any of the below is performed.
When the door unlock button is
pressed on the remote key or
smart key.
At this time, if you press the door lock
or unlock button on the remote key or
smart key the parking lamp and
headlamp will turn off immediately.
You can activate or deactivate the
Welcome Light from the User Settings
Mode (Light) on the LCD display.
For more details, refer to the "LCD
Display" section in this chapter.
NOTICE
NOTICE
OJS048038OOS047055
Page 118 of 480
3-118
Convenient features of your vehicle
For maximum defrost perform-
ance, set the temperature control
knob to the highest temperature
setting (rotated all the way to the
right) and the fan speed control to
the highest setting.
If warm air to the floor is desired
while defrosting or defogging, set the
mode to the floor-defrost position.
Before driving, clear all snow and
ice from the windshield, rear win-
dow, side view mirrors, and all side
windows.
Clear all snow and ice from the
hood and air inlet in the cowl grill to
improve heater and defroster effi-
ciency and to reduce the probability
of fogging up the inside of the wind-
shield.
If the engine temperature is still
cold after starting, then a brief
engine warm up period may be
required for the vented air flow to
become warm or hot.
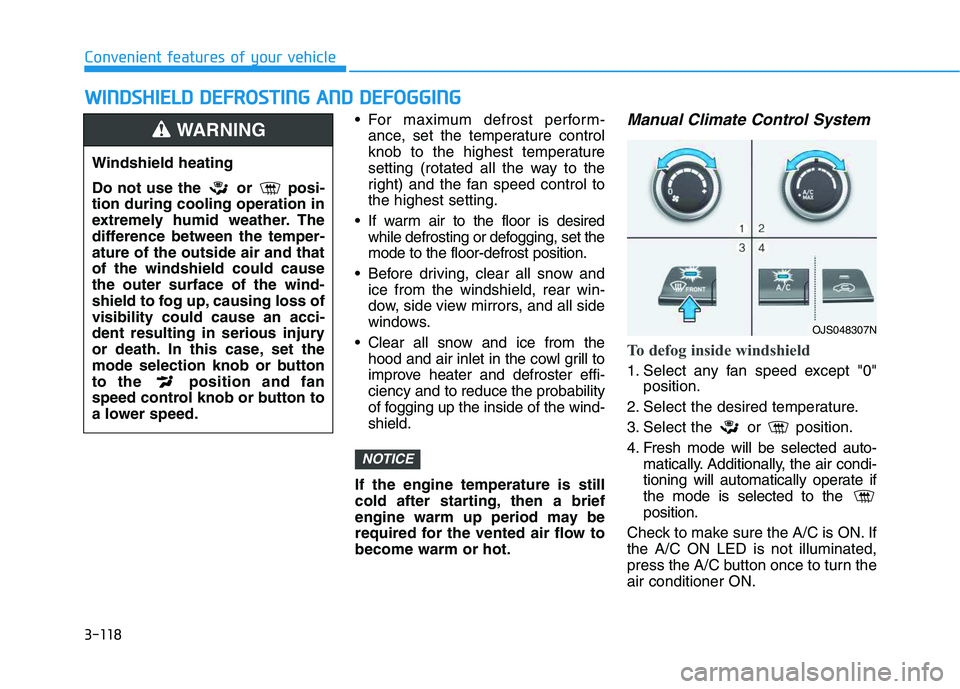
Manual Climate Control System
To defog inside windshield
1. Select any fan speed except "0"
position.
2. Select the desired temperature.
3. Select the or position.
4. Fresh mode will be selected auto-
matically. Additionally, the air condi-
tioning will automatically operate if
the mode is selected to the
position.
Check to make sure the A/C is ON. If
the A/C ON LED is not illuminated,
press the A/C button once to turn the
air conditioner ON.
NOTICE
W WI
IN
ND
DS
SH
HI
IE
EL
LD
D
D
DE
EF
FR
RO
OS
ST
TI
IN
NG
G
A
AN
ND
D
D
DE
EF
FO
OG
GG
GI
IN
NG
G
Windshield heating
Do not use the or posi-
tion during cooling operation in
extremely humid weather. The
difference between the temper-
ature of the outside air and that
of the windshield could cause
the outer surface of the wind-
shield to fog up, causing loss of
visibility could cause an acci-
dent resulting in serious injury
or death. In this case, set the
mode selection knob or button
to the position and fan
speed control knob or button to
a lower speed.
WARNING
OJS048307N
Page 122 of 480
3-122
Convenient features of your vehicle
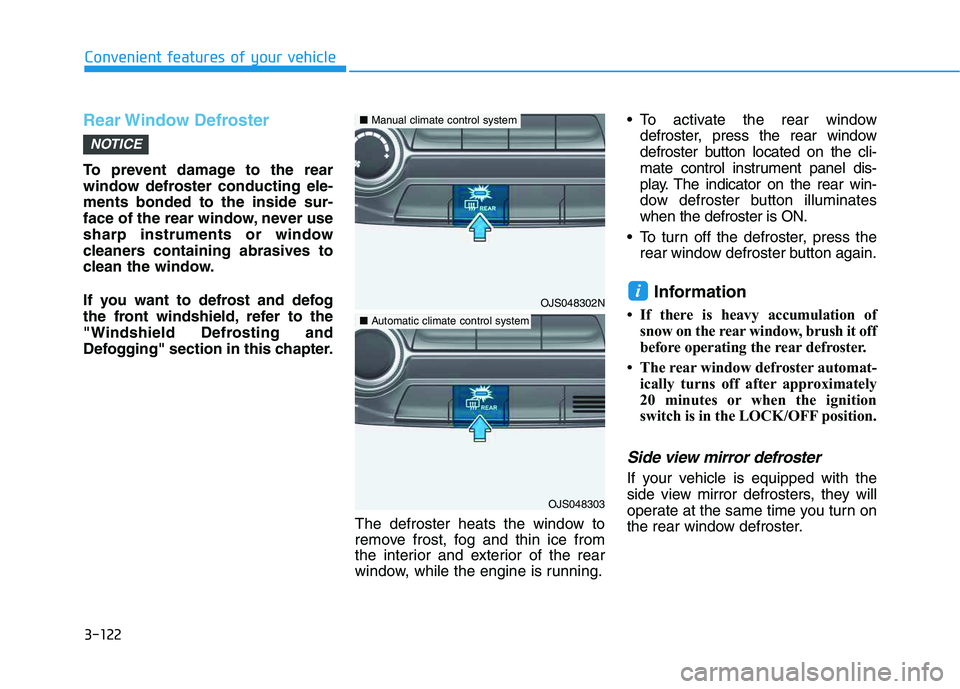
Rear Window Defroster
To prevent damage to the rear
window defroster conducting ele-
ments bonded to the inside sur-
face of the rear window, never use
sharp instruments or window
cleaners containing abrasives to
clean the window.
If you want to defrost and defog
the front windshield, refer to the
"Windshield Defrosting and
Defogging" section in this chapter.
The defroster heats the window to
remove frost, fog and thin ice from
the interior and exterior of the rear
window, while the engine is running. To activate the rear window
defroster, press the rear window
defroster button located on the cli-
mate control instrument panel dis-
play. The indicator on the rear win-
dow defroster button illuminates
when the defroster is ON.
To turn off the defroster, press the
rear window defroster button again.
Information
• If there is heavy accumulation of
snow on the rear window, brush it off
before operating the rear defroster.
• The rear window defroster automat-
ically turns off after approximately
20 minutes or when the ignition
switch is in the LOCK/OFF position.
Side view mirror defroster
If your vehicle is equipped with the
side view mirror defrosters, they will
operate at the same time you turn on
the rear window defroster.
i
NOTICE
OJS048302N
OJS048303
■Manual climate control system
■Automatic climate control system
Page 125 of 480
3-125
Convenient features of your vehicle
3
Sunglass Holder
To open:
Push and release the cover and the
holder will slowly open. Place your
sunglasses in the compartment door
with the lenses facing out.
To close:
Push back into position.
Make sure the sunglass holder is
closed while driving.
Do not keep objects except
sunglasses inside the sun-
glass holder. Such objects can
be thrown from the holder in
the event of a sudden stop or
an accident, possibly injuring
the passengers in the vehicle.
Do not open the sunglass
holder while the vehicle is
moving. The rear view mirror
of the vehicle can be blocked
by an open sunglass holder.
Do not put the glasses forcibly
into a sunglass holder. It may
cause personal injury if you
try to open it forcibly when the
glasses are jammed in holder.
WARNING
OOS047058