2020 HYUNDAI VELOSTER deactivate
[x] Cancel search: deactivatePage 40 of 480
2-23
Safety system of your vehicle
2
To fasten your seat belt:
Pull the seat belt out of the retractor
and insert the metal tab into the buck-
le. There will be an audible "click"
when the tab locks into the buckle.
When not securing a child restraint,
the seat belt operates in the same way
as the driver's seat belt (Emergency
Locking Retractor Type). It automati-
cally adjusts to the proper length only
after the lap belt portion of the seat
belt is adjusted manually so that it fits
snugly across your hips.
When the seat belt is fully extended
from the retractor to allow the installa-
tion of a child restraint system, the
seat belt operation changes to allow
the belt to retract, but not to extend
(Automatic Locking Retractor Type).
Refer to the "Using a Child Restraint
System" section in this chapter.Although the seat belt retractor
provides the same level of protec-
tion for seated passengers in
either emergency or automatic
locking modes, the emergency
locking mode allows seated pas-
sengers to move freely in their
seat while keeping some tension
on the belt. During a collision or
sudden stop, the retractor auto-
matically locks the belt to help
restrain your body.
To deactivate the automatic lock-
ing mode, unbuckle the seat belt
and allow the belt to fully retract.
Pre-tensioner seat belt
(Driver and front passenger)
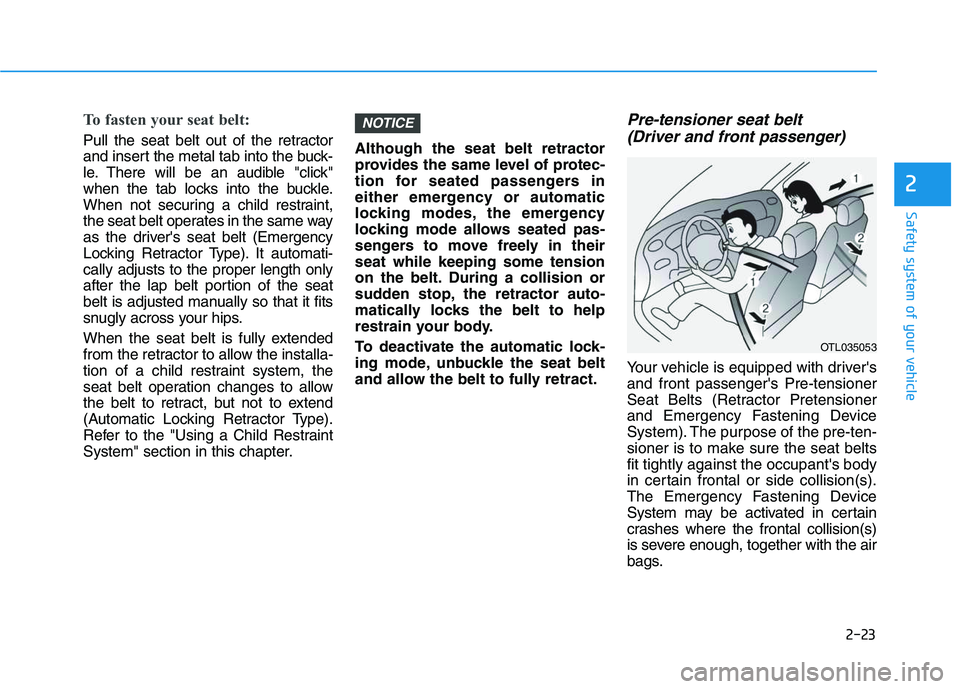
Your vehicle is equipped with driver's
and front passenger's Pre-tensioner
Seat Belts (Retractor Pretensioner
and Emergency Fastening Device
System). The purpose of the pre-ten-
sioner is to make sure the seat belts
fit tightly against the occupant's body
in certain frontal or side collision(s).
The Emergency Fastening Device
System may be activated in certain
crashes where the frontal collision(s)
is severe enough, together with the air
bags.
NOTICE
OTL035053
Page 69 of 480
2-52
Safety system of your vehicle
Occupant Classification
System (OCS)
Your vehicle is equipped with an
Occupant Classification System
(OCS) in the front passenger's seat.
Main components of the
Occupant Classification System
A detection device located within
the front passenger seat cushion.
Electronic system to determine
whether the passenger air bag
systems should be activated or
deactivated.
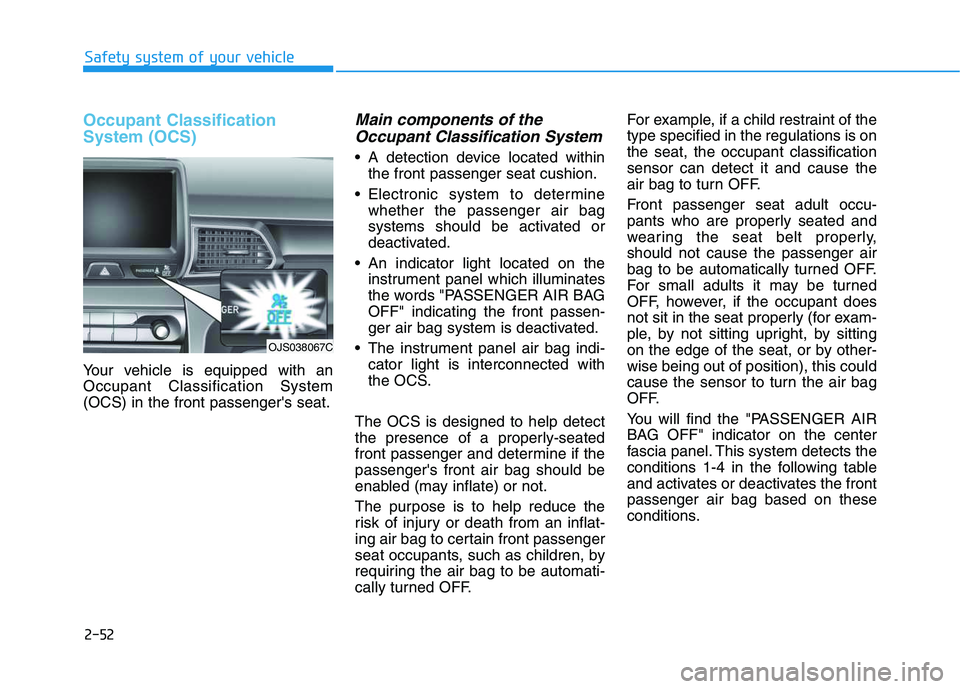
An indicator light located on the
instrument panel which illuminates
the words "PASSENGER AIR BAG
OFF" indicating the front passen-
ger air bag system is deactivated.
The instrument panel air bag indi-
cator light is interconnected with
the OCS.
The OCS is designed to help detect
the presence of a properly-seated
front passenger and determine if the
passenger's front air bag should be
enabled (may inflate) or not.
The purpose is to help reduce the
risk of injury or death from an inflat-
ing air bag to certain front passenger
seat occupants, such as children, by
requiring the air bag to be automati-
cally turned OFF.For example, if a child restraint of the
type specified in the regulations is on
the seat, the occupant classification
sensor can detect it and cause the
air bag to turn OFF.
Front passenger seat adult occu-
pants who are properly seated and
wearing the seat belt properly,
should not cause the passenger air
bag to be automatically turned OFF.
For small adults it may be turned
OFF, however, if the occupant does
not sit in the seat properly (for exam-
ple, by not sitting upright, by sitting
on the edge of the seat, or by other-
wise being out of position), this could
cause the sensor to turn the air bag
OFF.
You will find the "PASSENGER AIR
BAG OFF" indicator on the center
fascia panel. This system detects the
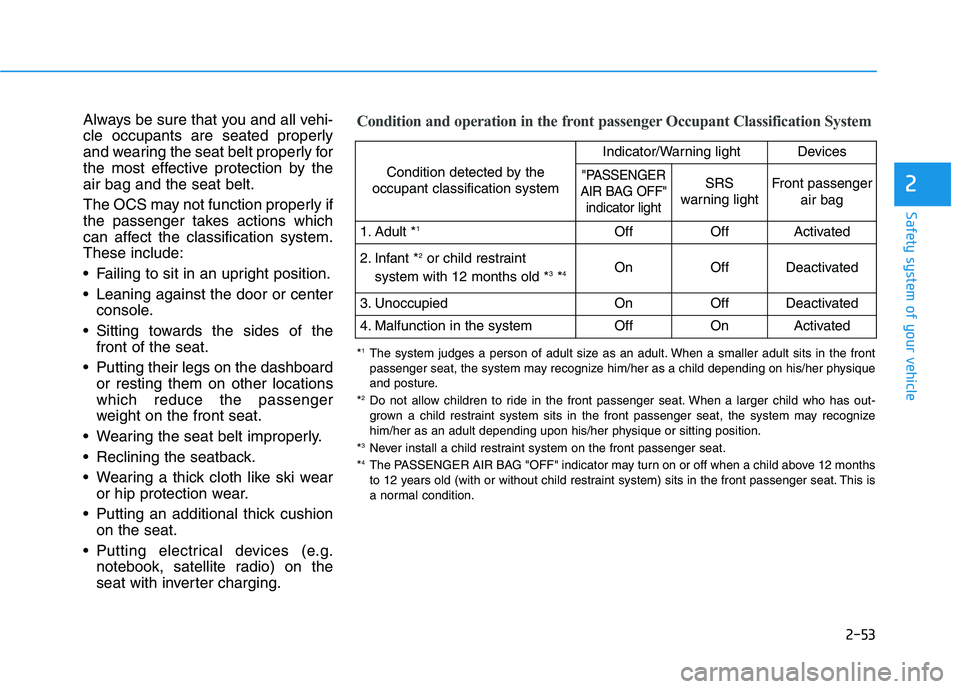
conditions 1-4 in the following table
and activates or deactivates the front
passenger air bag based on these
conditions.
OJS038067C
Page 70 of 480
2-53
Safety system of your vehicle
2
Always be sure that you and all vehi-
cle occupants are seated properly
and wearing the seat belt properly for
the most effective protection by the
air bag and the seat belt.
The OCS may not function properly if
the passenger takes actions which
can affect the classification system.
These include:
Failing to sit in an upright position.
Leaning against the door or center
console.
Sitting towards the sides of the
front of the seat.
Putting their legs on the dashboard
or resting them on other locations
which reduce the passenger
weight on the front seat.
Wearing the seat belt improperly.
Reclining the seatback.
Wearing a thick cloth like ski wear
or hip protection wear.
Putting an additional thick cushion
on the seat.
Putting electrical devices (e.g.
notebook, satellite radio) on the
seat with inverter charging.Condition and operation in the front passenger Occupant Classification System
Condition detected by the
occupant classification system
Indicator/Warning lightDevices
"PASSENGER
AIR BAG OFF"
indicator lightSRS
warning lightFront passenger
air bag
1. Adult *1OffOffActivated
2. Infant *2or child restraint
system with 12 months old *3*4 OnOffDeactivated
3. Unoccupied OnOffDeactivated
4. Malfunction in the systemOffOnActivated
*1The system judges a person of adult size as an adult. When a smaller adult sits in the front
passenger seat, the system may recognize him/her as a child depending on his/her physique
and posture.
*
2Do not allow children to ride in the front passenger seat. When a larger child who has out-
grown a child restraint system sits in the front passenger seat, the system may recognize
him/her as an adult depending upon his/her physique or sitting position.
*
3Never install a child restraint system on the front passenger seat.
*4The PASSENGER AIR BAG "OFF" indicator may turn on or off when a child above 12 months
to 12 years old (with or without child restraint system) sits in the front passenger seat. This is
a normal condition.
Page 86 of 480
3-86
Convenient features of your vehicle
Turn signals and lane change
signals
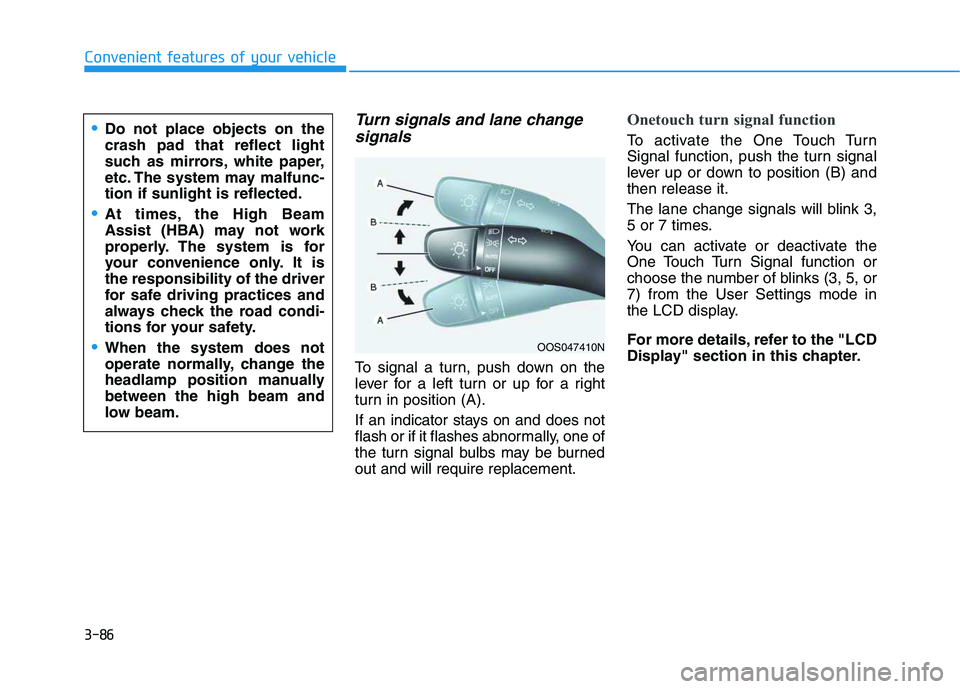
To signal a turn, push down on the
lever for a left turn or up for a right
turn in position (A).
If an indicator stays on and does not
flash or if it flashes abnormally, one of
the turn signal bulbs may be burned
out and will require replacement.
Onetouch turn signal function
To activate the One Touch Turn
Signal function, push the turn signal
lever up or down to position (B) and
then release it.
The lane change signals will blink 3,
5 or 7 times.
You can activate or deactivate the
One Touch Turn Signal function or
choose the number of blinks (3, 5, or
7) from the User Settings mode in
the LCD display.
For more details, refer to the "LCD
Display" section in this chapter.
OOS047410N
Do not place objects on the
crash pad that reflect light
such as mirrors, white paper,
etc. The system may malfunc-
tion if sunlight is reflected.
At times, the High Beam
Assist (HBA) may not work
properly. The system is for
your convenience only. It is
the responsibility of the driver
for safe driving practices and
always check the road condi-
tions for your safety.
When the system does not
operate normally, change the
headlamp position manually
between the high beam and
low beam.
Page 87 of 480
3-87
Convenient features of your vehicle
3
Battery saver function
The purpose of this feature is to pre-
vent the battery from being dis-
charged. The system automatically
turns off the parking lamp when the
driver turns the vehicle off and opens
the driver-side door.
With this feature, the parking lamps
will turn off automatically if the driver
parks on the side of road at night.
If necessary, to keep the lamps on
when the vehicle is turned off, perform
the following:
1) Open the driver-side door.
2) Turn the parking lamps OFF and
ON again using the headlamp
switch on the steering column.
Headlamp delay function
If the key is removed from the ignition
switch or placed in the ACC position
or the LOCK/OFF position with the
headlamps ON, the headlamps
(and/or parking lamps) remain on for
about 5 minutes. However, if the dri-
ver’s door is opened and closed, the
headlights are turned off after 15
seconds. Also, with the engine off if
the driver's door is opened and
closed, the headlamps (and/or park-
ing lamps) are turned off after 15
seconds.
The headlamps (and/or parking
lamps) can be turned off by pressing
the lock button on the remote key or
smart key twice or turning the head-
lamp switch to the OFF or AUTO
position.
You can activate or deactivate the
Headlamp Delay function from the
User Settings Mode in the LCD dis-
play.
For more details, refer to the "LCD
Display" section in this chapter.If the driver exits the vehicle
through another door besides the
driver door, the battery saver func-
tion does not operate and the
headlamp delay function does not
turn OFF automatically.
This may cause the battery to dis-
charge. To avoid battery dis-
charge, turn OFF the headlamps
manually from the headlamp
switch before exiting the vehicle.
NOTICE
Page 90 of 480
3-90
Convenient features of your vehicle
Luggage compartment lamp
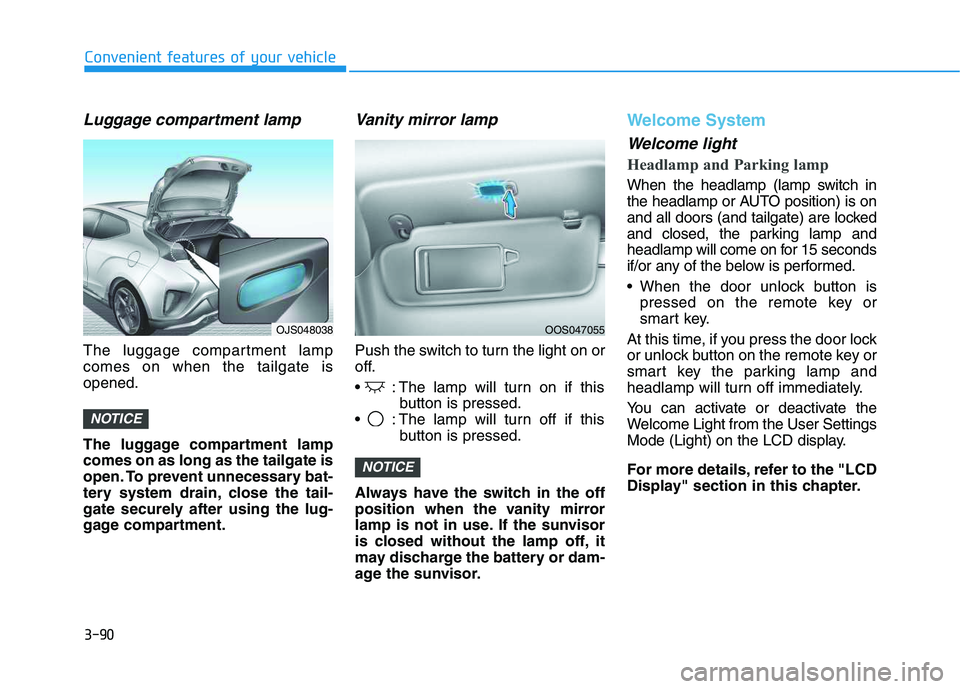
The luggage compartment lamp
comes on when the tailgate is
opened.
The luggage compartment lamp
comes on as long as the tailgate is
open. To prevent unnecessary bat-
tery system drain, close the tail-
gate securely after using the lug-
gage compartment.
Vanity mirror lamp
Push the switch to turn the light on or
off.
: The lamp will turn on if this
button is pressed.
: The lamp will turn off if this
button is pressed.
Always have the switch in the off
position when the vanity mirror
lamp is not in use. If the sunvisor
is closed without the lamp off, it
may discharge the battery or dam-
age the sunvisor.
Welcome System
Welcome light
Headlamp and Parking lamp
When the headlamp (lamp switch in
the headlamp or AUTO position) is on
and all doors (and tailgate) are locked
and closed, the parking lamp and
headlamp will come on for 15 seconds
if/or any of the below is performed.
When the door unlock button is
pressed on the remote key or
smart key.
At this time, if you press the door lock
or unlock button on the remote key or
smart key the parking lamp and
headlamp will turn off immediately.
You can activate or deactivate the
Welcome Light from the User Settings
Mode (Light) on the LCD display.
For more details, refer to the "LCD
Display" section in this chapter.
NOTICE
NOTICE
OJS048038OOS047055
Page 187 of 480
3-53
Convenient features of your vehicle
3
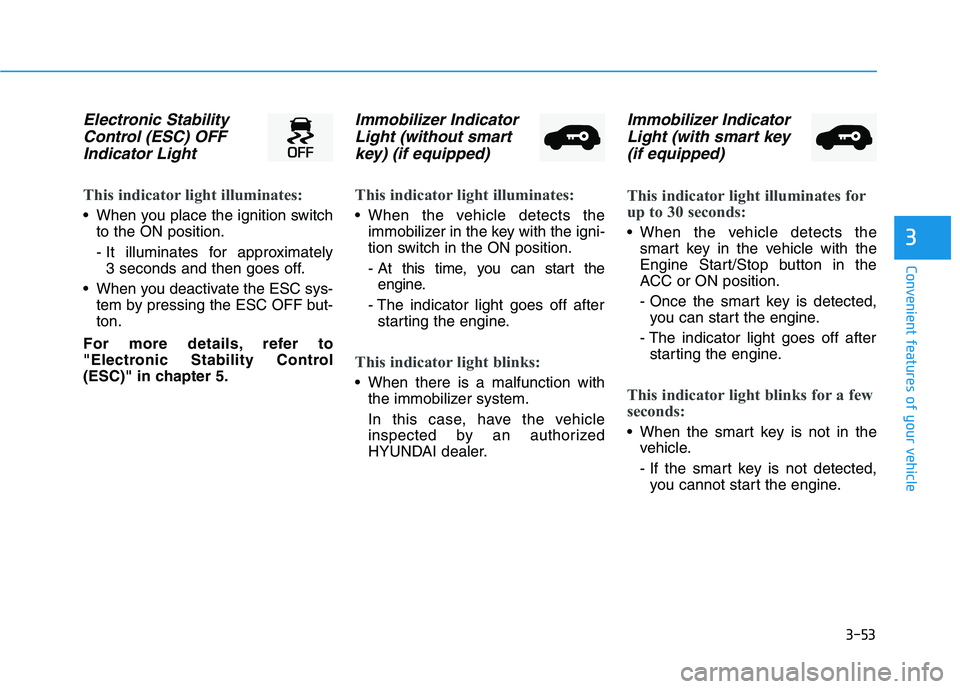
Electronic Stability
Control (ESC) OFF
Indicator Light
This indicator light illuminates:
When you place the ignition switch
to the ON position.
- It illuminates for approximately
3 seconds and then goes off.
When you deactivate the ESC sys-
tem by pressing the ESC OFF but-
ton.
For more details, refer to
"Electronic Stability Control
(ESC)" in chapter 5.
Immobilizer Indicator
Light (without smart
key) (if equipped)
This indicator light illuminates:
When the vehicle detects the
immobilizer in the key with the igni-
tion switch in the ON position.
- At this time, you can start the
engine.
- The indicator light goes off after
starting the engine.
This indicator light blinks:
When there is a malfunction with
the immobilizer system.
In this case, have the vehicle
inspected by an authorized
HYUNDAI dealer.
Immobilizer Indicator
Light (with smart key
(if equipped)
This indicator light illuminates for
up to 30 seconds:
When the vehicle detects the
smart key in the vehicle with the
Engine Start/Stop button in the
ACC or ON position.
- Once the smart key is detected,
you can start the engine.
- The indicator light goes off after
starting the engine.
This indicator light blinks for a few
seconds:
When the smart key is not in the
vehicle.
- If the smart key is not detected,
you cannot start the engine.
Page 202 of 480
3-68
Convenient features of your vehicle
ItemsExplanation
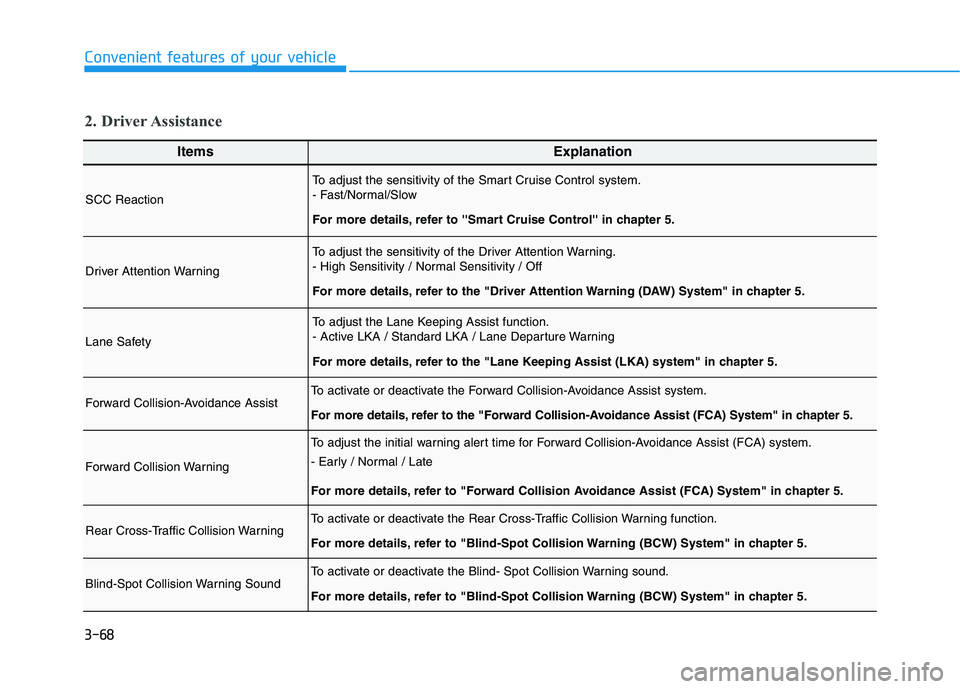
SCC Reaction
To adjust the sensitivity of the Smart Cruise Control system.
- Fast/Normal/Slow
For more details, refer to ''Smart Cruise Control'' in chapter 5.
Driver Attention Warning
To adjust the sensitivity of the Driver Attention Warning.
- High Sensitivity / Normal Sensitivity / Off
For more details, refer to the "Driver Attention Warning (DAW) System" in chapter 5.
Lane Safety
To adjust the Lane Keeping Assist function.
- Active LKA / Standard LKA / Lane Departure Warning
For more details, refer to the "Lane Keeping Assist (LKA) system" in chapter 5.
Forward Collision-Avoidance AssistTo activate or deactivate the Forward Collision-Avoidance Assist system.
For more details, refer to the "Forward Collision-Avoidance Assist (FCA) System" in chapter 5.
Forward Collision Warning
To adjust the initial warning alert time for Forward Collision-Avoidance Assist (FCA) system.
- Early / Normal / Late
For more details, refer to "Forward Collision Avoidance Assist (FCA) System" in chapter 5.
Rear Cross-Traffic Collision WarningTo activate or deactivate the Rear Cross-Traffic Collision Warning function.
For more details, refer to "Blind-Spot Collision Warning (BCW) System" in chapter 5.
Blind-Spot Collision Warning SoundTo activate or deactivate the Blind- Spot Collision Warning sound.
For more details, refer to "Blind-Spot Collision Warning (BCW) System" in chapter 5.
2. Driver Assistance