2020 HYUNDAI VELOSTER battery
[x] Cancel search: batteryPage 9 of 480
F9
Introduction
For customers who do not use TOP
Tier Detergent Gasoline regularly,
and have problems starting or the
engine does not run smoothly, deter-
gent-based fuel additives that you
can purchase separately may be
added to the gasoline. If TOP TIER
Detergent Gasoline is not available,
one bottle of additive added to the
fuel tank according to the mainte-
nance schedule is recommended
(refer to the Maintenance Schedule
in chapter 7).
Additives are available from your
authorized HYUNDAI dealer along
with information on how to use them.
Do not mix other additives.
Operation in foreign countries
If you are going to drive your vehicle
in another country, be sure to:
• Observe all regulations regarding
registration and insurance.
Determine that acceptable fuel is
available. This vehicle should not be modi-
fied. Modification of your vehicle
could affect its performance, safety
or durability and may even violate
governmental safety and emis-
sions regulations.
In addition, damage or perform-
ance problems resulting from any
modification may not be covered
under warranty.
If you use unauthorized electronic
devices, it may cause the vehicle to
operate abnormally, wire damage,
battery discharge and fire. For your
safety, do not use unauthorized
electronic devices.By following a few simple precautions
for the first 1,000 km (600 miles) you
may add to the performance, econo-
my and life of your vehicle.
Do not race the engine.
While driving, keep your engine
speed (rpm, or revolutions per
minute) between 2,000 rpm and
4,000 rpm.
Do not maintain a single speed for
long periods of time, either fast or
slow. Varying engine speed is need-
ed to properly break-in the engine.
Avoid hard stops, except in emer-
gencies, to allow the brakes to seat
properly.
V VE
EH
HI
IC
CL
LE
E
B
BR
RE
EA
AK
K-
-I
IN
N
P
PR
RO
OC
CE
ES
SS
S
V VE
EH
HI
IC
CL
LE
E
M
MO
OD
DI
IF
FI
IC
CA
AT
TI
IO
ON
NS
S
Page 17 of 480
1-6
Your vehicle at a glance
E EN
NG
GI
IN
NE
E
C
CO
OM
MP
PA
AR
RT
TM
ME
EN
NT
T
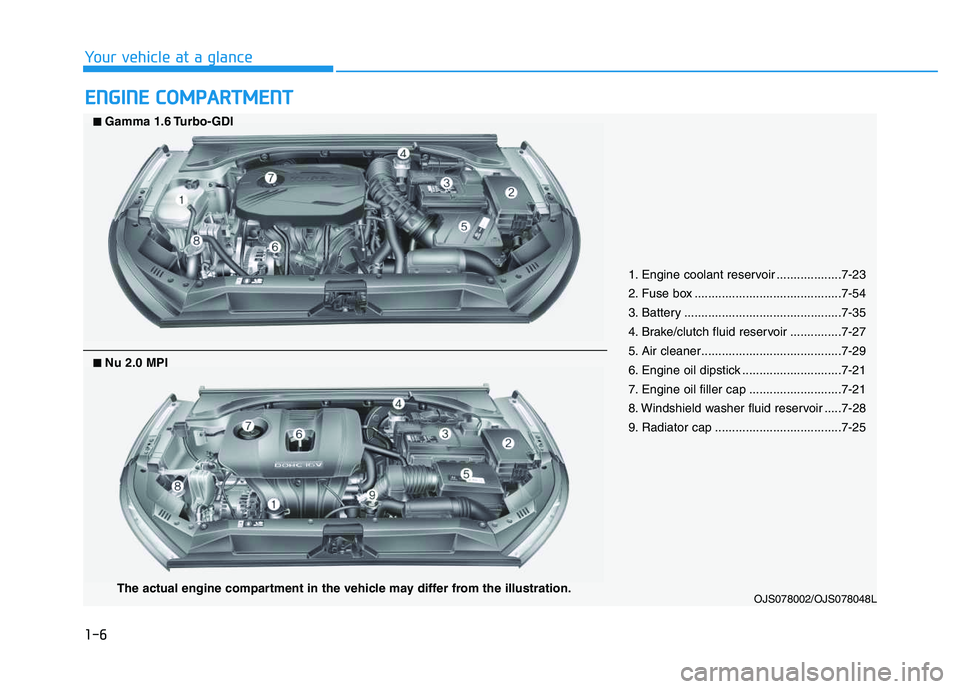
1. Engine coolant reservoir ...................7-23
2. Fuse box ...........................................7-54
3. Battery ..............................................7-35
4. Brake/clutch fluid reservoir ...............7-27
5. Air cleaner.........................................7-29
6. Engine oil dipstick .............................7-21
7. Engine oil filler cap ...........................7-21
8. Windshield washer fluid reservoir .....7-28
9. Radiator cap .....................................7-25
OJS078002/OJS078048L
■ ■Gamma 1.6 Turbo-GDI
The actual engine compartment in the vehicle may differ from the illustration.
■ ■Nu 2.0 MPI
Page 87 of 480
3-87
Convenient features of your vehicle
3
Battery saver function
The purpose of this feature is to pre-
vent the battery from being dis-
charged. The system automatically
turns off the parking lamp when the
driver turns the vehicle off and opens
the driver-side door.
With this feature, the parking lamps
will turn off automatically if the driver
parks on the side of road at night.
If necessary, to keep the lamps on
when the vehicle is turned off, perform
the following:
1) Open the driver-side door.
2) Turn the parking lamps OFF and
ON again using the headlamp
switch on the steering column.
Headlamp delay function
If the key is removed from the ignition
switch or placed in the ACC position
or the LOCK/OFF position with the
headlamps ON, the headlamps
(and/or parking lamps) remain on for
about 5 minutes. However, if the dri-
ver’s door is opened and closed, the
headlights are turned off after 15
seconds. Also, with the engine off if
the driver's door is opened and
closed, the headlamps (and/or park-
ing lamps) are turned off after 15
seconds.
The headlamps (and/or parking
lamps) can be turned off by pressing
the lock button on the remote key or
smart key twice or turning the head-
lamp switch to the OFF or AUTO
position.
You can activate or deactivate the
Headlamp Delay function from the
User Settings Mode in the LCD dis-
play.
For more details, refer to the "LCD
Display" section in this chapter.If the driver exits the vehicle
through another door besides the
driver door, the battery saver func-
tion does not operate and the
headlamp delay function does not
turn OFF automatically.
This may cause the battery to dis-
charge. To avoid battery dis-
charge, turn OFF the headlamps
manually from the headlamp
switch before exiting the vehicle.
NOTICE
Page 88 of 480
3-88
Convenient features of your vehicle
Daytime running light (DRL)
The Daytime Running Lights (DRL)
can make it easier for others to see
the front of your vehicle during the
day, especially after dawn and before
sunset.
The DRL system will turn the dedi-
cated lamp OFF when :
The headlamps are ON.
The parking lamps are ON.
The vehicle is turned off.
The parking brake is engaged.
Interior Lights
Do not use the interior lights for
extended periods when the vehi-
cle is turned off or the battery will
discharge.
Interior lamp AUTO cut
The interior lamps will automatically
go off approximately 20 minutes after
the engine is turned off and the
doors are closed. If a door is opened,
the lamp will go off 40 minutes after
the engine is turned off. If the doors
are locked by the remote key or
smart key and the vehicle enters the
armed stage of the theft alarm sys-
tem, the lamps will go off five sec-
onds later.
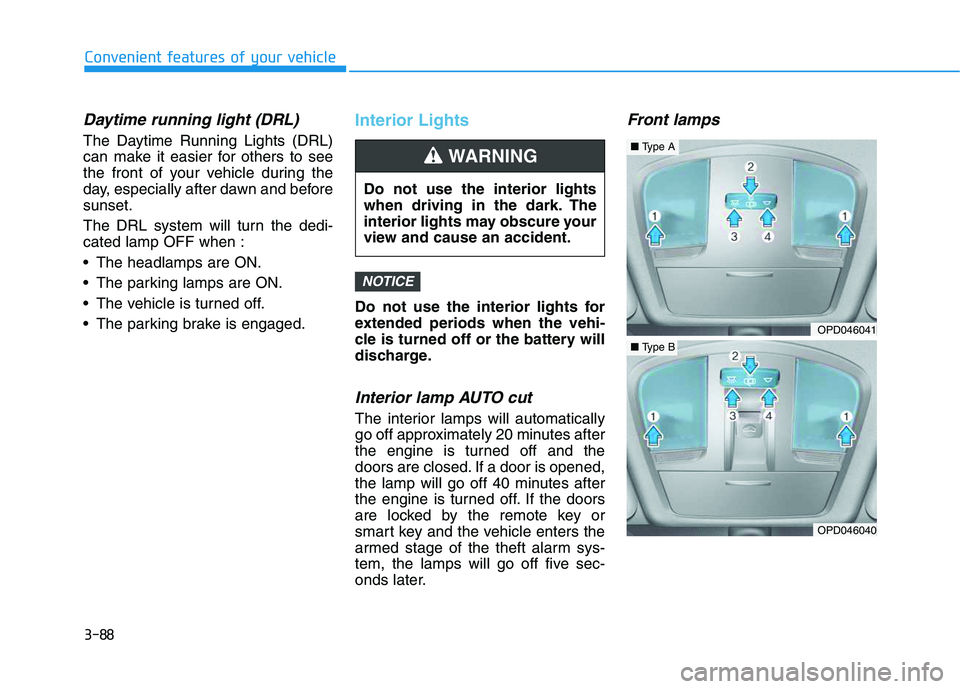
Front lamps
NOTICE
Do not use the interior lights
when driving in the dark. The
interior lights may obscure your
view and cause an accident.
WARNING
OPD046041
OPD046040
■Type A
■Type B
Page 90 of 480
3-90
Convenient features of your vehicle
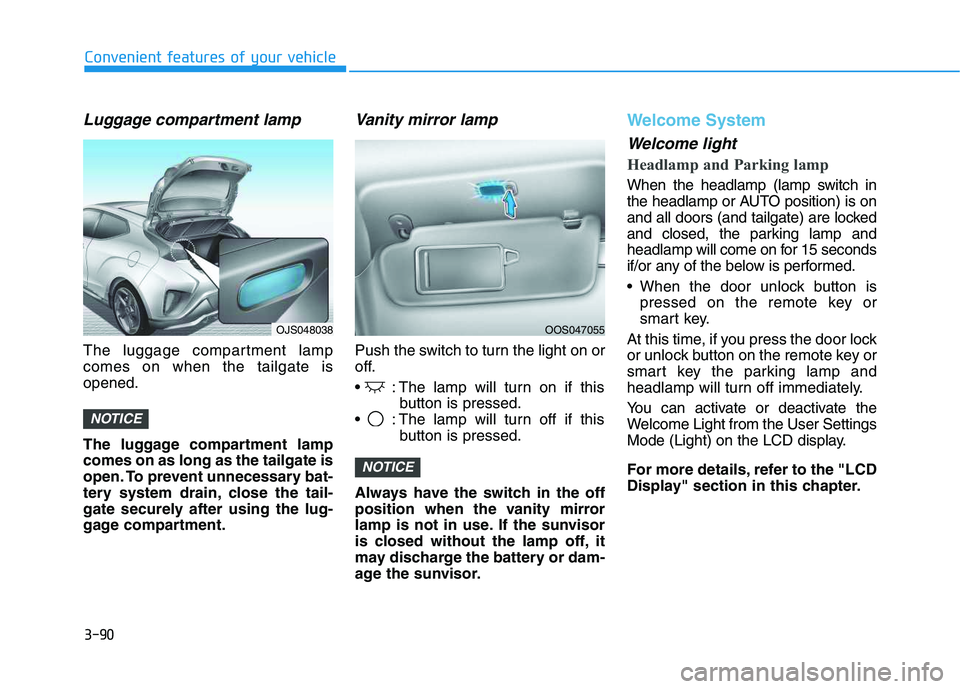
Luggage compartment lamp
The luggage compartment lamp
comes on when the tailgate is
opened.
The luggage compartment lamp
comes on as long as the tailgate is
open. To prevent unnecessary bat-
tery system drain, close the tail-
gate securely after using the lug-
gage compartment.
Vanity mirror lamp
Push the switch to turn the light on or
off.
: The lamp will turn on if this
button is pressed.
: The lamp will turn off if this
button is pressed.
Always have the switch in the off
position when the vanity mirror
lamp is not in use. If the sunvisor
is closed without the lamp off, it
may discharge the battery or dam-
age the sunvisor.
Welcome System
Welcome light
Headlamp and Parking lamp
When the headlamp (lamp switch in
the headlamp or AUTO position) is on
and all doors (and tailgate) are locked
and closed, the parking lamp and
headlamp will come on for 15 seconds
if/or any of the below is performed.
When the door unlock button is
pressed on the remote key or
smart key.
At this time, if you press the door lock
or unlock button on the remote key or
smart key the parking lamp and
headlamp will turn off immediately.
You can activate or deactivate the
Welcome Light from the User Settings
Mode (Light) on the LCD display.
For more details, refer to the "LCD
Display" section in this chapter.
NOTICE
NOTICE
OJS048038OOS047055
Page 105 of 480
3-105
Convenient features of your vehicle
3
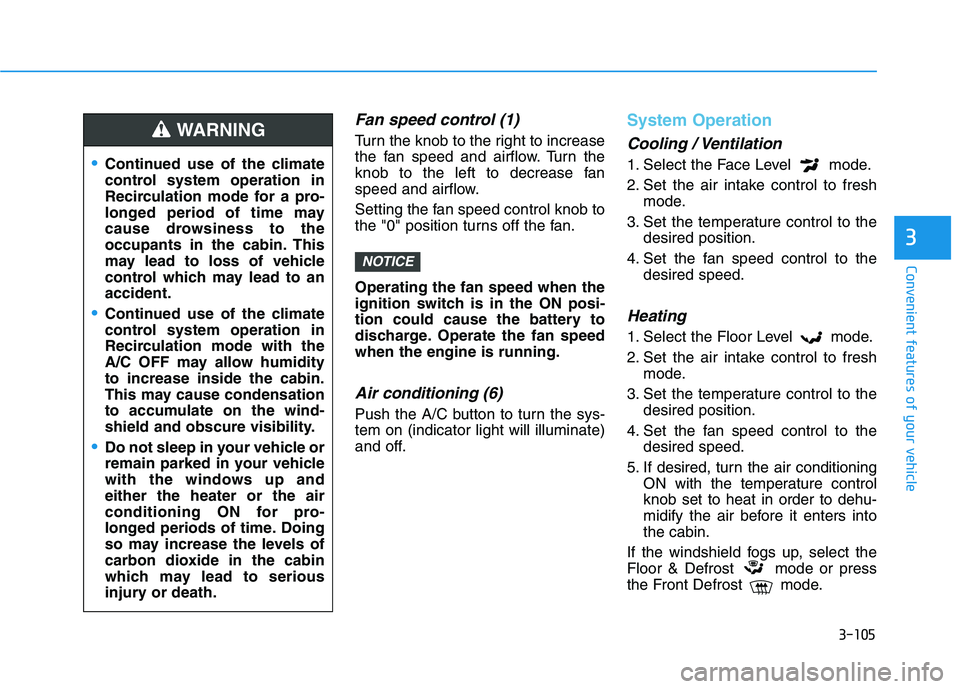
Fan speed control (1)
Turn the knob to the right to increase
the fan speed and airflow. Turn the
knob to the left to decrease fan
speed and airflow.
Setting the fan speed control knob to
the "0" position turns off the fan.
Operating the fan speed when the
ignition switch is in the ON posi-
tion could cause the battery to
discharge. Operate the fan speed
when the engine is running.
Air conditioning (6)
Push the A/C button to turn the sys-
tem on (indicator light will illuminate)
and off.
System Operation
Cooling / Ventilation
1. Select the Face Level mode.
2. Set the air intake control to fresh
mode.
3. Set the temperature control to the
desired position.
4. Set the fan speed control to the
desired speed.
Heating
1. Select the Floor Level mode.
2. Set the air intake control to fresh
mode.
3. Set the temperature control to the
desired position.
4. Set the fan speed control to the
desired speed.
5. If desired, turn the air conditioning
ON with the temperature control
knob set to heat in order to dehu-
midify the air before it enters into
the cabin.
If the windshield fogs up, select the
Floor & Defrost mode or press
the Front Defrost mode.
NOTICE
Continued use of the climate
control system operation in
Recirculation mode for a pro-
longed period of time may
cause drowsiness to the
occupants in the cabin. This
may lead to loss of vehicle
control which may lead to an
accident.
Continued use of the climate
control system operation in
Recirculation mode with the
A/C OFF may allow humidity
to increase inside the cabin.
This may cause condensation
to accumulate on the wind-
shield and obscure visibility.
Do not sleep in your vehicle or
remain parked in your vehicle
with the windows up and
either the heater or the air
conditioning ON for pro-
longed periods of time. Doing
so may increase the levels of
carbon dioxide in the cabin
which may lead to serious
injury or death.
WARNING
Page 114 of 480
3-114
Convenient features of your vehicle
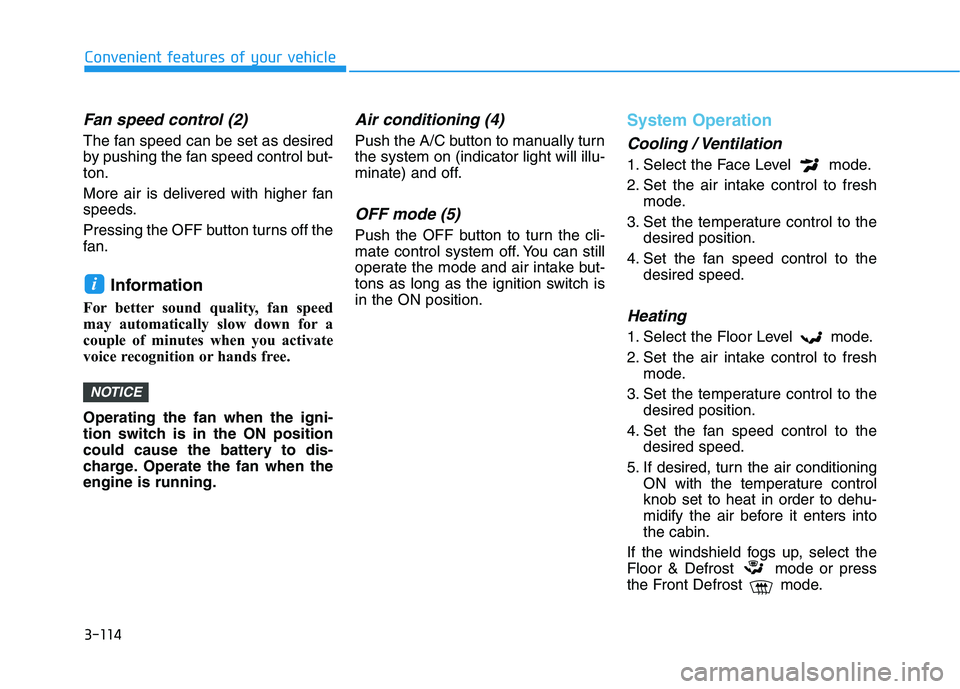
Fan speed control (2)
The fan speed can be set as desired
by pushing the fan speed control but-
ton.
More air is delivered with higher fan
speeds.
Pressing the OFF button turns off the
fan.
Information
For better sound quality, fan speed
may automatically slow down for a
couple of minutes when you activate
voice recognition or hands free.
Operating the fan when the igni-
tion switch is in the ON position
could cause the battery to dis-
charge. Operate the fan when the
engine is running.
Air conditioning (4)
Push the A/C button to manually turn
the system on (indicator light will illu-
minate) and off.
OFF mode (5)
Push the OFF button to turn the cli-
mate control system off. You can still
operate the mode and air intake but-
tons as long as the ignition switch is
in the ON position.
System Operation
Cooling / Ventilation
1. Select the Face Level mode.
2. Set the air intake control to fresh
mode.
3. Set the temperature control to the
desired position.
4. Set the fan speed control to the
desired speed.
Heating
1. Select the Floor Level mode.
2. Set the air intake control to fresh
mode.
3. Set the temperature control to the
desired position.
4. Set the fan speed control to the
desired speed.
5. If desired, turn the air conditioning
ON with the temperature control
knob set to heat in order to dehu-
midify the air before it enters into
the cabin.
If the windshield fogs up, select the
Floor & Defrost mode or press
the Front Defrost mode.
NOTICE
i
Page 120 of 480
3-120
Convenient features of your vehicle
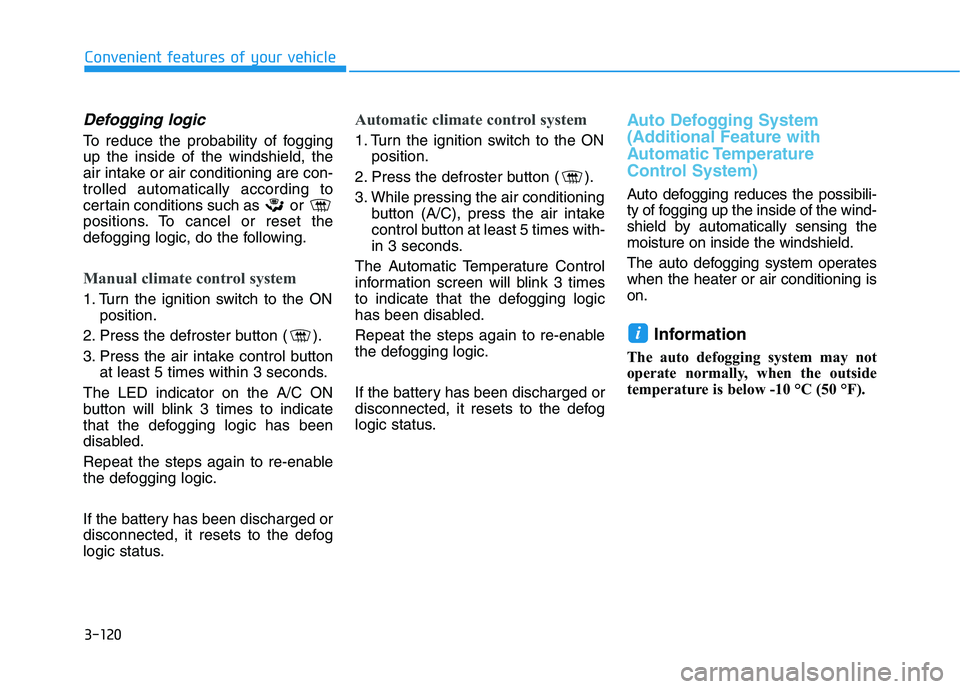
Defogging logic
To reduce the probability of fogging
up the inside of the windshield, the
air intake or air conditioning are con-
trolled automatically according to
certain conditions such as or
positions. To cancel or reset the
defogging logic, do the following.
Manual climate control system
1. Turn the ignition switch to the ON
position.
2. Press the defroster button ( ).
3. Press the air intake control button
at least 5 times within 3 seconds.
The LED indicator on the A/C ON
button will blink 3 times to indicate
that the defogging logic has been
disabled.
Repeat the steps again to re-enable
the defogging logic.
If the battery has been discharged or
disconnected, it resets to the defog
logic status.
Automatic climate control system
1. Turn the ignition switch to the ON
position.
2. Press the defroster button ( ).
3. While pressing the air conditioning
button (A/C), press the air intake
control button at least 5 times with-
in 3 seconds.
The Automatic Temperature Control
information screen will blink 3 times
to indicate that the defogging logic
has been disabled.
Repeat the steps again to re-enable
the defogging logic.
If the battery has been discharged or
disconnected, it resets to the defog
logic status.
Auto Defogging System
(Additional Feature with
Automatic Temperature
Control System)
Auto defogging reduces the possibili-
ty of fogging up the inside of the wind-
shield by automatically sensing the
moisture on inside the windshield.
The auto defogging system operates
when the heater or air conditioning is
on.
Information
The auto defogging system may not
operate normally, when the outside
temperature is below -10 °C (50 °F).
i