2020 HYUNDAI VELOSTER ECO mode
[x] Cancel search: ECO modePage 51 of 480
2-34
Safety system of your vehicle
After selecting a proper child seat for
your child, check to make sure it fits
properly in your vehicle. Follow the
instructions provided by the manu-
facturer when installing the child
seat. Note these general steps when
installing the seat to your vehicle:
Properly secure the child
restraint to the vehicle.All child
restraints must be secured to the
vehicle with the lap part of a
lap/shoulder belt or with the
LATCH system. If using the
lap/shoulder belt for your child
restraint, the convertible locking
retractor should be pulled all the
way out to engage the "automatic
locking" mode. (See page 2-38.)
Make sure the child restraint is
firmly secured.After installing a
child restraint to the vehicle, push
and pull the seat forward-and-back
and side-to-side to verify that it is
securely attached to the seat. A
child restraint secured with a seat
belt should be installed as firmly as
possible. However, some side-to-
side movement can be expected.Secure the child in the child
restraint.Make sure the child is
properly strapped in the child
restraint according to the manufac-
turer instructions.
Lower Anchors and Tether for
Children (LATCH System)
The LATCH system holds a child
restraint during driving and in an acci-
dent. This system is designed to
make installation of the child restraint
easier and reduce the possibility of
improperly installing your child
restraint. The LATCH system uses
anchors in the vehicle and attach-
ments on the child restraint. The
LATCH system eliminates the need
to use seat belts to secure the child
restraint to the rear seats.
Lower anchors are metal bars built
into the vehicle. There are two lower
anchors for each LATCH seating
position that will accommodate a
child restraint with lower attachments.
To use the LATCH system in your
vehicle, you must have a child
restraint with LATCH attachments.
The child seat manufacturer will pro-
vide you with instructions on how to
use the child seat with its attachments
for the LATCH lower anchors. A child restraint in a closed
vehicle can become very hot. To
prevent burns, check the seat-
ing surface and buckles before
placing your child in the child
restraint.
CAUTION
Page 57 of 480
2-40
Safety system of your vehicle
7. Double check that the retractor is
in the "Automatic Locking" mode
by attempting to pull more of the
seat belt out of the retractor. If you
cannot, the retractor is in the
"Automatic Locking" mode.
If your CRS manufacturer instructs or
recommends you to use a tether
anchor with the lap/shoulder belt,
refer to the previous pages for more
information.
When the seat belt is allowed to
retract to its fully stowed position,
the retractor will automatically
switch from the "Automatic
Locking" mode to the emergency
lock mode for normal adult usage.To remove the child restraint, press
the release button on the buckle and
then pull the lap/shoulder belt out of
the restraint and allow the seat belt
to retract fully.
NOTICE
If the retractor is not in the
"Automatic Locking" mode, the
child restraint can move when
your vehicle turns or stops sud-
denly. A child can be seriously
injured or killed if the child
restraint is not properly anchored
in the car, including manually
pulling the seat belt all the way
out to shift the rectractor to the
"Automatic Locking" mode.
WARNING
Page 60 of 480
2-43
Safety system of your vehicle
2
Where Are the Air Bags?
Driver's and passenger's front
air bags
Your vehicle is equipped with a
Advanced Supplemental Restraint
System (SRS) and lap/shoulder belts
at both the driver and passenger
seating positions.
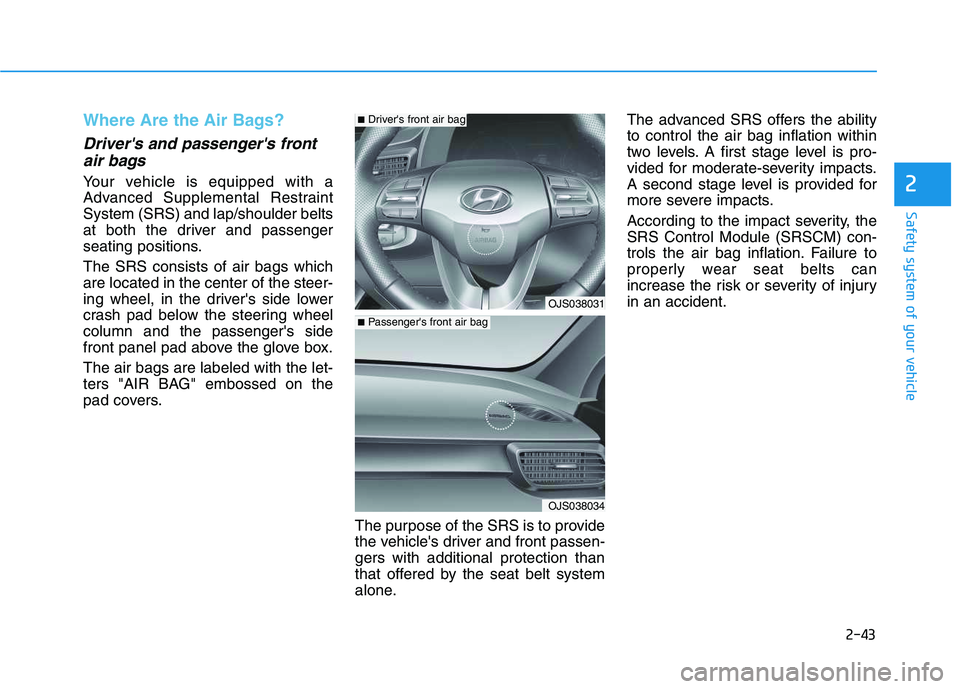
The SRS consists of air bags which
are located in the center of the steer-
ing wheel, in the driver's side lower
crash pad below the steering wheel
column and the passenger's side
front panel pad above the glove box.
The air bags are labeled with the let-
ters "AIR BAG" embossed on the
pad covers.
The purpose of the SRS is to provide
the vehicle's driver and front passen-
gers with additional protection than
that offered by the seat belt system
alone.The advanced SRS offers the ability
to control the air bag inflation within
two levels. A first stage level is pro-
vided for moderate-severity impacts.
A second stage level is provided for
more severe impacts.
According to the impact severity, the
SRS Control Module (SRSCM) con-
trols the air bag inflation. Failure to
properly wear seat belts can
increase the risk or severity of injury
in an accident.
OJS038034
OJS038031
■Passenger's front air bag
■Driver's front air bag
Page 87 of 480
3-87
Convenient features of your vehicle
3
Battery saver function
The purpose of this feature is to pre-
vent the battery from being dis-
charged. The system automatically
turns off the parking lamp when the
driver turns the vehicle off and opens
the driver-side door.
With this feature, the parking lamps
will turn off automatically if the driver
parks on the side of road at night.
If necessary, to keep the lamps on
when the vehicle is turned off, perform
the following:
1) Open the driver-side door.
2) Turn the parking lamps OFF and
ON again using the headlamp
switch on the steering column.
Headlamp delay function
If the key is removed from the ignition
switch or placed in the ACC position
or the LOCK/OFF position with the
headlamps ON, the headlamps
(and/or parking lamps) remain on for
about 5 minutes. However, if the dri-
ver’s door is opened and closed, the
headlights are turned off after 15
seconds. Also, with the engine off if
the driver's door is opened and
closed, the headlamps (and/or park-
ing lamps) are turned off after 15
seconds.
The headlamps (and/or parking
lamps) can be turned off by pressing
the lock button on the remote key or
smart key twice or turning the head-
lamp switch to the OFF or AUTO
position.
You can activate or deactivate the
Headlamp Delay function from the
User Settings Mode in the LCD dis-
play.
For more details, refer to the "LCD
Display" section in this chapter.If the driver exits the vehicle
through another door besides the
driver door, the battery saver func-
tion does not operate and the
headlamp delay function does not
turn OFF automatically.
This may cause the battery to dis-
charge. To avoid battery dis-
charge, turn OFF the headlamps
manually from the headlamp
switch before exiting the vehicle.
NOTICE
Page 90 of 480
3-90
Convenient features of your vehicle
Luggage compartment lamp
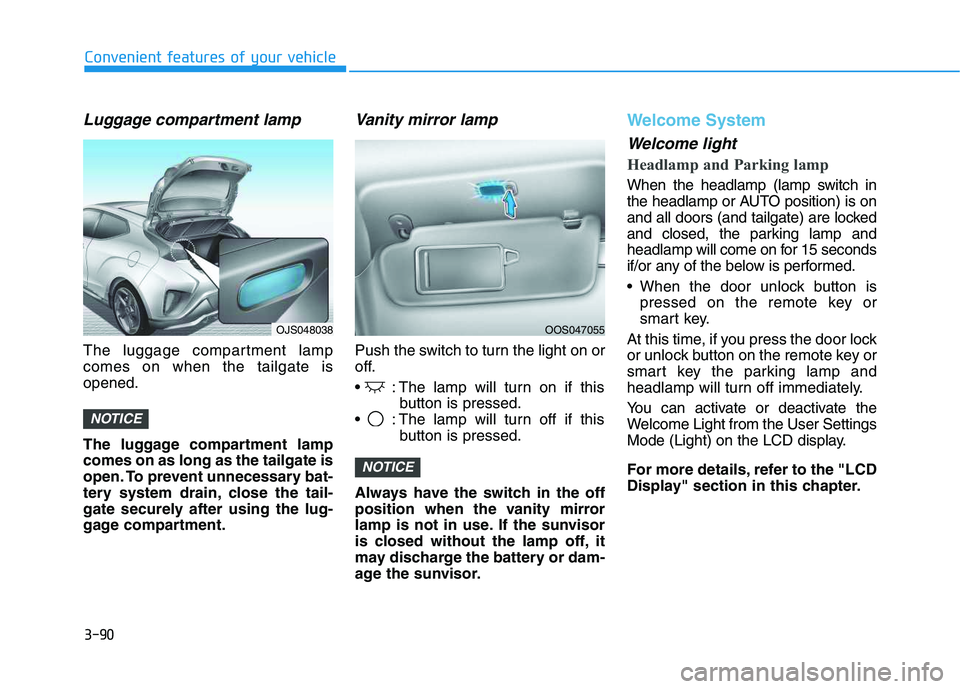
The luggage compartment lamp
comes on when the tailgate is
opened.
The luggage compartment lamp
comes on as long as the tailgate is
open. To prevent unnecessary bat-
tery system drain, close the tail-
gate securely after using the lug-
gage compartment.
Vanity mirror lamp
Push the switch to turn the light on or
off.
: The lamp will turn on if this
button is pressed.
: The lamp will turn off if this
button is pressed.
Always have the switch in the off
position when the vanity mirror
lamp is not in use. If the sunvisor
is closed without the lamp off, it
may discharge the battery or dam-
age the sunvisor.
Welcome System
Welcome light
Headlamp and Parking lamp
When the headlamp (lamp switch in
the headlamp or AUTO position) is on
and all doors (and tailgate) are locked
and closed, the parking lamp and
headlamp will come on for 15 seconds
if/or any of the below is performed.
When the door unlock button is
pressed on the remote key or
smart key.
At this time, if you press the door lock
or unlock button on the remote key or
smart key the parking lamp and
headlamp will turn off immediately.
You can activate or deactivate the
Welcome Light from the User Settings
Mode (Light) on the LCD display.
For more details, refer to the "LCD
Display" section in this chapter.
NOTICE
NOTICE
OJS048038OOS047055
Page 104 of 480
3-104
Convenient features of your vehicle
Instrument panel vents
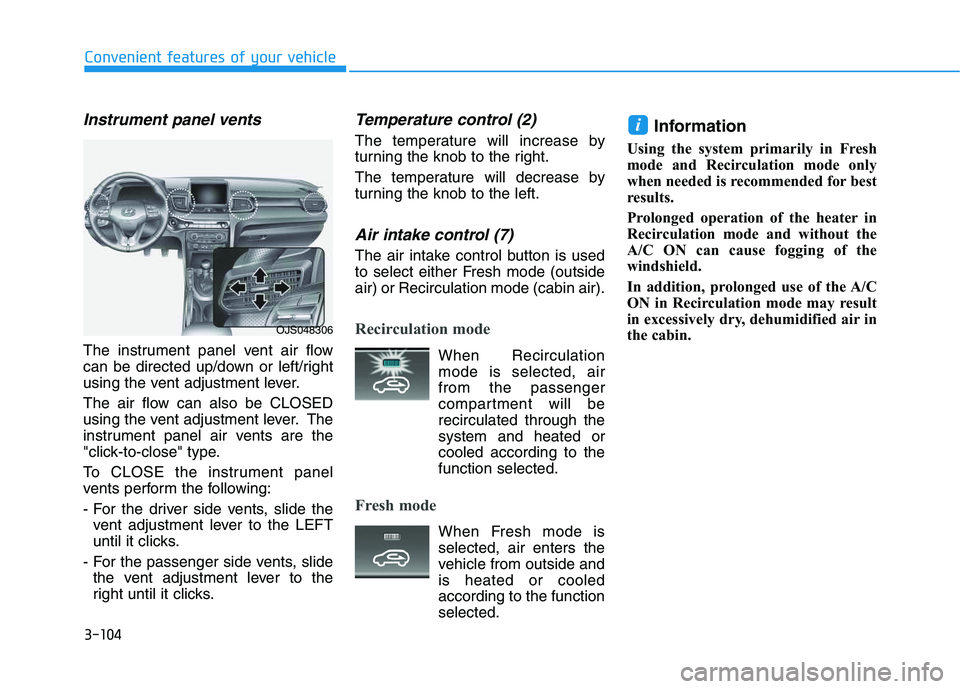
The instrument panel vent air flow
can be directed up/down or left/right
using the vent adjustment lever.
The air flow can also be CLOSED
using the vent adjustment lever. The
instrument panel air vents are the
"click-to-close" type.
To CLOSE the instrument panel
vents perform the following:
- For the driver side vents, slide the
vent adjustment lever to the LEFT
until it clicks.
- For the passenger side vents, slide
the vent adjustment lever to the
right until it clicks.
Temperature control (2)
The temperature will increase by
turning the knob to the right.
The temperature will decrease by
turning the knob to the left.
Air intake control (7)
The air intake control button is used
to select either Fresh mode (outside
air) or Recirculation mode (cabin air).
Recirculation mode
When Recirculation
mode is selected, air
from the passenger
compartment will be
recirculated through the
system and heated or
cooled according to the
function selected.
Fresh mode
When Fresh mode is
selected, air enters the
vehicle from outside and
is heated or cooled
according to the function
selected.
Information
Using the system primarily in Fresh
mode and Recirculation mode only
when needed is recommended for best
results.
Prolonged operation of the heater in
Recirculation mode and without the
A/C ON can cause fogging of the
windshield.
In addition, prolonged use of the A/C
ON in Recirculation mode may result
in excessively dry, dehumidified air in
the cabin.
i
OJS048306
Page 110 of 480
3-110
Convenient features of your vehicle
Automatic Temperature
Control Mode
The Automatic Climate Control
System is controlled by setting the
desired temperature.
1. Press the AUTO button (3).
The modes, fan speeds, air intake
and air-conditioning will be con-
trolled automatically by the tem-
perature setting you select.
2. Turn the temperature control knob
(1) to the desired temperature. If
the temperature is set to the low-
est setting (Lo), the air condition-
ing system will operate continu-
ously. After the interior has cooled
sufficiently, adjust the knob to a
higher temperature set point
whenever possible.
To turn the automatic operation off,
select any button of the following:
- Mode selection button
- Front windshield defroster button
(Press the button one more time
to deselect the front windshield
defroster function. The 'AUTO'
sign will illuminate on the infor-
mation display once again.)
- Fan speed control buttonThe selected function will be con-
trolled manually while other functions
operate automatically.
For your convenience and to improve
the efficiency of the climate control,
use the AUTO button and set the
temperature to 22°C (72°F).
To change the temperature unit from
°C to °F or °F to °C:
Press and hold the AUTO and OFF
buttons on the climate control unit for
3 seconds.
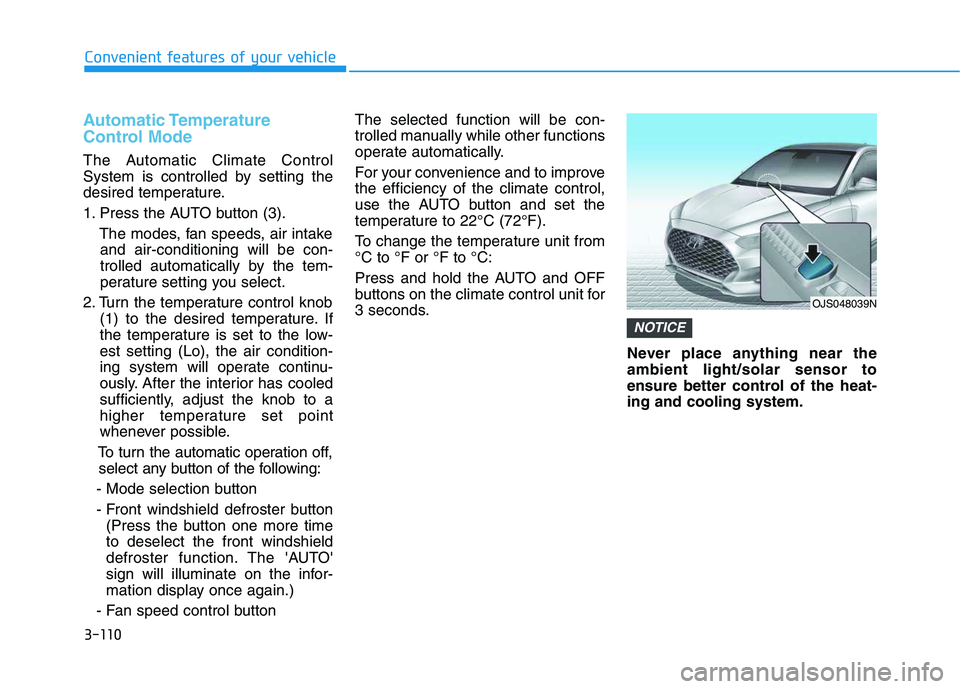
Never place anything near the
ambient light/solar sensor to
ensure better control of the heat-
ing and cooling system.
NOTICE
OJS048039N
Page 113 of 480
3-113
Convenient features of your vehicle
3
Temperature control (1)
Turn the knob to the right to increase
the temperature. Turn the knob to the
left to decrease temperature.
The temperature will increase or
decrease by 0.5°C/1°F for each incre-
mental location. When set to the low-
est temperature setting, the air condi-
tioning will operate continuously.
Air intake control (10)
The air intake control button is used
to select either Fresh mode (outside
air) or Recirculation mode (cabin air).
Recirculation mode
When Recirculation
mode is selected, air
from the passenger
compartment will be
recirculated through the
system and heated or
cooled according to the
function selected.
Fresh mode
When Fresh mode is
selected, air enters the
vehicle from outside and
is heated or cooled
according to the function
selected.
Information
Using the system primarily in Fresh
mode and Recirculation mode only
when needed is recommended for best
results.
Prolonged operation of the heater in
Recirculation mode and without the
A/C ON can cause fogging of the wind-
shield.
In addition, prolonged use of the A/C
ON in Recirculation mode may result in
excessively dry, dehumidified air in the
cabin.
i
Continued use of the climate
control system operation in
Recirculation mode for a pro-
longed period of time may
cause drowsiness to the
occupants in the cabin. This
may lead to loss of vehicle
control which may lead to an
accident.
Continued use of the climate
control system operation in
Recirculation mode with the
A/C OFF may allow humidity
to increase inside the cabin.
This may cause condensation
to accumulate on the wind-
shield and obscure visibility.
Do not sleep in your vehicle or
remain parked in your vehicle
with the windows up and
either the heater or the air
conditioning ON for pro-
longed periods of time. Doing
so may increase the levels of
carbon dioxide in the cabin
which may lead to serious
injury or death.
WARNING