2020 HYUNDAI TUCSON ULTIMATE light
[x] Cancel search: lightPage 372 of 546
5-106
Driving your vehicle
Smart Cruise Control Speed
To set Smart Cruise Control
speed
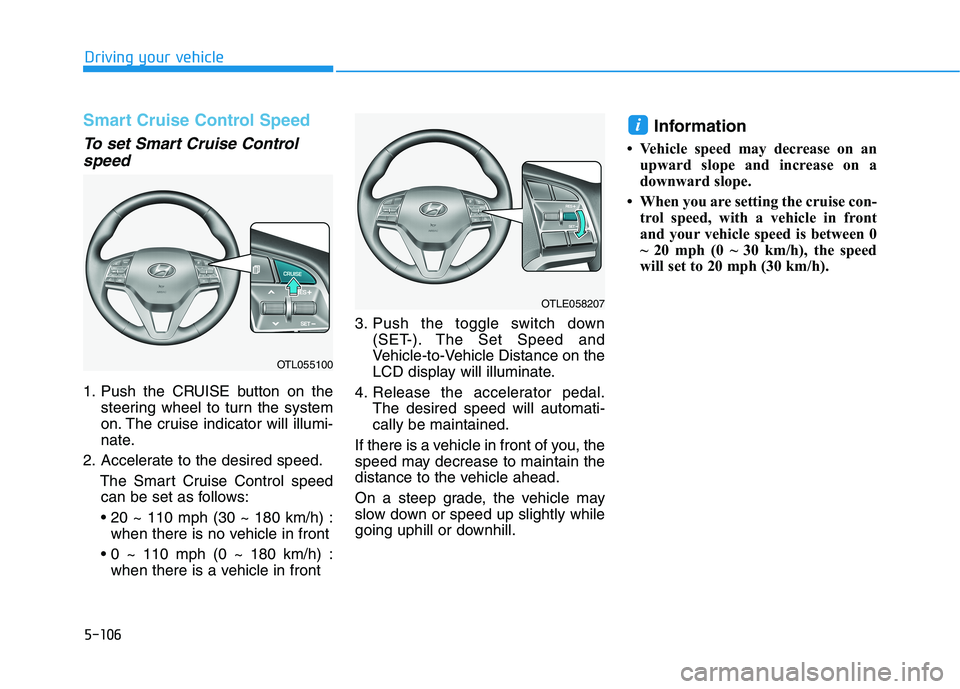
1. Push the CRUISE button on the
steering wheel to turn the system
on. The cruise indicator will illumi-
nate.
2. Accelerate to the desired speed.
The Smart Cruise Control speed
can be set as follows:
when there is no vehicle in front
when there is a vehicle in front3. Push the toggle switch down
(SET-). The Set Speed and
Vehicle-to-Vehicle Distance on the
LCD display will illuminate.
4. Release the accelerator pedal.
The desired speed will automati-
cally be maintained.
If there is a vehicle in front of you, the
speed may decrease to maintain the
distance to the vehicle ahead.
On a steep grade, the vehicle may
slow down or speed up slightly while
going uphill or downhill.
Information
• Vehicle speed may decrease on an
upward slope and increase on a
downward slope.
• When you are setting the cruise con-
trol speed, with a vehicle in front
and your vehicle speed is between 0
~ 20 mph (0 ~ 30 km/h), the speed
will set to 20 mph (30 km/h).
i
OTL055100
OTLE058207
Page 376 of 546
5-110
Driving your vehicle
To turn Cruise Control off
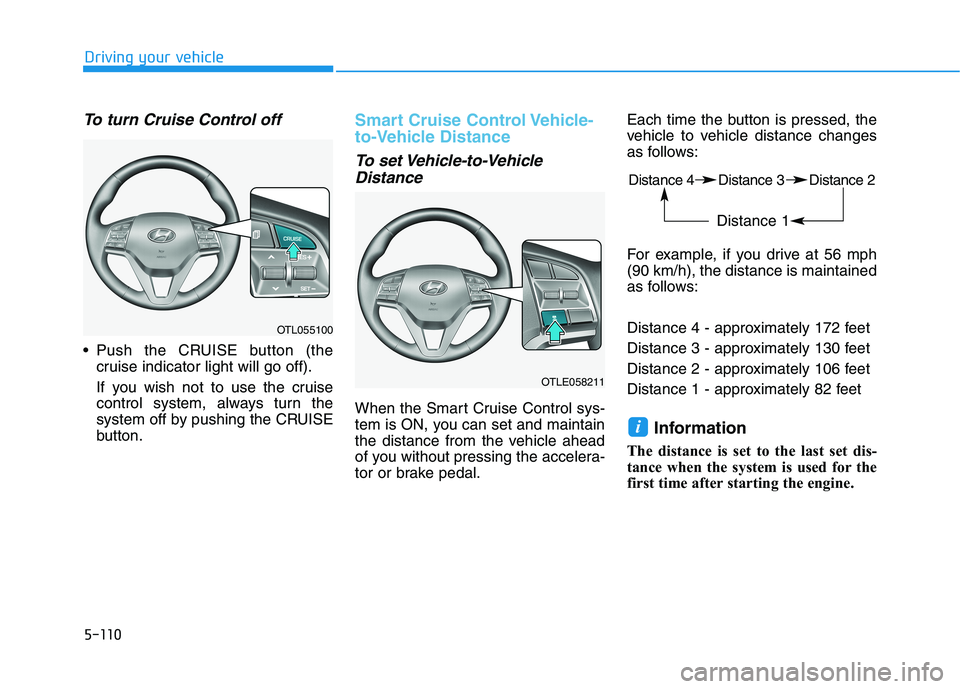
Push the CRUISE button (the
cruise indicator light will go off).
If you wish not to use the cruise
control system, always turn the
system off by pushing the CRUISE
button.
Smart Cruise Control Vehicle-
to-Vehicle Distance
To set Vehicle-to-Vehicle
Distance
When the Smart Cruise Control sys-
tem is ON, you can set and maintain
the distance from the vehicle ahead
of you without pressing the accelera-
tor or brake pedal.Each time the button is pressed, the
vehicle to vehicle distance changes
as follows:
For example, if you drive at 56 mph
(90 km/h), the distance is maintained
as follows:
Distance 4 - approximately 172 feet
Distance 3 - approximately 130 feet
Distance 2 - approximately 106 feet
Distance 1 - approximately 82 feet
Information
The distance is set to the last set dis-
tance when the system is used for the
first time after starting the engine.
i
OTL055100
OTLE058211
Distance 4 Distance 3 Distance 2
Distance 1
Page 379 of 546
5-113
Driving your vehicle
5
If you push the smart cruise control
toggle switch (RES+ or SET-) while
Auto Hold and smart cruise control
is operating the Auto Hold will be
released regardless of accelerator
pedal operation and the vehicle will
start to move. The AUTO HOLD
indicator changes from green to
white.- Driving on rainy, icy, or
snow-covered roads
- Driving on a steep downhill
or uphill
- Driving in windy areas
- Driving in parking lots
- Driving near crash barriers
- Driving on a sharp curve
- Driving with limited view
(possibly due to bad weath-
er, such as fog, snow, rain or
sandstorm)
- The vehicle's sensing ability
decreases due to vehicle
modification, resulting in a
level difference of the vehi-
cle's front and rear
Unexpected situations may
lead to possible accidents.
Pay attention continuously to
road conditions and driving
even when the smart cruise
control system is being oper-
ated.
Take the following precautions :
Always set the vehicle speed
under the speed limit.
If the Smart Cruise Control is
left on, (cruise indicator light
in the instrument cluster is
illuminated) the Smart Cruise
Control can be activated unin-
tentionally. Keep the Smart
Cruise Control system off
(cruise indicator light OFF)
when the Smart Cruise
Control is not in use, to avoid
inadvertently setting a speed.
Use the Smart Cruise Control
system only when traveling
on open highways in good
weather.
Do not use the Smart Cruise
Control when it may not be
safe to keep the vehicle at a
constant speed.
Do not use when:
- Driving in heavy traffic or
when traffic conditions make
it difficult to drive at a con-
stant speed
WARNING
Page 388 of 546
5-122
Driving your vehicle
Hazardous driving conditions
When hazardous driving elements
are encountered such as water,
snow, ice, mud and sand, take the
below suggestions:
Drive cautiously and keep a longer
braking distance.
Avoid abrupt braking or steering.
When your vehicle is stuck in snow,
mud, or sand, use second gear.
Accelerate slowly to avoid unnec-
essary wheel spin.
Put sand, rock salt, tire chains or
other non-slip materials under the
wheels to provide additional trac-
tion while the vehicle becomes
stuck in ice, snow, or mud.
Rocking the vehicle
If it is necessary to rock the vehicle
to free it from snow, sand, or mud,
first turn the steering wheel right and
left to clear the area around your
front wheels. Then, shift back and
forth between R (Reverse) and a for-
ward gear.
Try to avoid spinning the wheels, and
do not race the engine.
To prevent transmission wear, wait
until the wheels stop spinning before
shifting gears. Release the accelera-
tor pedal while shifting, and press
lightly on the accelerator pedal while
the transmission is in gear. Slowly
spinning the wheels in forward and
reverse directions causes a rocking
motion that may free the vehicle.
S SP
PE
EC
CI
IA
AL
L
D
DR
RI
IV
VI
IN
NG
G
C
CO
ON
ND
DI
IT
TI
IO
ON
NS
S
Downshifting with an automatic
transmission while driving on
slippery surfaces can cause an
accident. The sudden change in
tire speed could cause the tires
to skid. Be careful when down-
shifting on slippery surfaces.
WARNING
If the vehicle is stuck and
excessive wheel spin occurs,
the temperature in the tires can
increase very quickly. If the tires
become damaged, a tire blow
out or tire explosion can occur.
This condition is dangerous -
you and others may be injured.
Do not attempt this procedure if
people or objects are anywhere
near the vehicle.
If you attempt to free the vehicle,
the vehicle can overheat quickly,
possibly causing an engine
compartment fire or other dam-
age. Try to avoid spinning the
wheels as much as possible to
prevent overheating of either the
tires or the engine. DO NOT
allow the vehicle to spin the
wheels above 35 mph (56 km/h).
WARNING
Page 389 of 546
5-123
Driving your vehicle
5
Information
The ESC system must be turned OFF
before rocking the vehicle.
If you are still stuck after rocking
the vehicle a few times, have the
vehicle pulled out by a tow vehicle
to avoid engine overheating, possi-
ble damage to the transmission,
and tire damage. See "Towing" in
chapter 6.
Smooth cornering
Avoid braking or gear changing in
corners, especially when roads are
wet. Ideally, corners should always
be taken under gentle acceleration.
Driving at night
Night driving presents more hazards
than driving in the daylight. Here are
some important tips to remember:
Slow down and keep more dis-
tance between you and other vehi-
cles, as it may be more difficult to
see at night, especially in areas
where there may not be any street
lights.
Adjust your mirrors to reduce the
glare from other driver's head-
lamps.
Keep your headlamps clean and
properly aimed. Dirty or improperly
aimed headlamps will make it
much more difficult to see at night.
Avoid staring directly at the head-
lamps of oncoming vehicles. You
could be temporarily blinded, and it
will take several seconds for your
eyes to readjust to the darkness.
Driving in the rain
Rain and wet roads can make driving
dangerous. Here are a few things to
consider when driving in the rain or
on slick pavement:
Slow down and allow extra follow-
ing distance. A heavy rainfall
makes it harder to see and increas-
es the distance needed to stop
your vehicle.
Turn OFF your Cruise Control.
Replace your windshield wiper
blades when they show signs of
streaking or missing areas on the
windshield.
Be sure your tires have enough
tread. If your tires do not have
enough tread, making a quick stop
on wet pavement can cause a skid
and possibly lead to an accident.
See "Tire replacement" in chap-
ter 7.
Turn on your headlamps to make it
easier for others to see you.
Driving too fast through large pud-
dles can affect your brakes. If you
must go through puddles, try to
drive through them slowly.
NOTICE
i
Page 390 of 546
5-124
Driving your vehicle
If you believe your brakes may be
wet, apply them lightly while driv-
ing until normal braking operation
returns.
Hydroplaning
If the road is wet enough and you are
going fast enough, your vehicle may
have little or no contact with the road
surface and actually ride on the
water. The best advice is SLOW
DOWN when the road is wet.
The risk of hydroplaning increases
as the depth of tire tread decreas-
es, refer to "Tire replacement" in
chapter 7.
Driving in flooded areas
Avoid driving through flooded areas
unless you are sure the water is no
higher than the bottom of the wheel
hub. Drive through any water slowly.
Allow adequate stopping distance
because brake performance may be
reduced.
After driving through water, dry the
brakes by gently applying them sev-
eral times while the vehicle is moving
slowly.
Highway driving
Tires
Adjust the tire inflation, as specified.
Under-inflation may overheat or
damage the tires.
Do not install worn-out or damaged
tires, which may reduce traction or
fail the braking operation.
Information
Never over-inflate your tires above the
maximum inflation pressure, as speci-
fied on your tires.
Fuel, engine coolant and engine
oil
Driving at higher speeds on the high-
way consumes more fuel and is less
efficient than driving at a slower,
more moderate speed. Maintain a
moderate speed in order to conserve
fuel when driving on the highway.
Be sure to check both the engine
coolant level and the engine oil
before driving.
Drive belt
A loose or damaged drive belt may
overheat the engine.
i
Page 392 of 546
5-126
Driving your vehicle
W WI
IN
NT
TE
ER
R
D
DR
RI
IV
VI
IN
NG
G
The severe weather conditions of
winter quickly wear out tires and
cause other problems. To minimize
winter driving problems, you should
take the following suggestions:
Snow or Icy Conditions
You need to keep sufficient distance
between your vehicle and the vehicle
in front of you.
Apply the brakes gently. Speeding,
rapid acceleration, sudden brake
applications, and sharp turns are
potentially very hazardous practices.
During deceleration, use engine
braking to the fullest extent. Sudden
brake applications on snowy or icy
roads may cause the vehicle to skid.
To drive your vehicle in deep snow, it
may be necessary to use snow tires
or to install tire chains on your tires.
Always carry emergency equipment.
Some of the items you may want to
carry include tire chains, tow straps
or chains, a flashlight, emergency
flares, sand, a shovel, jumper cables,
a window scraper, gloves, ground
cloth, coveralls, a blanket, etc.
Snow tires
If you mount snow tires on your vehi-
cle, make sure to use radial tires of
the same size and load range as the
original tires. Mount snow tires on all
four wheels to balance your vehicle’s
handling in all weather conditions.
The traction provided by snow tires
on dry roads may not be as high as
your vehicle's original equipment
tires. Check with the tire dealer for
maximum speed recommendations.
Information
Do not install studded tires without
first checking local, state and munici-
pal regulations for possible restric-
tions against their use.
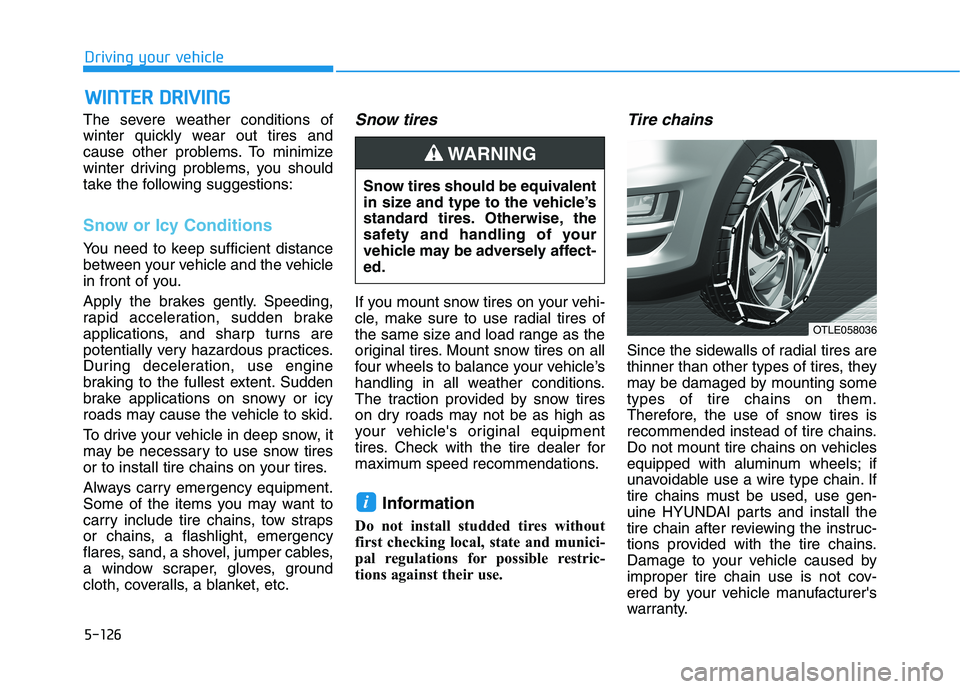
Tire chains
Since the sidewalls of radial tires are
thinner than other types of tires, they
may be damaged by mounting some
types of tire chains on them.
Therefore, the use of snow tires is
recommended instead of tire chains.
Do not mount tire chains on vehicles
equipped with aluminum wheels; if
unavoidable use a wire type chain. If
tire chains must be used, use gen-
uine HYUNDAI parts and install the
tire chain after reviewing the instruc-
tions provided with the tire chains.
Damage to your vehicle caused by
improper tire chain use is not cov-
ered by your vehicle manufacturer's
warranty.
i
Snow tires should be equivalent
in size and type to the vehicle’s
standard tires. Otherwise, the
safety and handling of your
vehicle may be adversely affect-
ed.
WARNING
OTLE058036
Page 399 of 546
5-133
Driving your vehicle
5
Safety chains
You should always attach chains
between your vehicle and your trail-
er. Cross the safety chains under the
tongue of the trailer so that the
tongue will not drop to the road if it
becomes separated from the hitch.
Instructions about safety chains may
be provided by the hitch manufactur-
er or trailer manufacturer. Follow the
manufacturer’s recommendation for
attaching safety chains. Always leave
just enough slack so you can turn
with your trailer. And, never allow
safety chains to drag on the ground.
Trailer brakes
If your trailer is equipped with a brak-
ing system, make sure it conforms to
federal and/or local regulations and
that it is properly installed and oper-
ating correctly.
If your trailer weighs more than the
maximum trailer weight without trail-
er brakes loaded, then it needs its
own brakes and they must be ade-
quate. Be sure to read and follow the
instructions for the trailer brakes so
you’ll be able to install, adjust and
maintain them properly. Do not tap
into your vehicle's brake system.
Trailer brakes must be applied sepa-
rately from your vehicle's brake sys-
tem.
Driving with a trailer
Towing a trailer requires a certain
amount of experience. Before setting
out for the open road, you must get
to know your trailer. Acquaint your-
self with the feel of handling and
braking with the added weight of the
trailer. And always keep in mind that
the vehicle you are driving is now
longer and not nearly as responsive
as your vehicle is by itself.
Before you start, check the trailer
hitch and platform, safety chains,
electrical connector(s), lights, tires
and brakes.
During your trip, occasionally check
to be sure that the load is secure,
and that the lights and trailer brakes
are still working.
Do not use a trailer with its own
brakes unless you are absolute-
ly certain that you have properly
set up the brake system. Use an
experienced, competent trailer
shop for this work.
WARNING