2020 Hyundai Tucson turn signal
[x] Cancel search: turn signalPage 18 of 637
1-5
Your vehicle at a glance
1
I IN
NS
ST
TR
RU
UM
ME
EN
NT
T
P
PA
AN
NE
EL
L
O
OV
VE
ER
RV
VI
IE
EW
W
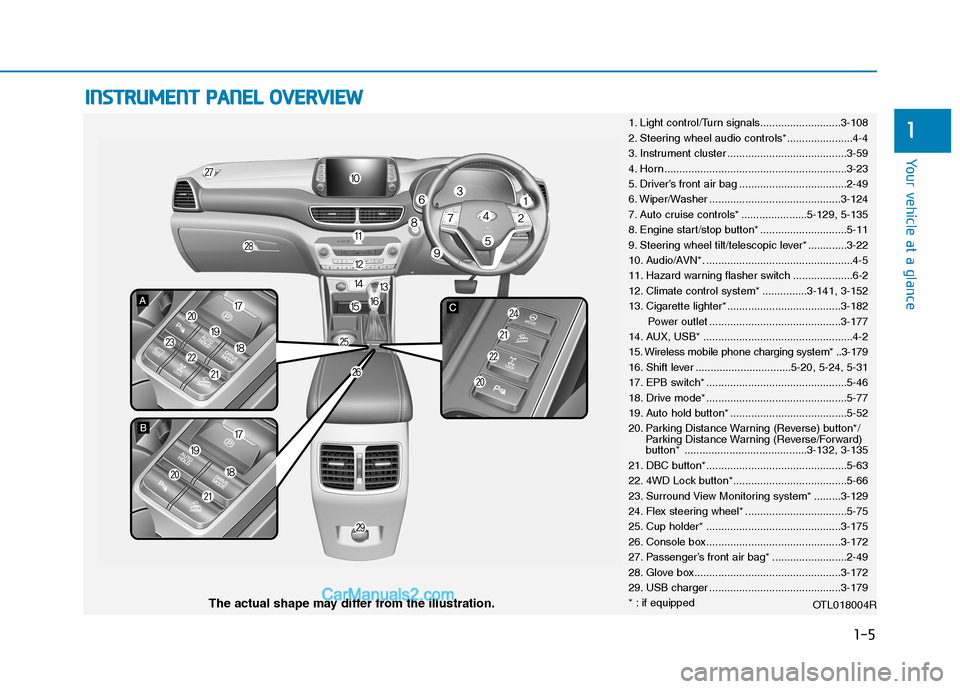
1. Light control/Turn signals...........................3-108
2. Steering wheel audio controls*......................4-4
3. Instrument cluster ........................................3-59
4. Horn .............................................................3-23
5. Driver’s front air bag ....................................2-49
6. Wiper/Washer ............................................3-124
7. Auto cruise controls* ......................5-129, 5-135
8. Engine start/stop button* .............................5-11
9. Steering wheel tilt/telescopic lever* .............3-22
10. Audio/AVN*. .................................................4-5
11. Hazard warning flasher switch ....................6-2
12. Climate control system* ...............3-141, 3-152
13. Cigarette lighter* ......................................3-182
Power outlet ............................................3-177
14. AUX, USB* ..................................................4-2
15. Wireless mobile phone charging system* ..3-179
16. Shift lever ................................5-20, 5-24, 5-31
17. EPB switch* ...............................................5-46
18. Drive mode* ...............................................5-77
19. Auto hold button* .......................................5-52
20. Parking Distance Warning (Reverse) button*/
Parking Distance Warning (Reverse/Forward)
button* .........................................3-132, 3-135
21. DBC button*...............................................5-63
22. 4WD Lock button*......................................5-66
23. Surround View Monitoring system* .........3-129
24. Flex steering wheel* ..................................5-75
25. Cup holder* .............................................3-175
26. Console box.............................................3-172
27. Passenger’s front air bag* .........................2-49
28. Glove box.................................................3-172
29. USB charger ............................................3-179
* : if equipped
OTL018004R
The actual shape may differ from the illustration.
Page 74 of 637
2-53
Safety system of your vehicle
2
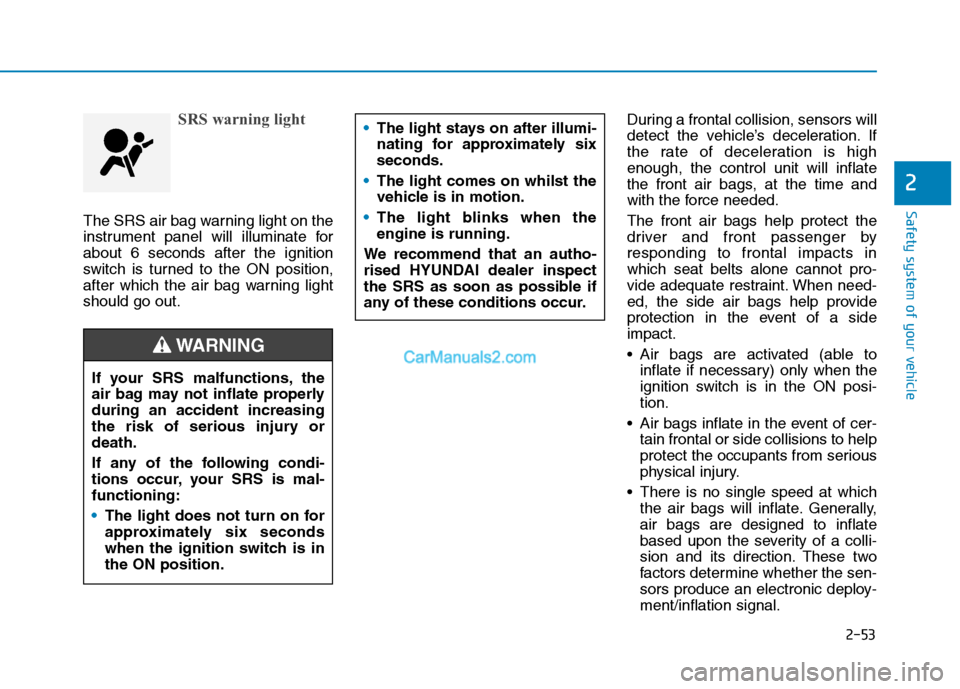
SRS warning light
The SRS air bag warning light on the
instrument panel will illuminate for
about 6 seconds after the ignition
switch is turned to the ON position,
after which the air bag warning light
should go out.During a frontal collision, sensors will
detect the vehicle’s deceleration. If
the rate of deceleration is high
enough, the control unit will inflate
the front air bags, at the time and
with the force needed.
The front air bags help protect the
driver and front passenger by
responding to frontal impacts in
which seat belts alone cannot pro-
vide adequate restraint. When need-
ed, the side air bags help provide
protection in the event of a side
impact.
Air bags are activated (able to
inflate if necessary) only when the
ignition switch is in the ON posi-
tion.
Air bags inflate in the event of cer-
tain frontal or side collisions to help
protect the occupants from serious
physical injury.
There is no single speed at which
the air bags will inflate. Generally,
air bags are designed to inflate
based upon the severity of a colli-
sion and its direction. These two
factors determine whether the sen-
sors produce an electronic deploy-
ment/inflation signal. The light stays on after illumi-
nating for approximately six
seconds.
The light comes on whilst the
vehicle is in motion.
The light blinks when the
engine is running.
We recommend that an autho-
rised HYUNDAI dealer inspect
the SRS as soon as possible if
any of these conditions occur.
If your SRS malfunctions, the
air bag may not inflate properly
during an accident increasing
the risk of serious injury or
death.
If any of the following condi-
tions occur, your SRS is mal-
functioning:
The light does not turn on for
approximately six seconds
when the ignition switch is in
the ON position.
WARNING
Page 162 of 637
3-76
Convenient features of your vehicle
ItemsExplanation
One Touch Turn Signal
The one touch turn signal function will be deactivated.
The turn signal indicator will blink 3, 5, or 7 times when the turn signal lever is moved
slightly.
For more details, refer to "Lighting" in this chapter.
Head lamp delayTo activate or deactivate the headlamp delay function.
For more details, refer to "Lighting" in this chapter.
3. Lights
ItemsExplanation
Volume for PDW
(Parking Distance Warning)To adjust the volume of the Parking Distance Warning (PDW) system. (Level 1~3)
For more details, refer to the "Parking Distance Warning (PDW)" in chapter 5.
Welcome soundTo activate or deactivate the welcome sound.
4. Sound
Page 170 of 637
3-84
Convenient features of your vehicle
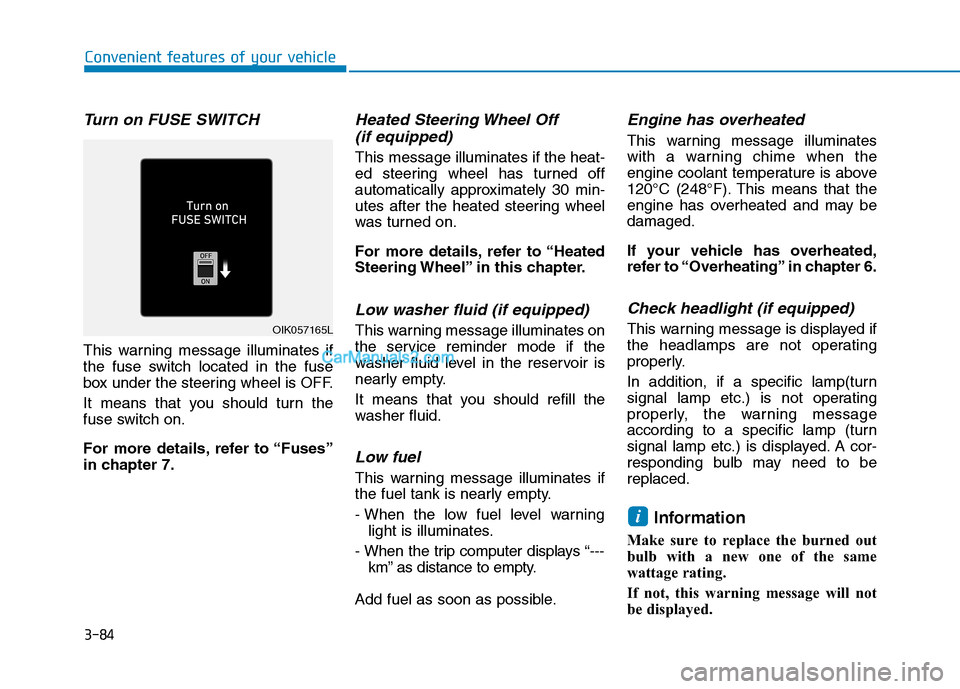
Turn on FUSE SWITCH
This warning message illuminates if
the fuse switch located in the fuse
box under the steering wheel is OFF.
It means that you should turn the
fuse switch on.
For more details, refer to “Fuses”
in chapter 7.
Heated Steering Wheel Off
(if equipped)
This message illuminates if the heat-
ed steering wheel has turned off
automatically approximately 30 min-
utes after the heated steering wheel
was turned on.
For more details, refer to “Heated
Steering Wheel” in this chapter.
Low washer fluid (if equipped)
This warning message illuminates on
the service reminder mode if the
washer fluid level in the reservoir is
nearly empty.
It means that you should refill the
washer fluid.
Low fuel
This warning message illuminates if
the fuel tank is nearly empty.
- When the low fuel level warning
light is illuminates.
- When the trip computer displays “---
km” as distance to empty.
Add fuel as soon as possible.
Engine has overheated
This warning message illuminates
with a warning chime when the
engine coolant temperature is above
120°C (248°F). This means that the
engine has overheated and may be
damaged.
If your vehicle has overheated,
refer to “Overheating” in chapter 6.
Check headlight (if equipped)
This warning message is displayed if
the headlamps are not operating
properly.
In addition, if a specific lamp(turn
signal lamp etc.) is not operating
properly, the warning message
according to a specific lamp (turn
signal lamp etc.) is displayed. A cor-
responding bulb may need to be
replaced.
Information
Make sure to replace the burned out
bulb with a new one of the same
wattage rating.
If not, this warning message will not
be displayed.
i
OIK057165L
Page 189 of 637
3-103
Convenient features of your vehicle
3
This indicator light blinks for a few
seconds:
When the smart key is not in the
vehicle.
- At this time, you can not start the
engine.
This indicator light illuminates for
2 seconds and goes off:
When the vehicle can not detect
the smart key which is in the vehi-
cle whilst the Engine Start/Stop
button is ON.
In this case, we recommend that
you have the vehicle inspected by
an authorised HYUNDAI dealer.
This indicator light blinks:
When the battery of the smart key
is weak.
- At this time, you can not start the
engine. However, you can start
the engine if you press the
Engine Start/Stop button with the
smart key.(For more details,
refer to “Starting the Engine” in
chapter 5).
When there is a malfunction with
the immobiliser system.
In this case, we recommend that
you have the vehicle inspected by
an authorised HYUNDAI dealer.
Turn Signal Indicator
Light
This indicator light blinks:
When you turn the turn signal light
on.
If any of the following occurs, there
may a malfunction with the turn sig-
nal system. In this case, we recom-
mend that you have the vehicle
inspected by an authorised
HYUNDAI dealer.
- The indicator light does not blink
but illuminates.
- The indicator light blinks more
rapidly.
- The indicator light does not illumi-
nate at all.
Page 190 of 637
3-104
Convenient features of your vehicle
Low Beam Indicator
Light (if equipped)
This indicator light illuminates:
When the headlights are on.
High Beam Indicator
Light
This indicator light illuminates:
When the headlights are on and in
the high beam position
When the turn signal lever is pulled
into the Flash-to-Pass position.
High Beam Assist
(HBA) indicator light
This warning light illuminates:
When the high-beam is on with the
light switch in the AUTO light posi-
tion.
If your vehicle detects oncoming or
preceding vehicles, the High Beam
Assist (HBA) system will switch the
high beam to low beam automati-
cally.
For more details, refer to "High
Beam Assist (HBA)" in this chap-
ter.
Light ON Indicator
Light
This indicator light illuminates:
When the tail lights or headlights
are on.
Page 199 of 637
3-113
Convenient features of your vehicle
3
Turn signals and lane change
signals
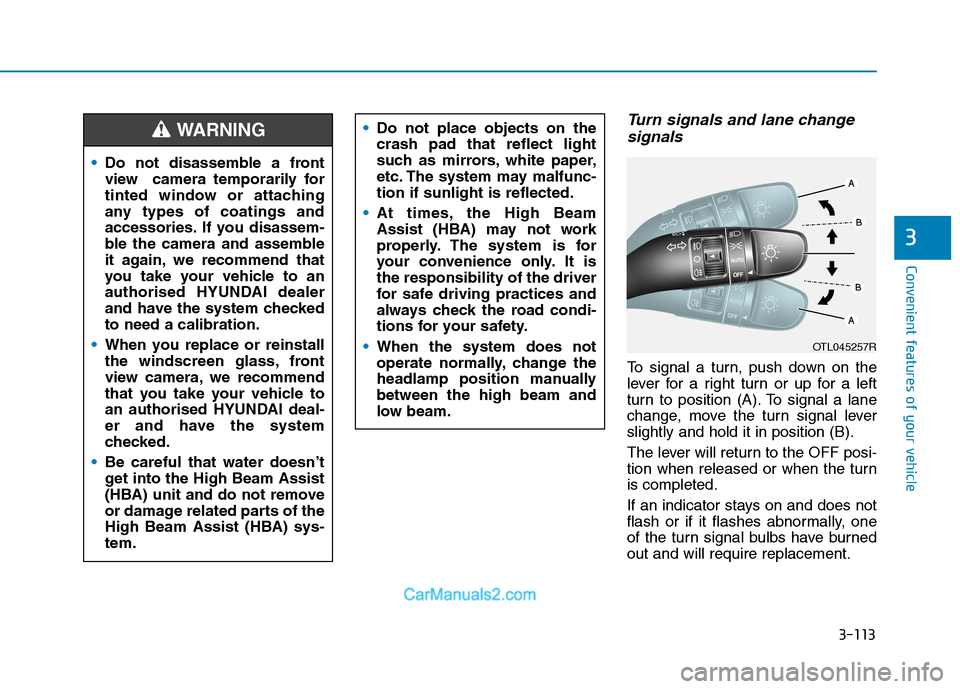
To signal a turn, push down on the
lever for a right turn or up for a left
turn to position (A). To signal a lane
change, move the turn signal lever
slightly and hold it in position (B).
The lever will return to the OFF posi-
tion when released or when the turn
is completed.
If an indicator stays on and does not
flash or if it flashes abnormally, one
of the turn signal bulbs have burned
out and will require replacement.
OTL045257R
Do not disassemble a front
view camera temporarily for
tinted window or attaching
any types of coatings and
accessories. If you disassem-
ble the camera and assemble
it again, we recommend that
you take your vehicle to an
authorised HYUNDAI dealer
and have the system checked
to need a calibration.
When you replace or reinstall
the windscreen glass, front
view camera, we recommend
that you take your vehicle to
an authorised HYUNDAI deal-
er and have the system
checked.
Be careful that water doesn’t
get into the High Beam Assist
(HBA) unit and do not remove
or damage related parts of the
High Beam Assist (HBA) sys-
tem.
WARNING Do not place objects on the
crash pad that reflect light
such as mirrors, white paper,
etc. The system may malfunc-
tion if sunlight is reflected.
At times, the High Beam
Assist (HBA) may not work
properly. The system is for
your convenience only. It is
the responsibility of the driver
for safe driving practices and
always check the road condi-
tions for your safety.
When the system does not
operate normally, change the
headlamp position manually
between the high beam and
low beam.
Page 200 of 637
3-114
Convenient features of your vehicle
One-touch turn signal function
(if equipped)
To activate a one-touch turn signal
function, move the turn signal lever
slightly and then release it. The lane
change signals will blink 3, 5 or 7
times.
You can activate/deactivate the One
Touch Turn Signal function or choose
the number of blinks (3, 5, or 7) from
the User Settings Mode on the LCD
display.For more details, refer to
"LCD Display" in this chapter.
Front fog lamps (if equipped)
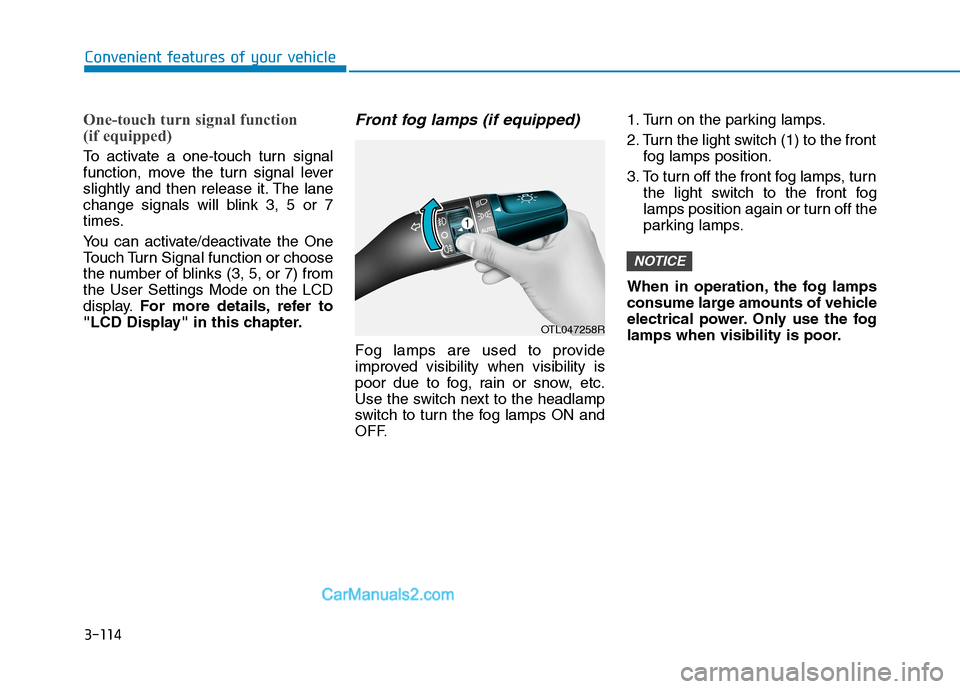
Fog lamps are used to provide
improved visibility when visibility is
poor due to fog, rain or snow, etc.
Use the switch next to the headlamp
switch to turn the fog lamps ON and
OFF.1. Turn on the parking lamps.
2. Turn the light switch (1) to the front
fog lamps position.
3. To turn off the front fog lamps, turn
the light switch to the front fog
lamps position again or turn off the
parking lamps.
When in operation, the fog lamps
consume large amounts of vehicle
electrical power. Only use the fog
lamps when visibility is poor.
NOTICE
OTL047258R