2020 Hyundai Santa Fe Set up
[x] Cancel search: Set upPage 20 of 557

2-2
You will find many safety precautions
and recommendations throughout
this section, and throughout this
manual. The safety precautions in
this section are among the most
important.
Always Wear Your Seat Belt
A seat belt is your best protection in
all types of accidents. Air bags are
designed to supplement seat belts,
not replace them. So even though
your vehicle is equipped with air
bags, ALWAYS make sure you and
your passengers wear your seat
belts, and wear them properly.
Restrain All Children
All children under age 13 should ride
in your vehicle properly restrained in
a rear seat, not the front seat. Infants
and small children should be
restrained in an appropriate child
restraint. Larger children should use
a booster seat with the lap/shoulder
belt until they can use the seat belt
properly without a booster seat.
Air Bag Hazards
While air bags can save lives, they
can also cause serious or fatal
injuries to occupants who sit too
close to them, or who are not prop-
erly restrained. Infants, young chil-
dren, and shorter adults are at the
greatest risk of being injured by an
inflating air bag. Follow all instruc-
tions and warnings in this manual.
Driver Distraction
Driver distraction presents a serious
and potentially deadly danger, espe-
cially for inexperienced drivers.
Safety should be the first concern
when behind the wheel and drivers
need to be aware of the wide array of
potential distractions, such as
drowsiness, reaching for objects,
eating, personal grooming, other
passengers, and using cellular
phones.
Drivers can become distracted when
they take their eyes and attention off
the road or their hands off the wheel
to focus on activities other than driv-
ing. To reduce your risk of distraction
or getting into an accident:
• ALWAYS set up your mobiledevices (i.e., MP3 players,
phones, navigation units, etc.)
when your vehicle is parked or
safely stopped.
I IM
M P
PO
O R
RT
TA
A N
N T
T
S
S A
A F
FE
E T
T Y
Y
P
P R
R E
EC
CA
A U
U T
TI
IO
O N
NS
S
Safety system of your vehicle
Page 31 of 557

2-13
Safety system of your vehicle
2
Rear Seats
Rear seat adjustment
Seatback angle
To recline the seatback:
1. Pull up the seatback recline lever.
2. Hold the lever and adjust the seat-back of the seat to the position
you desire.
3. Release the lever and make sure the seatback is locked in place.
(The lever MUST return to its original
position for the seatback to lock.)
Folding the rear seat
The rear seatbacks can be folded to
facilitate carrying long items or to
increase the luggage capacity of the
vehicle. To fold down the rear seatback:
1. Set the front seatback to the
upright position and if necessary,
slide the front seat forward.
2. Lower the rear head restraints to the lowest position by pushing and
holding the release button (1) and
pushing down on the head
restraint (2).
OTM038022
Never allow passengers to sit
on top of the folded down
seatback while the vehicle is
moving. This is not a proper
seating position and no seat
belts are available for use.
This could result in serious
injury or death in case of an
accident or sudden stop.
Objects carried on the folded
down seatback should not
extend higher than the top of
the front seatbacks. This
could allow cargo to slide for-
ward and cause injury or dam-
age during sudden stops.
WARNING
OTMA038101
Page 40 of 557
2-22
Safety system of your vehicle
Each time you push the switch, the temperature setting of the seat is
changed as follows :
When pressing the switch for more than 1.5 seconds with the
seat warmer operating, the seat
warmer will turn OFF.
The seat warmer defaults to the OFF position each time the ignition
switches is turned to the ON posi-
tion.
Auto Comfort Control (for driver's seat) (if equipped)
- The seat warmer automaticallycontrols the seat temperature
depending on the ambient tem-
perature and the set climate con-
trol temperature when the engine
is running. If the seat warmer
switch is pushed, the seat warmer
will have to be controlled manual-
ly.
To use this function, it must be activated from the Settings menu
in the AV/AVN system screen. - The seat warmer defaults to the
OFF position whenever the igni-
tion switch is ON. However, if the
Auto Comfort Control function is
ON, the driver's seat warmer will
turn on and off depending on the
ambient temperature and the set
climate control temperature.
For more details, refer to the sep-
arately supplied Multimedia manu-
al with your vehicle.
Information
With the seat warmer switch in the
ON position, the heating system in the
seat turns off or on automatically
depending on the seat temperature.
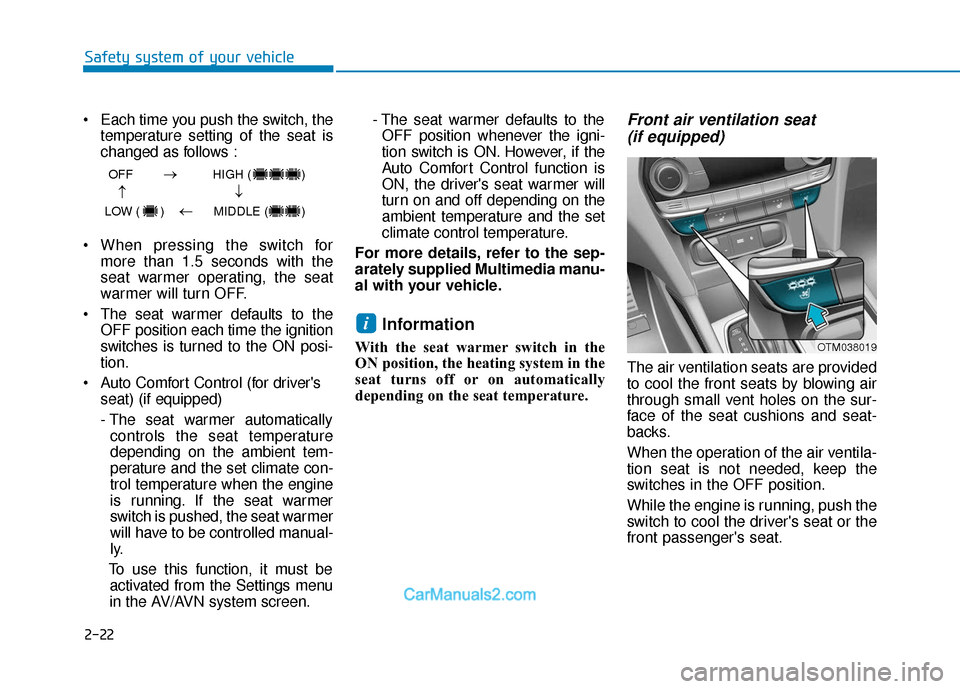
Front air ventilation seat (if equipped)
The air ventilation seats are provided
to cool the front seats by blowing air
through small vent holes on the sur-
face of the seat cushions and seat-
backs.
When the operation of the air ventila-
tion seat is not needed, keep the
switches in the OFF position.
While the engine is running, push the
switch to cool the driver's seat or the
front passenger's seat.
i
OFF HIGH ( )
LOW ( ) MIDDLE ( )
→→
→
→
OTM038019
Page 41 of 557
2-23
Safety system of your vehicle
2
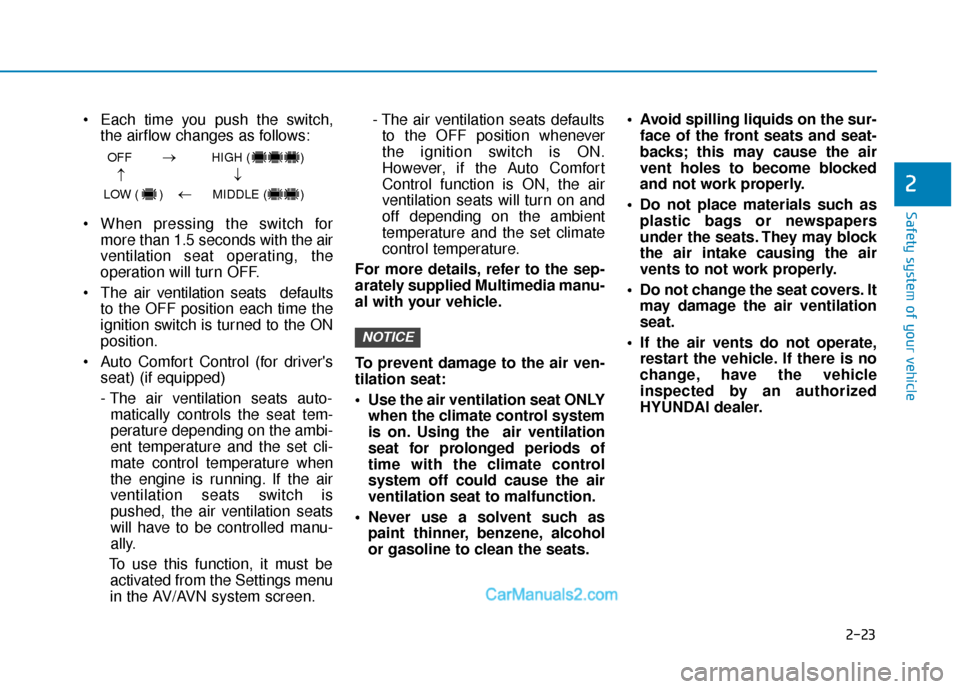
Each time you push the switch,the airflow changes as follows:
When pressing the switch for more than 1.5 seconds with the air
ventilation seat operating, the
operation will turn OFF.
The air v entilation seats def aults
to the OFF position each time the
ignition switch is turned to the ON
position.
Auto Comfort Control (for driver's seat) (if equipped)
- The air ventilation seats auto-matically controls the seat tem-
perature depending on the ambi-
ent temperature and the set cli-
mate control temperature when
the engine is running. If the air
ventilation seats switch is
pushed, the air ventilation seats
will have to be controlled manu-
ally.
To use this function, it must be activated from the Settings menu
in the AV/AVN system screen. - The air ventilation seats defaults
to the OFF position whenever
the ignition switch is ON.
However, if the Auto Comfort
Control function is ON, the air
ventilation seats will turn on and
off depending on the ambient
temperature and the set climate
control temperature.
For more details, refer to the sep-
arately supplied Multimedia manu-
al with your vehicle.
To prevent damage to the air ven-
tilation seat:
Use the air ventilation seat ONLY when the climate control system
is on. Using the air ventilation
seat for prolonged periods of
time with the climate control
system off could cause the air
ventilation seat to malfunction.
Never use a solvent such as paint thinner, benzene, alcohol
or gasoline to clean the seats. Avoid spilling liquids on the sur-
face of the front seats and seat-
backs; this may cause the air
vent holes to become blocked
and not work properly.
Do not place materials such as plastic bags or newspapers
under the seats. They may block
the air intake causing the air
vents to not work properly.
Do not change the seat covers. It may damage the air ventilation
seat.
If the air vents do not operate, restart the vehicle. If there is no
change, have the vehicle
inspected by an authorized
HYUNDAI dealer.
NOTICE
OFF HIGH ( )
LOW ( ) MIDDLE ( )
→→
→
→
Page 42 of 557
2-24
Safety system of your vehicle
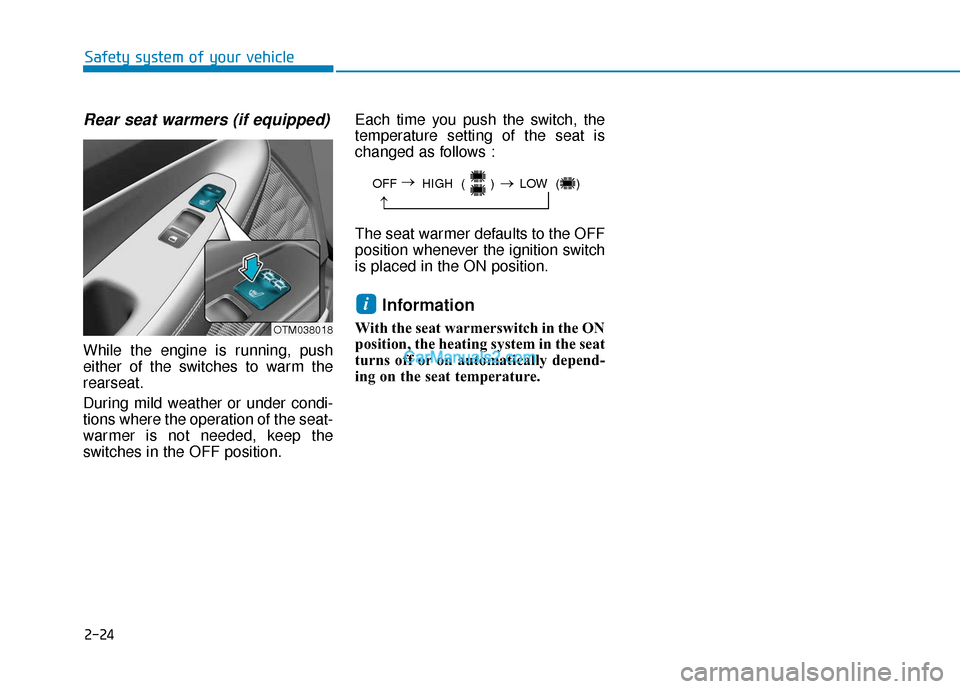
Rear seat warmers (if equipped)
While the engine is running, push
either of the switches to warm the
rearseat.
During mild weather or under condi-
tions where the operation of the seat-
warmer is not needed, keep the
switches in the OFF position.Each time you push the switch, the
temperature setting of the seat is
changed as follows :
The seat warmer defaults to the OFF
position whenever the ignition switch
is placed in the ON position.
Information
With the seat warmerswitch in the ON
position, the heating system in the seat
turns off or on automatically depend-
ing on the seat temperature.
i
OFF HIGH ( ) LOW ( )
→
→
→
OTM038018
Page 90 of 557

Convenient features of your vehicle
Accessing Your Vehicle .........................................3-4
Remote Key........................................................................\
.3-4
Smart Key ........................................................................\
....3-7
Immobilizer System .........................................................3-12
Door Locks ............................................................3-13
Operating Door Locks from Outside the Vehicle ....3-13
Operating Door Locks from Inside the Vehicle .......3-15
Automatic Door Lock and Unlock Features .............3-17
Child-Protector Rear Door Locks ...............................3-18
Electronic Child Safety Lock System .........................3-19
Safe Exit Assist (SEA) System .....................................3-20
Rear Occupant Alert (ROA) System ...........................3-21
Theft-Alarm System ............................................3-23
Driver Position Memory System ........................3-24
Storing Positions into Memory ..................................3-24
Recalling Positions from Memory...............................3-25
Resetting the Driver's Seat Memory System...........3-25
Easy Access Function ....................................................3-26
Steering Wheel .....................................................3-27
Electric Power Steering (EPS) .....................................3-27
Tilt Steering / Telescopic Steering .............................3-28
Horn ........................................................................\
............3-28
Heated Steering Wheel ..................................................3-29
Mirrors ...................................................................3-30
Inside Rearview Mirror ..................................................3-30
Side View Mirrors ...........................................................3-38
Reverse Parking Aid Function......................................3-40
Windows ................................................................3-41
Power Windows ...............................................................3-42
Panoramic Sunroof ..............................................3-45
Sunshade ........................................................................\
...3-46
Sliding the Sunroof .........................................................3-46
Tilting the Sunroof .........................................................3-47
Closing the Sunroof........................................................3-47
Resetting the Sunroof ...................................................3-48
Sunroof Open Warning ..................................................3-48
Exterior Features .................................................3-49
Hood ........................................................................\
...........3-49
Non-Powered Liftgate ...................................................3-50
Power Liftgate .................................................................3-52
Smart Liftgate ..................................................................3-59
Fuel Filler Door ................................................................3-62
Instrument Cluster ...............................................3-66
Instrument Cluster Control............................................3-67
Gauges and Meters ........................................................3-68
Transmission Shift Indicator .........................................3-71
Warning and Indicator Lights .......................................3-72
LCD Display Messages ...................................................3-85
3
Page 93 of 557
3-4
Convenient features of your vehicle
Remote Key (if equipped)
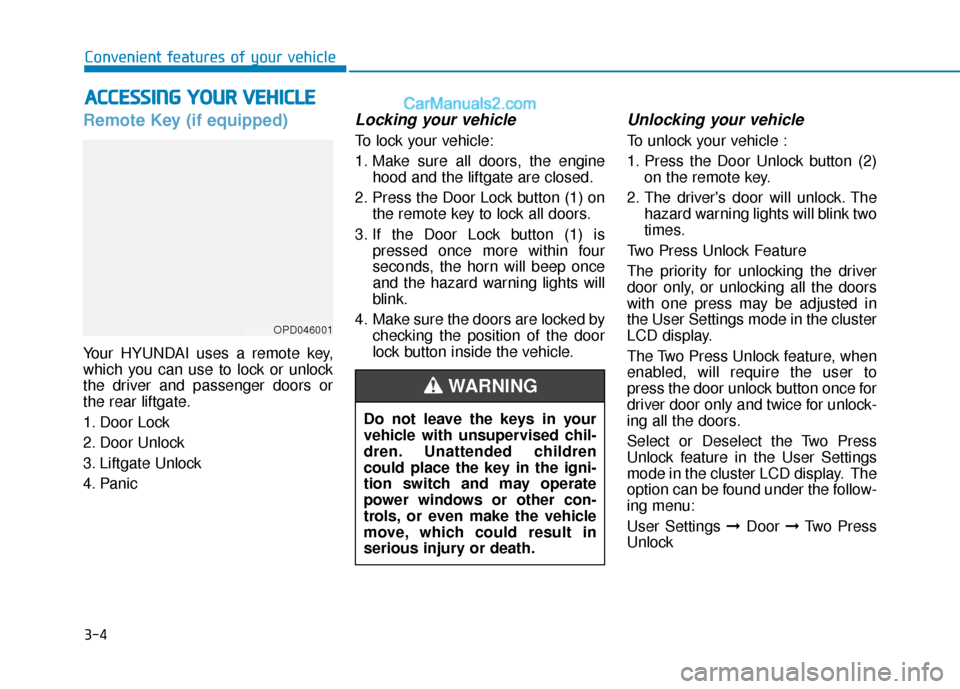
Your HYUNDAI uses a remote key,
which you can use to lock or unlock
the driver and passenger doors or
the rear liftgate.
1. Door Lock
2. Door Unlock
3. Liftgate Unlock
4. Panic
Locking your vehicle
To lock your vehicle:
1. Make sure all doors, the enginehood and the liftgate are closed.
2. Press the Door Lock button (1) on the remote key to lock all doors.
3. If the Door Lock button (1) is pressed once more within four
seconds, the horn will beep once
and the hazard warning lights will
blink.
4. Make sure the doors are locked by checking the position of the door
lock button inside the vehicle.
Unlocking your vehicle
To unlock your vehicle :
1. Press the Door Unlock button (2)on the remote key.
2. The driver's door will unlock. The hazard warning lights will blink two
times.
Two Press Unlock Feature
The priority for unlocking the driver
door only, or unlocking all the doors
with one press may be adjusted in
the User Settings mode in the cluster
LCD display.
The Two Press Unlock feature, when
enabled, will require the user to
press the door unlock button once for
driver door only and twice for unlock-
ing all the doors.
Select or Deselect the Two Press
Unlock feature in the User Settings
mode in the cluster LCD display. The
option can be found under the follow-
ing menu:
User Settings ➞ Door ➞Two Press
Unlock
A A C
CC
CE
E S
SS
SI
IN
N G
G
Y
Y O
O U
UR
R
V
V E
EH
H I
IC
C L
LE
E
OPD046001
Do not leave the keys in your
vehicle with unsupervised chil-
dren. Unattended children
could place the key in the igni-
tion switch and may operate
power windows or other con-
trols, or even make the vehicle
move, which could result in
serious injury or death.
WARNING
Page 98 of 557
3-9
Convenient features of your vehicle
3
Two Press Unlock Feature
The priority for unlocking the driver
door only, or unlocking all the doors
with one press may be adjusted in
the User Settings mode in the cluster
LCD display.
The Two Press Unlock feature, when
enabled, will require the user to
press the door unlock button once for
driver door only and twice for unlock-
ing all the doors.
Select or Deselect the Two Press
Unlock feature in the User Settings
mode in the cluster LCD display. The
option can be found under the follow-
ing menu:
User Settings ➞Door ➞Two Press
Unlock The Two Press Unlock feature can
also be enabled or disabled by
pressing the door lock and unlock
buttons simultaneously on the Key
FOB:
Press and hold both the Door Lock
button and the Door Unlock button
simultaneously until the hazard
warning lights blink.
This will enable or disable the Two
Press Unlock feature. Repeat this
procedure to enable/disable the
mode again.
Information
• The door handle buttons will only
operate when the smart key is with-
in 28-40 inches (0.7~1m) from the
outside door handle.
• Either the driver or front passenger door can be opened with the door
handle button when the smart key
is within this range.
• If you press the front passenger outside door handle with the smart
key in your possession, all the doors
will unlock.
Opening the liftgate
Non-power liftgate
To unlock and open the liftgate:
1. Make sure you have the smart keyin your possession.
2. Press either the liftgate handle release switch on the vehicle or
press and hold the Liftgate Unlock
button on the smart key for more
than one second. The hazard
warning lights will blink two times
and the liftgate latch will unlock.
3. Once the liftgate is opened and then closed, the liftgate will auto-
matically re-lock after 30 seconds.
Information
• The liftgate handle switch will onlyoperate when the smart key is with-
in 28 inches (0.7 m) from the lift-
gate handle.
• The Liftgate Unlock button (3) will only unlock the liftgate. It will not
release the latch and open the lift-
gate automatically. If the Liftgate
Unlock button is used, someone
must still press the liftgate handle
switch to open the liftgate.
i
i