2020 Hyundai Santa Fe Set up
[x] Cancel search: Set upPage 115 of 557
3-26
Convenient features of your vehicle
Reattempt to do the resetting procedure again, when the reset-
ting procedure incompletely
stops or the notification sound
do not stop.
Make sure that there is no obsta- cle around the driver's seat in
advance of resetting the driver's
seat memory system.
Easy Access Function
The system will move the driver's
seat automatically as follows:
- It will move the driver’s seat rear- ward when the ignition key is
removed.
- It will move the driver’s seat for- ward when the ignition key is
inserted.
- It will move the driver’s seat rear- ward when the Engine Start/Stop
button is pressed to the OFF posi-
tion. - It will move the driver’s seat for-
ward when the Engine Start/Stop
button is pressed to the ACC or
START position.
You can activate or deactivate the
Easy Access Function from the User
Settings mode in the cluster LCD dis-
play.
'Convenience →Seat Easy Access →
Off/Normal/Extended'.
For more details, refer to "LCD
Display" in this chapter.
NOTICE
Driver should be cautious when
using this function to assure no
injury to passenger or child on
the back seat. In case of emer-
gency the driver has to stop
movement of front seat (when
easy access feature is activat-
ed) by pressing SET button or
any of the driver seat control
switches.
CAUTION
Page 118 of 557
3-29
Convenient features of your vehicle
3
Heated Steering Wheel
(if equipped)
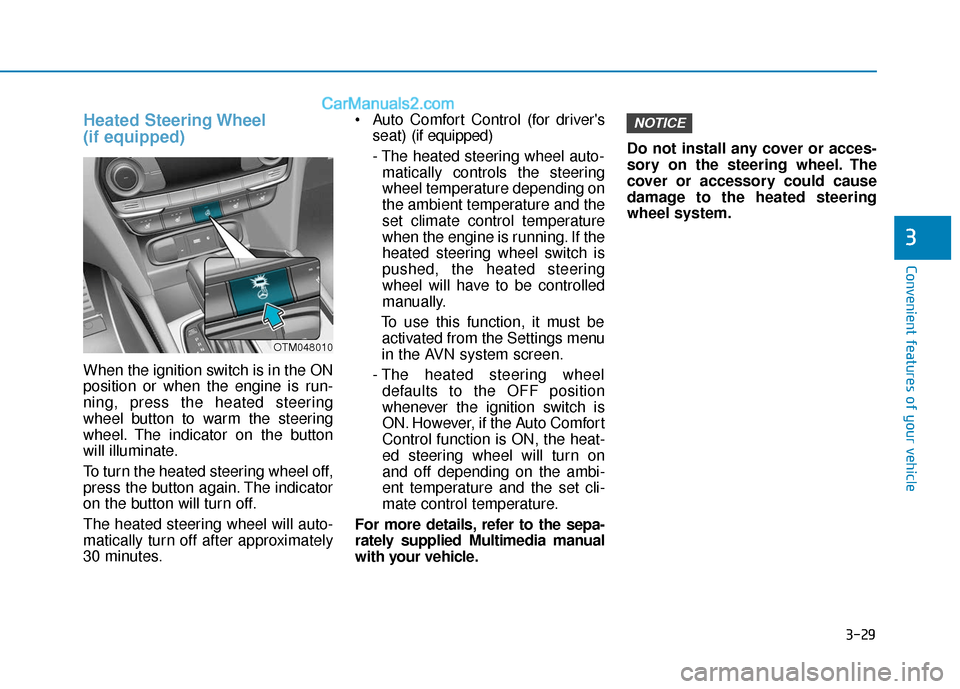
When the ignition switch is in the ON
position or when the engine is run-
ning, press the heated steering
wheel button to warm the steering
wheel. The indicator on the button
will illuminate.
To turn the heated steering wheel off,
press the button again. The indicator
on the button will turn off.
The heated steering wheel will auto-
matically turn off after approximately
30 minutes. Auto Comfort Control (for driver's
seat) (if equipped)
- The heated steering wheel auto- matically controls the steering
wheel temperature depending on
the ambient temperature and the
set climate control temperature
when the engine is running. If the
heated steering wheel switch is
pushed, the heated steering
wheel will have to be controlled
manually.
To use this function, it must be activated from the Settings menu
in the AVN system screen.
- The heated steering wheel defaults to the OFF position
whenever the ignition switch is
ON. However, if the Auto Comfort
Control function is ON, the heat-
ed steering wheel will turn on
and off depending on the ambi-
ent temperature and the set cli-
mate control temperature.
For more details, refer to the sepa-
rately supplied Multimedia manual
with your vehicle. Do not install any cover or acces-
sory on the steering wheel. The
cover or accessory could cause
damage to the heated steering
wheel system.
NOTICE
OTM048010
Page 122 of 557
3-33
Convenient features of your vehicle
3
Compass function
The Compass can be turned ON and
OFF and will remember the last state
when the ignition is cycled. To turn
the display feature ON/OFF:
1. Press and release the buttonwithin 1 second to turn the display
feature OFF.
2. Press and release the button again within 1 second to turn the
display back ON.
Additional options can be set with
press and hold sequences of the
button and are detailed below.
There is a difference between mag-
netic north and true north. To com-
pensate for this difference you will
need to adjust the Zone setting based
on where you live.
B520C05NF
Page 123 of 557
3-34
Convenient features of your vehicle
To adjust the Zone setting:
1. Determine the desired Zone Number based upon your current
location on the Zone Map.
2. Press and hold the button for 6 seconds, the current Zone
Number will appear on the display.
3. Pressing and holding the button again will cause the numbers to
increment (Note: they will repeat
…13, 14, 15, 1, 2, …). Releasing
the button when the desired Zone
Number appears on the display
will set the new Zone.
4. Within about 5 seconds the com- pass will start displaying a com-
pass heading again.
There are some conditions that can
cause changes to the vehicle mag-
nets, such as installing a ski rack or
a CB antenna. Body repair work on
the vehicle can also cause changes
to the vehicle’s magnetic field. In
these situations, the compass will
need to be re-calibrated to quickly
correct these changes. If you need to recalibrate the com-
pass:
1. Press and hold the button for
more than 9 seconds. When the
compass memory is cleared a "C"
will appear in the display.
2. Drive the vehicle in 2 complete cir- cles at less than 5 mph (8 km/h).
Integrated HomeLink®Wireless
Control System
The HomeLink®Wireless Control
System can replace up to three
hand-held radio-frequency (RF)
transmitters with a single built-in
device. This innovative feature will
learn the radio frequency codes of
most current transmitters to operate
devices such as gate operators,
garage door openers, entry door
locks, security systems, even home
lighting. Both standard and rolling
code-equipped transmitters can be
programmed by following the out-
lined procedures.
Additional HomeLink
®information
can be found at: www.homelink.com
or by calling 1-800-355-3515.
Retain the original transmitter of the
RF device you are programming for
use in other vehicles as well as for
future HomeLink
®programming. It is
also suggested that upon the sale of
the vehicle, the programmed
HomeLink
®buttons be erased for
security purposes.
Page 132 of 557
3-43
Convenient features of your vehicle
3
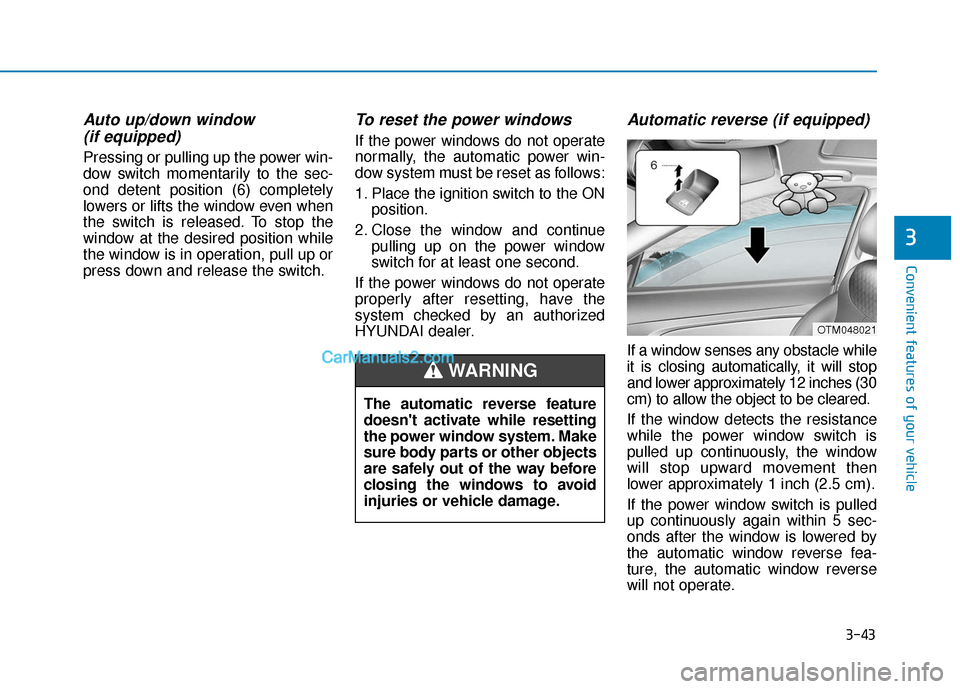
Auto up/down window (if equipped)
Pressing or pulling up the power win-
dow switch momentarily to the sec-
ond detent position (6) completely
lowers or lifts the window even when
the switch is released. To stop the
window at the desired position while
the window is in operation, pull up or
press down and release the switch.
To reset the power windows
If the power windows do not operate
normally, the automatic power win-
dow system must be reset as follows:
1. Place the ignition switch to the ON
position.
2. Close the window and continue pulling up on the power window
switch for at least one second.
If the power windows do not operate
properly after resetting, have the
system checked by an authorized
HYUNDAI dealer.
Automatic reverse (if equipped)
If a window senses any obstacle while
it is closing automatically, it will stop
and lower approximately 12 inches (30
cm) to allow the object to be cleared.
If the window detects the resistance
while the power window switch is
pulled up continuously, the window
will stop upward movement then
lower approximately 1 inch (2.5 cm).
If the power window switch is pulled
up continuously again within 5 sec-
onds after the window is lowered by
the automatic window reverse fea-
ture, the automatic window reverse
will not operate.
The automatic reverse feature
doesn't activate while resetting
the power window system. Make
sure body parts or other objects
are safely out of the way before
closing the windows to avoid
injuries or vehicle damage.
WARNING
OTM048021
Page 137 of 557

3-48
Convenient features of your vehicle
Periodically remove any dirt that may accumulate on the sunroof
guide rail or between the sun-
roof and roof panel which can
make a noise.
Do not try to open the sunroof when the temperature is below
freezing or when the sunroof is
covered with snow or ice, other-
wise the motor could be dam-
aged. In cold and wet climates, the
sunroof may not work properly.
Resetting the Sunroof
The sunroof may need to be reset if
the following conditions occur:
The battery is discharged or dis-connected or the sunroof fuse has
been replaced or disconnected
The sunroof control lever is not operating correctly
To reset the sunroof, perform the fol-
lowing steps:
1. Turn the engine on and close the sunroof glass and sunshade com-
pletely. 2. Release the control lever.
3. Push and hold the sunroof control
lever forward (to close the sun-
shade) for about 10 seconds until
the sunroof moves slightly, then
release the control lever.
4. Push and hold the sunroof control lever forward until the sunroof
operates as follows:
Sunshade Open → Glass Tilt Open
→ Glass Slide Open → Glass Slide
Close → Sunshade Close
Then, release the control lever.
When this is complete, the sunroof
system is reset.
For more information, contact an
authorized HYUNDAI dealer.
Information
If you do not reset the sunroof, it may
not work properly.
Sunroof Open Warning
(if equipped)
If the driver turns off the engine when the sunroof is not fully
closed, the warning chime will
sound for approximately 3 seconds
and the sunroof open warning will
appear on the cluster LCD display.
If the driver turns off the engine and opens the door when the sun-
roof is not fully closed, the sunroof
open warning will appear on the
cluster LCD display until the door is
closed or the sunroof is fully closed.
Close the sunroof securely when
leaving your vehicle.
i
NOTICE
OTM048118
Page 138 of 557
3-49
Convenient features of your vehicle
3
Hood
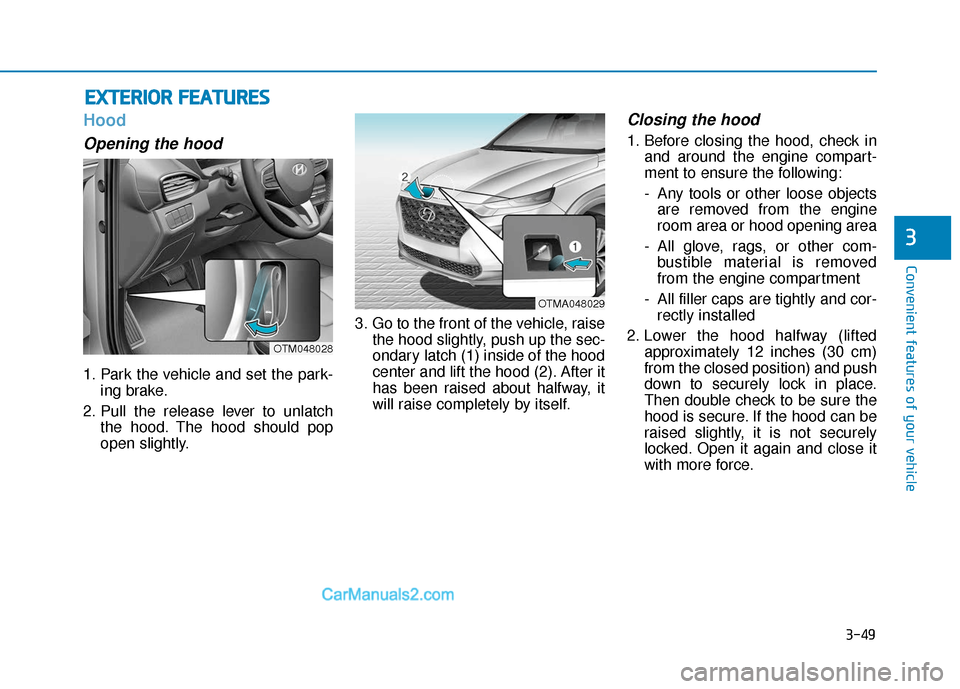
Opening the hood
1. Park the vehicle and set the park-ing brake.
2. Pull the release lever to unlatch the hood. The hood should pop
open slightly. 3. Go to the front of the vehicle, raise
the hood slightly, push up the sec-
ondary latch (1) inside of the hood
center and lift the hood (2). After it
has been raised about halfway, it
will raise completely by itself.
Closing the hood
1. Before closing the hood, check inand around the engine compart-
ment to ensure the following:
- Any tools or other loose objectsare removed from the engine
room area or hood opening area
- All glove, rags, or other com- bustible material is removed
from the engine compartment
- All filler caps are tightly and cor- rectly installed
2. Lower the hood halfway (lifted approximately 12 inches (30 cm)
from the closed position) and push
down to securely lock in place.
Then double check to be sure the
hood is secure. If the hood can be
raised slightly, it is not securely
locked. Open it again and close it
with more force.
E EX
X T
TE
ER
R I
IO
O R
R
F
F E
E A
A T
TU
U R
RE
ES
S
OTM048028
OTMA048029
Page 141 of 557
3-52
Convenient features of your vehicle
Power Liftgate (if equipped)
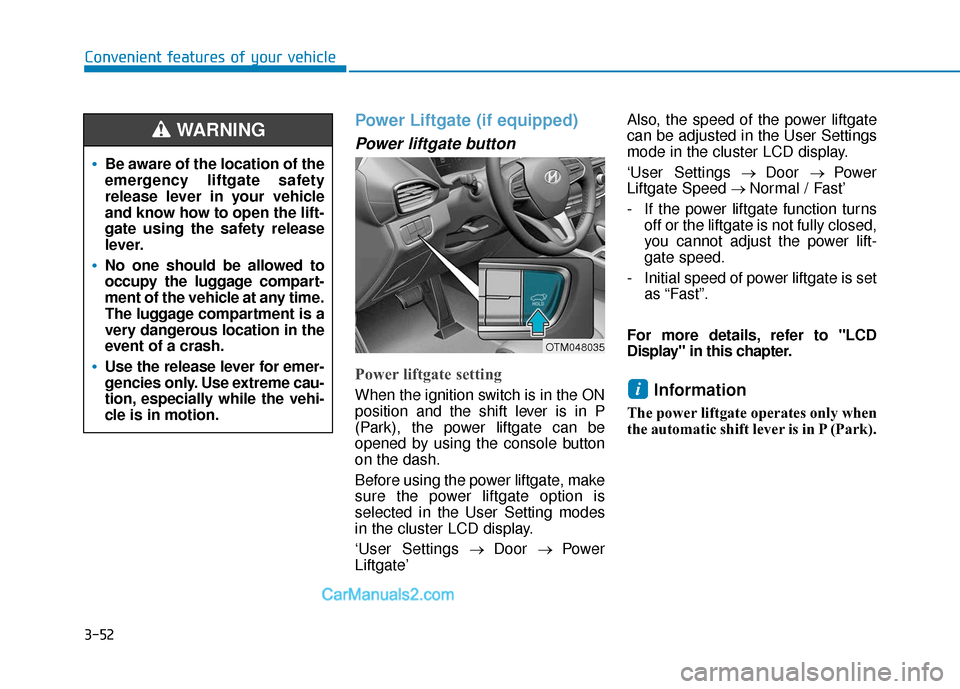
Power liftgate button
Power liftgate setting
When the ignition switch is in the ON
position and the shift lever is in P
(Park), the power liftgate can be
opened by using the console button
on the dash.
Before using the power liftgate, make
sure the power liftgate option is
selected in the User Setting modes
in the cluster LCD display.
‘User Settings→ Door → Power
Liftgate’ Also, the speed of the power liftgate
can be adjusted in the User Settings
mode in the cluster LCD display.
‘User Settings
→ Door → Power
Liftgate Speed → Normal / Fast’
- If the power liftgate function turns off or the liftgate is not fully closed,
you cannot adjust the power lift-
gate speed.
- Initial speed of power liftgate is set as “Fast”.
For more details, refer to "LCD
Display" in this chapter.Information
The power liftgate operates only when
the automatic shift lever is in P (Park).
i
Be aware of the location of the
emergency liftgate safety
release lever in your vehicle
and know how to open the lift-
gate using the safety release
lever.
No one should be allowed to
occupy the luggage compart-
ment of the vehicle at any time.
The luggage compartment is a
very dangerous location in the
event of a crash.
Use the release lever for emer-
gencies only. Use extreme cau-
tion, especially while the vehi-
cle is in motion.
WARNING
OTM048035