2020 Hyundai Santa Fe Struct
[x] Cancel search: StructPage 64 of 557
2-46
Safety system of your vehicle
Securing a child restraint withlap/shoulder belt
When not using the LATCH system,
all child restraints must be secured to
a vehicle rear seat with the lap part
of a lap/shoulder belt.
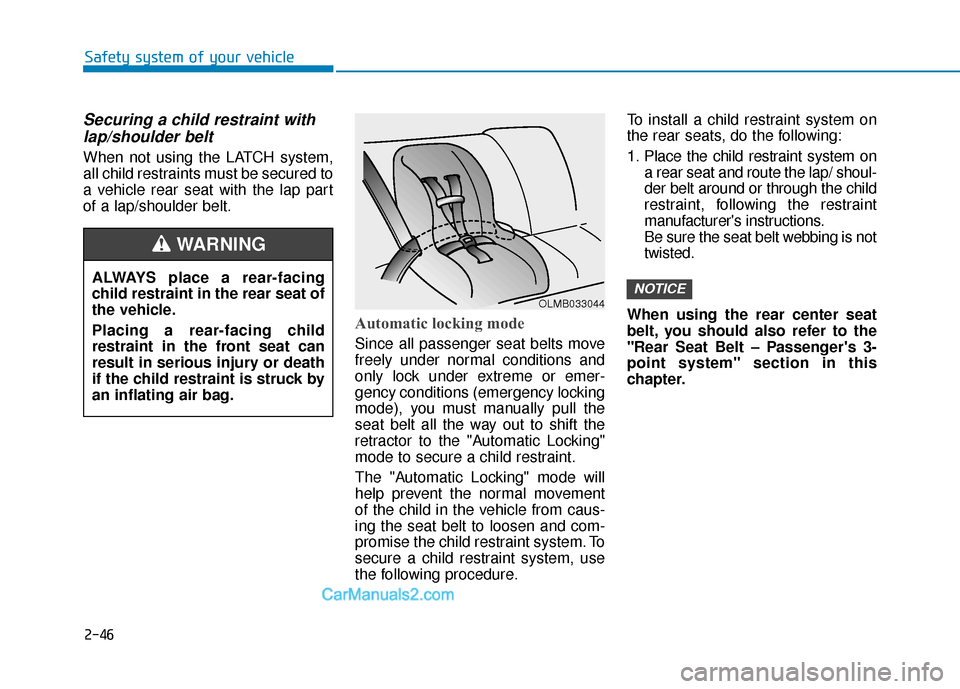
Automatic locking mode
Since all passenger seat belts move
freely under normal conditions and
only lock under extreme or emer-
gency conditions (emergency locking
mode), you must manually pull the
seat belt all the way out to shift the
retractor to the "Automatic Locking"
mode to secure a child restraint.
The "Automatic Locking" mode will
help prevent the normal movement
of the child in the vehicle from caus-
ing the seat belt to loosen and com-
promise the child restraint system. To
secure a child restraint system, use
the following procedure. To install a child restraint system on
the rear seats, do the following:
1. Place the child restraint system on
a rear seat and route the lap/ shoul-
der belt around or through the child
restraint, following the restraint
manufacturer's instructions.
Be sure the seat belt webbing is not
twisted.
When using the rear center seat
belt, you should also refer to the
"Rear Seat Belt – Passenger's 3-
point system" section in this
chapter.
NOTICEALWAYS place a rear-facing
child restraint in the rear seat of
the vehicle.
Placing a rear-facing child
restraint in the front seat can
result in serious injury or death
if the child restraint is struck by
an inflating air bag.
WARNING
OLMB033044
Page 66 of 557

2-48
Safety system of your vehicle
5. Remove as much slack from the belt as possible by pushing down
on the child restraint system while
feeding the shoulder belt back into
the retractor.
6. Push and pull on the child restraint system to confirm that the seat
belt is holding it firmly in place. If it
is not, release the seat belt and
repeat steps 2 through 6.
7. Double check that the retractor is in the "Automatic Locking" mode
by attempting to pull more of the
seat belt out of the retractor. If you
cannot, the retractor is in the
"Automatic Locking" mode.
If your CRS manufacturer instructs or
recommends you to use a tether
anchor with the lap/shoulder belt,
refer to the previous pages for more
information. When the seat belt is allowed to
retract to its fully stowed position,
the retractor will automatically
switch from the "Automatic
Locking" mode to the emergency
lock mode for normal adult usage.
To remove the child restraint, press
the release button on the buckle and
then pull the lap/shoulder belt out of
the restraint and allow the seat belt
to retract fully.
NOTICE
If the retractor is not in the
"Automatic Locking" mode, the
child restraint can move when
your vehicle turns or stops sud-
denly. A child can be seriously
injured or killed if the child
restraint is not properly anchored
in the car, including manually
pulling the seat belt all the way
out to shift the rectractor to the
"Automatic Locking" mode.
WARNING
Page 74 of 557

2-56
Safety system of your vehicle
During a frontal collision, sensors will
detect the vehicle's deceleration. If
the rate of deceleration is high
enough, the control unit will inflate
the front air bags.
The front air bags help protect the
driver and front passenger by
responding to frontal impacts in
which seat belts alone cannot pro-
vide adequate restraint. When need-
ed, the side air bags help provide
protection in the event of a side
impact or rollover.
Air bags are activated (able to inflate if necessary) only when the
ignition switch is in the ON posi-
tion.
Air bags inflate in the event of cer- tain frontal or side collisions to
help protect the occupants from
serious physical injury.
Generally, air bags are designed to inflate based upon the severity
of a collision, its direction, etc.
These two factors determine
whether the sensors produce an
electronic deployment/inflation
signal. The front air bags will completely
inflate and deflate in an instant. It is
virtually impossible for you to see
the air bags inflate during an acci-
dent. It is much more likely that you
will simply see the deflated air
bags hanging out of their storage
compartments after the collision.
In addition to inflating in certain side collisions, vehicles equipped
with a rollover sensor, side and
curtain air bags will inflate if the
sensing system detects a rollover.
When a rollover is detected, side
and curtain air bags will remain
inflated longer to help provide pro-
tection from ejection, especially
when used in conjunction with the
seat belts. To help provide protection, the air
bags must inflate rapidly. The
speed of air bag inflation is a con-
sequence of extremely short time
in which to inflate the air bag
between the occupant and the
vehicle structures before the occu-
pant impacts those structures. This
speed of inflation reduces the risk
of serious or life-threatening
injuries and is thus a necessary
part of air bag design.
However, the rapid air bag inflation
can also cause injuries which can
include facial abrasions, bruises
and broken bones because the
inflation speed also causes the air
bags to expand with a great deal
of force.
There are even circumstances under which contact with the air
bag can cause fatal injuries, espe-
cially if the occupant is positioned
excessively close to the air bag.
Page 88 of 557
2-70
Safety system of your vehicle
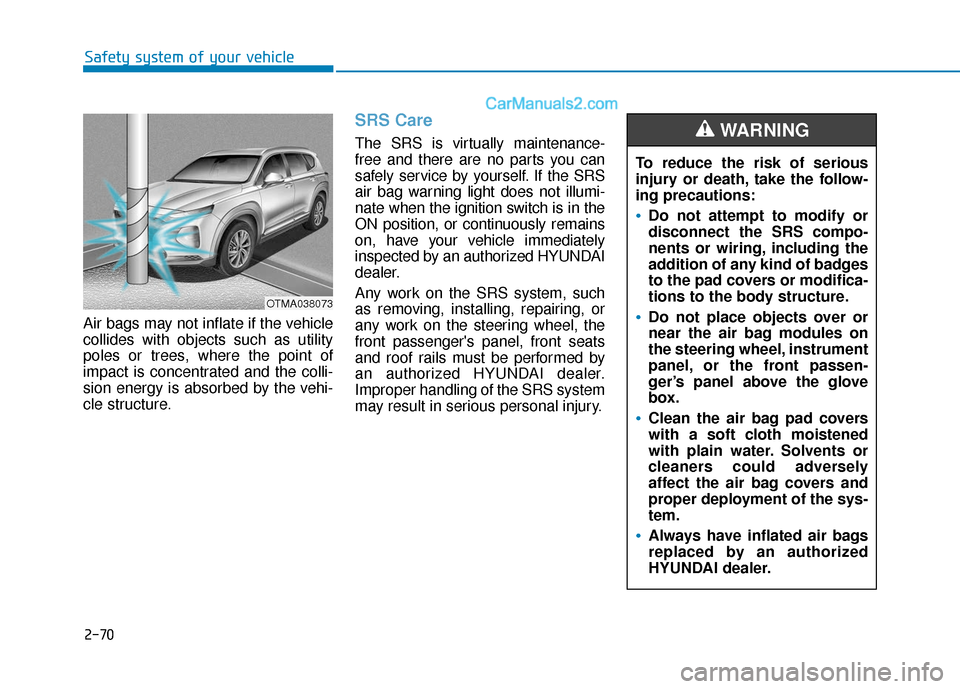
Air bags may not inflate if the vehicle
collides with objects such as utility
poles or trees, where the point of
impact is concentrated and the colli-
sion energy is absorbed by the vehi-
cle structure.
SRS Care
The SRS is virtually maintenance-
free and there are no parts you can
safely service by yourself. If the SRS
air bag warning light does not illumi-
nate when the ignition switch is in the
ON position, or continuously remains
on, have your vehicle immediately
inspected by an authorized HYUNDAI
dealer.
Any work on the SRS system, such
as removing, installing, repairing, or
any work on the steering wheel, the
front passenger's panel, front seats
and roof rails must be performed by
an authorized HYUNDAI dealer.
Improper handling of the SRS system
may result in serious personal injury. To reduce the risk of serious
injury or death, take the follow-
ing precautions:
Do not attempt to modify or
disconnect the SRS compo-
nents or wiring, including the
addition of any kind of badges
to the pad covers or modifica-
tions to the body structure.
Do not place objects over or
near the air bag modules on
the steering wheel, instrument
panel, or the front passen-
ger’s panel above the glove
box.
Clean the air bag pad covers
with a soft cloth moistened
with plain water. Solvents or
cleaners could adversely
affect the air bag covers and
proper deployment of the sys-
tem.
Always have inflated air bags
replaced by an authorized
HYUNDAI dealer.
WARNING
OTMA038073
Page 119 of 557
3-30
Convenient features of your vehicle
M
MI
IR
R R
RO
O R
RS
S
Inside Rearview Mirror
Before driving your vehicle, check to
see that your inside rearview mirror
is properly positioned. Adjust the
rearview mirror so that the view
through the rear window is properly
centered.
When cleaning the mirror, use a
paper towel or similar material
dampened with glass cleaner. Do
not spray glass cleaner directly on
the mirror as this may cause the
liquid cleaner to enter the mirror
housing.
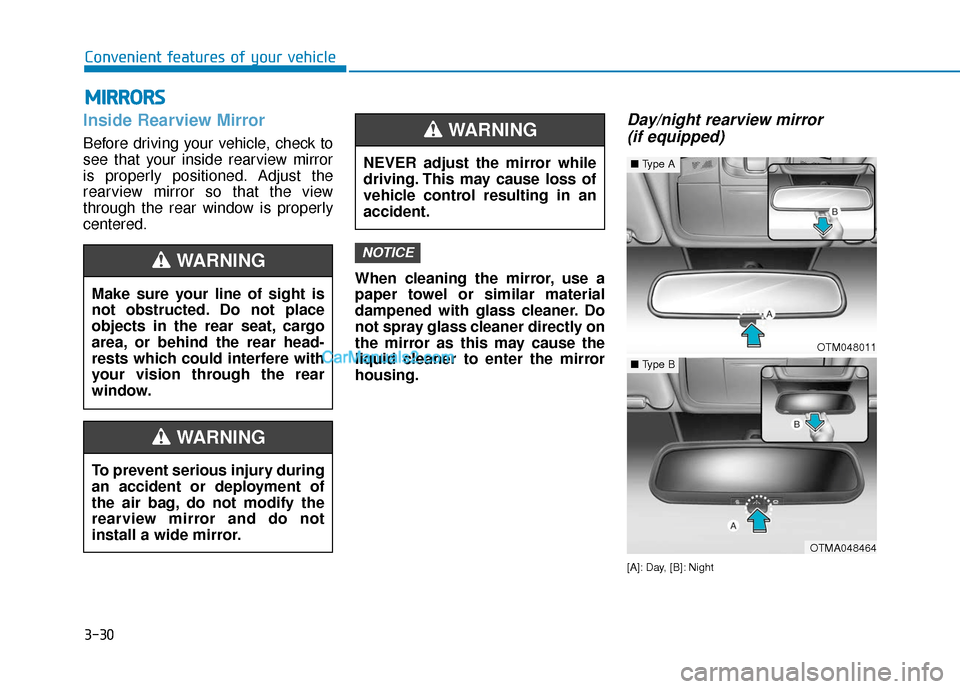
Day/night rearview mirror (if equipped)
[A]: Day, [B]: Night
NOTICE
NEVER adjust the mirror while
driving. This may cause loss of
vehicle control resulting in an
accident.
WARNING
OTM048011
■ Type A
OTMA048464
■Type B
Make sure your line of sight is
not obstructed. Do not place
objects in the rear seat, cargo
area, or behind the rear head-
rests which could interfere with
your vision through the rear
window.
WARNING
To prevent serious injury during
an accident or deployment of
the air bag, do not modify the
rearview mirror and do not
install a wide mirror.
WARNING
Page 121 of 557

3-32
Convenient features of your vehicle
(1) Blue Link Center button
(2) Blue Link POI button
(3) Blue Link SOS button
(4) Compass control button & Dimming ON/OFF button
(5) Status indicator LED
(6) Channel 1 button
(7) Channel 2 button
(8) Channel 3 button
(9) Compass display
(10) Rear light sensor
Automatic-Dimming Night Vision
Safety™ (NVS®) Mirror
(if equipped)
The NVS®Mirror automatically
reduces glare by monitoring light lev-
els in the front and the rear of the
vehicle. Any object that obstructs
either light sensor will degrade the
automatic dimming control feature.
For more information regarding
NVS
®mirrors and other applica-
tions, please refer to the Gentex
website:
www.gentex.com Your mirror will automatically dim
upon detecting glare from the vehi-
cles traveling behind you. The auto-
dimming function can be controlled
by pressing the Dimming ON/OFF
button (4):
1. Pressing and holding the button
for 3 seconds turns the auto-dim-
ming function OFF which is indi-
cated by the green Status
Indicator LED turning off.
2. Pressing and holding the button for 3 seconds again turns the auto-
dimming function ON which is indi-
cated by the green Status Indicator
LED turning on.
The mirror defaults to the ON posi-
tion each time the vehicle is started.
Z-Nav™ Compass Display
The NVS™ Mirror in your vehicle is
also equipped with a Z-Nav™
Compass that shows the vehicle
Compass heading in the Display
Window using the 8 basic cardinal
headings (N, NE, E, SE, etc.).
OAD045045N
Page 124 of 557
3-35
Convenient features of your vehicle
3
Programming HomeLink®
Please note the following:
When programming a garage dooropener, it is advised to park the
vehicle outside of the garage.
It is recommended that a new bat- tery be placed in the hand-held
transmitter of the device being pro-
grammed to HomeLink
®for quicker
training and accurate transmission
of the radio-frequency signal.
Some vehicles may require the igni- tion switch to be placed in the ACC
(or "Accessories") position for pro-
gramming and/or operation of
HomeLink
®.
In the event that there are still pro- gramming difficulties or questions
after following the programming
steps listed below, contact
HomeLink
®at: www.homelink.com
or by calling 1-800-355-3515.
Programming
To train most devices, follow these
instructions:
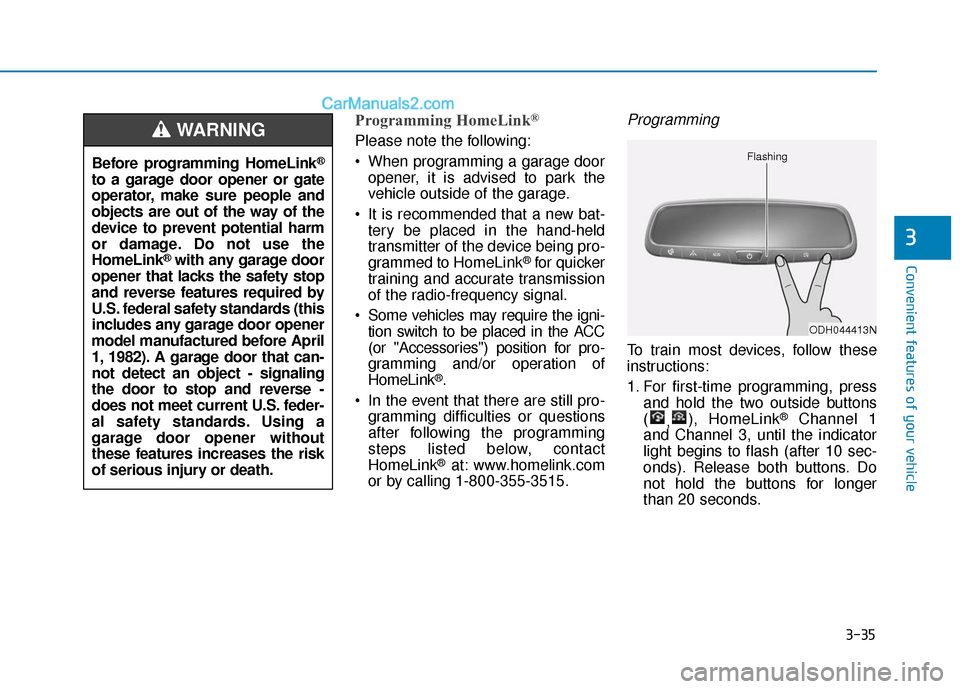
1. For first-time programming, press and hold the two outside buttons
( ,), HomeLink
®Channel 1
and Channel 3, until the indicator
light begins to flash (after 10 sec-
onds). Release both buttons. Do
not hold the buttons for longer
than 20 seconds.
ODH044413N
Flashing
Before programming HomeLink®
to a garage door opener or gate
operator, make sure people and
objects are out of the way of the
device to prevent potential harm
or damage. Do not use the
HomeLink
®with any garage door
opener that lacks the safety stop
and reverse features required by
U.S. federal safety standards (this
includes any garage door opener
model manufactured before April
1, 1982). A garage door that can-
not detect an object - signaling
the door to stop and reverse -
does not meet current U.S. feder-
al safety standards. Using a
garage door opener without
these features increases the risk
of serious injury or death.
WARNING
Page 139 of 557
3-50
Convenient features of your vehicle
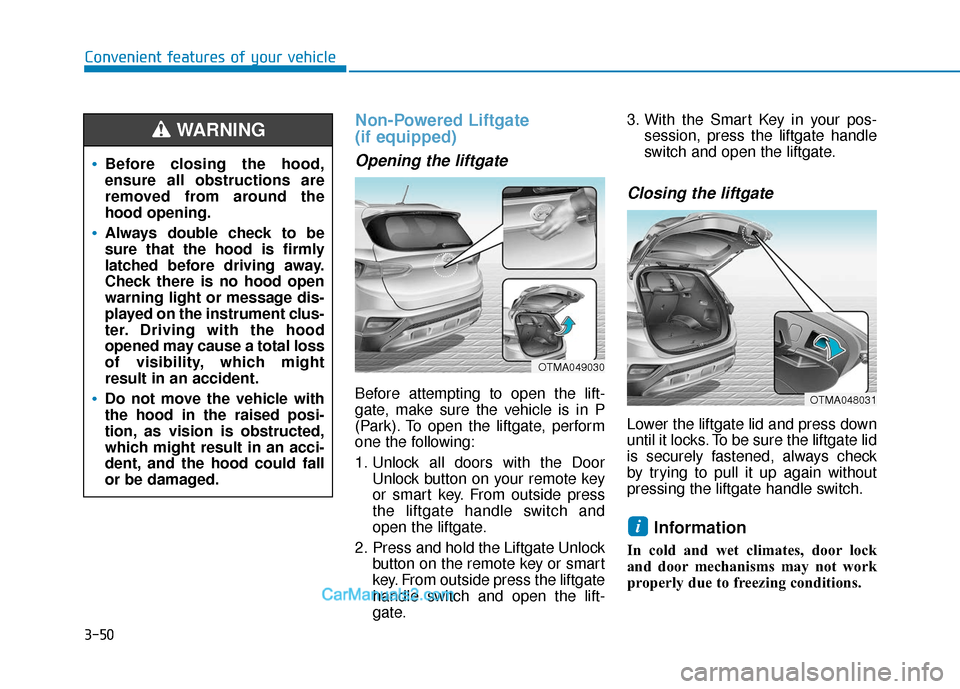
Non-Powered Liftgate
(if equipped)
Opening the liftgate
Before attempting to open the lift-
gate, make sure the vehicle is in P
(Park). To open the liftgate, perform
one the following:
1. Unlock all doors with the DoorUnlock button on your remote key
or smart key. From outside press
the liftgate handle switch and
open the liftgate.
2. Press and hold the Liftgate Unlock button on the remote key or smart
key. From outside press the liftgate
handle switch and open the lift-
gate. 3. With the Smart Key in your pos-
session, press the liftgate handle
switch and open the liftgate.
Closing the liftgate
Lower the liftgate lid and press down
until it locks. To be sure the liftgate lid
is securely fastened, always check
by trying to pull it up again without
pressing the liftgate handle switch.
Information
In cold and wet climates, door lock
and door mechanisms may not work
properly due to freezing conditions.
i
Before closing the hood,
ensure all obstructions are
removed from around the
hood opening.
Always double check to be
sure that the hood is firmly
latched before driving away.
Check there is no hood open
warning light or message dis-
played on the instrument clus-
ter. Driving with the hood
opened may cause a total loss
of visibility, which might
result in an accident.
Do not move the vehicle with
the hood in the raised posi-
tion, as vision is obstructed,
which might result in an acci-
dent, and the hood could fall
or be damaged.
WARNING
OTMA049030
OTMA048031