Page 146 of 561
3-59
Convenient features of your vehicle
3
Instrument Cluster Control
Adjusting instrument cluster
illumination
When the vehicle's position lights or
headlights are on, press the illumina-
tion control button to adjust the
brightness of the instrument panel
illumination.
When pressing the illumination con-
trol button, the interior switch illumi-
nation intensity is also adjusted. The brightness of the instrument
panel illumination is displayed.
If the brightness reaches the maxi-
mum or minimum level, a chime
will sound.
Gauges and Meters
Speedometer
The speedometer indicates the
speed of the vehicle and is calibrated
in miles per hour (MPH) and/or kilo-
meters per hour (km/h). Never adjust the instrument
cluster while driving. Doing so
could lead to driver distraction
which may cause an accident
and lead to vehicle damage,
serious injury, or death.
WARNING
OFE048043
OFE048101N
Page 177 of 561
3-90
Convenient features of your vehicle
Do not cover or spill anything on
the sensor (1) located in front of
the instrument panel.
Do not clean the sensor using a
window cleaner, the cleanser may
leave a light film which could
interfere with sensor operation.
If your vehicle has window tint
or other types of metallic coat-
ing on the front windshield, the
AUTO headlamp system may not
work properly.
Parking lamp position ( )
The parking lamp, license plate lamp
and instrument panel lamp are turned
ON.
Headlamp position ( )
The headlamp, parking lamp, license
plate lamp and instrument panel lamp
are turned ON.
Information
The POWER button must be in the
ON position to turn on the headlamp.
i
NOTICE
OOS047405NOOS047406N
Page 238 of 561
3-151
Convenient features of your vehicle
3
Instrument panel vents
The instrument panel vent air flow
can be directed up/down or left/right
using the vent adjustment lever.The air flow can also be CLOSED
using the vent adjustment lever. The
instrument panel air vents are the
"click-to-close" type.
To CLOSE the instrument panel
vents perform the following:
- For the driver side vents, slide the
vent adjustment lever to the LEFT
until it clicks.
- For the passenger side vents, slide
the vent adjustment lever to the
LEFT until it clicks.
Temperature control (1,2)
Press the up/down switch to increase/
decrease the temperature.
OFE048303
■Front
OFE048304
■Rear
OFE048309N
Page 248 of 561

3-161
Convenient features of your vehicle
3
Information
• When the air conditioning is turned
on by Auto defogging system, if you
try to turn off the air conditioning, the
indicator will blink 3 times and the air
conditioning will not be turned off.
• To maintain the effectiveness and
efficiency of the Auto Defogging
System, do not select Recirculation
mode while the system is operating.
• When the Auto Defogging System is
operating, the fan speed adjustment
button, the temperature adjustment
knob, and the air intake control but-
ton are all disabled.
Do not remove the sensor cover
located on the upper end of the
windshield glass.
Damage to system parts could
occur and may not be covered by
your vehicle warranty.
Rear Window Defroster
To prevent damage to the rear
window defroster conducting ele-
ments bonded to the inside sur-
face of the rear window, never use
sharp instruments or window
cleaners containing abrasives to
clean the window.
If you want to defrost and defog
the front windshield, refer to the
"Windshield Defrosting and
Defogging" section in this chapter.
The defroster heats the
window to remove frost,
fog and thin ice from the
interior and exterior of
the rear window, while
the vehicle is in the
ready ( ) mode.
To activate the rear window
defroster, press the rear window
defroster button located in the center
control panel. The indicator on the
rear window defroster button illumi-
nates when the defroster is ON. To turn off the defroster, press the
rear window defroster button again.Information
• If there is heavy accumulation of
snow on the rear window, brush it
off before operating the rear
defroster.
• The rear window defroster automat-
ically turns off after approximately
20 minutes or when the POWER
button is in the OFF position.
Side view mirror defroster
If your vehicle is equipped with the
side view mirror defrosters, they will
operate at the same time you turn on
the rear window defroster.
i
NOTICE
NOTICE
i
Page 270 of 561
5-3
Driving your vehicle
5
Keep the air intakes clear.
To assure proper operation of the ventilation system, keep the ventilation air intakes located in front of the wind-
shield clear of snow, ice, leaves, or other obstructions.
If you must drive with the liftgate open:
Close all windows.
Open instrument panel air vents.
Set the air intake control at "Fresh", the air flow control at "Floor" or "Face", and the fan control set to high.
WARNING
Page 271 of 561

5-4
Driving your vehicle
Before Entering the Vehicle
• Be sure all windows, outside mir-
ror(s), and outside lights are clean
and unobstructed.
Remove frost, snow, or ice.
Visually check the tires for uneven
wear and damage.
Check under the vehicle for any
sign of leaks.
Be sure there are no obstacles
behind you if you intend to back up.
Before Starting
Make sure the hood, the liftgate,
and the doors are securely closed
and locked.
Adjust the position of the seat and
steering wheel.
Adjust the inside and outside
rearview mirrors.
Verify all the lights work.
Fasten your seatbelt. Check that all
passengers have fastened their
seatbelts.
Check the gauges and indicators in
the instrument panel and the mes-
sages on the instrument display
when the POWER button is in the
ON position.
Check that any items you are car-
rying are stored properly or fas-
tened down securely. CALIFORNIA PROPOSITION 65
WARNING
An wide variety of automobile
components including compo-
nents found in the interior fur-
nishings in a vehicle, contain or
emit harmful chemicals known
to the State of California to
cause cancer and birth defects
and reproductive harm. In addi-
tion, certain fluids contained in
vehicles and certain products
of components contain or emit
chemicals known to the State of
California to cause cancer and
birth defects or other reproduc-
tive harm.WARNING
B BE
EF
FO
OR
RE
E
D
DR
RI
IV
VI
IN
NG
G
Page 347 of 561

5-80
Driving your vehicle
LKA System Operation
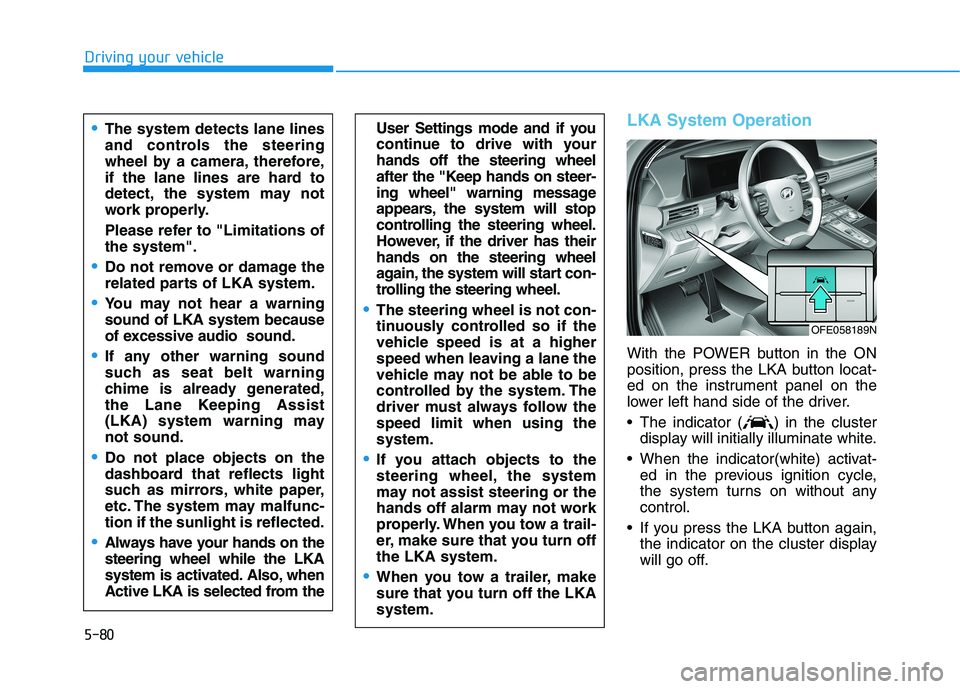
With the POWER button in the ON
position, press the LKA button locat-
ed on the instrument panel on the
lower left hand side of the driver.
The indicator ( ) in the cluster
display will initially illuminate white.
When the indicator(white) activat-
ed in the previous ignition cycle,
the system turns on without any
control.
If you press the LKA button again,
the indicator on the cluster display
will go off.
User Settings mode and if you
continue to drive with your
hands off the steering wheel
after the "Keep hands on steer-
ing wheel" warning message
appears, the system will stop
controlling the steering wheel.
However, if the driver has their
hands on the steering wheel
again, the system will start con-
trolling the steering wheel.
The steering wheel is not con-
tinuously controlled so if the
vehicle speed is at a higher
speed when leaving a lane the
vehicle may not be able to be
controlled by the system. The
driver must always follow the
speed limit when using the
system.
If you attach objects to the
steering wheel, the system
may not assist steering or the
hands off alarm may not work
properly. When you tow a trail-
er, make sure that you turn off
the LKA system.
When you tow a trailer, make
sure that you turn off the LKA
system.
The system detects lane lines
and controls the steering
wheel by a camera, therefore,
if the lane lines are hard to
detect, the system may not
work properly.
Please refer to "Limitations of
the system".
Do not remove or damage the
related parts of LKA system.
You may not hear a warning
sound of LKA system because
of excessive audio sound.
If any other warning sound
such as seat belt warning
chime is already generated,
the Lane Keeping Assist
(LKA) system warning may
not sound.
Do not place objects on the
dashboard that reflects light
such as mirrors, white paper,
etc. The system may malfunc-
tion if the sunlight is reflected.
Always have your hands on the
steering wheel while the LKA
system is activated. Also, when
Active LKA is selected from the
OFE058189N
Page 427 of 561

7
Fuses ......................................................................7-\
45
Instrument Panel Fuse Replacement..........................7-46
Fuel cell power module compartment
Panel Fuse Replacement ...............................................7-47
Fuse/Relay Panel Description ......................................7-49
Light bulbs.............................................................7-57
Headlamp, front center lamp, turn signal lamp,
daytime running lamp, parking lamp, side marker
replacement ......................................................................7-\
58
Side Repeater Lamp Replacement ..............................7-58
Rear Combination Light Bulb Replacement ..............7-59
High mounted stop lamp ...............................................7-59
License Plate Light Bulb Replacement ......................7-60
Interior Light Bulb Replacement .................................7-60
Appearance care ..................................................7-62
Exterior Care ....................................................................7-62\
Interior Care .....................................................................7-6\
7
California perchlorate notice .............................7-70