Page 114 of 561

3-27
Convenient features of your vehicle
3
Programming HomeLink®
Please note the following:
When programming a garage door
opener, it is advised to park the
vehicle outside of the garage.
It is recommended that a new bat-
tery be placed in the hand-held
transmitter of the device being pro-
grammed to HomeLink
®for quicker
training and accurate transmission
of the radio-frequency signal.
Some vehicles may require the
POWER button to be placed in the
ACC (or "Accessories") position for
programming and/or operation of
HomeLink
®.
In the event that there are still pro-
gramming difficulties or questions
after following the programming
steps listed below, contact
HomeLink
®at: www.homelink.com
or by calling 1-800-355-3515.
Rolling code programming
Rolling code devices which are
"code-protected" and manufactured
after 1996 may be determined by the
following:
Reference the device owner’s
manual for verification.
The handheld transmitter appears
to program the HomeLink
®
Universal Transceiver but does not
activate the device.
Press and hold the trained
HomeLink button. The device has
the rolling code feature if the indi-
cator light flashes rapidly and then
turns solid after 2 seconds. Before programming HomeLink
®
to a garage door opener or gate
operator, make sure people and
objects are out of the way of the
device to prevent potential harm
or damage. Do not use the
HomeLink
®with any garage door
opener that lacks the safety stop
and reverse features required by
U.S. federal safety standards (this
includes any garage door opener
model manufactured before April
1, 1982). A garage door that can-
not detect an object - signaling
the door to stop and reverse -
does not meet current U.S. feder-
al safety standards. Using a
garage door opener without
these features increases the risk
of serious injury or death.
WARNING
Page 117 of 561

3-30
Convenient features of your vehicle
Erasing HomeLink®buttons
Individual buttons cannot be erased.
However, to erase all three pro-
grammed buttons:
1. Press and hold the two outer
HomeLink
®buttons until the indi-
cator light begins to flash-after 20
seconds.
2. Release both buttons. Do not hold
for longer than 30 seconds.
The Integrated HomeLink
®Wireless
Control System is now in the training
(learn) mode and can be pro-
grammed at any time following the
appropriate steps in the Programming
chapters above.
NVS
®is a registered trademark and
Z-Nav™ is a trademark of the Gentex
Corporation, Zeeland, Michigan.
HomeLink
®is a registered trademark
owned by Johnson Controls,
Incorporated, Milwaukee, Wisconsin.
FCC ID : NZLHFCHL4
IC : 4112A-HFCHL4
Information
This device complies with Part 15 of
the FCC Rules.
Operation is subject to the following
three conditions:
1. This device may not cause harmful
interference, and
2. This device must accept any inter-
ference received, including interfer-
ence that may cause undesired
operation.
3. The transceiver has been tested and
complies with FCC and Industry
Canada rules. Changes or modifi-
cations not expressly approved by
the party responsible for compli-
ance could void the user's authority
to operate the device.
Information
FOR CANADA
This device complies with Industry
Canada Standard RSS-210.
Operation is subject to the following
three conditions:
1. This device may not cause harmful
interference, and
2. This device must accept any inter-
ference received, including interfer-
ence that may cause undesired
operation.
3. The transceiver has been tested and
complies with FCC and Industry
Canada rules. Changes or modifi-
cations not expressly approved by
the party responsible for compli-
ance could void the user's authority
to operate the device.
ii
Page 127 of 561

3-40
Convenient features of your vehicle
Resetting the Sunroof
Sunroof needs to be reset if the fol-
lowing occurs :
- Battery is discharged or discon-
nected or the related fuse has been
replaced or disconnected
- The one-touch sliding function of
the sunroof does not normally oper-
ate
Reset procedure :
1. Place the POWER button to the
ON position or start the vehicle
( indicator ON). It is recom-
mended to reset the sunroof while
the vehicle is in the ready ( )
mode.
2. Push the control lever forward.
The sunroof will close completely
or tilt depending on the condition
of the sunroof.
3. Release the control lever when
the sunroof stops moving.4. Push the control lever forward
about 10 seconds.
- When the sunroof is in the
closed position :
The glass will tilt and slightly
move up and down.
- When the sunroof is in the tilt
position:
The glass will slightly move up
and down.
Do not release the lever until the
operation is completed.
If you release the lever during opera-
tion, start the procedure again from
step 2.
5. Within 3 seconds, push and hold
the control lever forward until the
sunroof operates as follows:
Tilt down →Slide Open →Slide
Close.Do not release the lever until the
operation is completed.
If you release the lever during opera-
tion, start the procedure again from
step 2.
6. Release the sunroof control lever
after all steps have completed. The
sunroof system has been reset.
Information
• If the sunroof is not reset when the
vehicle battery is disconnected or
discharged, or the sunroof fuse is
blown, the sunroof may not operate
normally.
• For more detailed information, con-
tact an authorized HYUNDAI dealer.
i
Page 135 of 561

3-48
Convenient features of your vehicle
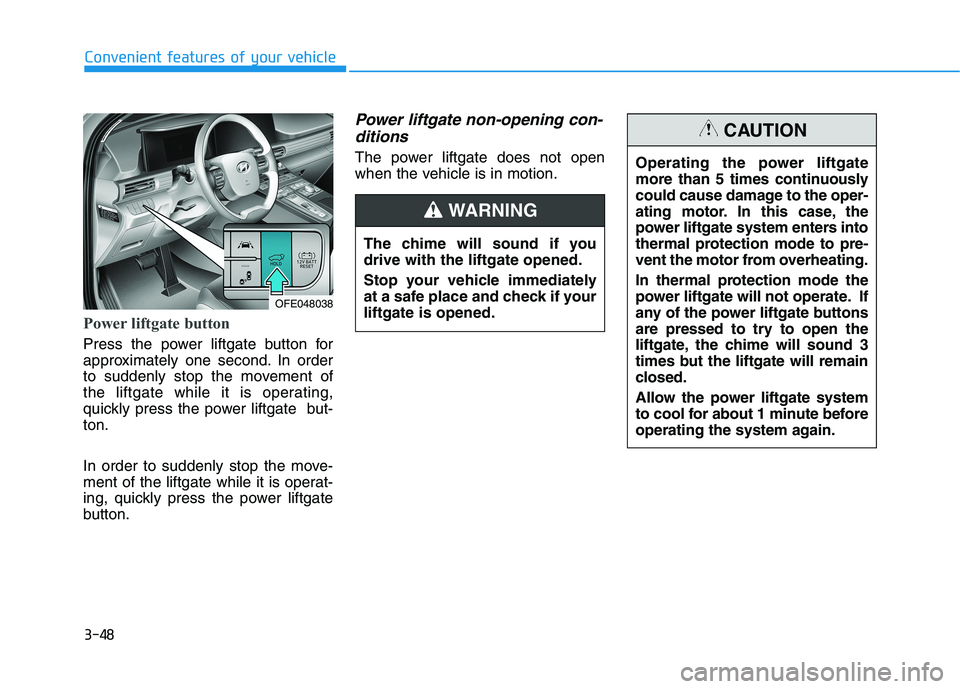
Power liftgate button
Press the power liftgate button for
approximately one second. In order
to suddenly stop the movement of
the liftgate while it is operating,
quickly press the power liftgate but-
ton.
In order to suddenly stop the move-
ment of the liftgate while it is operat-
ing, quickly press the power liftgate
button.
Power liftgate non-opening con-
ditions
The power liftgate does not open
when the vehicle is in motion.
The chime will sound if you
drive with the liftgate opened.
Stop your vehicle immediately
at a safe place and check if your
liftgate is opened.
WARNING
OFE048038
Operating the power liftgate
more than 5 times continuously
could cause damage to the oper-
ating motor. In this case, the
power liftgate system enters into
thermal protection mode to pre-
vent the motor from overheating.
In thermal protection mode the
power liftgate will not operate. If
any of the power liftgate buttons
are pressed to try to open the
liftgate, the chime will sound 3
times but the liftgate will remain
closed.
Allow the power liftgate system
to cool for about 1 minute before
operating the system again.
CAUTION
Page 149 of 561
3-62
Convenient features of your vehicle
Outside temperature gauge
This gauge indicates the current out-
side air temperature by 1 degrees F
(1 degrees C).
- Temperature range :-40°F ~ 140°F
(-40°C ~ 60°C)
Note that the temperature indicated
on the LCD display may not change
as quickly as the outside tempera-
ture (there may be a slight delay
before the temperature changes.) The temperature unit (from °C to °F
or from °F to °C) can be changed by:
- Press the AUTO button while
pressing the OFF button on the cli-
mate control unit for 3 seconds
- Go to General settings mode →
Unit → Temperature in the AVN dis-
play.
Both the temperature unit on the
cluster LCD display and climate con-
trol screen will change.
Odometer
The odometer indicates the total dis-
tance that the vehicle has been driv-
en and should be used to determine
when periodic maintenance should
be performed.
OFE048106NOFE048104N
Page 151 of 561

3-64
Shift indicator pop-up
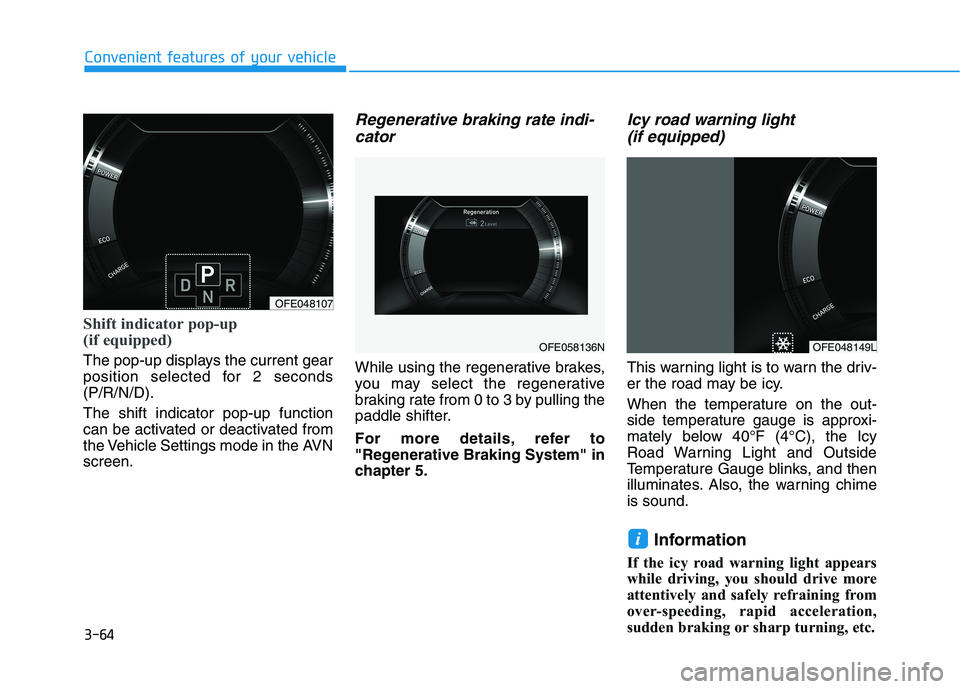
(if equipped)
The pop-up displays the current gear
position selected for 2 seconds
(P/R/N/D).
The shift indicator pop-up function
can be activated or deactivated from
the Vehicle Settings mode in the AVN
screen.
Regenerative braking rate indi-
cator
While using the regenerative brakes,
you may select the regenerative
braking rate from 0 to 3 by pulling the
paddle shifter.
For more details, refer to
"Regenerative Braking System" in
chapter 5.
Icy road warning light
(if equipped)
This warning light is to warn the driv-
er the road may be icy.
When the temperature on the out-
side temperature gauge is approxi-
mately below 40°F (4°C), the Icy
Road Warning Light and Outside
Temperature Gauge blinks, and then
illuminates. Also, the warning chime
is sound.
Information
If the icy road warning light appears
while driving, you should drive more
attentively and safely refraining from
over-speeding, rapid acceleration,
sudden braking or sharp turning, etc.
i
Convenient features of your vehicle
OFE048107
OFE058136NOFE048149L
Page 162 of 561
3-75
Convenient features of your vehicle
High Beam Indicator
Light
This indicator light illuminates:
When the headlights are on and in
the high beam position.
When the turn signal lever is pulled
into the Flash-to-Pass position.
Light ON Indicator
Light
This indicator light illuminates:
When the tail lights or headlights are
on.
ECO Mode Indicator
Light
This indicator light illuminates :
When you select "ECO" mode as
drive mode.
For more details, refer to "Drive
Mode Integrated Control System"
in this chapter.
3
Page 170 of 561
3-83
Convenient features of your vehicle
3
Trip computer mode
The trip computer mode displays
information related to vehicle driving
parameters including fuel economy,
tripmeter information and vehicle
speed.
For more details, refer to "Trip
Computer" in this chapter.
Turn By Turn (TBT) mode
This mode displays the state of the
navigation.
Information mode
Tire Pressure
This mode displays information relat-
ed to Tire Pressure.
For more details, refer to "Tire
Pressure Monitoring System
(TPMS)" in chapter 6.
OFE048154NOFE048119NOFE048155L