2020 Hyundai Ioniq Plug-in Hybrid turn signal
[x] Cancel search: turn signalPage 405 of 635

5-139
Driving your vehicle
5
Check Lane Following Assist(LFA)
system
If there is a problem with the system
a message will appear for a few sec-
onds. If the problem continues the
LFA system failure indicator will illu-
minate.
The LFA system will not be in the
ENABLED state and/or the steering
wheel will not be assisted when:
The turn signal is turned on before
changing a lane. If you change
lanes without the turn signal on,
the steering wheel might be con-
trolled. The vehicle is not driven in the mid-
dle of the lane when the system is
turned on or right after changing a
lane.
ESC (Electronic Stability Control) or
VSM (Vehicle Stability Management)
is activated.
The vehicle is driven on a sharp
curve.
Vehicle speed is over 110 mph
(180km/h).
The vehicle makes sharp lane
changes.
The vehicle brakes suddenly.
Only one lane marker is detected.
The lane is very wide or narrow.
There are more than two lane
markers on the road (e.g. construc-
tion area).
Radius of a curve is too small.
The vehicle is driven on a steep
incline.
The steering wheel is turned sud-
denly.
The system may not operate for 15
seconds after the vehicle is started
or the camera is initialized or
rebooting of the front view camera.
Limitations of the system
LFA system may operate premature-
ly even if the vehicle does not depart
from the intended lane, OR, LFA sys-
tem may not assist your steering or
warn you if the vehicle leaves the
intended lane under the following cir-
cumstances:
When the lane and road condi-
tions are poor
It is difficult to distinguish the lane
marking from the road surface or
the lane marking is faded or not
clearly marked.
It is difficult to distinguish the color
of the lane marker from the road.
There are markings on the road
surface that look like a lane marker
that is inadvertently being detected
by the camera.
The lane marker is indistinct or
damaged.
The lane marker is merged or
divided. (e.g. tollgate)
The lane number increases or
decreases or the lane marker are
crossing complicatedly.
OAEPH059623L
Page 411 of 635
5-145
Driving your vehicle
5
HDA system will not be in the
ENABLED state and/or the steer-
ing wheel will not be assisted
when:
The turn signal is turned on before
changing a lane. If you change
lanes without the turn signal on,
the steering wheel might be con-
trolled.
The vehicle is not driven in the mid-
dle of the lane when the system is
turned on or right after changing a
lane.
ESC (Electronic Stability Control)
or VSM (Vehicle Stability
Management) is activated.
The vehicle is driven on a sharp
curve.
Vehicle speed is over 95 mph (153
km/h).
The vehicle makes sharp lane
changes.
The vehicle brakes suddenly.
Only one lane marker is detected.
The lane is very wide or narrow. There are more than two lane
markers on the road (e.g. construc-
tion area).
Radius of a curve is too small.
The vehicle is driven on a steep
incline.
The steering wheel is turned sud-
denly.System malfunction
Check Highway Driving Assist
(HDA) system
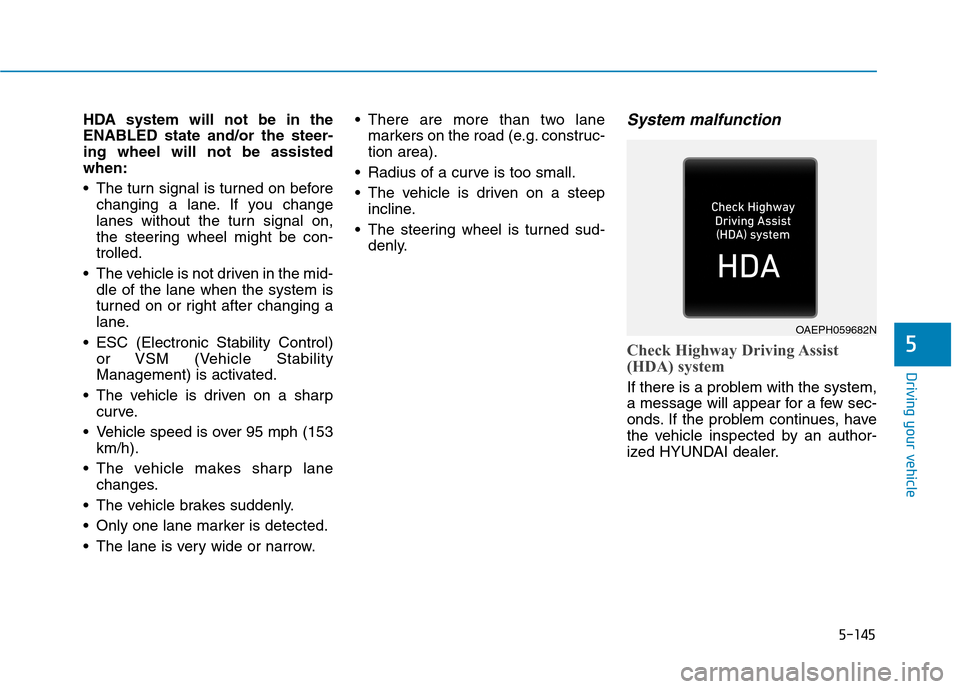
If there is a problem with the system,
a message will appear for a few sec-
onds. If the problem continues, have
the vehicle inspected by an author-
ized HYUNDAI dealer.
OAEPH059682N
Page 438 of 635

6-2
The hazard warning flasher serves
as a warning to other drivers to exer-
cise extreme caution when approach-
ing, overtaking, or passing your vehi-
cle.
It should be used whenever emer-
gency repairs are being made or
when the vehicle is stopped near the
edge of a roadway.To turn the hazard warning flasher
on or off, press the hazard warning
flasher button both the left and right.
The button is located in the center
fascia panel. All turn signal lights will
flash simultaneously.
• The hazard warning flasher oper-
ates whether your vehicle is run-
ning or not.
The turn signals do not work when
the hazard flasher is on.
If the Engine Stalls While
Driving
Reduce your speed gradually,
keeping a straight line. Move cau-
tiously off the road to a safe place.
Turn on your hazard warning flash-
er.
Try to start the hybrid system
again. If your vehicle will not start,
contact an authorized HYUNDAI
dealer or seek other qualified
assistance.
If the Vehicle Stalls at a
Crossroad or Crossing
If the vehicle stalls at a crossroad or
crossing, if safe to do so, move the
shift lever to the N (Neutral) position
and then push the vehicle to a safe
location.
H HA
AZ
ZA
AR
RD
D
W
WA
AR
RN
NI
IN
NG
G
F
FL
LA
AS
SH
HE
ER
R
What to do in an emergency
I
IN
N
C
CA
AS
SE
E
O
OF
F
A
AN
N
E
EM
ME
ER
RG
GE
EN
NC
CY
Y
W WH
HI
IL
LE
E
D
DR
RI
IV
VI
IN
NG
G
OAEPH048016
Page 482 of 635
7
Wheel Alignment and Tire Balance ............................7-38
Tire Replacement ............................................................7-38
Wheel Replacement ........................................................7-39
Tire Traction .....................................................................7-39
Tire Maintenance ............................................................7-40
Tire Sidewall Labeling ....................................................7-40
Tire Terminology and Definitions................................7-44
All Season Tires ...............................................................7-47
Summer Tires ...................................................................7-47
Snow Tires ........................................................................7-47
Radial-Ply Tires ...............................................................7-47
Low Aspect Ratio Tires..................................................7-48
Fuses ......................................................................7-49
Instrument Panel Fuse Replacement..........................7-50
Engine Compartment Panel Fuse Replacement.......7-52
Fuse/Relay Panel Description ......................................7-53
Light Bulbs ............................................................7-55
Headlamp, Parking Lamp, Turn Signal Lamp and
Side Marker ......................................................................7-55
Daytime Running Light (DRL).......................................7-60
Side Repeater Lamp Replacement ..............................7-60
Rear combination lamp bulb replacement ................7-61
High Mounted Stop Lamp Replacement ....................7-64License Plate Light Bulb Replacement ......................7-65
Interior Light Bulb Replacement .................................7-65
Appearance Care..................................................7-67
Exterior Care ....................................................................7-67
Interior Care .....................................................................7-73
Emission Control System ....................................7-75
Crankcase Emission Control System ..........................7-76
Evaporative Emission Control System Including
Onboard Refueling Vapor Recovery (ORVR)............7-76
Exhaust Emission Control System ..............................7-76
California Perchlorate Notice.............................7-79
Page 488 of 635

7-8
Maintenance
At least monthly:
Check coolant level in the engine
coolant reservoir.
Check the operation of all exterior
lights, including the brake lights,
turn signals and hazard warning
flashers.
Check the inflation pressures of all
tires including the spare for tires
that are worn, show uneven wear,
or are damaged.
Check for loose wheel lug nuts.
At least twice a year:
(i.e., every Spring and Fall)
Check radiator, heater and air con-
ditioning hoses for leaks or dam-
age.
Check windshield washer spray
and wiper operation. Clean wiper
blades with a clean cloth damp-
ened with washer fluid.
Check headlamp alignment.
Check muffler, exhaust pipes,
shields and clamps.
Check the seat belts for wear and
function.
At least once a year:
Clean body and door drain holes.
Lubricate door hinges and hood
hinges.
Lubricate door and hood locks and
latches.
Lubricate door rubber weather
strips.
Lubricate door checker.
Check the air conditioning system.
Inspect and lubricate transmission
linkage and controls.
Clean the battery and terminals.
Check the brake fluid level.Follow Normal Maintenance Schedule
if the vehicle is usually operated where
none of the following conditions apply.
If any of the following conditions apply,
you must follow the Maintenance
Under Severe Usage Conditions.
Repeated short distance driving.
Driving in dusty conditions or
sandy areas.
Extensive use of brakes.
Driving in areas where salt or other
corrosive materials are used.
Driving on rough or muddy roads.
Driving in mountainous areas.
Extended periods of idling or low
speed operation.
Driving for a prolonged period in
cold temperatures and/or extreme-
ly humid climates.
More than 50% driving in heavy
city traffic during hot weather
above 90°F (32°C).
For additional information or assis-
tance see your authorized HYUNDAI
dealer.
S SC
CH
HE
ED
DU
UL
LE
ED
D
M
MA
AI
IN
NT
TE
EN
NA
AN
NC
CE
E
S SE
ER
RV
VI
IC
CE
ES
S
Page 535 of 635

7-55
7
Maintenance
L LI
IG
GH
HT
T
B
BU
UL
LB
BS
S
Consult an authorized HYUNDAI
dealer to replace most vehicle light
bulbs. It is difficult to replace vehicle
light bulbs because other parts of the
vehicle must be removed before you
can get to the bulb. This is especially
true for removing the headlamp
assembly to get to the bulb(s).
Removing/installing the headlamp
assembly can result in damage to
the vehicle.
Information
The headlamp and tail lamp lenses
could appear frosty if the vehicle is
washed after driving or the vehicle is
driven at night in wet weather. This
condition is caused by temperature
difference between the lamp inside
and outside and, it does not indicate a
problem with your vehicle. When
moisture condenses in the lamp, it will
be removed after driving with the
headlamp on. The removable level
may differ depending on lamp size,
lamp position and environmental con-
dition. However, if moisture is not
removed, we recommend that your
vehicle is inspected by an authorized
HYUNDAI dealer.
Headlamp, Parking Lamp, Turn
Signal Lamp and Side Marker
Type A – Standard type
(1) Headlamp (Low)
(2) Headlamp (High)
(3) Turn signal lamp
(4) Parking lamp
(5) Side marker
i
Prior to replacing a lamp,
depress the foot brake, move
the shift lever into P (Park)
apply the parking brake, place
the Engine Start/Stop button
to the OFF position, and take
the key with you when leaving
the vehicle to avoid sudden
movement of the vehicle and
to prevent possible electric
shock.
Be aware the bulbs may be
hot and may burn your fin-
gers.
WARNING
OAE076028
Page 537 of 635

7-57
7
Maintenance
7. Connect the headlamp bulb sock-
et-connector. (for low beam and
high beam)
8. Install the hbulb cover (1) by turn-
ing it clockwise.
Information
The headlamp aiming should be
adjusted after an accident or after the
headlamp assembly is reinstalled at an
authorized HYUNDAI dealer.
Turn signal
1. Open the hood.
2. Disconnect the negative battery
cable.
3. Remove the socket from the
assembly by turning the socket
counterclockwise until the tabs on
the socket align with the slots on
the assembly.
4. Remove the bulb from the socket
by pressing it in and rotating it
counterclockwise until the tabs on
the bulb align with the slots in the
socket. Pull the bulb out of the
socket.5. Install a new bulb by inserting it
into the socket and rotating it until
it locks into place.
6. Install the socket into the assem-
bly by aligning the tabs on the
socket with the slots in the assem-
bly.
7. Push the socket into the assembly
and turn the socket clockwise.
i
OAE076031
Page 538 of 635

7-58
Maintenance
Side marker
1. Open the hood.
2. Disconnect the negative battery
cable.
3. Remove the socket from the
assembly by turning the socket
counterclockwise until the tabs on
the socket align with the slots on
the assembly.
4. Remove the bulb from the socket
by pulling out the bulb.
5. Insert a new bulb.
Type B
(1) Headlamp (high)
(2) Headlamp (low)
(3) Turn signal lamp
(4) Parking lamp
(5) Side marker lamp
Headlamp, parking lamp and side
marker lamp
If the light bulb does not operate, we
recommend that you have the vehi-
cle checked by an authorized
HYUNDAI dealer.
OAEPH077075N
OAE078052
HID headlamp
Do not attempt to replace or
inspect the low beam (XENON
bulb) due to electric shock dan-
ger. If the low beam (XENON
bulb) is not working, have your
vehicle checked by an author-
ized HYUNDAI Dealer.
WARNING