Page 253 of 613
3-106
Convenient features of your vehicle
Exterior lights
Lighting control
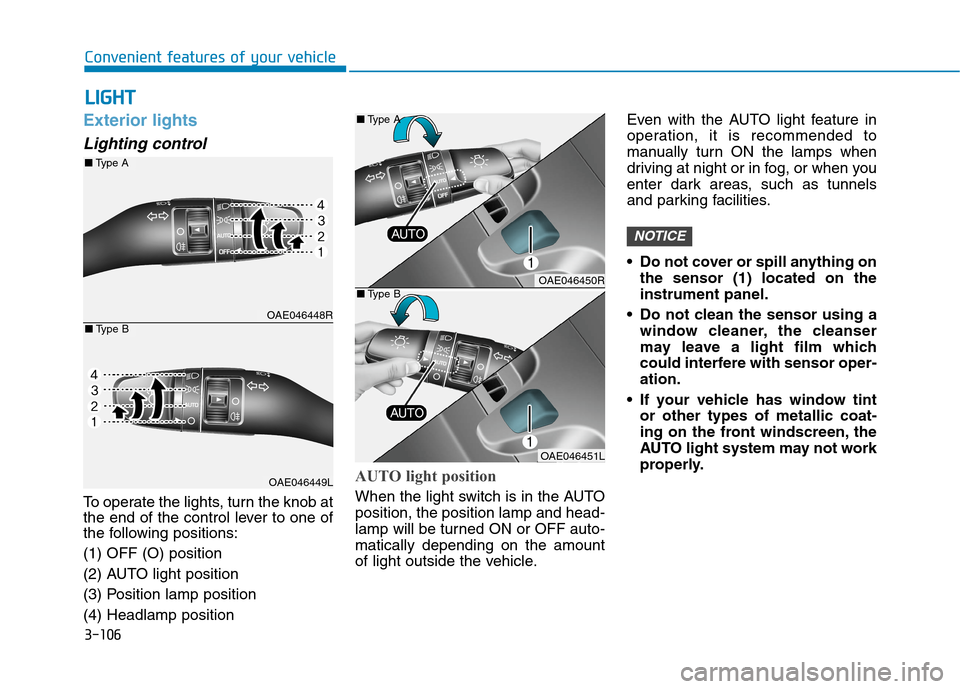
To operate the lights, turn the knob at
the end of the control lever to one of
the following positions:
(1) OFF (O) position
(2) AUTO light position
(3) Position lamp position
(4) Headlamp position
AUTO light position
When the light switch is in the AUTO
position, the position lamp and head-
lamp will be turned ON or OFF auto-
matically depending on the amount
of light outside the vehicle.Even with the AUTO light feature in
operation, it is recommended to
manually turn ON the lamps when
driving at night or in fog, or when you
enter dark areas, such as tunnels
and parking facilities.
• Do not cover or spill anything on
the sensor (1) located on the
instrument panel.
Do not clean the sensor using a
window cleaner, the cleanser
may leave a light film which
could interfere with sensor oper-
ation.
If your vehicle has window tint
or other types of metallic coat-
ing on the front windscreen, the
AUTO light system may not work
properly.
NOTICE
L LI
IG
GH
HT
T
OAE046448R
OAE046449L
■Type A
■Type B
OAE046450R
OAE046451L ■Type A
■Type B
Page 256 of 613
3-109
Convenient features of your vehicle
High Beam Assist (HBA) system
(if equipped)
The High Beam Assist (HBA) is a
system that automatically adjusts the
headlamp range (switches between
high beam and low beam) according
to the brightness of other vehicles
and road conditions.
Operating condition
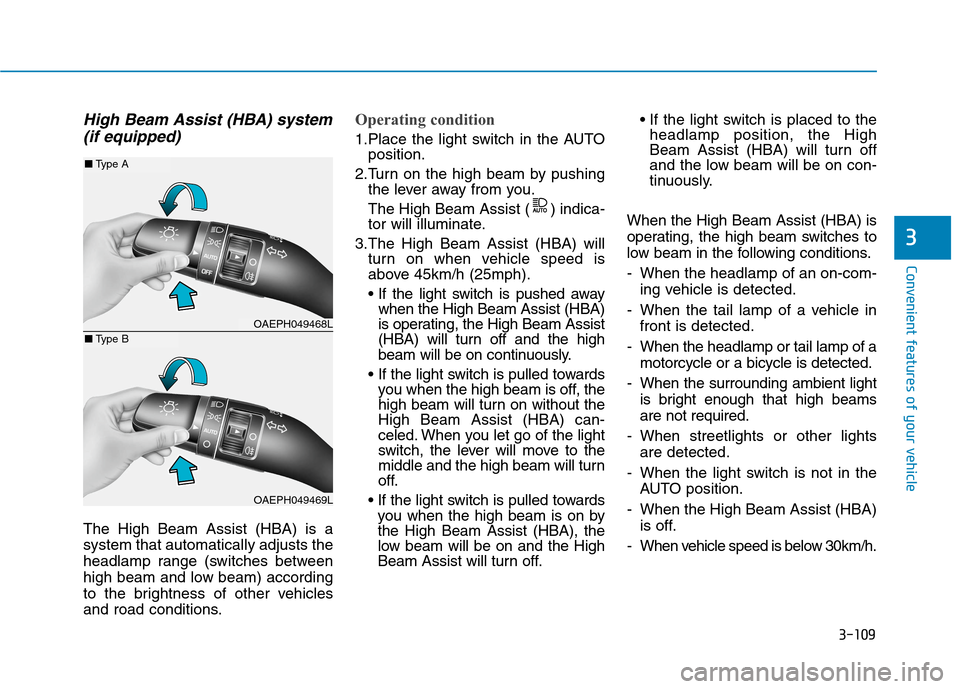
1.Place the light switch in the AUTO
position.
2.Turn on the high beam by pushing
the lever away from you.
The High Beam Assist ( ) indica-
tor will illuminate.
3.The High Beam Assist (HBA) will
turn on when vehicle speed is
above 45km/h (25mph).
• If the light switch is pushed away
when the High Beam Assist (HBA)
is operating, the High Beam Assist
(HBA) will turn off and the high
beam will be on continuously.
you when the high beam is off, the
high beam will turn on without the
High Beam Assist (HBA) can-
celed. When you let go of the light
switch, the lever will move to the
middle and the high beam will turn
off.
you when the high beam is on by
the High Beam Assist (HBA), the
low beam will be on and the High
Beam Assist will turn off.
headlamp position, the High
Beam Assist (HBA) will turn off
and the low beam will be on con-
tinuously.
When the High Beam Assist (HBA) is
operating, the high beam switches to
low beam in the following conditions.
- When the headlamp of an on-com-
ing vehicle is detected.
- When the tail lamp of a vehicle in
front is detected.
- When the headlamp or tail lamp of a
motorcycle or a bicycle is detected.
- When the surrounding ambient light
is bright enough that high beams
are not required.
- When streetlights or other lights
are detected.
- When the light switch is not in the
AUTO position.
- When the High Beam Assist (HBA)
is off.
- When vehicle speed is below 30km/h.
3
OAEPH049468L
OAEPH049469L
■Type A
■Type B
Page 262 of 613
3-115
Convenient features of your vehicle
3
Daytime running light (DRL)
The Daytime Running Lights (DRL)
can make it easier for others to see
the front of your vehicle during the
day, especially after dawn and before
sunset.
The DRL system will turn the dedi-
cated lamp OFF when:
1. The headlamps are in the ON
position.
2. The engine is turned off.
Headlamp levelling device
Manual type
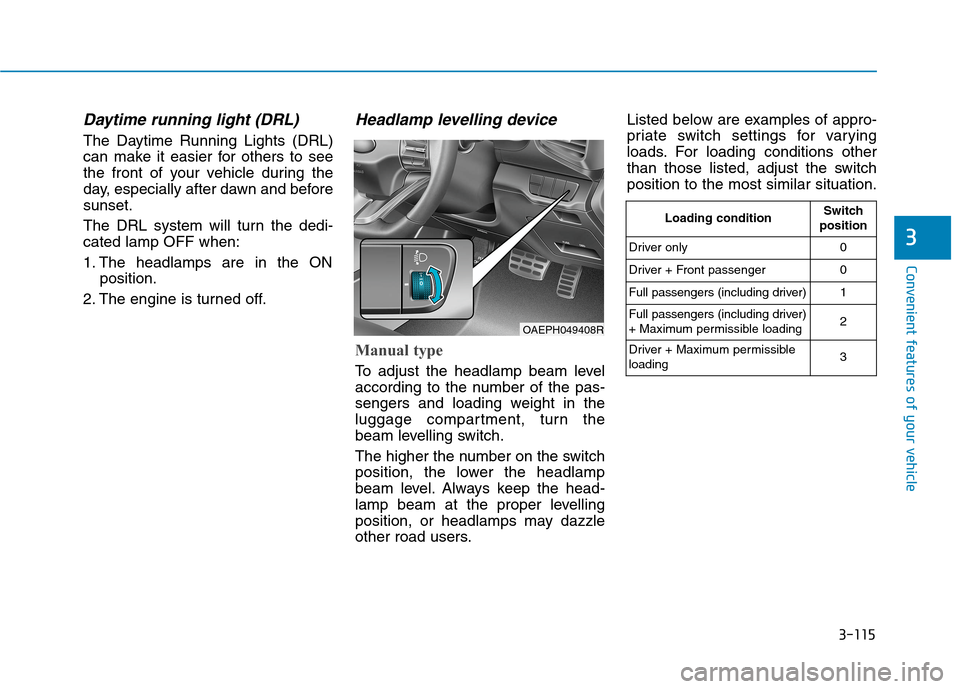
To adjust the headlamp beam level
according to the number of the pas-
sengers and loading weight in the
luggage compartment, turn the
beam levelling switch.
The higher the number on the switch
position, the lower the headlamp
beam level. Always keep the head-
lamp beam at the proper levelling
position, or headlamps may dazzle
other road users.Listed below are examples of appro-
priate switch settings for varying
loads. For loading conditions other
than those listed, adjust the switch
position to the most similar situation.
OAEPH049408R
Loading conditionSwitch
position
Driver only 0
Driver + Front passenger 0
Full passengers (including driver) 1
Full passengers (including driver)
+ Maximum permissible loading2
Driver + Maximum permissible
loading 3
Page 264 of 613
3-117
Convenient features of your vehicle
3
Headlamp and position lamp
When the headlamp (lamp switch in
the headlamp or AUTO position) is
on and all doors (and tailgate) are
locked and closed, the position lamp
and headlamp will come on for 15
seconds if/or any of the below is per-
formed.
When the door unlock button is
pressed on the remote key or
smart key.
At this time, if you press the door lock
or unlock button, the position lamp
and headlamp will turn off immedi-
ately.
You can activate or deactivate the
Welcome Light from the User
Settings Mode on the LCD display.
For more information, refer to
"LCD Display" in this chapter.
Interior lamp
When the interior lamp switch is in
the DOOR position and all doors (and
tailgate) are closed and locked, the
room lamp will come on for 30 sec-
onds if any of the below is performed.
When the door unlock button is
pressed on the remote key or
smart key.
When the button of the outside
door handle is pressed.
At this time, if you press the door lock
or unlock button, the room lamp will
turn off immediately.
Interior lights
Do not use the interior lights for
extended periods when the engine
is turned off or the battery will dis-
charge.
NOTICE
Page 318 of 613
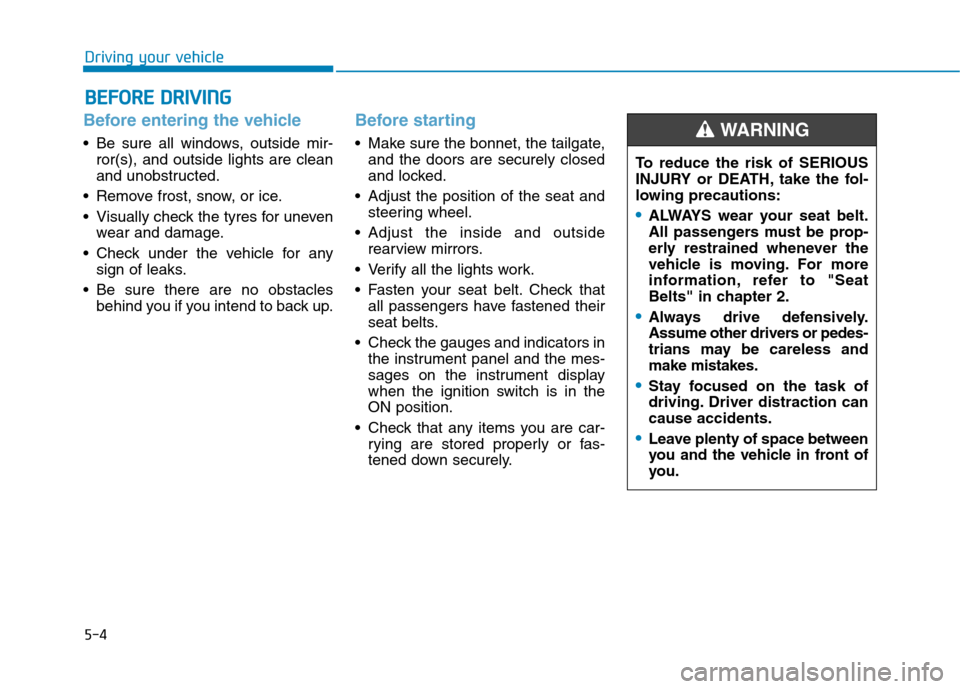
5-4
Driving your vehicle
Before entering the vehicle
• Be sure all windows, outside mir-
ror(s), and outside lights are clean
and unobstructed.
Remove frost, snow, or ice.
Visually check the tyres for uneven
wear and damage.
Check under the vehicle for any
sign of leaks.
Be sure there are no obstacles
behind you if you intend to back up.
Before starting
Make sure the bonnet, the tailgate,
and the doors are securely closed
and locked.
Adjust the position of the seat and
steering wheel.
Adjust the inside and outside
rearview mirrors.
Verify all the lights work.
Fasten your seat belt. Check that
all passengers have fastened their
seat belts.
Check the gauges and indicators in
the instrument panel and the mes-
sages on the instrument display
when the ignition switch is in the
ON position.
Check that any items you are car-
rying are stored properly or fas-
tened down securely.
B BE
EF
FO
OR
RE
E
D
DR
RI
IV
VI
IN
NG
G
To reduce the risk of SERIOUS
INJURY or DEATH, take the fol-
lowing precautions:
•ALWAYS wear your seat belt.
All passengers must be prop-
erly restrained whenever the
vehicle is moving. For more
information, refer to "Seat
Belts" in chapter 2.
Always drive defensively.
Assume other drivers or pedes-
trians may be careless and
make mistakes.
Stay focused on the task of
driving. Driver distraction can
cause accidents.
Leave plenty of space between
you and the vehicle in front of
you.
WARNING
Page 321 of 613
5-7
Driving your vehicle
5
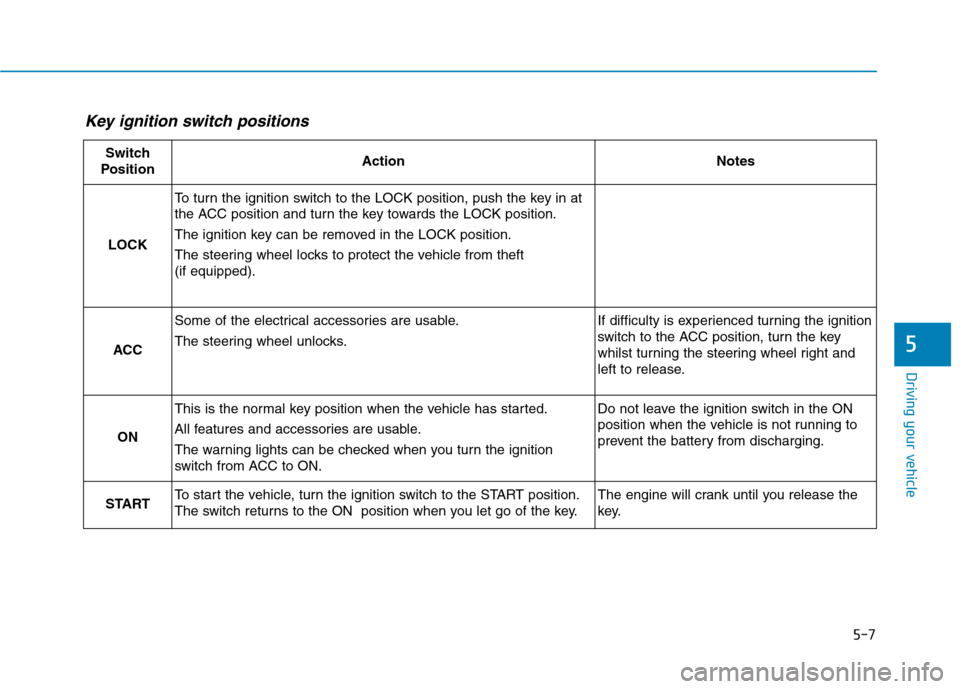
Key ignition switch positions
Switch
PositionActionNotes
LOCK
To turn the ignition switch to the LOCK position, push the key in at
the ACC position and turn the key towards the LOCK position.
The ignition key can be removed in the LOCK position.
The steering wheel locks to protect the vehicle from theft
(if equipped).
ACC
Some of the electrical accessories are usable.
The steering wheel unlocks.If difficulty is experienced turning the ignition
switch to the ACC position, turn the key
whilst turning the steering wheel right and
left to release.
ON
This is the normal key position when the vehicle has started.
All features and accessories are usable.
The warning lights can be checked when you turn the ignition
switch from ACC to ON.Do not leave the ignition switch in the ON
position when the vehicle is not running to
prevent the battery from discharging.
STARTTo start the vehicle, turn the ignition switch to the START position.
The switch returns to the ON position when you let go of the key.The engine will crank until you release the
key.
Page 325 of 613
5-11
Driving your vehicle
5
Button Position Action Notice
ON
Press the Engine Start/Stop button whilst it
is in the ACC position without depressing
the brake pedal.
The warning lights can be checked before
the vehicle is started.Do not leave the Engine Start/Stop button in
the ON position when the vehicle is not run-
ning to prevent the battery from discharging.
START
To start the vehicle, depress the brake pedal
and press the Engine Start/Stop button with
the shift lever in the P (Park) position.If you press the Engine Start/Stop button
without depressing the brake pedal, the vehi-
cle does not start and the Engine Start/Stop
button changes as follows:
OFF → →
ACC → →
ON → →
OFF or ACC
Page 360 of 613
5-46
Driving your vehicle
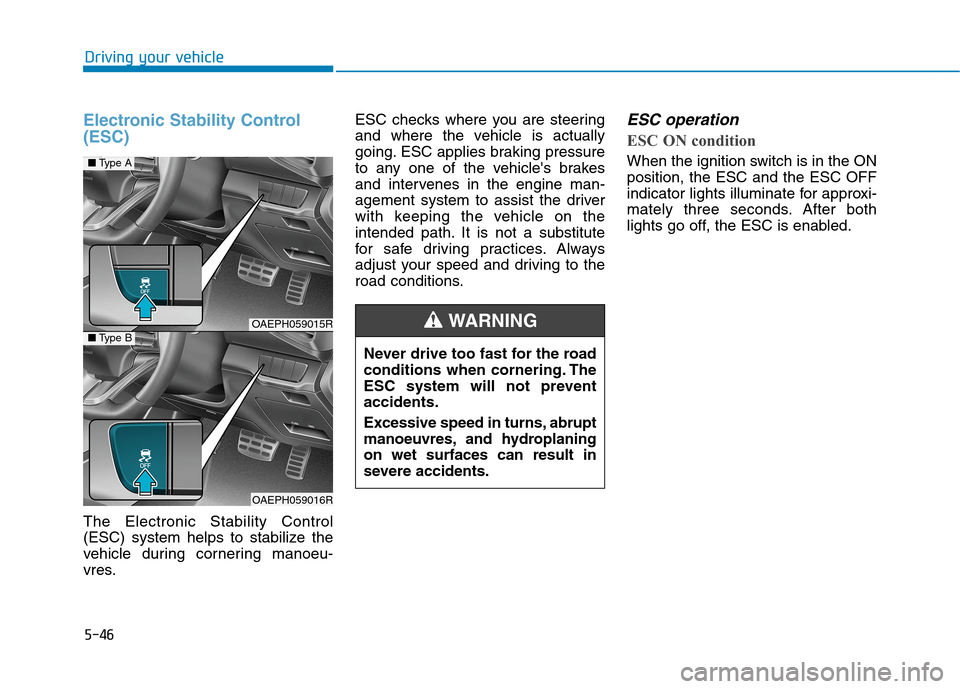
Electronic Stability Control
(ESC)
The Electronic Stability Control
(ESC) system helps to stabilize the
vehicle during cornering manoeu-
vres.ESC checks where you are steering
and where the vehicle is actually
going. ESC applies braking pressure
to any one of the vehicle's brakes
and intervenes in the engine man-
agement system to assist the driver
with keeping the vehicle on the
intended path. It is not a substitute
for safe driving practices. Always
adjust your speed and driving to the
road conditions.
ESC operation
ESC ON condition
When the ignition switch is in the ON
position, the ESC and the ESC OFF
indicator lights illuminate for approxi-
mately three seconds. After both
lights go off, the ESC is enabled.
OAEPH059015R
OAEPH059016R
■Type A
■Type B
Never drive too fast for the road
conditions when cornering. The
ESC system will not prevent
accidents.
Excessive speed in turns, abrupt
manoeuvres, and hydroplaning
on wet surfaces can result in
severe accidents.
WARNING