2020 Hyundai Ioniq Hybrid brake
[x] Cancel search: brakePage 144 of 613
2-63
Safety system of your vehicle
2
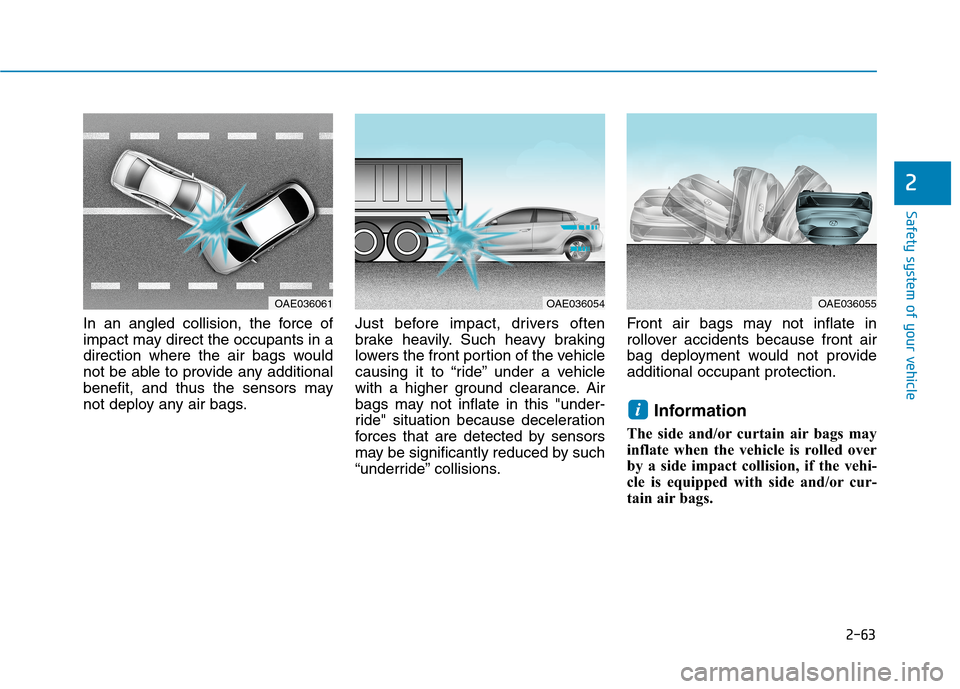
In an angled collision, the force of
impact may direct the occupants in a
direction where the air bags would
not be able to provide any additional
benefit, and thus the sensors may
not deploy any air bags.Just before impact, drivers often
brake heavily. Such heavy braking
lowers the front portion of the vehicle
causing it to “ride” under a vehicle
with a higher ground clearance. Air
bags may not inflate in this "under-
ride" situation because deceleration
forces that are detected by sensors
may be significantly reduced by such
“underride” collisions.Front air bags may not inflate in
rollover accidents because front air
bag deployment would not provide
additional occupant protection.
Information
The side and/or curtain air bags may
inflate when the vehicle is rolled over
by a side impact collision, if the vehi-
cle is equipped with side and/or cur-
tain air bags.
i
OAE036061OAE036054OAE036055
Page 162 of 613
3-15
Convenient features of your vehicle
3
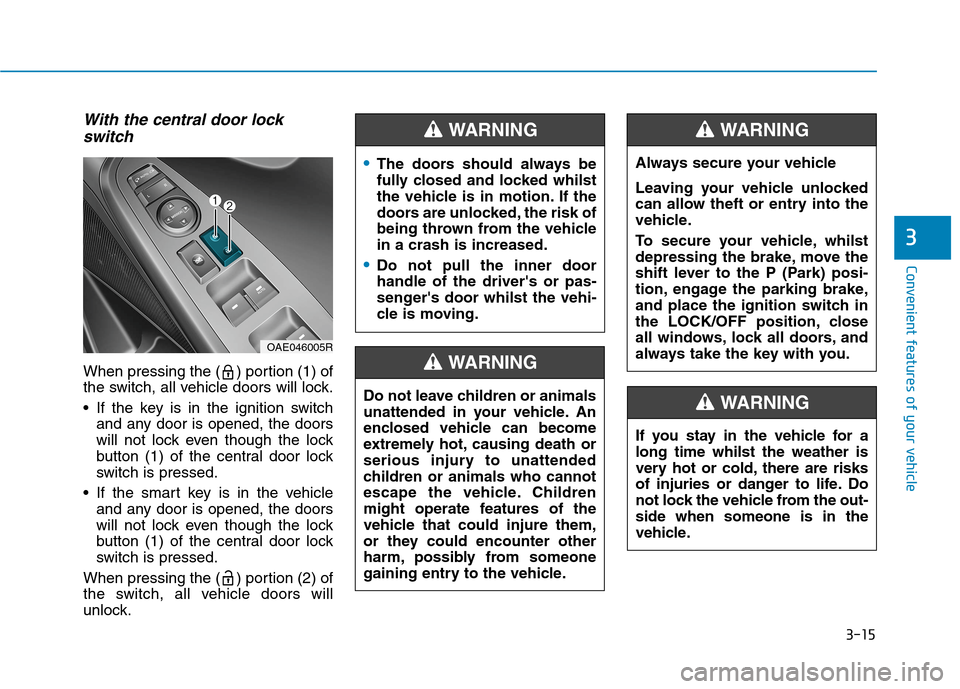
With the central door lock
switch
When pressing the ( ) portion (1) of
the switch, all vehicle doors will lock.
If the key is in the ignition switch
and any door is opened, the doors
will not lock even though the lock
button (1) of the central door lock
switch is pressed.
If the smart key is in the vehicle
and any door is opened, the doors
will not lock even though the lock
button (1) of the central door lock
switch is pressed.
When pressing the ( ) portion (2) of
the switch, all vehicle doors will
unlock.
OAE046005R
The doors should always be
fully closed and locked whilst
the vehicle is in motion. If the
doors are unlocked, the risk of
being thrown from the vehicle
in a crash is increased.
Do not pull the inner door
handle of the driver's or pas-
senger's door whilst the vehi-
cle is moving.
WARNING
Do not leave children or animals
unattended in your vehicle. An
enclosed vehicle can become
extremely hot, causing death or
serious injury to unattended
children or animals who cannot
escape the vehicle. Children
might operate features of the
vehicle that could injure them,
or they could encounter other
harm, possibly from someone
gaining entry to the vehicle.
WARNING
Always secure your vehicle
Leaving your vehicle unlocked
can allow theft or entry into the
vehicle.
To secure your vehicle, whilst
depressing the brake, move the
shift lever to the P (Park) posi-
tion, engage the parking brake,
and place the ignition switch in
the LOCK/OFF position, close
all windows, lock all doors, and
always take the key with you.
WARNING
If you stay in the vehicle for a
long time whilst the weather is
very hot or cold, there are risks
of injuries or danger to life. Do
not lock the vehicle from the out-
side when someone is in the
vehicle.
WARNING
Page 184 of 613
3-37
Convenient features of your vehicle
3
Bonnet
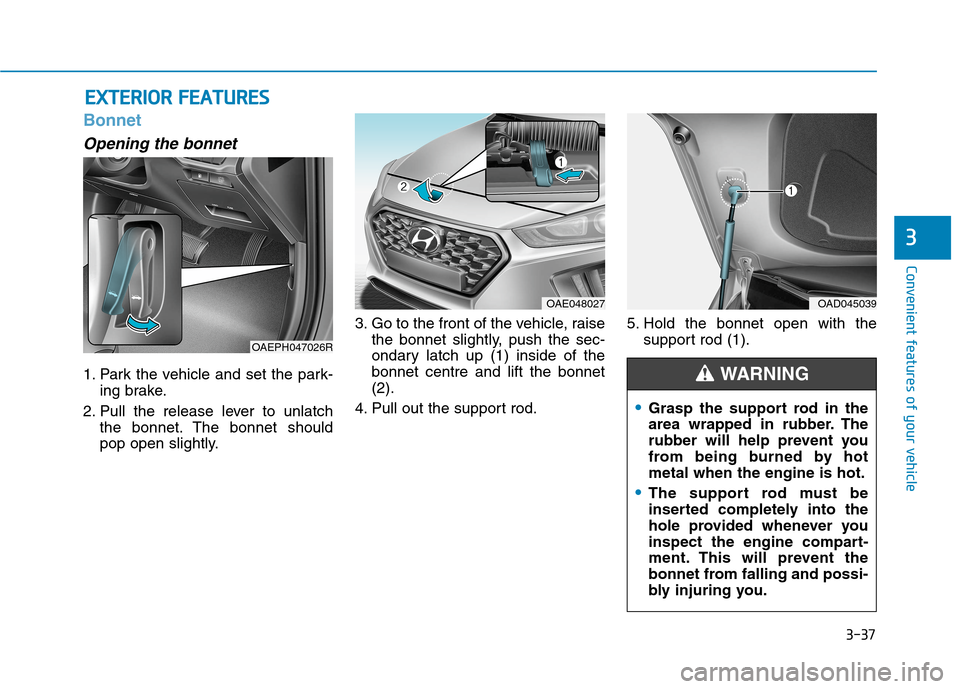
Opening the bonnet
1. Park the vehicle and set the park-
ing brake.
2. Pull the release lever to unlatch
the bonnet. The bonnet should
pop open slightly.3. Go to the front of the vehicle, raise
the bonnet slightly, push the sec-
ondary latch up (1) inside of the
bonnet centre and lift the bonnet
(2).
4. Pull out the support rod.5. Hold the bonnet open with the
support rod (1).
E EX
XT
TE
ER
RI
IO
OR
R
F
FE
EA
AT
TU
UR
RE
ES
S
OAE048027
Grasp the support rod in the
area wrapped in rubber. The
rubber will help prevent you
from being burned by hot
metal when the engine is hot.
The support rod must be
inserted completely into the
hole provided whenever you
inspect the engine compart-
ment. This will prevent the
bonnet from falling and possi-
bly injuring you.
WARNING
OAD045039
OAEPH047026R
Page 185 of 613
3-38
Convenient features of your vehicle
Closing the bonnet
1. Before closing the bonnet, check
the following:
ment must be correctly installed.
bustible material must be removed
from the engine compartment.
2. Return the support rod to its clip to
prevent it from rattling.
3. Lower the bonnet halfway (lifted
approximately 30cm from the
closed position) and push down to
securely lock in place. Then double
check to be sure the bonnet is
secure.
If the bonnet can be raised slight-
ly it is not securely locked. Open it
again and close it with more force.
Tailgate
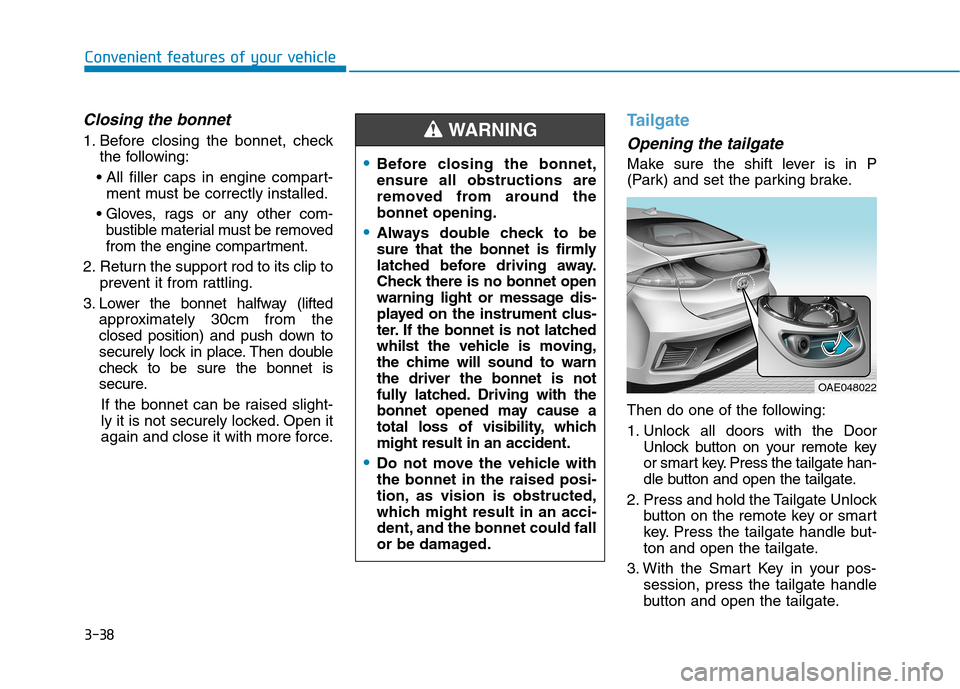
Opening the tailgate
Make sure the shift lever is in P
(Park) and set the parking brake.
Then do one of the following:
1. Unlock all doors with the Door
Unlock button on your remote key
or smart key. Press the tailgate han-
dle button and open the tailgate.
2. Press and hold the Tailgate Unlock
button on the remote key or smart
key. Press the tailgate handle but-
ton and open the tailgate.
3. With the Smart Key in your pos-
session, press the tailgate handle
button and open the tailgate.Before closing the bonnet,
ensure all obstructions are
removed from around the
bonnet opening.
Always double check to be
sure that the bonnet is firmly
latched before driving away.
Check there is no bonnet open
warning light or message dis-
played on the instrument clus-
ter. If the bonnet is not latched
whilst the vehicle is moving,
the chime will sound to warn
the driver the bonnet is not
fully latched. Driving with the
bonnet opened may cause a
total loss of visibility, which
might result in an accident.
Do not move the vehicle with
the bonnet in the raised posi-
tion, as vision is obstructed,
which might result in an acci-
dent, and the bonnet could fall
or be damaged.
WARNING
OAE048022
Page 188 of 613
3-41
Convenient features of your vehicle
3
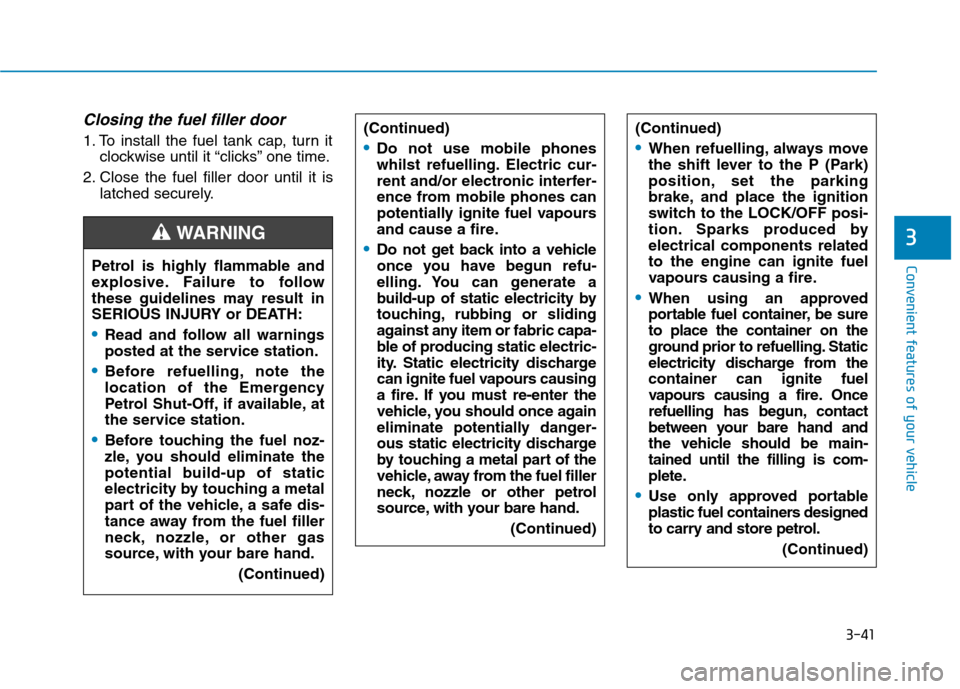
Closing the fuel filler door
1. To install the fuel tank cap, turn it
clockwise until it “clicks” one time.
2. Close the fuel filler door until it is
latched securely.(Continued)When refuelling, always move
the shift lever to the P (Park)
position, set the parking
brake, and place the ignition
switch to the LOCK/OFF posi-
tion. Sparks produced by
electrical components related
to the engine can ignite fuel
vapours causing a fire.
When using an approved
portable fuel container, be sure
to place the container on the
ground prior to refuelling. Static
electricity discharge from the
container can ignite fuel
vapours causing a fire. Once
refuelling has begun, contact
between your bare hand and
the vehicle should be main-
tained until the filling is com-
plete.
Use only approved portable
plastic fuel containers designed
to carry and store petrol.
(Continued)
Petrol is highly flammable and
explosive. Failure to follow
these guidelines may result in
SERIOUS INJURY or DEATH:
Read and follow all warnings
posted at the service station.
Before refuelling, note the
location of the Emergency
Petrol Shut-Off, if available, at
the service station.
Before touching the fuel noz-
zle, you should eliminate the
potential build-up of static
electricity by touching a metal
part of the vehicle, a safe dis-
tance away from the fuel filler
neck, nozzle, or other gas
source, with your bare hand.
(Continued)
WARNING
(Continued)
Do not use mobile phones
whilst refuelling. Electric cur-
rent and/or electronic interfer-
ence from mobile phones can
potentially ignite fuel vapours
and cause a fire.
Do not get back into a vehicle
once you have begun refu-
elling. You can generate a
build-up of static electricity by
touching, rubbing or sliding
against any item or fabric capa-
ble of producing static electric-
ity. Static electricity discharge
can ignite fuel vapours causing
a fire. If you must re-enter the
vehicle, you should once again
eliminate potentially danger-
ous static electricity discharge
by touching a metal part of the
vehicle, away from the fuel filler
neck, nozzle or other petrol
source, with your bare hand.
(Continued)
Page 191 of 613
3-44
Closing the fuel filler door
1. To install the fuel tank cap, turn it
clockwise until it “clicks” one time.
2. Close the fuel filler door until it is
latched securely.
Convenient features of your vehicle
Petrol is highly flammable and
explosive. Failure to follow
these guidelines may result in
SERIOUS INJURY or DEATH:
Read and follow all warnings
posted at the service station.
Before refuelling, note the
location of the Emergency
Petrol Shut-Off, if available, at
the service station.
Before touching the fuel noz-
zle, you should eliminate the
potential build-up of static
electricity by touching a metal
part of the vehicle, a safe dis-
tance away from the fuel filler
neck, nozzle, or other gas
source, with your bare hand.
(Continued)
WARNING
(Continued)
Do not use mobile phones
whilst refuelling. Electric cur-
rent and/or electronic interfer-
ence from mobile phones can
potentially ignite fuel vapours
and cause a fire.
Do not get back into a vehicle
once you have begun refu-
elling. You can generate a
build-up of static electricity by
touching, rubbing or sliding
against any item or fabric capa-
ble of producing static electric-
ity. Static electricity discharge
can ignite fuel vapourscaus-
ing a fire. If you must re-enter
the vehicle, you should once
again eliminate potentially dan-
gerous static electricity dis-
charge by touching a metal
part of the vehicle, away from
the fuel filler neck, nozzle or
other petrol source, with your
bare hand.
(Continued)
(Continued)
When refuelling, always move
the shift lever to the P (Park)
position, set the parking
brake, and place the ignition
switch to the LOCK/OFF posi-
tion. Sparks produced by
electrical components related
to the engine can ignite fuel
vapours causing a fire.
When using an approved
portable fuel container, be sure
to place the container on the
ground prior to refuelling.Static
electricity discharge from the
container can ignite fuel
vapourscausing a fire. Once
refuelling has begun, contact
between your bare hand and
the vehicle should be main-
tained until the filling is com-
plete.
Use only approved portable
plastic fuel containers designed
to carry and store petrol.
(Continued)
Page 202 of 613
3-55
Convenient features of your vehicle
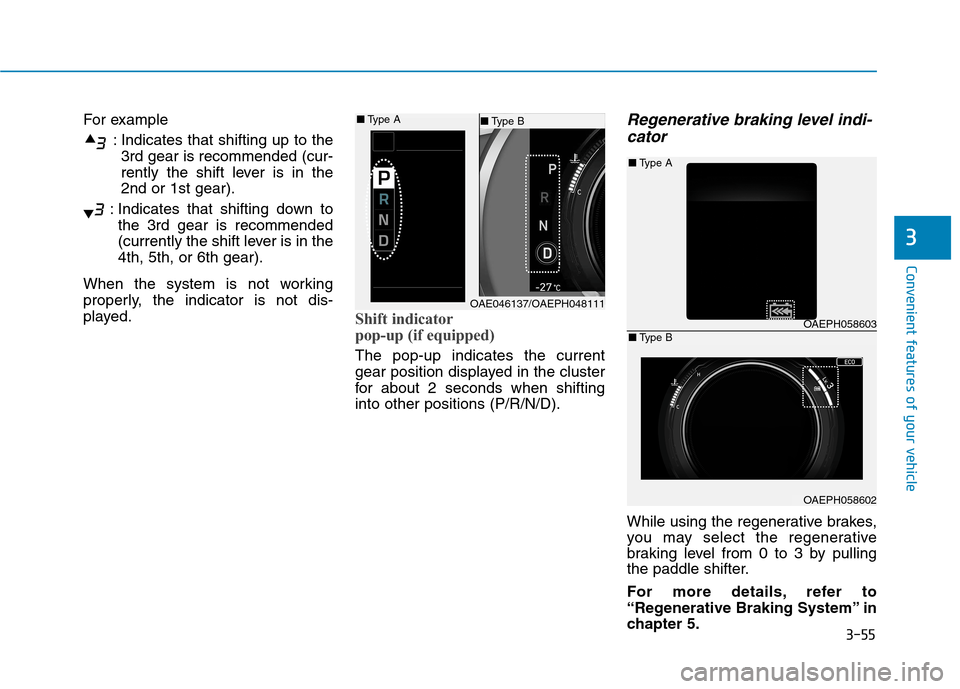
For example
: Indicates that shifting up to the
3rd gear is recommended (cur-
rently the shift lever is in the
2nd or 1st gear).
: Indicates that shifting down to
the 3rd gear is recommended
(currently the shift lever is in the
4th, 5th, or 6th gear).
When the system is not working
properly, the indicator is not dis-
played.
Shift indicator
pop-up (if equipped)
The pop-up indicates the current
gear position displayed in the cluster
for about 2 seconds when shifting
into other positions (P/R/N/D).
Regenerative braking level indi-
cator
While using the regenerative brakes,
you may select the regenerative
braking level from 0 to 3 by pulling
the paddle shifter.
For more details, refer to
“Regenerative Braking System” in
chapter 5.
3
OAE046137/OAEPH048111
■Type B ■Type A
OAEPH058603
OAEPH058602
■Type A
■Type B
Page 204 of 613
3-57
Convenient features of your vehicle
3
Seat Belt Warning Light
This warning light informs the driver
that the seat belt is not fastened.
For more information, refer to
“Seat Belts” in chapter 2.
Parking Brake & Brake
Fluid Warning Light
This warning light illuminates:
Once you turn the ignition switch or
the Engine Start/Stop button to the
ON position.
- It illuminates for approximately 3
seconds
- It remains on if the parking brake
is applied.
When the parking brake is applied.
When the brake fluid level in the
reservoir is low.
- If the warning light illuminates
with the parking brake released, it
the indicates the brake fluid level
in reservoir is low.
not operate.
If the brake fluid level in the reser-
voir is low:
1. Drive carefully to the nearest safe
location and stop your vehicle.
2. With the engine stopped, check the
brake fluid level immediately and
add fluid as required (For more
information, refer to “Brake
Fluid” in chapter 7). After adding
brake fluid, check all brake compo-
nents for fluid leaks. If a brake fluid
leak is found, or if the warning light
remains on, or if the brakes do not
operate properly, do not drive the
vehicle. We recommend that you
have the vehicle inspected by an
authorised HYUNDAI dealer.
Dual-diagonal braking system
Your vehicle is equipped with dual-
diagonal braking systems. This
means you still have braking on two
wheels even if one of the dual sys-
tems should fail.
With only one of the dual systems
working, more than normal pedal
travel and greater pedal pressure is
required to stop the vehicle.
(red colour)