Page 504 of 613
6-31
What to do in an emergency
6
5. Unscrew the valve cap from the
valve of the flat tyre and screw the
filling hose (3) of the sealant bottle
onto the valve.
6. Ensure that the compressor is
switched OFF.7. Plug the compressor power cord
(4) into the vehicle power outlet.
8. With the With the vehicle ON (
indicator ON), switch on the com-
pressor and let it run for approxi-
mately 5~7 minutes to fill the
sealant up to proper pressure.
(Refer to the Tyre and Wheels,
chapter 8).The inflation pressure
of the tyre after filling is unimpor-
tant and will be checked/corrected
later.
Be careful not to overinflate the
tyre and stay away from the tyre
when filling it.
Securely install the sealant fill-
ing hose to the valve. If not,
sealant may flow rearward, pos-
sibly clogging the filling hose.
CAUTION
OAE066027
OAE067040OAEPH047541R
Page 505 of 613

6-32
What to do in an emergency
9. Switch off the compressor.
10. Detach the hoses from the
sealant bottle connector and
from the tyre valve.
Return the Tyre Mobility Kit to its
storage location in the vehicle.
Distributing the sealant
11. Immediately drive approximately
7~10 km (4~6 miles or about 10
minutes) to evenly distribute the
sealant in the tyre.
Do not exceed a speed of 80 km/h
(50 mph). If possible, do not fall
below a speed of 20 km/h (12 mph).
Whilst driving, if you experience any
unusual vibration, ride disturbance or
noise, reduce your speed and drive
with caution until you can safely pull
off of the side of the road.
Call for road side service or towing.
Checking the tyre inflation pres-
sure
1. After driving approximately 7~10 km
(4~6 miles or about 10 minutes),
stop at a safe location.
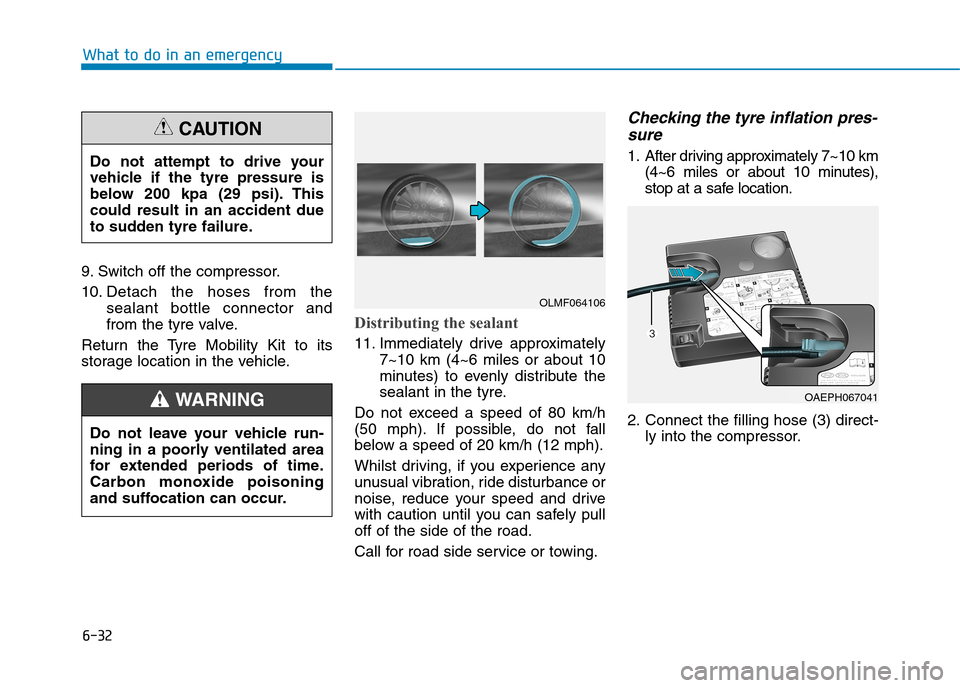
2. Connect the filling hose (3) direct-
ly into the compressor. Do not attempt to drive your
vehicle if the tyre pressure is
below 200 kpa (29 psi). This
could result in an accident due
to sudden tyre failure.
CAUTION
Do not leave your vehicle run-
ning in a poorly ventilated area
for extended periods of time.
Carbon monoxide poisoning
and suffocation can occur.
WARNING
OLMF064106
OAEPH067041
Page 506 of 613

6-33
What to do in an emergency
6
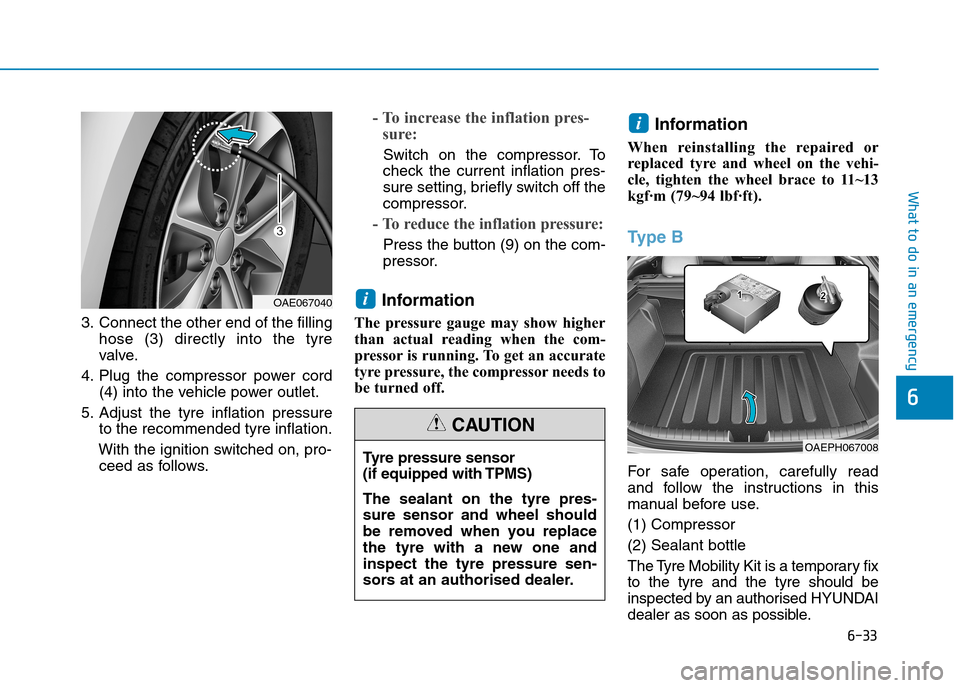
3. Connect the other end of the filling
hose (3) directly into the tyre
valve.
4. Plug the compressor power cord
(4) into the vehicle power outlet.
5. Adjust the tyre inflation pressure
to the recommended tyre inflation.
With the ignition switched on, pro-
ceed as follows.
- To increase the inflation pres-
sure:
Switch on the compressor. To
check the current inflation pres-
sure setting, briefly switch off the
compressor.
- To reduce the inflation pressure:
Press the button (9) on the com-
pressor.
Information
The pressure gauge may show higher
than actual reading when the com-
pressor is running. To get an accurate
tyre pressure, the compressor needs to
be turned off.
Information
When reinstalling the repaired or
replaced tyre and wheel on the vehi-
cle, tighten the wheel brace to 11~13
kgf·m (79~94 lbf·ft).
Ty p e B
For safe operation, carefully read
and follow the instructions in this
manual before use.
(1) Compressor
(2) Sealant bottle
The Tyre Mobility Kit is a temporary fix
to the tyre and the tyre should be
inspected by an authorised HYUNDAI
dealer as soon as possible.
i
i
Tyre pressure sensor
(if equipped with TPMS)
The sealant on the tyre pres-
sure sensor and wheel should
be removed when you replace
the tyre with a new one and
inspect the tyre pressure sen-
sors at an authorised dealer.
CAUTION
OAEPH067008
OAE067040
Page 509 of 613
6-36
1. Speed restriction label
2. Sealant bottle and label with
speed restriction
3. Filling hose from sealant bottle to
wheel
4. Connectors and cable for power
outlet direct connection
5. Holder for the sealant bottle
6. Compressor
7. ON/OFF switch
8. Pressure gauge for displaying the
tyre inflation pressure
9. Button for reducing tyre inflation
pressure
Connectors, cable and connection
hose are stored in the compressor
housing.
Strictly follow the specified sequence,
otherwise the sealant may escape
under high pressure.
What to do in an emergency
Components of the Tyre Mobility Kit
ODE067044
Page 511 of 613
6-38
4. Unscrew the valve cap from the
valve of the defective and screw
the filling hose (3) of the sealant
bottle onto the valve.5. Plug the compressor power cord
(4) into the vehicle power outlet.
6. With the With the vehicle ON (
indicator ON), switch on the com-
pressor and let it run for approxi-
mately 5~7 minutes to fill the
sealant up to proper pressure.
(Refer to the Tyre and Wheels,
chapter 8).The inflation pressure
of the tyre after filling is unimpor-
tant and will be checked/corrected
later.
Be careful not to overinflate the
tyre and stay away from the tyre
when filling it.
What to do in an emergency
Securely install the sealant fill-
ing hose to the valve. If not,
sealant may flow rearward, pos-
sibly clogging the filling hose.
CAUTION
OAE066027
OAEPH047541ROAE067040
Page 512 of 613

6-39
What to do in an emergency
7. Switch off the compressor.
8. Detach the hoses from the sealant
bottle connector and from the tyre
valve.
Return the Tyre Mobility Kit to its
storage location in the vehicle.
Distributing the sealant
9. Immediately drive approximately
7~10 km (4~6 miles or about 10
minutes) to evenly distribute the
sealant in the tyre.
Do not exceed a speed of 80 km/h
(50 mph). If possible, do not fall
below a speed of 20 km/h (12 mph).
Whilst driving, if you experience any
unusual vibration, ride disturbance or
noise, reduce your speed and drive
with caution until you can safely pull
off of the side of the road.
Call for road side service or towing.
Checking the tyre inflation pres-
sure
1. After driving approximately 7~10 km
(4~6 miles or about 10 minutes),
stop at a safe location.
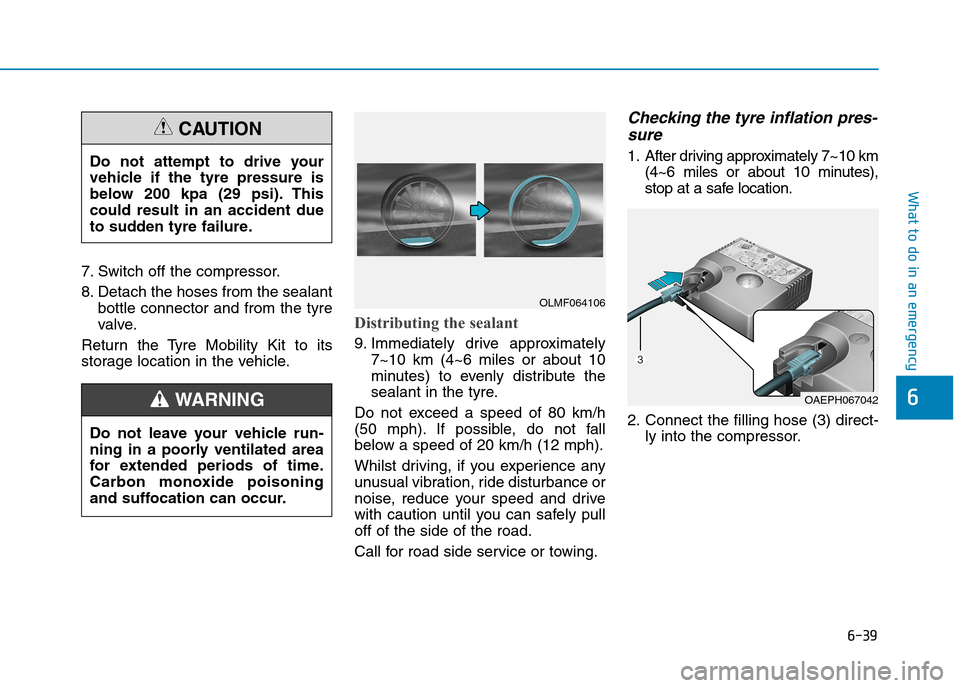
2. Connect the filling hose (3) direct-
ly into the compressor.
6
Do not attempt to drive your
vehicle if the tyre pressure is
below 200 kpa (29 psi). This
could result in an accident due
to sudden tyre failure.
CAUTION
Do not leave your vehicle run-
ning in a poorly ventilated area
for extended periods of time.
Carbon monoxide poisoning
and suffocation can occur.
WARNING
OLMF064106
OAEPH067042
Page 513 of 613

6-40
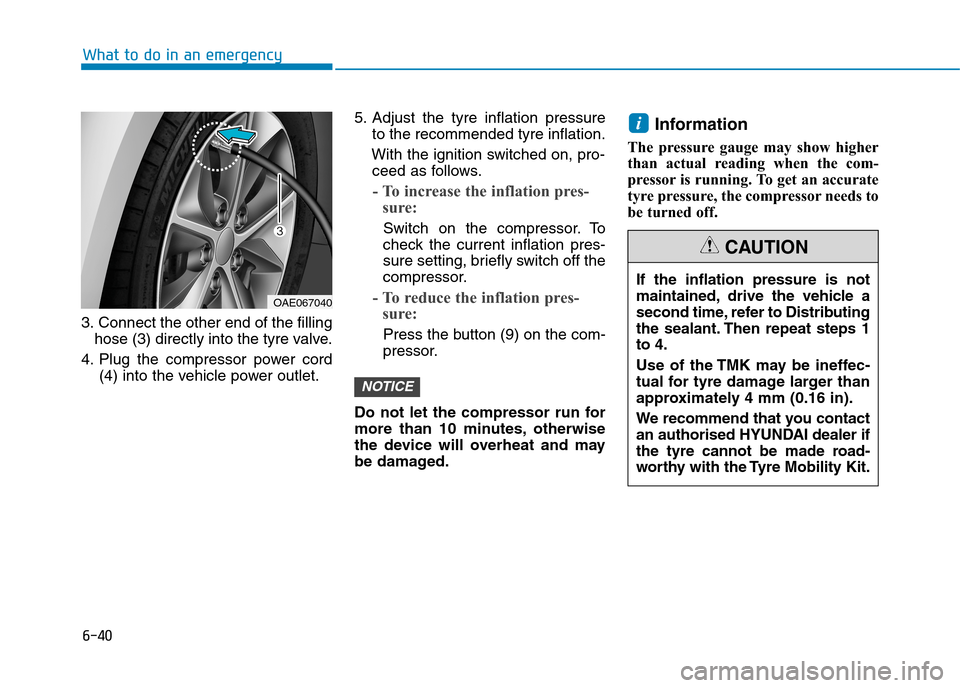
3. Connect the other end of the filling
hose (3) directly into the tyre valve.
4. Plug the compressor power cord
(4) into the vehicle power outlet.5. Adjust the tyre inflation pressure
to the recommended tyre inflation.
With the ignition switched on, pro-
ceed as follows.
- To increase the inflation pres-
sure:
Switch on the compressor. To
check the current inflation pres-
sure setting, briefly switch off the
compressor.
- To reduce the inflation pres-
sure:
Press the button (9) on the com-
pressor.
Do not let the compressor run for
more than 10 minutes, otherwise
the device will overheat and may
be damaged.
Information
The pressure gauge may show higher
than actual reading when the com-
pressor is running. To get an accurate
tyre pressure, the compressor needs to
be turned off.
i
NOTICE
What to do in an emergency
If the inflation pressure is not
maintained, drive the vehicle a
second time, refer to Distributing
the sealant. Then repeat steps 1
to 4.
Use of the TMK may be ineffec-
tual for tyre damage larger than
approximately 4 mm (0.16 in).
We recommend that you contact
an authorised HYUNDAI dealer if
the tyre cannot be made road-
worthy with the Tyre Mobility Kit.
CAUTION
OAE067040
Page 514 of 613
6-41
What to do in an emergency
Information
When reinstalling the repaired or
replaced tyre and wheel on the vehi-
cle, tighten the wheel brace to 11~13
kgf·m (79~94 lbf·ft).
i
6
Tyre pressure sensor
(if equipped with TPMS)
The sealant on the tyre pres-
sure sensor and wheel should
be removed when you replace
the tyre with a new one and
inspect the tyre pressure sen-
sors at an authorised dealer.
CAUTION
The tyre inflation pressure must
be at least 220 kPa (32 psi). If it
is not, do not continue driving.
Call for road side service or tow-
ing.
WARNING