2020 Hyundai Ioniq Electric drive mode
[x] Cancel search: drive modePage 14 of 561
I IN
NS
ST
TR
RU
UM
ME
EN
NT
T
P
PA
AN
NE
EL
L
O
OV
VE
ER
RV
VI
IE
EW
W
The actual shape may differ from the illustration.
1-5
Your vehicle at a glance
1
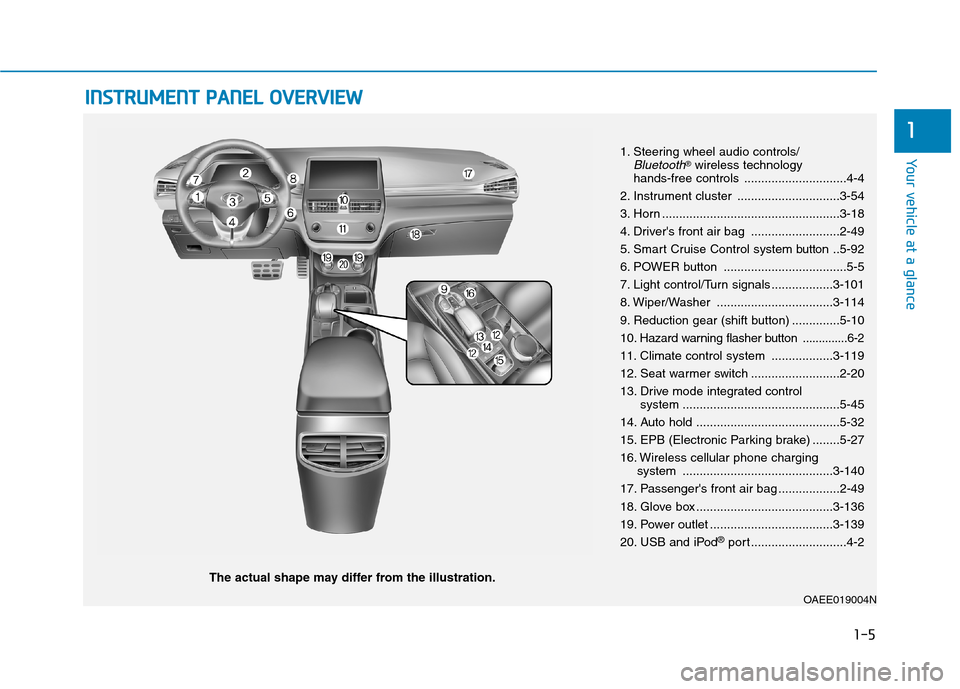
1. Steering wheel audio controls/Bluetooth®wireless technology
hands-free controls ..............................4-4
2. Instrument cluster ..............................3-54
3. Horn ....................................................3-18
4. Driver's front air bag ..........................2-49
5. Smart Cruise Control system
button..5-92
6. POWER button ....................................5-5
7. Light control/Turn signals ..................3-101
8. Wiper/Washer ..................................3-114
9. Reduction gear (shift button) ..............5-10
10
. Hazard warning flasher button ..............6-2
11. Climate control system ..................3-119
12. Seat warmer switch ..........................2-20
13. Drive mode integrated control
system ..............................................5-45
14. Auto hold ..........................................5-32
15. EPB (Electronic Parking brake) ........5-27
16. Wireless cellular phone charging
system ............................................3-140
17. Passenger's front air bag ..................2-49
18. Glove box ........................................3-136
19. Power outlet ....................................3-139
20. USB and iPod
®port ............................4-2
OAEE019004N
Page 36 of 561
2-21
Safety system of your vehicle
2
To prevent damage to the seat
warmers and seats:
Never use a solvent such as
paint thinner, benzene, alcohol
or gasoline to clean the seats.
Do not place heavy or sharp
objects on seats equipped with
seat warmers.
Do not change the seat cover. It
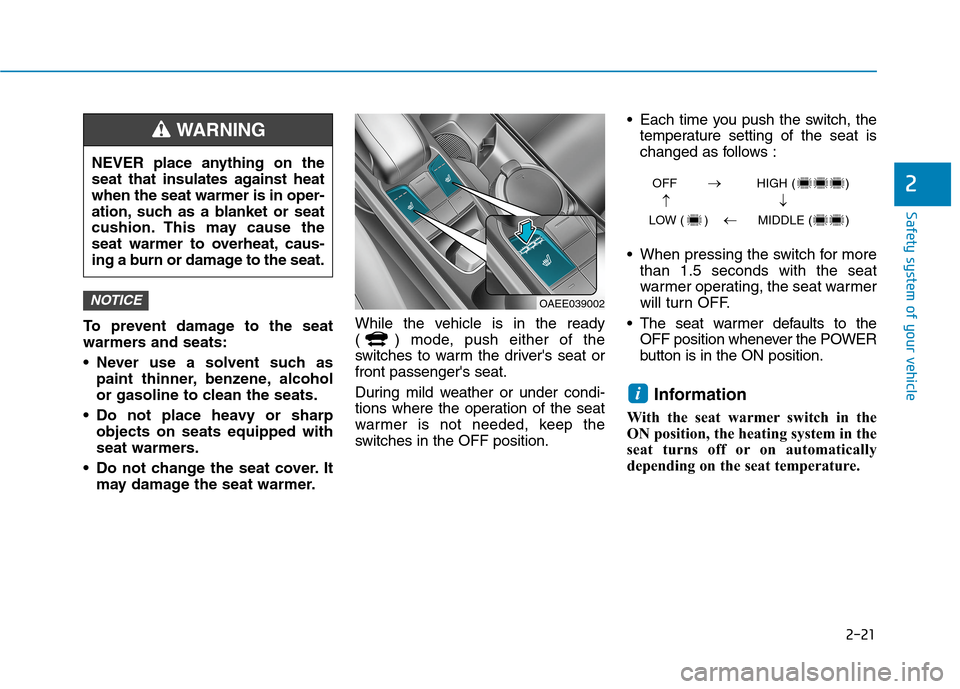
may damage the seat warmer.While the vehicle is in the ready
( ) mode, push either of the
switches to warm the driver's seat or
front passenger's seat.
During mild weather or under condi-
tions where the operation of the seat
warmer is not needed, keep the
switches in the OFF position. Each time you push the switch, the
temperature setting of the seat is
changed as follows :
When pressing the switch for more
than 1.5 seconds with the seat
warmer operating, the seat warmer
will turn OFF.
The seat warmer defaults to the
OFF position whenever the POWER
button is in the ON position.
Information
With the seat warmer switch in the
ON position, the heating system in the
seat turns off or on automatically
depending on the seat temperature.
i
NOTICE
NEVER place anything on the
seat that insulates against heat
when the seat warmer is in oper-
ation, such as a blanket or seat
cushion. This may cause the
seat warmer to overheat, caus-
ing a burn or damage to the seat.
WARNING
OAEE039002
OFF HIGH ( )
LOW ( ) MIDDLE ( )
→→
→
→
Page 43 of 561
2-28
Safety system of your vehicle
Rear Seat Belt – Passenger's 3-
point system with convertible
locking retractor
This type of seat belt combines the
features of both an emergency locking
retractor seat belt and an automatic
locking retractor seat belt. Convertible
retractor type seat belts are installed in
the rear seat positions to help accom-
modate the installation of child
restraint systems. Although a convert-
ible retractor is also installed in the
front passenger seat position, NEVER
place any infant/child restraint system
in the front seat of the vehicle.
To fasten your seat belt:
Pull the seat belt out of the retractor
and insert the metal tab into the buck-
le. There will be an audible "click"
when the tab locks into the buckle.
When not securing a child restraint,
the seat belt operates in the same way
as the driver's seat belt (Emergency
Locking Retractor Type). It automati-
cally adjusts to the proper length only
after the lap belt portion of the seat
belt is adjusted manually so that it fits
snugly across your hips.
When the seat belt is fully extended
from the retractor to allow the installa-
tion of a child restraint system, the
seat belt operation changes to allow
the belt to retract, but not to extend
(Automatic Locking Retractor Type).
Refer to the "Using a Child Restraint
System" section in this chapter.Although the seat belt retractor
provides the same level of protec-
tion for seated passengers in
either emergency or automatic
locking modes, the emergency
locking mode allows seated pas-
sengers to move freely in their
seat while keeping some tension
on the belt. During a collision or
sudden stop, the retractor auto-
matically locks the belt to help
restrain your body.
To deactivate the automatic lock-
ing mode, unbuckle the seat belt
and allow the belt to fully retract.
NOTICE
Page 64 of 561
2-49
Safety system of your vehicle
2
Where Are the Air Bags?
Driver's and passenger's front
air bags
Your vehicle is equipped with a
Advanced Supplemental Restraint
System (SRS) and lap/shoulder belts
at both the driver and passenger
seating positions.
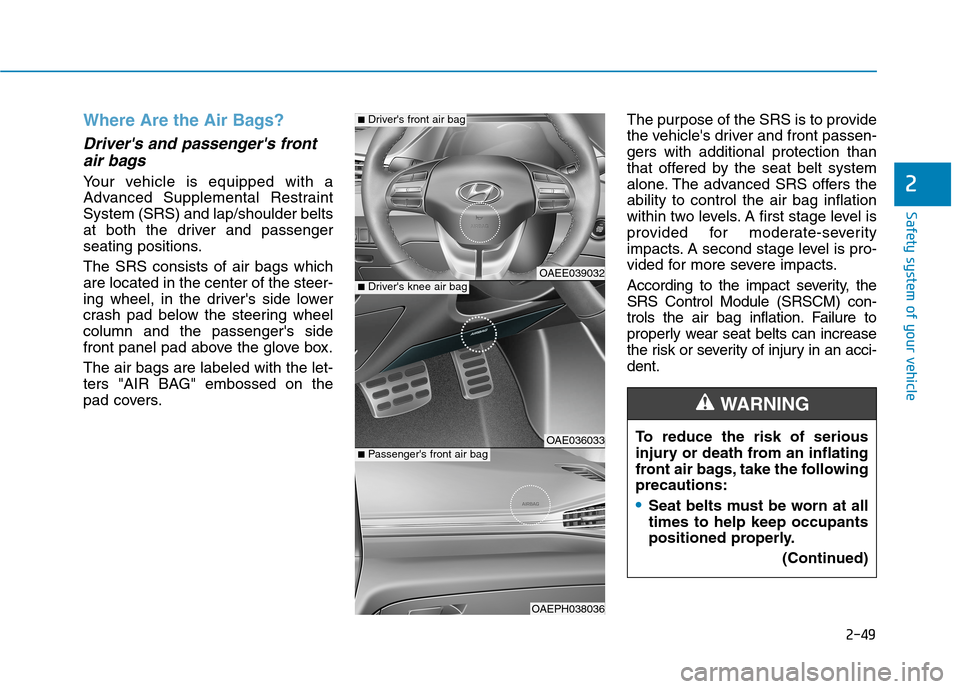
The SRS consists of air bags which
are located in the center of the steer-
ing wheel, in the driver's side lower
crash pad below the steering wheel
column and the passenger's side
front panel pad above the glove box.
The air bags are labeled with the let-
ters "AIR BAG" embossed on the
pad covers.The purpose of the SRS is to provide
the vehicle's driver and front passen-
gers with additional protection than
that offered by the seat belt system
alone. The advanced SRS offers the
ability to control the air bag inflation
within two levels. A first stage level is
provided for moderate-severity
impacts. A second stage level is pro-
vided for more severe impacts.
According to the impact severity, the
SRS Control Module (SRSCM) con-
trols the air bag inflation. Failure to
properly wear seat belts can increase
the risk or severity of injury in an acci-
dent.
OAEE039032
OAE036033
OAEPH038036
■Driver's knee air bag
■Driver's front air bag
■Passenger's front air bag
To reduce the risk of serious
injury or death from an inflating
front air bags, take the following
precautions:
Seat belts must be worn at all
times to help keep occupants
positioned properly.
(Continued)
WARNING
Page 69 of 561

2-54
Safety system of your vehicle
During a frontal collision, sensors will
detect the vehicle's deceleration. If
the rate of deceleration is high
enough, the control unit will inflate
the front air bags.
The front air bags help protect the
driver and front passenger by
responding to frontal impacts in
which seat belts alone cannot pro-
vide adequate restraint. When need-
ed, the side air bags help provide
protection in the event of a side
impact or rollover.
Air bags are activated (able to
inflate if necessary) only when the
POWER button is in the ON posi-
tion.
Air bags inflate in the event of cer-
tain frontal or side collisions to help
protect the occupants from serious
physical injury.
Generally, air bags are designed to
inflate based upon the severity of a
collision, its direction, etc. These
two factors determine whether the
sensors produce an electronic
deployment/inflation signal. Air bag deployment depends on a
number of factors including vehicle
speed, angles of impact and the
density and stiffness of the vehicles
or objects which your vehicle
impacts during a collision. The
determining factors are not limited
to those mentioned above.
The front air bags will completely
inflate and deflate in an instant. It is
virtually impossible for you to see
the air bags inflate during an acci-
dent. It is much more likely that you
will simply see the deflated air bags
hanging out of their storage com-
partments after the collision.
In addition to inflating in certain
side collisions, vehicles equipped
with a rollover sensor, side and
curtain air bags will inflate if the
sensing system detects a rollover.
When a rollover is detected, side
and curtain air bags will remain
inflated longer to help provide pro-
tection from ejection, especially
when used in conjunction with the
seat belts. If your SRS malfunctions, the air
bag may not inflate properly dur-
ing an accident increasing the
risk of serious injury or death.
If any of the following condi-
tions occur, your SRS is mal-
functioning:
The light does not turn on for
approximately six seconds
when the POWER button is in
the ON position.
The light stays on after illumi-
nating for approximately six
seconds.
The light comes on while the
vehicle is in motion.
The light blinks when the
vehicle is in the ready ( )
mode.
Have an authorized HYUNDAI
dealer inspect the SRS as soon
as possible if any of these con-
ditions occur.
WARNING
Page 86 of 561
Convenient features of your vehicle
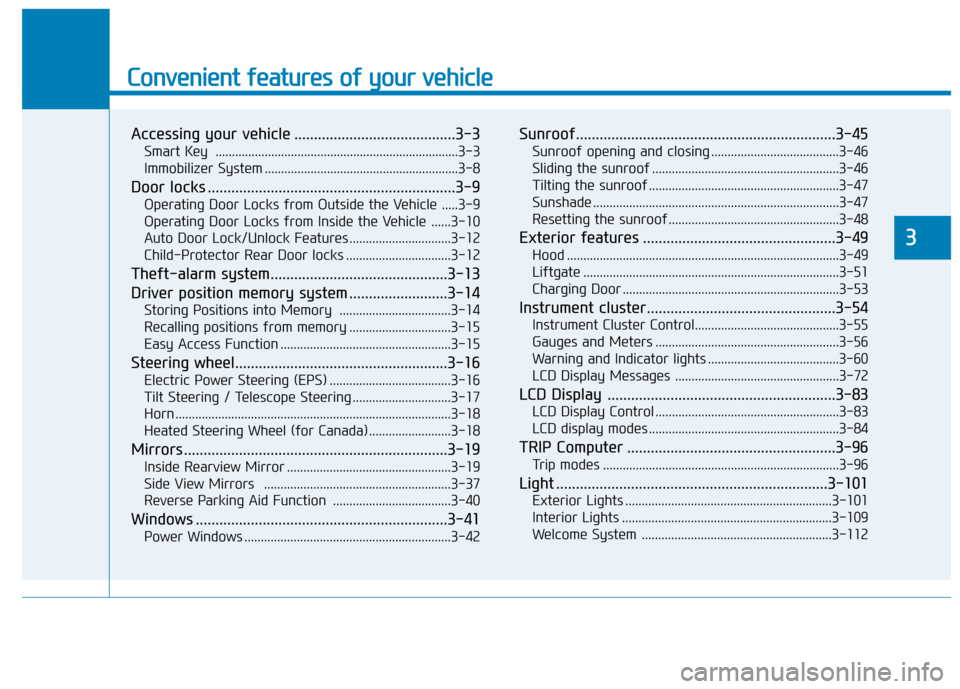
Accessing your vehicle .........................................3-3
Smart Key ..........................................................................3-3
Immobilizer System ...........................................................3-8
Door locks ...............................................................3-9
Operating Door Locks from Outside the Vehicle .....3-9
Operating Door Locks from Inside the Vehicle ......3-10
Auto Door Lock/Unlock Features ...............................3-12
Child-Protector Rear Door locks ................................3-12
Theft-alarm system.............................................3-13
Driver position memory system .........................3-14
Storing Positions into Memory ..................................3-14
Recalling positions from memory ...............................3-15
Easy Access Function ....................................................3-15
Steering wheel......................................................3-16
Electric Power Steering (EPS) .....................................3-16
Tilt Steering / Telescope Steering ..............................3-17
Horn ....................................................................................3-18
Heated Steering Wheel (for Canada) .........................3-18
Mirrors ...................................................................3-19
Inside Rearview Mirror ..................................................3-19
Side View Mirrors .........................................................3-37
Reverse Parking Aid Function ....................................3-40
Windows ................................................................3-41
Power Windows ...............................................................3-42
Sunroof..................................................................3-45
Sunroof opening and closing .......................................3-46
Sliding the sunroof .........................................................3-46
Tilting the sunroof ..........................................................3-47
Sunshade ...........................................................................3-47
Resetting the sunroof ....................................................3-48
Exterior features .................................................3-49
Hood ...................................................................................3-49
Liftgate ..............................................................................3-51
Charging Door ..................................................................3-53
Instrument cluster................................................3-54
Instrument Cluster Control............................................3-55
Gauges and Meters ........................................................3-56
Warning and Indicator lights ........................................3-60
LCD Display Messages ..................................................3-72
LCD Display ..........................................................3-83
LCD Display Control ........................................................3-83
LCD display modes ..........................................................3-84
TRIP Computer .....................................................3-96
Trip modes ........................................................................3-96
Light .....................................................................3-101
Exterior Lights ...............................................................3-101
Interior Lights ................................................................3-109
Welcome System ..........................................................3-112
3
Page 89 of 561
3-4
Convenient features of your vehicle
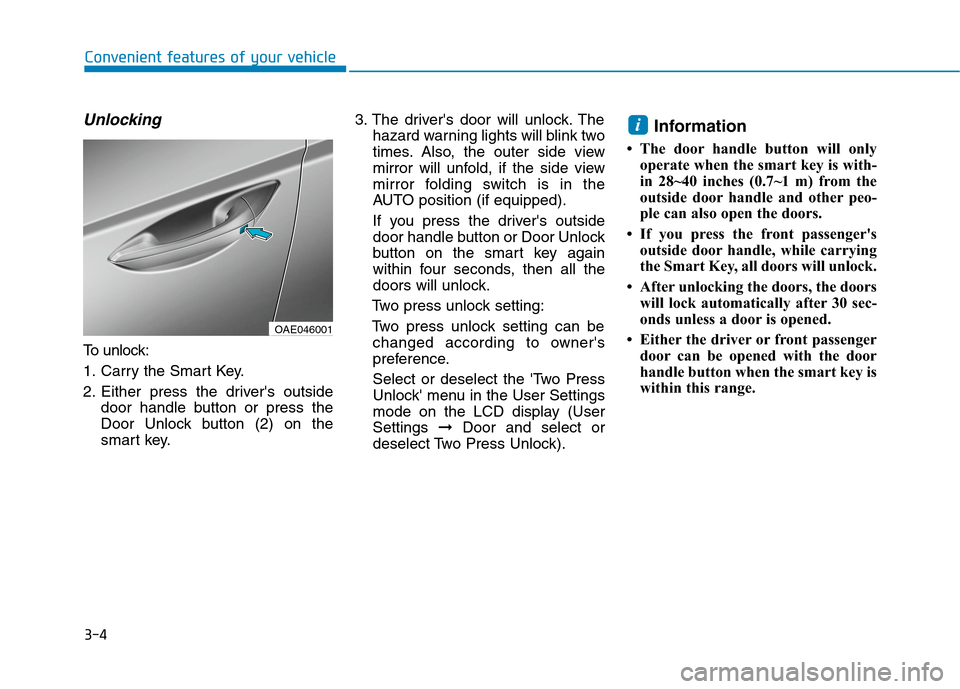
Unlocking
To unlock:
1. Carry the Smart Key.
2. Either press the driver's outside
door handle button or press the
Door Unlock button (2) on the
smart key.3. The driver's door will unlock. The
hazard warning lights will blink two
times. Also, the outer side view
mirror will unfold, if the side view
mirror folding switch is in the
AUTO position (if equipped).
If you press the driver's outside
door handle button or Door Unlock
button on the smart key again
within four seconds, then all the
doors will unlock.
Two press unlock setting:
Two press unlock setting can be
changed according to owner's
preference.
Select or deselect the 'Two Press
Unlock' menu in the User Settings
mode on the LCD display (User
Settings ➞Door and select or
deselect Two Press Unlock).
Information
• The door handle button will only
operate when the smart key is with-
in 28~40 inches (0.7~1 m) from the
outside door handle and other peo-
ple can also open the doors.
• If you press the front passenger's
outside door handle, while carrying
the Smart Key, all doors will unlock.
• After unlocking the doors, the doors
will lock automatically after 30 sec-
onds unless a door is opened.
• Either the driver or front passenger
door can be opened with the door
handle button when the smart key is
within this range.
i
OAE046001
Page 100 of 561
3-15
Convenient features of your vehicle
3
Recalling positions from mem-
ory
1. Shift to P (Park) while the POWER
button is in the ON position.
2. Press the desired memory button
(1 or 2). The system will beep
once, and then the driver’s seat
position, side view mirror position
and instrument panel illumination
intensity will automatically adjust
to the stored positions.
3. "Driver 1(or 2) settings is applied"
will appear on the LCD display. While recalling the "1" memory
position, pressing the SET or 1
button temporarily stops the
adjustment of the recalled memo-
ry position. Pressing the 2 button
recalls the "2" memory position.
While recalling the "2" memory
position, pressing the SET or 2
button temporarily stops the
adjustment of the recalled memo-
ry position. Pressing the 1 button
recalls the "1" memory position.
While recalling the stored posi-
tions, pressing one of the con-
trol buttons for the driver’s seat,
side view mirror or instrument
panel illumination will cause the
movement of that component to
stop and move in the direction
that the control button is
pressed.
Easy Access Function
When exiting the vehicle the driver’s
seat will move rearward when the
vehicle is turned off, and the gear in
P (Park).
When entering the vehicle the dri-
ver's seat will move forward when the
smart key is detected with the
POWER button in the ACC/ON/
START position.
You can activate or deactivate the
Easy Access Function from the User
Settings mode on the LCD display.
For more information, refer to the
"LCD Display" section in this
chapter.
NOTICE