2020 Hyundai Ioniq Electric ECU
[x] Cancel search: ECUPage 108 of 561
3-23
Convenient features of your vehicle
3
To adjust the Zone setting:
1.Determine the desired Zone
Number based upon your current
location on the Zone Map.
2.Press and hold the Control Button
for up to 6 seconds, the current
Zone Number will appear on the
display.
3.Release and press the Control
Button and then hold the Control
Button again will cause the num-
bers to increment (Note: they will
repeat …13, 14, 15, 1, 2, …).
Releasing the button when the
desired Zone Number appears on
the display will set the new Zone.
4.Within about 5 seconds the com-
pass will start displaying a com-
pass heading again.
There are some conditions that can
cause changes to the vehicle mag-
nets, such as installing a ski rack or
a CB antenna. Body repair work on
the vehicle can also cause changes
to the vehicle's magnetic field. In
these situations, the compass will
need to be re-calibrated to correct
these changes.If you need to recalibrate the com-
pass:
1.Press and hold the Control Button
for more than 6 seconds. When the
compass memory is cleared, a "C"
will appear in the display.
2.Drive the vehicle in 2 complete cir-
cles at less than 5 mph (8 km/h).Integrated HomeLink®Wireless
Control System
The HomeLink®Wireless Control
System can replace up to three
hand-held radio-frequency (RF)
transmitters with a single built-in
device. This innovative feature will
learn the radio frequency codes of
most current transmitters to operate
devices such as gate operators,
garage door openers, entry door
locks, security systems, even home
lighting. Both standard and rolling
code-equipped transmitters can be
programmed by following the out-
lined procedures.
Additional HomeLink
®information
can be found at: www.homelink.com,
www.youtube.com/HomeLinkGentex
or by calling 1-800-355-3515.
Retain the original transmitter of the
RF device you are programming for
use in other vehicles as well as for
future HomeLink
®programming. It is
also suggested that upon the sale of
the vehicle, the programmed
HomeLink
®buttons be erased for
security purposes.
Page 110 of 561
3-25
Convenient features of your vehicle
3
2. Press and hold the button you
wish to program for approximately
15-25 seconds until the LED flash-
es in Orange for several times.
3. Hold the Garage Door Opener
Original Transmitter (OT) near the
HomeLink Mirror.
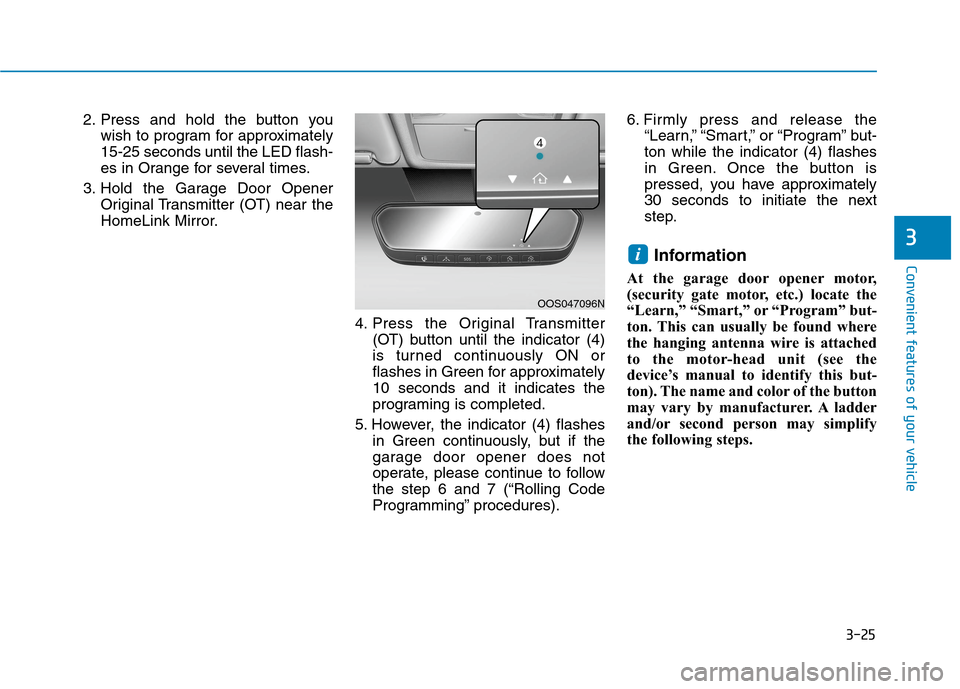
4. Press the Original Transmitter
(OT) button until the indicator (4)
is turned continuously ON or
flashes in Green for approximately
10 seconds and it indicates the
programing is completed.
5. However, the indicator (4) flashes
in Green continuously, but if the
garage door opener does not
operate, please continue to follow
the step 6 and 7 (“Rolling Code
Programming” procedures).6. Firmly press and release the
“Learn,” “Smart,” or “Program” but-
ton while the indicator (4) flashes
in Green. Once the button is
pressed, you have approximately
30 seconds to initiate the next
step.
Information
At the garage door opener motor,
(security gate motor, etc.) locate the
“Learn,” “Smart,” or “Program” but-
ton. This can usually be found where
the hanging antenna wire is attached
to the motor-head unit (see the
device’s manual to identify this but-
ton). The name and color of the button
may vary by manufacturer. A ladder
and/or second person may simplify
the following steps.
i
OOS047096N
Page 118 of 561
3-33
Convenient features of your vehicle
3
There are some conditions that can
cause changes to the vehicle mag-
nets, such as installing a ski rack or
a CB antenna. Body repair work on
the vehicle can also cause changes
to the vehicle’s magnetic field. In
these situations, the compass will
need to be re-calibrated to quickly
correct these changes.
If you need to recalibrate the com-
pass:
1. Press and hold the button for
more than 6 seconds. When the
compass memory is cleared a "C"
will appear in the display.
2. Drive the vehicle in 2 complete cir-
cles at less than 5 mph (8 km/h).Integrated HomeLink®Wireless
Control System
The HomeLink®Wireless Control
System can replace up to three hand-
held radio-frequency (RF) transmit-
ters with a single built-in device. This
innovative feature will learn the radio
frequency codes of most current
transmitters to operate devices such
as gate operators, garage door open-
ers, entry door locks, security sys-
tems, even home lighting. Both stan-
dard and rolling code-equipped trans-
mitters can be programmed by fol-
lowing the outlined procedures.
Additional HomeLink
®information
can be found at: www.homelink.com
or by calling 1-800-355-3515.
Retain the original transmitter of the
RF device you are programming for
use in other vehicles as well as for
future HomeLink
®programming. It is
also suggested that upon the sale of
the vehicle, the programmed
HomeLink
®buttons be erased for
security purposes.
Before programming HomeLink®
to a garage door opener or gate
operator, make sure people and
objects are out of the way of the
device to prevent potential harm
or damage. Do not use the
HomeLink
®with any garage door
opener that lacks the safety stop
and reverse features required by
U.S. federal safety standards (this
includes any garage door opener
model manufactured before April
1, 1982). A garage door that can-
not detect an object - signaling
the door to stop and reverse -
does not meet current U.S. feder-
al safety standards. Using a
garage door opener without
these features increases the risk
of serious injury or death.
WARNING
Page 121 of 561
3-36
Gate operator & Canadian program-
ming
During programming, your handheld
transmitter may automatically stop
transmitting. Continue to press the
Integrated HomeLink
®Wireless
Control System button (note
steps 2 through 4 in the Standard
Programming portion of this docu-
ment) while you press and re-press
("cycle") your handheld transmitter
every two seconds until the frequen-
cy signal has been learned. The indi-
cator light will flash slowly and then
rapidly after several seconds upon
successful training.
Operating HomeLink®
To operate, simply press and release
the programmed HomeLink®button.
Activation will now occur for the
trained device (i.e. garage door
opener, gate operator, security sys-
tem, entry door lock, home/office
lighting, etc.). For convenience, the
hand-held transmitter of the device
may also be used at any time.
Reprogramming a single
HomeLink®button
To program a new device to a previ-
ously trained HomeLink®button, fol-
low these steps:
1. Press and hold the desired
HomeLink
®button. Do NOT
release until step 4 has been com-
pleted.
2. When the indicator light begins to
flash slowly (after 20 seconds),
position the handheld transmitter 1
to 3 inches away from the
HomeLink
®surface.
3. Press and hold the handheld
transmitter button. The HomeLink
®
indicator light will flash, first slowly
and then rapidly.
4. When the indicator light begins to
flash rapidly, release both buttons.
5. Press and hold the just-trained
HomeLink
®button and observe
the red Status Indicator LED. If the
indicator light stays on constantly,
programming is complete and
your new device should activate.
Erasing HomeLink®buttons
Individual buttons cannot be erased.
However, to erase all three pro-
grammed buttons:
1. Press and hold the two outer
HomeLink
®buttons until the indi-
cator light begins to flash-after 20
seconds.
2. Release both buttons. Do not hold
for longer than 30 seconds.
The Integrated HomeLink
®Wireless
Control System is now in the training
(learn) mode and can be pro-
grammed at any time following the
appropriate steps in the Programming
chapters above.
NVS
®is a registered trademark and
Z-Nav™ is a trademark of the Gentex
Corporation, Zeeland, Michigan.
HomeLink
®is a registered trademark
owned by Johnson Controls,
Incorporated, Milwaukee, Wisconsin.
FCC ID: NZLZTVHL3
IC: 4112A-ZTVHL3
Convenient features of your vehicle
Page 135 of 561
3-50
Convenient features of your vehicle
Closing the hood
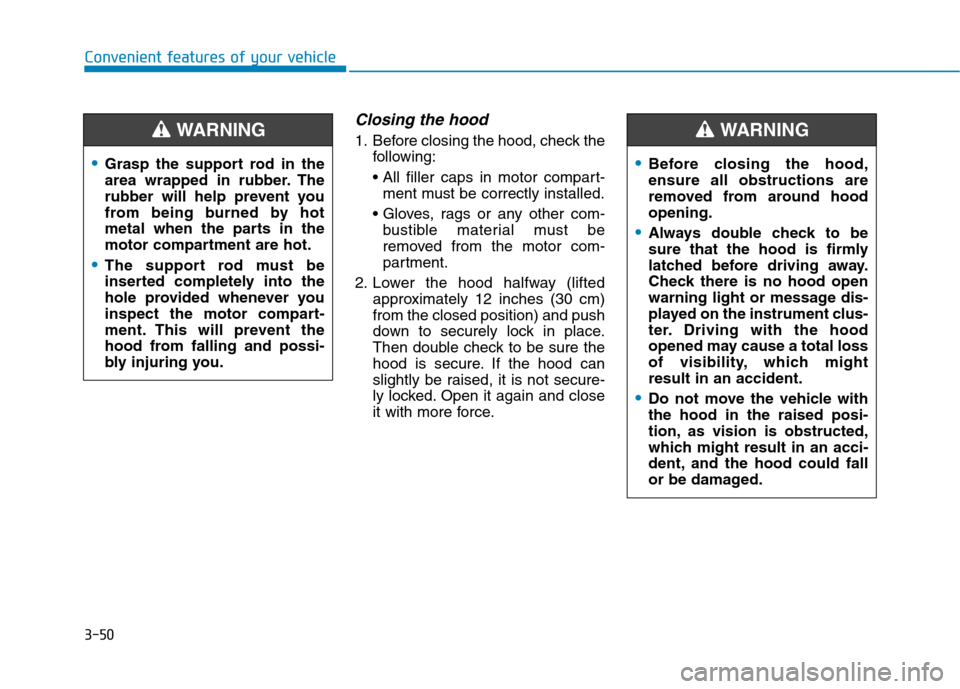
1. Before closing the hood, check the
following:
ment must be correctly installed.
bustible material must be
removed from the motor com-
partment.
2. Lower the hood halfway (lifted
approximately 12 inches (30 cm)
from the closed position) and push
down to securely lock in place.
Then double check to be sure the
hood is secure. If the hood can
slightly be raised, it is not secure-
ly locked. Open it again and close
it with more force.
Before closing the hood,
ensure all obstructions are
removed from around hood
opening.
Always double check to be
sure that the hood is firmly
latched before driving away.
Check there is no hood open
warning light or message dis-
played on the instrument clus-
ter. Driving with the hood
opened may cause a total loss
of visibility, which might
result in an accident.
Do not move the vehicle with
the hood in the raised posi-
tion, as vision is obstructed,
which might result in an acci-
dent, and the hood could fall
or be damaged.
WARNING
Grasp the support rod in the
area wrapped in rubber. The
rubber will help prevent you
from being burned by hot
metal when the parts in the
motor compartment are hot.
The support rod must be
inserted completely into the
hole provided whenever you
inspect the motor compart-
ment. This will prevent the
hood from falling and possi-
bly injuring you.
WARNING
Page 136 of 561
3-51
Convenient features of your vehicle
3
Liftgate
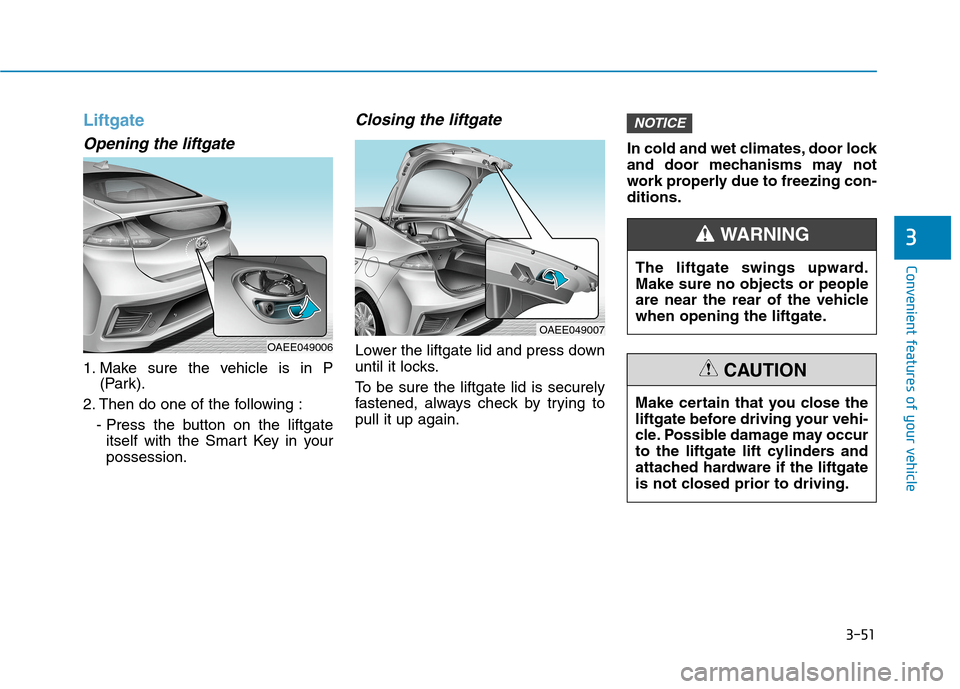
Opening the liftgate
1. Make sure the vehicle is in P
(Park).
2. Then do one of the following :
- Press the button on the liftgate
itself with the Smart Key in your
possession.
Closing the liftgate
Lower the liftgate lid and press down
until it locks.
To be sure the liftgate lid is securely
fastened, always check by trying to
pull it up again.In cold and wet climates, door lock
and door mechanisms may not
work properly due to freezing con-
ditions.
NOTICE
OAEE049007
The liftgate swings upward.
Make sure no objects or people
are near the rear of the vehicle
when opening the liftgate.
WARNING
Make certain that you close the
liftgate before driving your vehi-
cle. Possible damage may occur
to the liftgate lift cylinders and
attached hardware if the liftgate
is not closed prior to driving.
CAUTION
OAEE049006
Page 138 of 561
3-53
Convenient features of your vehicle
3
Charging Door
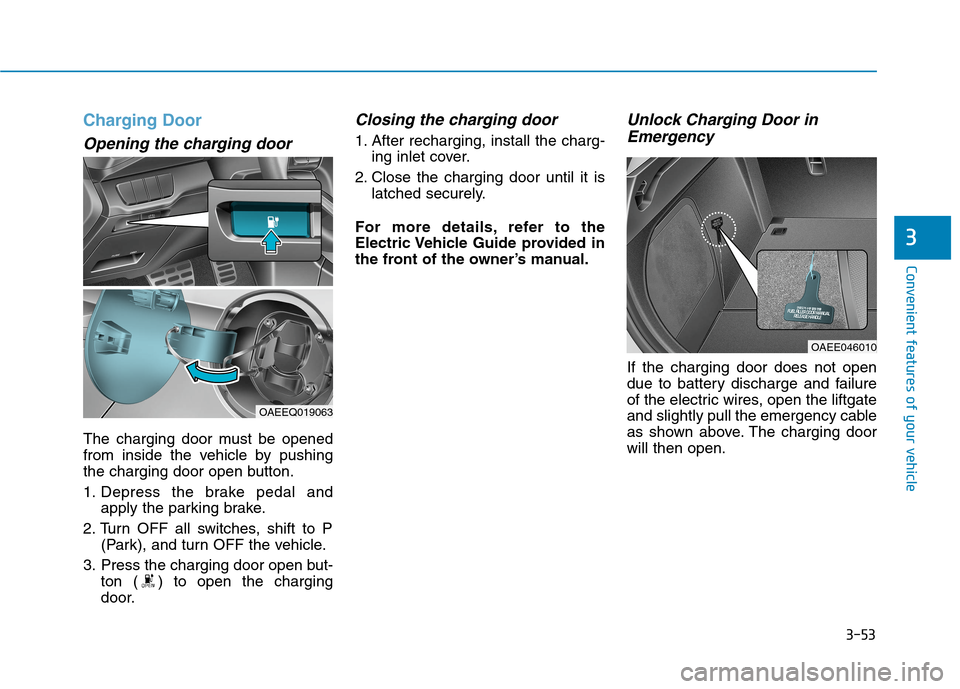
Opening the charging door
The charging door must be opened
from inside the vehicle by pushing
the charging door open button.
1. Depress the brake pedal and
apply the parking brake.
2. Turn OFF all switches, shift to P
(Park), and turn OFF the vehicle.
3. Press the charging door open but-
ton ( ) to open the charging
door.
Closing the charging door
1. After recharging, install the charg-
ing inlet cover.
2. Close the charging door until it is
latched securely.
For more details, refer to the
Electric Vehicle Guide provided in
the front of the owner’s manual.
Unlock Charging Door in
Emergency
If the charging door does not open
due to battery discharge and failure
of the electric wires, open the liftgate
and slightly pull the emergency cable
as shown above. The charging door
will then open.
OAEE046010
OAEEQ019063
Page 196 of 561
3-111
Convenient features of your vehicle
3
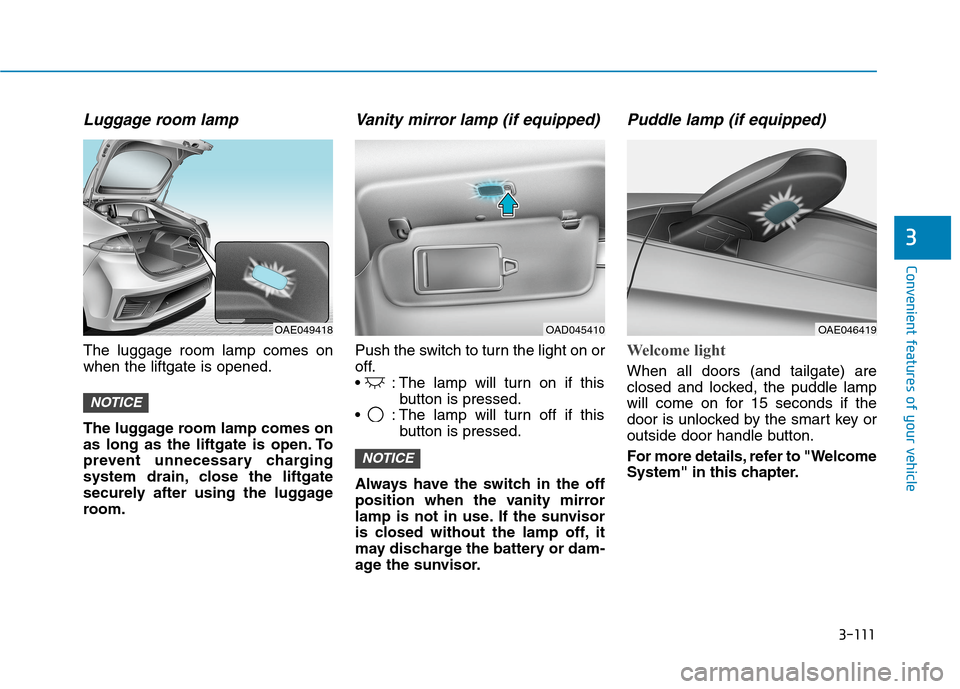
Luggage room lamp
The luggage room lamp comes on
when the liftgate is opened.
The luggage room lamp comes on
as long as the liftgate is open. To
prevent unnecessary charging
system drain, close the liftgate
securely after using the luggage
room.
Vanity mirror lamp (if equipped)
Push the switch to turn the light on or
off.
: The lamp will turn on if this
button is pressed.
: The lamp will turn off if this
button is pressed.
Always have the switch in the off
position when the vanity mirror
lamp is not in use. If the sunvisor
is closed without the lamp off, it
may discharge the battery or dam-
age the sunvisor.
Puddle lamp (if equipped)
Welcome light
When all doors (and tailgate) are
closed and locked, the puddle lamp
will come on for 15 seconds if the
door is unlocked by the smart key or
outside door handle button.
For more details, refer to "Welcome
System" in this chapter.
NOTICE
NOTICE
OAD045410OAE049418OAE046419