2020 GMC SIERRA buttons
[x] Cancel search: buttonsPage 181 of 502

GMC Sierra/Sierra Denali Owner Manual (GMNA-Localizing-U.S./Canada/
Mexico-13337776) - 2020 - CRC - 4/4/19
180 Climate Controls
The fan, air delivery mode, air
conditioning, driver and passenger
temperatures, and Sync settings
can be controlled by touching
CLIMATE on the infotainment Home
Page or the climate button in the
climate control display application
tray. A selection can then be made
on the front climate control page
displayed. See the infotainment
manual.
Climate Control Status Display
The climate control status display
appears briefly when the center
stack climate controls are adjusted.Automatic Operation
The system automatically controls
the fan speed, air delivery, air
conditioning, and recirculation in
order to heat or cool the vehicle to
the desired temperature.
When AUTO is lit, all four functions
operate automatically. Each function
can also be manually set and the
selected setting is displayed.
Functions not manually set will
continue to be automatically
controlled, even if the AUTO
indicator is not lit.
For automatic operation:
1. Press AUTO.
2. Set the temperature. Allow the system time to stabilize. Adjust
the temperature as needed for
best comfort.
To improve fuel efficiency and to
cool the vehicle faster, recirculation
may be automatically selected in
warm weather. The recirculation light will not come
on when automatically controlled.
See
@under
“Manual Operation”
for more details.
Manual Operation
9: Turn clockwise or
counterclockwise to increase or
decrease the fan speed. Press the
knob to turn the fan off. When off is
selected, a small amount of air may
still come out of the outlets
depending on vehicle speed. If any
buttons are pressed or knobs are
turned, the climate control system
will turn on and operate at the
current setting.
Press AUTO to return to automatic
operation.
Driver and Passenger
Temperature Control : The
temperature can be adjusted
separately for the driver and
passenger.
Turn the knob clockwise or
counterclockwise to increase or
decrease the driver or passenger
temperature setting. The driver side
Page 225 of 502
GMC Sierra/Sierra Denali Owner Manual (GMNA-Localizing-U.S./Canada/
Mexico-13337776) - 2020 - CRC - 4/4/19
224 Driving and Operating
L :This position allows selection of
a range of gears appropriate for
current driving conditions.
If equipped, see “Range Selection
Mode” underManual Mode 0224.
Caution
Spinning the tires or holding the
vehicle in one place on a hill
using only the accelerator pedal
may damage the transmission.
The repair will not be covered by
the vehicle warranty. If the vehicle
is stuck, do not spin the tires.
When stopping on a hill, use the
brakes to hold the vehicle in
place.
Manual Mode
Range Selection Mode
Range Selection Mode helps control
the vehicle's transmission and
vehicle speed while driving downhill
or towing a trailer by letting you
select a desired range of gears.
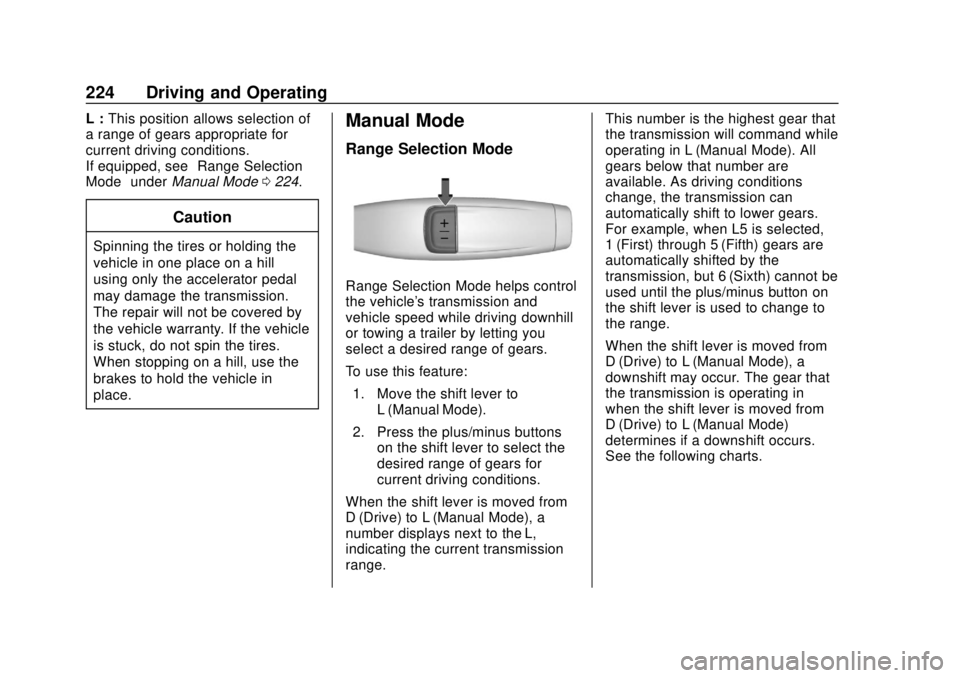
To use this feature:
1. Move the shift lever to L (Manual Mode).
2. Press the plus/minus buttons on the shift lever to select the
desired range of gears for
current driving conditions.
When the shift lever is moved from
D (Drive) to L (Manual Mode), a
number displays next to the L,
indicating the current transmission
range. This number is the highest gear that
the transmission will command while
operating in L (Manual Mode). All
gears below that number are
available. As driving conditions
change, the transmission can
automatically shift to lower gears.
For example, when L5 is selected,
1 (First) through 5 (Fifth) gears are
automatically shifted by the
transmission, but 6 (Sixth) cannot be
used until the plus/minus button on
the shift lever is used to change to
the range.
When the shift lever is moved from
D (Drive) to L (Manual Mode), a
downshift may occur. The gear that
the transmission is operating in
when the shift lever is moved from
D (Drive) to L (Manual Mode)
determines if a downshift occurs.
See the following charts.
Page 260 of 502
GMC Sierra/Sierra Denali Owner Manual (GMNA-Localizing-U.S./Canada/
Mexico-13337776) - 2020 - CRC - 4/4/19
Driving and Operating 259
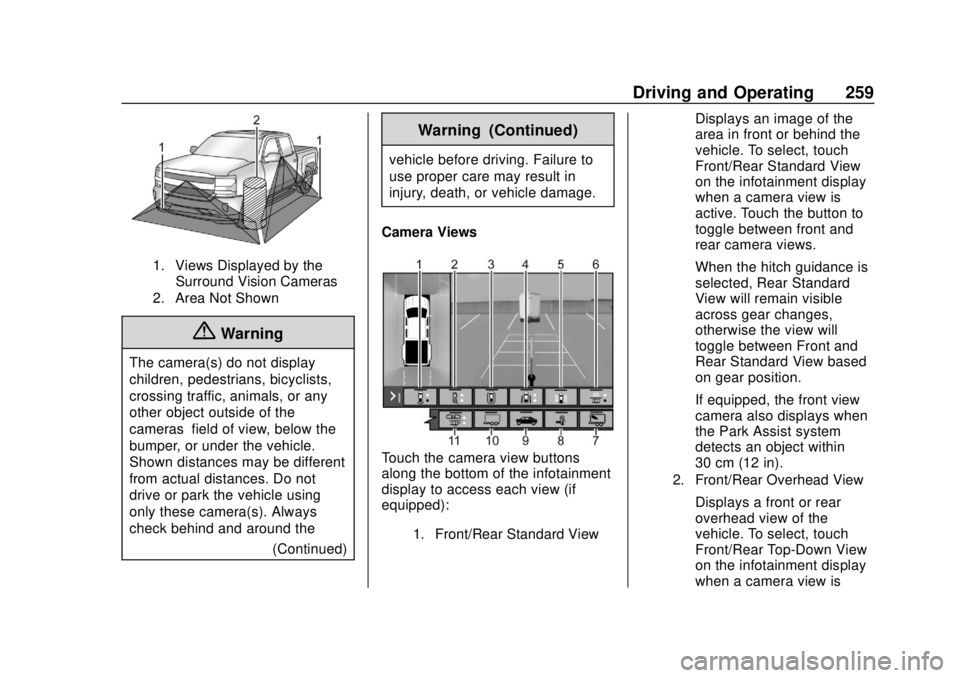
1. Views Displayed by theSurround Vision Cameras
2. Area Not Shown
{Warning
The camera(s) do not display
children, pedestrians, bicyclists,
crossing traffic, animals, or any
other object outside of the
cameras’ field of view, below the
bumper, or under the vehicle.
Shown distances may be different
from actual distances. Do not
drive or park the vehicle using
only these camera(s). Always
check behind and around the
(Continued)
Warning (Continued)
vehicle before driving. Failure to
use proper care may result in
injury, death, or vehicle damage.
Camera Views
Touch the camera view buttons
along the bottom of the infotainment
display to access each view (if
equipped):
1. Front/Rear Standard View
Displays an image of the
area in front or behind the
vehicle. To select, touch
Front/Rear Standard View
on the infotainment display
when a camera view is
active. Touch the button to
toggle between front and
rear camera views.
When the hitch guidance is
selected, Rear Standard
View will remain visible
across gear changes,
otherwise the view will
toggle between Front and
Rear Standard View based
on gear position.
If equipped, the front view
camera also displays when
the Park Assist system
detects an object within
30 cm (12 in).
2. Front/Rear Overhead View
Displays a front or rear
overhead view of the
vehicle. To select, touch
Front/Rear Top-Down View
on the infotainment display
when a camera view is
Page 265 of 502
GMC Sierra/Sierra Denali Owner Manual (GMNA-Localizing-U.S./Canada/
Mexico-13337776) - 2020 - CRC - 4/4/19
264 Driving and Operating
display when a camera
view is active. Each
press of the button will
toggle through the Rear
Trailer View, Trailer Tow
mirror View and Combo
View. To access this
view when in a forward
gear above 12 km/h
(8 mph), touch
CAMERA on the
infotainment display and
touch the Rear Trailer
View/Rear Side View
with Available
Articulation
Functionality/
Picture-in-Picture Side
View icon. Touch X
to exit.
HD Surround Vision with Trailer
Camera Provisions
If equipped, this feature provides
additional views to aid in trailering/
towing. The system shows multiple
views in the infotainment display
using five cameras mounted around
the vehicle and up to two additional
accessory cameras that can be mounted on or in a trailer. The front
camera is in the grille under the
front emblem, the side cameras are
on the bottom of the outside mirrors,
the rear camera is in the tailgate
handle and the bed camera is
mounted on the rear of the cab.
Additionally, up to two accessory
cameras can be mounted to the rear
and/or interior of the trailer. See
your dealer for accessory trailer
cameras. To access, touch
CAMERA on the infotainment
display or shift to R (Reverse). To
return to the previous screen when
not in reverse, touch the Home or
Back buttons on the infotainment
display.
Available camera views:
.
Front/Rear Standard View
. Front/Rear Top-Down View
. Rear Bowl View
. Front/Rear Side View
. Hitch View
. Bed View
. Rear trailer View .
Rear Side view with a available
articulation functionality
. Picture-in-Picture Side View
. Interior Trailer View
. Transparent trailer View
. Surround View
. Guidance Lines
. Hitch Guidance
Surround Vision (360 Degrees)
If equipped, the Surround Vision
system can display various views
surrounding the vehicle in the
infotainment display using four
cameras mounted around the
vehicle. The front camera is in the
grille under the front emblem, the
side cameras are on the bottom of
the outside mirrors, and the rear
camera is in the tailgate handle.
The Surround Vision system can be
accessed by selecting CAMERA in
the infotainment display or when the
vehicle is shifted into R (Reverse).
To return to the previous screen
sooner, when not in R (Reverse),
press the Home or Back button on
Page 306 of 502
GMC Sierra/Sierra Denali Owner Manual (GMNA-Localizing-U.S./Canada/
Mexico-13337776) - 2020 - CRC - 4/4/19
Driving and Operating 305
available power output to the trailer
brakes can be adjusted to a wide
range of trailering situations.
The ITBC system is integrated with
the vehicle’s brake, antilock brake,
and StabiliTrak/Electronic Stability
Control (ESC) systems. In trailering
conditions that cause the vehicle’s
antilock brake or StabiliTrak/ESC
systems to activate, power sent to
the trailer's brakes will be
automatically adjusted to minimize
trailer wheel lock-up. This does not
imply that the trailer has
StabiliTrak/ESC.
If the vehicle’s brake, antilock brake,
or StabiliTrak/ESC systems are not
functioning properly, the ITBC
system may not function fully or at
all. Make sure all of these systems
are fully operational to allow the
ITBC system to function properly.
The ITBC system is powered
through the vehicle's electrical
system. Turning the ignition off will
also turn off the ITBC system. The
ITBC system is fully functional only
when the ignition is in on.{Warning
Connecting a trailer that has an
air brake system may result in
reduced or complete loss of trailer
braking, including increased
stopping distance or trailer
instability which could result in
serious injury, death, or property
damage. Only use the ITBC
system with electric or electric
over hydraulic trailer brake
systems.
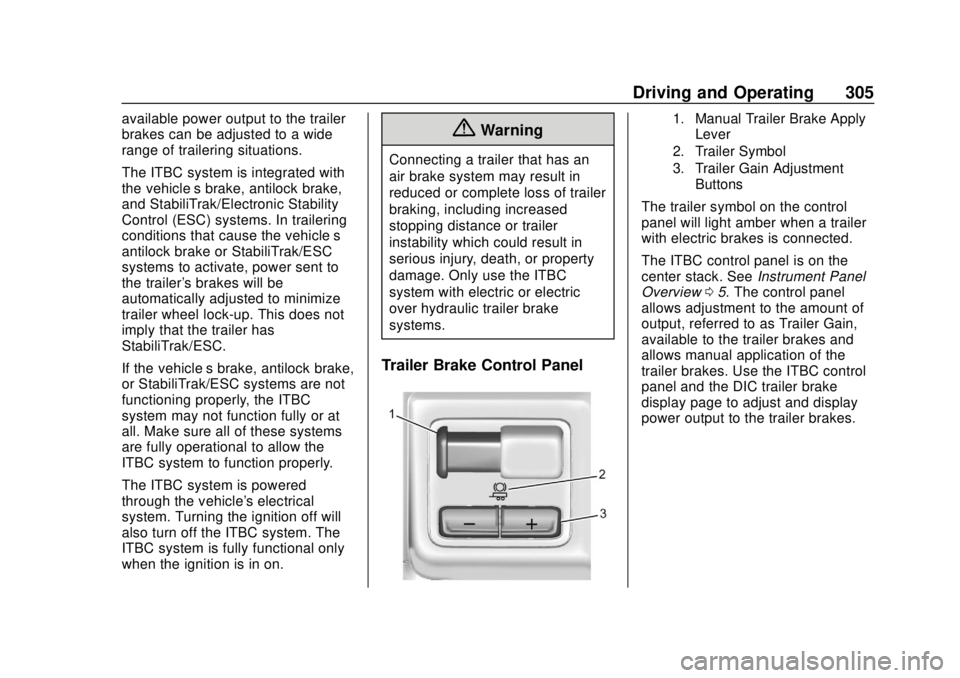
Trailer Brake Control Panel
1. Manual Trailer Brake Apply
Lever
2. Trailer Symbol
3. Trailer Gain Adjustment Buttons
The trailer symbol on the control
panel will light amber when a trailer
with electric brakes is connected.
The ITBC control panel is on the
center stack. See Instrument Panel
Overview 05. The control panel
allows adjustment to the amount of
output, referred to as Trailer Gain,
available to the trailer brakes and
allows manual application of the
trailer brakes. Use the ITBC control
panel and the DIC trailer brake
display page to adjust and display
power output to the trailer brakes.
Page 307 of 502
GMC Sierra/Sierra Denali Owner Manual (GMNA-Localizing-U.S./Canada/
Mexico-13337776) - 2020 - CRC - 4/4/19
306 Driving and Operating
Trailer Brake DIC Display Page
The ITBC display page indicates:
.Trailer Gain setting
. Output to the trailer brakes
. Trailer connection
. System operational status
To display:
. Scroll through the DIC menu
pages
. Press a Trailer Gain (+) or (−)
button
. Activate the Manual Trailer
Brake Apply Lever
TRAILER GAIN: Press a Trailer
Gain button to recall the current
Trailer Gain setting. Each press and
release of the gain buttons will then
change the Trailer Gain setting.
Press the Trailer Gain (+) or (-) to
adjust. Press and hold to
continuously adjust the Trailer Gain.
To turn the output to the trailer off,
adjust the Trailer Gain setting to 0.0.
This setting can be adjusted from
0.0 to 10.0 with a trailer connected
or disconnected. TRAILER OUTPUT: This displays
anytime a trailer with electric brakes
is connected. Output to the trailer
brakes is based on the amount of
vehicle braking present and relative
to the Trailer Gain setting. Output is
displayed from 0 to 100% for each
gain setting.
The Trailer Output will indicate
“- - -
- - -” on the Trailer Brake Display
Page whenever the following occur:
. No trailer is connected.
. A trailer without electric brakes
is connected. No DIC message
displays.
. A trailer with electric brakes has
become disconnected.
A CHECK TRAILER WIRING
message displays on the DIC.
. There is a fault present in the
wiring to the trailer brakes.
A CHECK TRAILER WIRING
message displays on the DIC.
. The ITBC system is not working
due to a fault. A SERVICE
TRAILER BRAKE SYSTEM
message displays in the DIC.
Manual Trailer Brake Apply
Lever
Slide this lever right to apply the
trailer ’s electric brakes independent
of the vehicle’s brakes. Use this
lever to adjust the Trailer Gain to
achieve proper power output to the
trailer brakes. Under certain
circumstances, this lever can also
be used to apply additional trailer
braking. The trailer and vehicle
brake lamps will come on when
either the vehicle brakes or trailer
brakes are applied and properly
connected.
Trailer Gain Adjustment
Procedure
Trailer Gain should be set for a
specific trailering condition and it
must be readjusted anytime vehicle
loading, trailer loading, or road
surface conditions change.
Page 308 of 502
GMC Sierra/Sierra Denali Owner Manual (GMNA-Localizing-U.S./Canada/
Mexico-13337776) - 2020 - CRC - 4/4/19
Driving and Operating 307
{Warning
Trailer brakes that are
over-gained or under-gained may
not stop the vehicle and the trailer
as intended and can result in a
crash. Always follow the
instructions to set the Trailer Gain
for the proper trailer stopping
performance.
To adjust Trailer Gain for each
towing condition: 1. Drive the vehicle with the trailer attached on a level road
surface representative of the
towing condition and free of
traffic at about 32–40 km/h
(20–25 mph) and fully apply
the Manual Trailer Brake Apply
Lever.
Adjusting Trailer Gain at
speeds lower than 32–40 km/h
(20–25 mph) may result in an
incorrect gain setting. 2. Adjust the Trailer Gain, using
the Trailer Gain (+) or (−)
adjustment buttons, to just
below the point of trailer wheel
lock-up, indicated by trailer
wheel squeal or tire smoke
when a trailer wheel locks.
Trailer wheel lock-up may not
occur if towing a heavily loaded
trailer. Adjust the Trailer Gain
to the highest allowable setting
for the towing condition.
3. Readjust Trailer Gain anytime vehicle loading, trailer loading,
or road surface conditions
change or if trailer wheel
lock-up is noticed at any time
while towing.
Other ITBC-Related DIC
Messages
TRAILER CONNECTED: This
message will briefly display when a
trailer with electric brakes is first
connected to the vehicle. This
message will automatically turn off
in about 10 seconds. This message
can be acknowledged before it
automatically turns off. CHECK TRAILER WIRING: This
message will display if:
.
The ITBC system first
determines connection to a
trailer with electric brakes and
then the trailer harness becomes
disconnected from the vehicle.
If the disconnect occurs while
the vehicle is stationary, this
message will automatically turn
off in about 30 seconds. This
message will also turn off if it is
acknowledged or if the trailer
harness is reconnected.
If the disconnect occurs while
the vehicle is moving, this
message will continue until the
ignition is turned off. This
message will also turn off if it is
acknowledged or if the trailer
harness is reconnected.
. There is an electrical fault in the
wiring to the trailer brakes. This
message will continue as long
as there is an electrical fault in
the trailer wiring. This message
will also turn off if it is
acknowledged.
Page 357 of 502

GMC Sierra/Sierra Denali Owner Manual (GMNA-Localizing-U.S./Canada/
Mexico-13337776) - 2020 - CRC - 4/10/19
356 Vehicle Care
Caution
Continuing to drive with worn-out
brake pads could result in costly
brake repair.
Some driving conditions or climates
can cause a brake squeal when the
brakes are first applied or lightly
applied. This does not mean
something is wrong with the brakes.
Properly torqued wheel nuts are
necessary to help prevent brake
pulsation. When tires are rotated,
inspect brake pads for wear and
evenly tighten wheel nuts in the
proper sequence to torque
specifications in Capacities and
Specifications 0459.
Brake linings should always be
replaced as complete axle sets.
Brake Pedal Travel
See your dealer if the brake pedal
does not return to normal height,
or if there is a rapid increase in
pedal travel. This could be a sign
that brake service may be required.
Replacing Brake System Parts
Always replace brake system parts
with new, approved replacement
parts. If this is not done, the brakes
may not work properly. The braking
performance expected can change
in many other ways if the wrong
replacement brake parts are
installed or parts are improperly
installed.
Brake Pad Life System
When to Change Brake Pads
This vehicle has a system that
estimates the remaining life of the
front and rear brake pads. Brake
pad life is displayed in the Driver
Information Center (DIC), along with
a percentage for each axle. The
system must be reset every time the
brake pads are changed.
When the system has determined
that the brake pads need to be
replaced, a message will display,
which may include mileage
remaining. Brake pads should always be
replaced as complete axle sets.
How to Reset the Brake Pad
Life System
The system will automatically detect
when significantly worn brake pads
are replaced. When the ignition is
turned on after new pads and wear
sensors are installed, a message
will display. Follow the prompts to
reset the system.
The brake pad life system can also
be manually reset:
1. Display Brake Pad Life on the DIC. See Driver Information
Center (DIC) (Base Level)
0 148 or
Driver Information Center (DIC)
(Midlevel and Uplevel) 0149.
2. Press the thumbwheel or the trip odometer reset stem if the
vehicle does not have DIC
buttons. Select front or rear
pads as appropriate.
3. Select YES on the confirmation message, or press the trip
odometer reset stem on a base