2020 FORD EXPEDITION brake
[x] Cancel search: brakePage 261 of 542

WARNING: The system cannot
help prevent all crashes. Do not rely on
this system to replace driver judgment
and the need to maintain a safe distance
and speed.
Using the Pre-Collision Assist
System
The pre-collision assist system is active at
speeds above approximately
3 mph
(5 km/h) and pedestrian detection is active
at speeds up to
50 mph (80 km/h). If your vehicle is rapidly approaching
another stationary vehicle, a vehicle
traveling in the same direction as yours, or
a pedestrian within your driving path, the
system is designed to provide three levels
of functionality:
1. Alert
2. Brake Support
3. Active Braking
Alert
: When active, a flashing visual
warning appears and an audible warning
tone sounds.
Brake Support
: The system is designed
to help reduce the impact speed by
preparing the brakes for rapid braking.
Brake support does not automatically
apply the brakes. If you press the brake
pedal, the system could apply additional
braking up to maximum braking force, even
if you lightly press the brake pedal.
Active Braking
: Active braking may
activate if the system determines that a
collision is imminent. The system may help
the driver reduce impact damage or avoid
the crash completely. Note:
Brake support and active braking are
active at speeds up to
75 mph (120 km/h).
If the vehicle has a radar sensor or adaptive
cruise control, then brake support and active
braking are active up to the maximum speed
of the vehicle.
Note: If you perceive pre-collision assist
alerts as being too frequent or disturbing,
then you can reduce the alert sensitivity,
though the manufacturer recommends
using the highest sensitivity setting where
possible. Setting lower sensitivity leads to
fewer and later system warnings.
Note: The system disables when you select
4x4 low, sand mode, mud/ruts mode or
when you manually disable AdvanceTrac ™.
Distance Indication and Alert
(If
Equipped)
This is a function that provides you with a
graphical indication of the time gap to
other preceding vehicles traveling in the
same direction. The distance indication
and alert screen in the information display
shows one of the following graphics.
258
Expedition (TB8) Canada/United States of America, enUSA, Edition date: 201907, Third-Printing- Driving AidsE156130
Page 266 of 542
Sport - For aggressive on-road
driving. This mode increases
throttle response, provides a
sportier steering feel, along with quicker
shifting. The suspension stiffens, with an
emphasis on handling and control. The
transmission also holds gears longer,
helping your vehicle accelerate faster when
shifting gears. Tow/Haul
- For improved
transmission operation when
towing a trailer or a heavy load.
This mode moves upshifts to higher engine
speeds to reduce the frequency of
transmission shifting. This mode also
provides engine braking in all forward
gears, which slows your vehicle and assists
you in controlling your vehicle when
descending a grade. The amount of
downshift braking provided varies based
on the amount you press the brake pedal.
Note: All transmission gear ranges are
available when using
Tow/Haul. ECO
- For efficient and
responsible driving. This mode
helps deliver maximum fuel
efficiency and increases driving range.
Off-Road Modes Snow/Wet
(4X2) or Grass/
Gravel/Snow (4WD) - For firm
surfaces covered with loose or
slippery material such as packed
snow, ice, water, grass or a thin
layer of gravel or sand. Sand
- For soft dry sand or deep
gravel. Mud/Ruts
- For muddy, rutted,
soft or uneven terrain.
Note: The system has diagnostic checks
that continuously monitor the system for
proper operation. Certain drive modes are
not available based on gear shifter position.
If a mode is unavailable due to a system
fault, the mode defaults to
Normal.
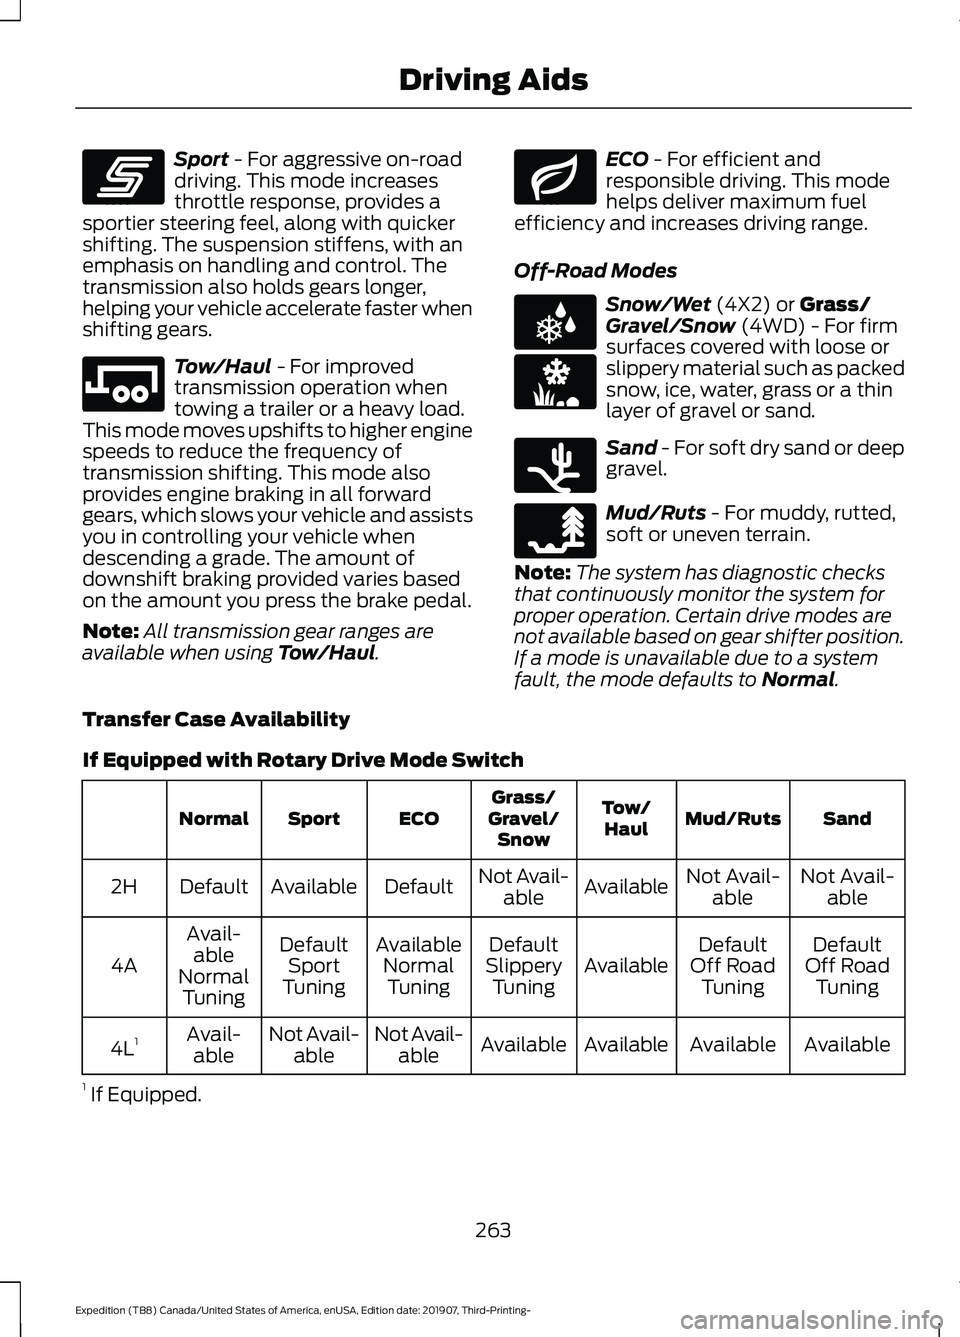
Transfer Case Availability
If Equipped with Rotary Drive Mode Switch Sand
Mud/Ruts
Tow/
Haul
Grass/
Gravel/ Snow
ECO
Sport
Normal
Not Avail-able
Not Avail-
able
Available
Not Avail-
able
Default
Available
Default
2H
Default
Off Road Tuning
Default
Off Road Tuning
Available
Default
Slippery Tuning
Available
NormalTuning
Default
Sport
Tuning
Avail-
able
Normal Tuning
4A
Available
Available
Available
Available
Not Avail-
able
Not Avail-
able
Avail-
able
4L 1
1 If Equipped.
263
Expedition (TB8) Canada/United States of America, enUSA, Edition date: 201907, Third-Printing- Driving AidsE246593 E246592 E246597 E225312 E246594 E246596 E246595
Page 274 of 542
The total load on each axle must
never exceed its Gross Axle
Weight Rating.
GVWR (Gross Vehicle Weight
Rating)
GVWR is the maximum allowable
weight of the fully loaded vehicle.
This includes all options,
equipment, passengers and cargo.
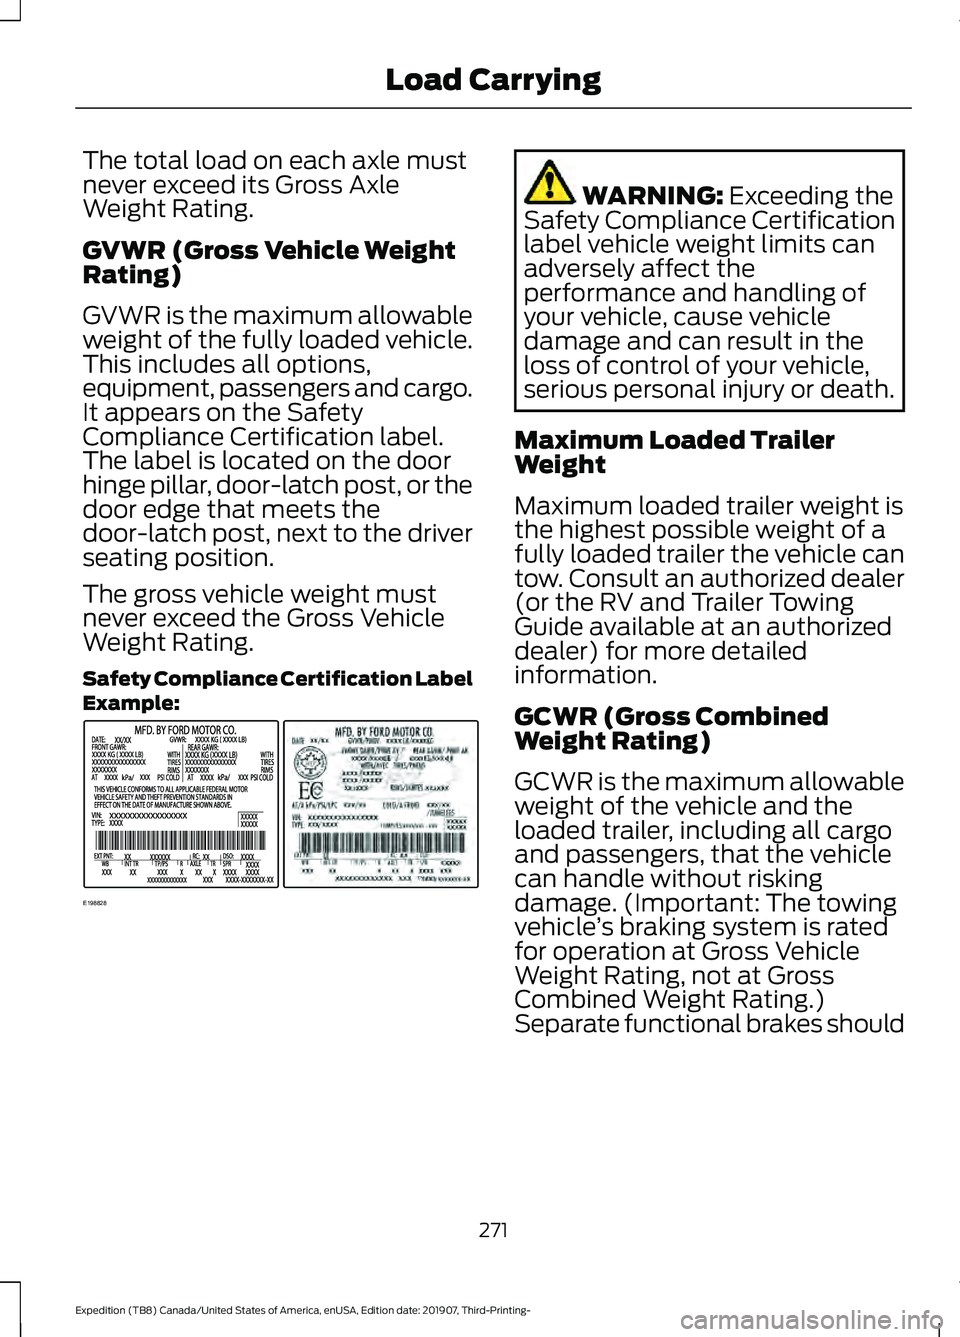
It appears on the Safety
Compliance Certification label.
The label is located on the door
hinge pillar, door-latch post, or the
door edge that meets the
door-latch post, next to the driver
seating position.
The gross vehicle weight must
never exceed the Gross Vehicle
Weight Rating.
Safety Compliance Certification Label
Example:
WARNING: Exceeding the
Safety Compliance Certification
label vehicle weight limits can
adversely affect the
performance and handling of
your vehicle, cause vehicle
damage and can result in the
loss of control of your vehicle,
serious personal injury or death.
Maximum Loaded Trailer
Weight
Maximum loaded trailer weight is
the highest possible weight of a
fully loaded trailer the vehicle can
tow. Consult an authorized dealer
(or the RV and Trailer Towing
Guide available at an authorized
dealer) for more detailed
information.
GCWR (Gross Combined
Weight Rating)
GCWR is the maximum allowable
weight of the vehicle and the
loaded trailer, including all cargo
and passengers, that the vehicle
can handle without risking
damage. (Important: The towing
vehicle ’s braking system is rated
for operation at Gross Vehicle
Weight Rating, not at Gross
Combined Weight Rating.)
Separate functional brakes should
271
Expedition (TB8) Canada/United States of America, enUSA, Edition date: 201907, Third-Printing- Load CarryingE198828
Page 278 of 542

TOWING A TRAILER
WARNING: Towing trailers
beyond the maximum
recommended gross trailer
weight exceeds the limit of your
vehicle and could result in engine
damage, transmission damage,
structural damage, loss of
vehicle control, vehicle rollover
and personal injury. WARNING:
Do not exceed
the GVWR or the GAWR
specified on the certification
label.
Your vehicle may have electrical
items, such as fuses or relays,
related to towing. See
Fuses
(page 315).
Some vehicles may have the
ability to modify trailer towing
features. See Towing (page 275
).
Your vehicle's load capacity
designation is by weight, not by
volume, so you cannot necessarily
use all available space when
loading a vehicle or trailer.
Towing a trailer places an extra
load on your vehicle's engine,
transmission, axle, brakes, tires
and suspension. Inspect these
components periodically during,
and after, any towing operation. Load Placement
To help minimize how trailer
movement affects your vehicle
when driving:
•
Load the heaviest items closest
to the trailer floor.
• Load the heaviest items
centered between the left and
right side trailer tires.
• Load the heaviest items above
the trailer axles or just slightly
forward toward the trailer
tongue. Do not allow the final
trailer tongue weight to go
above or below 10-15% of the
loaded trailer weight.
• Select a ball mount with the
correct rise or drop and load
capacity. When both the
loaded vehicle and trailer are
connected, the trailer frame
should be level, or slightly
angled down toward your
vehicle, when viewed from the
side.
When driving with a trailer or
payload, a slight takeoff vibration
or shudder may be present due to
the increased payload weight.
Additional information regarding
proper trailer loading and setting
your vehicle up for towing is
located in another chapter of this
manual. See
Load Limit (page
269).
You can also find information in
the
RV & Trailer Towing Guide
available at your authorized
dealer, or online.
275
Expedition (TB8) Canada/United States of America, enUSA, Edition date: 201907, Third-Printing- Towing
Page 279 of 542
RV & Trailer Towing Guide Online
http://www.fleet.ford.com/towing-guides/
Website
TRAILER REVERSING AIDS (IF
EQUIPPED)
Pro Trailer Backup Assist™ WARNING: Driving while distracted
can result in loss of vehicle control, crash
and injury. We strongly recommend that
you use extreme caution when using any
device that may take your focus off the
road. Your primary responsibility is the
safe operation of your vehicle. We
recommend against the use of any
hand-held device while driving and
encourage the use of voice-operated
systems when possible. Make sure you
are aware of all applicable local laws
that may affect the use of electronic
devices while driving. WARNING:
This system is an extra
driving aid. It does not replace your
attention and judgment, or the need to
apply the brakes. This system does NOT
automatically brake your vehicle. If you
fail to press the brake pedal when
necessary, you may collide with another
vehicle.
Note: The system is not a substitute for
safe driving practices.
Note: You must always be aware of the
vehicle and trailer combination and the
surrounding environment.
Note: The system does not detect or
prevent the vehicle or trailer from making
contact with obstacles in the surrounding
environment. Note:
Keep in mind that the front end of
the vehicle swings out when changing the
direction of the trailer.
Note: The system relies on user
measurements to determine sticker
placement and system limits. It is critical to
take the key measurements correctly.
Incorrect measurements can result in the
improper function of the system up to and
including contact between the vehicle and
trailer.
Note: The system limits vehicle speed when
backing up. The system is not a replacement
for proper use of the throttle and brake
pedals.
Principle of Operation
This feature helps you to steer your vehicle
when backing up with a trailer attached.
Turn and hold the control knob in the
direction you want the trailer to go and the
system takes over the steering. This allows
you to focus on checking the mirrors and
operating the brake and accelerator.
Each trailer you use with your vehicle has
to be setup once.
You must take care to follow the setup
process accurately, to make sure the
sticker is placed correctly.
Contact your dealership if you need
assistance in setting up your trailer.
Setting Up Pro Trailer Backup
Assist
Note: Once you have entered a trailer's
information into the system, it is stored for
easy recall. A maximum of 10 trailers can be
added to the system.
276
Expedition (TB8) Canada/United States of America, enUSA, Edition date: 201907, Third-Printing- Towing
Page 280 of 542
Step 1: Position your Vehicle and Trailer
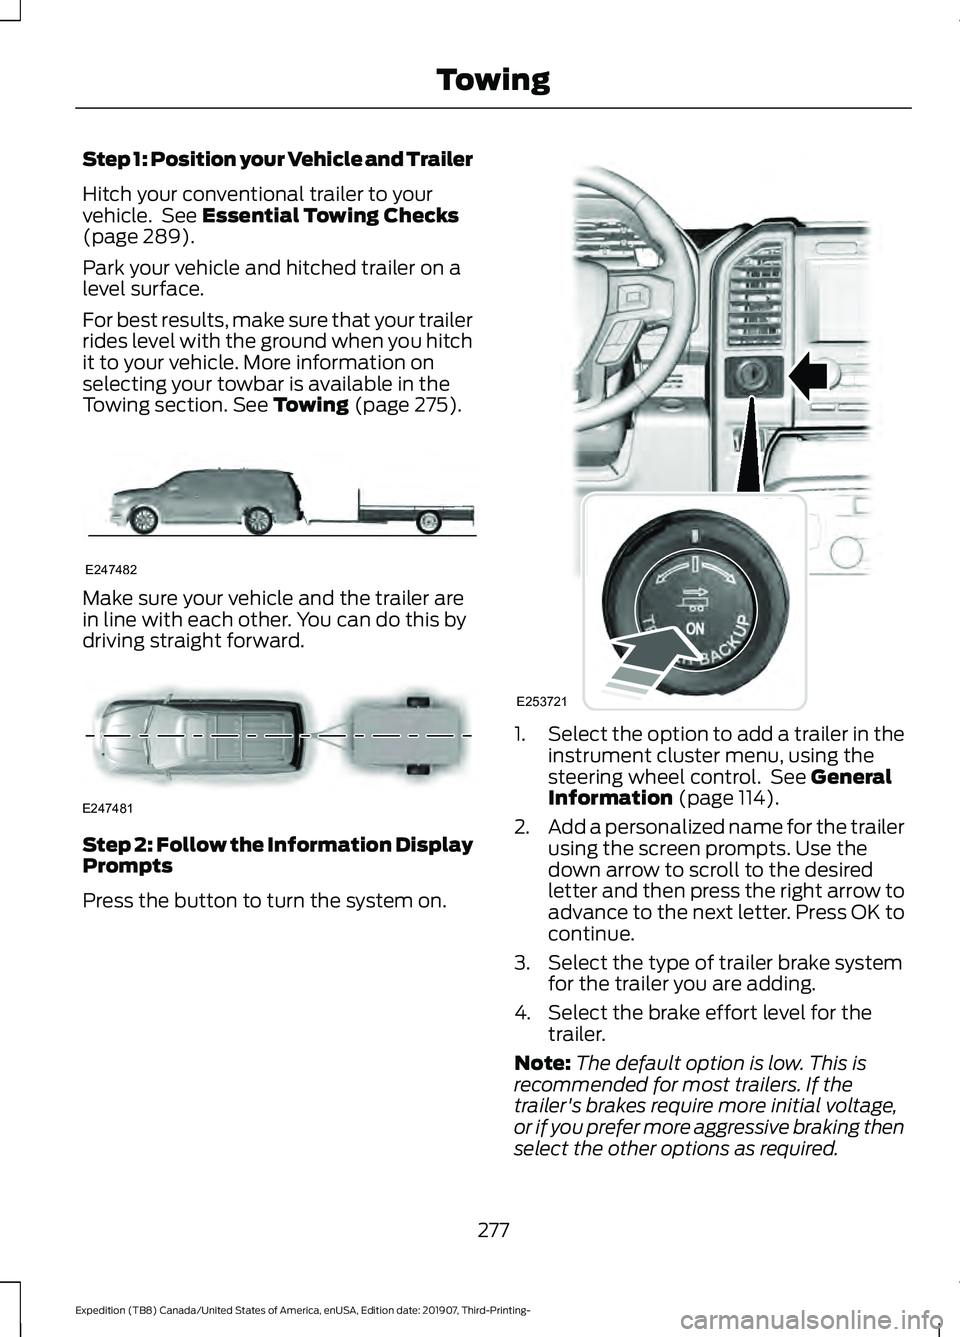
Hitch your conventional trailer to your
vehicle. See Essential Towing Checks
(page 289).
Park your vehicle and hitched trailer on a
level surface.
For best results, make sure that your trailer
rides level with the ground when you hitch
it to your vehicle. More information on
selecting your towbar is available in the
Towing section.
See Towing (page 275). Make sure your vehicle and the trailer are
in line with each other. You can do this by
driving straight forward.
Step 2: Follow the Information Display
Prompts
Press the button to turn the system on. 1.
Select the option to add a trailer in the
instrument cluster menu, using the
steering wheel control. See
General
Information (page 114).
2. Add a personalized name for the trailer
using the screen prompts. Use the
down arrow to scroll to the desired
letter and then press the right arrow to
advance to the next letter. Press OK to
continue.
3. Select the type of trailer brake system for the trailer you are adding.
4. Select the brake effort level for the trailer.
Note: The default option is low. This is
recommended for most trailers. If the
trailer's brakes require more initial voltage,
or if you prefer more aggressive braking then
select the other options as required.
277
Expedition (TB8) Canada/United States of America, enUSA, Edition date: 201907, Third-Printing- TowingE247482 E247481 E253721
Page 284 of 542
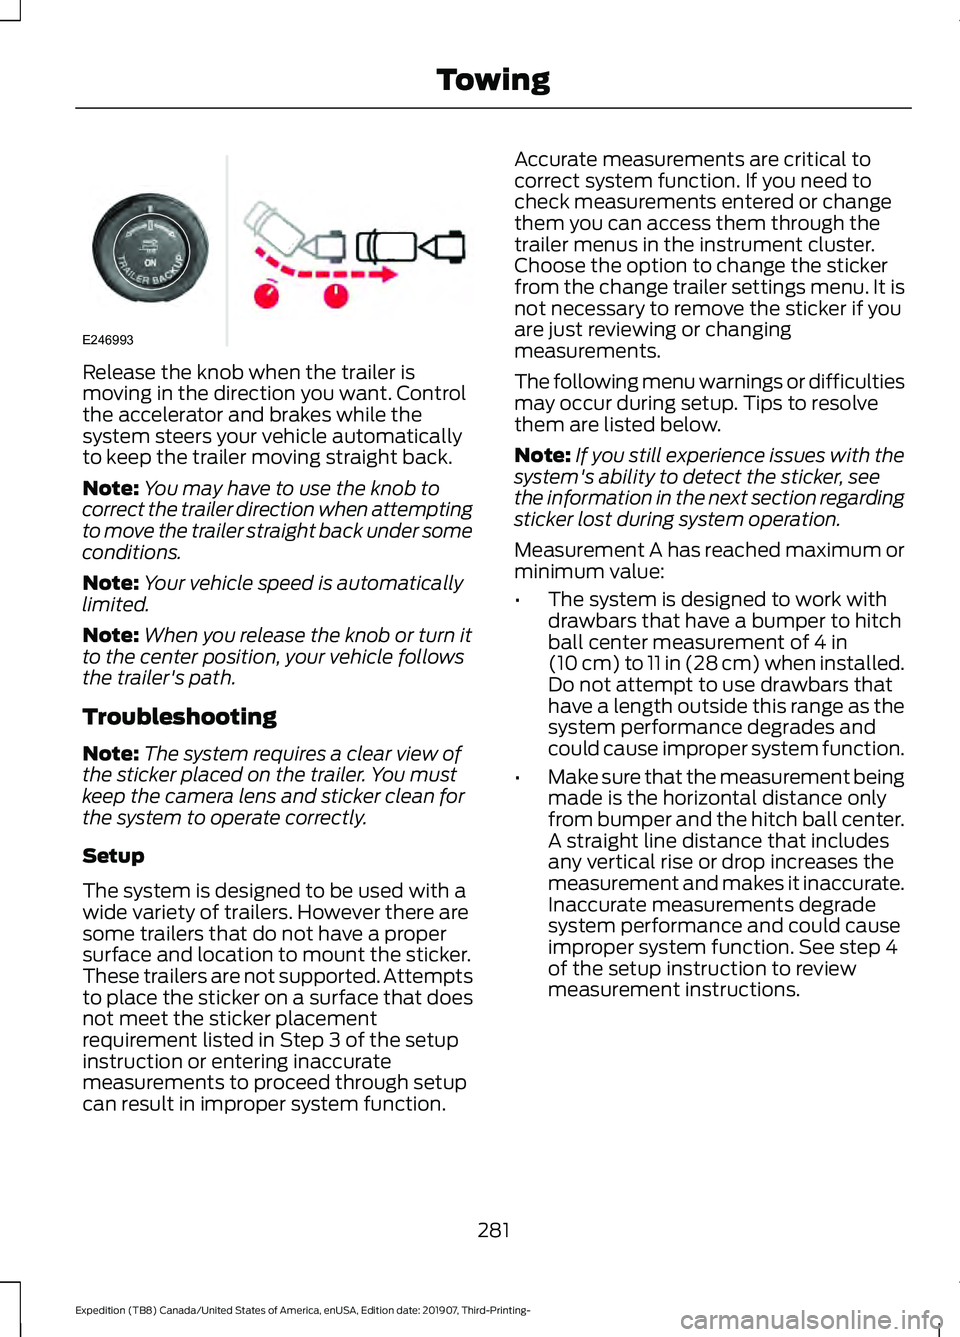
Release the knob when the trailer is
moving in the direction you want. Control
the accelerator and brakes while the
system steers your vehicle automatically
to keep the trailer moving straight back.
Note:
You may have to use the knob to
correct the trailer direction when attempting
to move the trailer straight back under some
conditions.
Note: Your vehicle speed is automatically
limited.
Note: When you release the knob or turn it
to the center position, your vehicle follows
the trailer's path.
Troubleshooting
Note: The system requires a clear view of
the sticker placed on the trailer. You must
keep the camera lens and sticker clean for
the system to operate correctly.
Setup
The system is designed to be used with a
wide variety of trailers. However there are
some trailers that do not have a proper
surface and location to mount the sticker.
These trailers are not supported. Attempts
to place the sticker on a surface that does
not meet the sticker placement
requirement listed in Step 3 of the setup
instruction or entering inaccurate
measurements to proceed through setup
can result in improper system function. Accurate measurements are critical to
correct system function. If you need to
check measurements entered or change
them you can access them through the
trailer menus in the instrument cluster.
Choose the option to change the sticker
from the change trailer settings menu. It is
not necessary to remove the sticker if you
are just reviewing or changing
measurements.
The following menu warnings or difficulties
may occur during setup. Tips to resolve
them are listed below.
Note:
If you still experience issues with the
system's ability to detect the sticker, see
the information in the next section regarding
sticker lost during system operation.
Measurement A has reached maximum or
minimum value:
• The system is designed to work with
drawbars that have a bumper to hitch
ball center measurement of 4 in
(10 cm) to 11 in (28 cm) when installed.
Do not attempt to use drawbars that
have a length outside this range as the
system performance degrades and
could cause improper system function.
• Make sure that the measurement being
made is the horizontal distance only
from bumper and the hitch ball center.
A straight line distance that includes
any vertical rise or drop increases the
measurement and makes it inaccurate.
Inaccurate measurements degrade
system performance and could cause
improper system function. See step 4
of the setup instruction to review
measurement instructions.
281
Expedition (TB8) Canada/United States of America, enUSA, Edition date: 201907, Third-Printing- TowingE246993
Page 289 of 542
This feature applies your vehicle brakes at
individual wheels and, if necessary, reduces
engine power. If the trailer begins to sway,
the stability control light flashes and the
message TRAILER SWAY REDUCE
SPEED appears in the information display.
The first thing to do is slow your vehicle
down, then pull safely to the side of the
road and check for proper tongue load and
trailer load distribution. See Towing (page
275
).
RECOMMENDED TOWING
WEIGHTS
Note: Do not exceed the trailer
weight for your vehicle
configuration listed in the chart
that follows.
Note: Make sure to take into
consideration trailer frontal area.
Do not exceed 55 ft² (5.11 m²) if
your vehicle has the standard
towing package, or 60 ft² (5.57 m²)
if your vehicle has the heavy duty
package.
Note: Your vehicle could have
reduced performance when
operating at high altitudes and
when heavily loaded or towing a
trailer. When driving at elevation,
to match driving performance as
perceived at sea level, reduce gross
vehicle weight and gross
combination weight by 2% per
1,000 ft (300 m)
of elevation. Note:
Certain states require
electric trailer brakes for trailers
over a specified weight. Be sure to
check state regulations for this
specified weight. This specified
weight could limit the maximum
trailer weights, as the vehicle ’s
electrical system may not include
the wiring connector needed to
activate electric trailer brakes.
Your vehicle may tow a trailer
provided the maximum trailer
weight is less than or equal to the
maximum trailer weight listed for
your vehicle configuration on the
chart that follows.
To calculate the maximum loaded
trailer weight for your vehicle:
1. Start with the gross combined weight rating for your vehicle
model and axle ratio. See the
chart that follows.
2. Subtract all of the following
that apply to your vehicle:
•Vehicle curb weight.
• Hitch hardware weight, such
as a draw bar, ball, locks or
weight distributing.
• Driver weight.
• Passenger weight.
• Payload, cargo and luggage
weight.
• Aftermarket equipment
weight.
3. This equals the maximum
loaded trailer weight for this
combination.
286
Expedition (TB8) Canada/United States of America, enUSA, Edition date: 201907, Third-Printing- Towing