2020 FORD EXPEDITION parking brake
[x] Cancel search: parking brakePage 298 of 542
When Towing a Trailer
•
Do not tow during the first 1,000 mi
(1,600 km).
• Do not make full-throttle starts.
• Check your hitch, electrical connections
and trailer wheel lug nuts thoroughly
after you have traveled 50 mi (80 km).
• When stopped in congested or heavy
traffic during hot weather, place the
transmission in park (P) to aid engine
and transmission cooling and to help
A/C performance.
• Turn off the speed control with heavy
loads or in hilly terrain. The speed
control may turn off automatically
when you are towing on long, steep
slopes.
• Shift to a lower gear when driving down
a long or steep hill. Do not apply the
brakes continuously, as they may
overheat and become less effective.
• If your transmission is equipped with a
Grade Assist or Tow/Haul feature, use
this feature when towing. This provides
engine braking and helps eliminate
excessive transmission shifting for
optimum fuel economy and
transmission cooling.
• If your vehicle is equipped with
AdvanceTrac with RSC, this system
may turn on during typical cornering
maneuvers with a heavily loaded trailer.
This is normal. Turning the corner at a
slower speed when towing may reduce
this tendency.
• If you are towing a trailer frequently in
hot weather, hilly conditions, at the
gross combined weight rating (or any
combination of these factors), consider
refilling your rear axle with synthetic
gear lubricant if the axle is not already
filled with it. See
Capacities and
Specifications (page 380). •
Allow more distance for stopping with
a trailer attached. Anticipate stops and
brake gradually.
• Avoid parking on a slope. However, if
you must park on a slope:
1. Turn the steering wheel to point your vehicle tires away from traffic flow.
2. Set your vehicle parking brake.
3. Place the transmission in park (P).
4. Place wheel chocks in front and back of the trailer wheels. Chocks are not
included with your vehicle.
Your vehicle may be equipped with a
temporary or conventional spare tire. A
temporary spare tire is different in size,
tread-type, or is from a different
manufacturer than the road tires on your
vehicle. Consult information on the tire
label or Safety Compliance label for
limitations when using these tires.
Launching or Retrieving a Boat or
Personal Watercraft (PWC)
Note: Disconnect the wiring to the trailer
before backing the trailer into the water.
Note: Reconnect the wiring to the trailer
after removing the trailer from the water.
When backing down a ramp during boat
launching or retrieval:
• Do not allow the static water level to
rise above the bottom edge of the rear
bumper.
• Do not allow waves to break higher
than
6 in (15 cm) above the bottom
edge of the rear bumper.
Exceeding these limits may allow water to
enter vehicle components:
• Causing internal damage to the
components.
• Affecting driveability, emissions and
reliability.
295
Expedition (TB8) Canada/United States of America, enUSA, Edition date: 201907, Third-Printing- Towing
Page 301 of 542
Note:
If completed successfully, the
instrument cluster displays 4X2, and
Neutral Tow Disabled.
Note: If the indicator light and message do
not display, you must perform the procedure
again from the beginning.
Note: You may hear an audible noise as the
transfer case shifts out of its neutral
position. This is normal.
Note: If
Shift Delayed Pull Forward
appears in the instrument cluster, transfer
case gear tooth blockage is present. See the
instructions after this section.
6. Apply the parking brake, then disconnect your vehicle from the tow
vehicle.
7. Release the parking brake, start the engine and shift the transmission to
drive (D) to make sure the transfer
case is out neutral (N).
8. If the transfer case does not successfully shift out of neutral (N),
set the parking brake until you can have
your vehicle serviced.
Resolving the
Shift Delayed Pull
Forward Message
If the instrument cluster displays
Shift
Delayed Pull Forward, perform the
following:
1. Press and hold the brake pedal.
2. Put the transmission into neutral (N), then start the engine.
3. With the engine running, shift the transmission to drive (D) and let the
vehicle roll forward up to
3 ft (1 m). You
may hear an audible noise as the
transfer case shifts out of its neutral
position. This is normal.
4. Make sure the instrument cluster displays
Neutral Tow Disabled.
298
Expedition (TB8) Canada/United States of America, enUSA, Edition date: 201907, Third-Printing- Towing
Page 322 of 542

Protected Component
Fuse Rating
Fuse
Number
Not used.
—
64
Not used.
—
65
Not used.
—
66
Not used.
—
67
Power liftgate module.
30A
69
Anti-lock brake system and parking brake module.
40A
70
4x4 module.
25A
71
Not used.
—
72
Not used.
—
73
Trailer tow backup lamps.
10A
74
Not used.
—
75
Body control module power 2.
50A
76
Climate control seat module.
30A
77
Not used.
—
78
Not used.
—
79
Heated wiper park.
10A
80
Not used.
—
81
Not used.
—
82
Not used (spare).
15A
83
Not used.
—
84
Not used.
—
85
USB smart charger 5.
5A
86
USB smart charger 3.
5A
87
Multi-contour seats relay.
10A
88
Power running boards.
40A
89
Not used.
—
91
319
Expedition (TB8) Canada/United States of America, enUSA, Edition date: 201907, Third-Printing- Fuses
Page 328 of 542
GENERAL INFORMATION
Have your vehicle serviced regularly to help
maintain its roadworthiness and resale
value. There is a large network of
authorized dealers that are there to help
you with their professional servicing
expertise. We believe that their specially
trained technicians are best qualified to
service your vehicle properly and expertly.
They are supported by a wide range of
highly specialized tools developed
specifically for servicing your vehicle.
If your vehicle requires professional service,
an authorized dealer can provide the
necessary parts and service. Check your
warranty information to find out which
parts and services are covered.
Use only recommended fuels, lubricants,
fluids and service parts conforming to
specifications. Motorcraft® parts are
designed and built to provide the best
performance in your vehicle.
Precautions
•
Do not work on a hot engine.
• Make sure that nothing gets caught in
moving parts.
• Do not work on a vehicle with the
engine running in an enclosed space,
unless you are sure you have enough
ventilation.
• Keep all open flames and other burning
material (such as cigarettes) away
from the battery and all fuel related
parts.
Working with the Engine Off
1. Set the parking brake and shift the transmission to park (P).
2. Switch off the engine.
3. Block the wheels. Working with the Engine On WARNING: To reduce the risk of
vehicle damage and personal burn
injuries, do not start your engine with the
air cleaner removed and do not remove
it while the engine is running.
1. Set the parking brake and shift the transmission to park (P).
2. Block the wheels.
OPENING AND CLOSING THE
HOOD
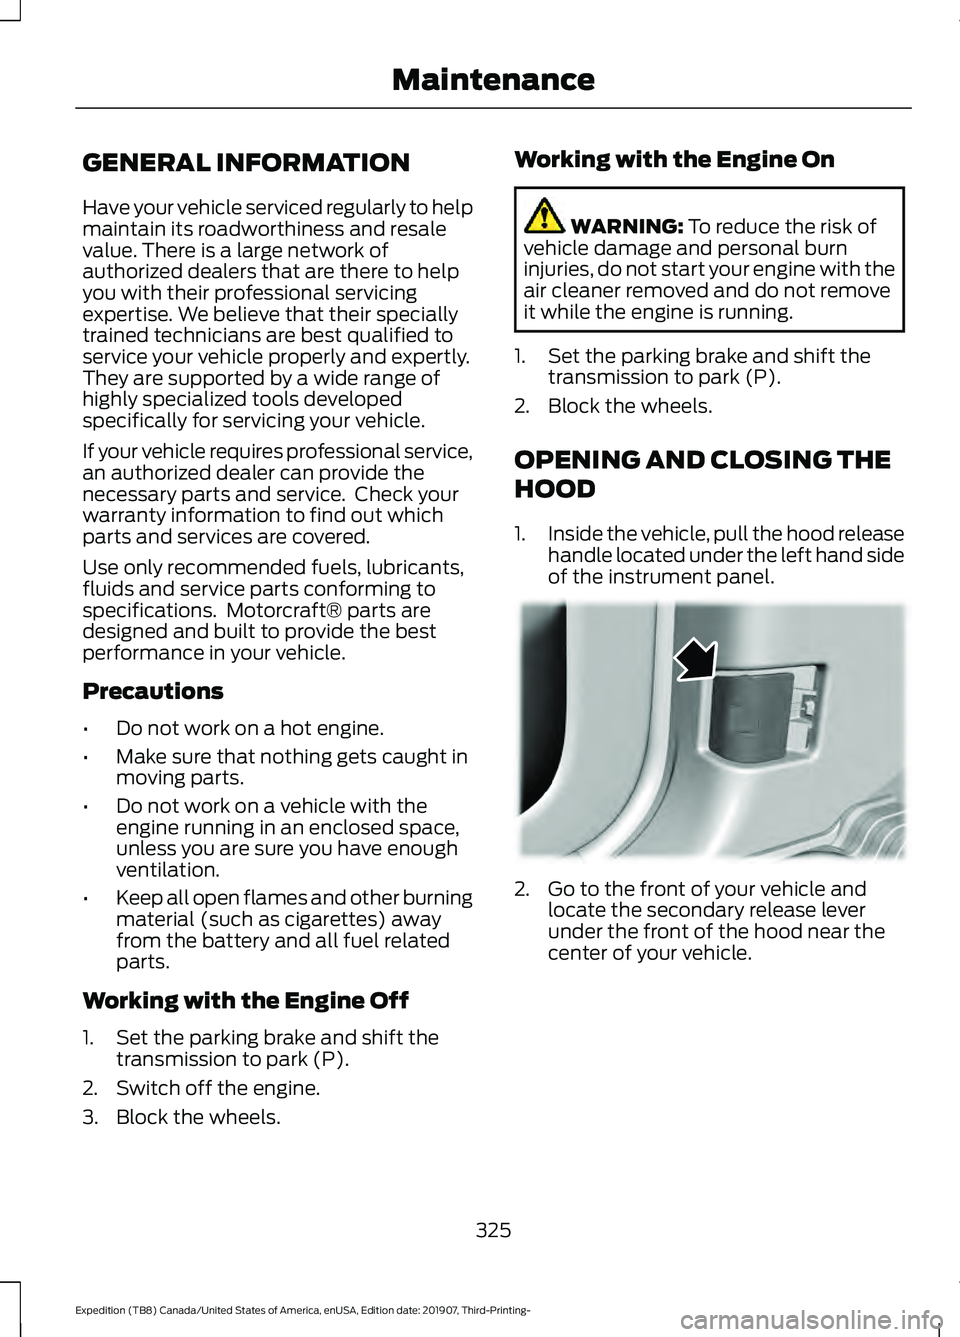
1. Inside the vehicle, pull the hood release
handle located under the left hand side
of the instrument panel. 2. Go to the front of your vehicle and
locate the secondary release lever
under the front of the hood near the
center of your vehicle.
325
Expedition (TB8) Canada/United States of America, enUSA, Edition date: 201907, Third-Printing- Maintenance E166491
Page 330 of 542

Battery. See Changing the 12V Battery (page 335).
C.
Engine oil filler cap.
See Engine Oil Check (page 327).
D.
Engine oil dipstick.
See Engine Oil Dipstick (page 327).
E.
Brake fluid reservoir. See
Brake Fluid Check (page 334).
F.
Air filter.
See Changing the Engine Air Filter (page 329).
G.
Engine coolant reservoir. See
Engine Coolant Check (page 329).
H.
ENGINE OIL DIPSTICK MINA
MAX
B
ENGINE OIL CHECK
To check the engine oil level consistently
and accurately, do the following:
1. Make sure the parking brake is on. Make
sure the transmission is in park (P) or
neutral (N).
2. Run the engine until it reaches normal operating temperature.
3. Make sure that your vehicle is on level ground. 4. Switch the engine off and wait 15
minutes for the oil to drain into the oil
pan. Checking the engine oil level too
soon after you switch the engine off
may result in an inaccurate reading.
5. Open the hood. See
Opening and
Closing the Hood (page 325).
6. Remove the dipstick and wipe it with a clean, lint-free cloth. See
Under
Hood Overview (page 326).
7. Reinstall the dipstick and remove it again to check the oil level. See
Engine Oil Dipstick
(page 327).
8. Make sure that the oil level is between
the maximum and minimum marks. If
the oil level is at the minimum mark,
add oil immediately. See
Capacities
and Specifications (page 384).
9. If the oil level is correct, replace the dipstick and make sure it is fully seated.
Note: Do not remove the dipstick when the
engine is running.
Note: If the oil level is between the
maximum and minimum marks, the oil level
is acceptable. Do not add oil.
Note: The oil consumption of new engines
reaches its normal level after approximately
3,000 mi (5,000 km)
.
Adding Engine Oil WARNING: Do not remove the filler
cap when the engine is running.
327
Expedition (TB8) Canada/United States of America, enUSA, Edition date: 201907, Third-Printing- MaintenanceE146429
Page 336 of 542
4. Check the coolant level. If the coolant
level is at or below the minimum mark,
add prediluted coolant immediately.
5. When the engine temperature cools, you can re-start the engine. Have your
vehicle checked as soon as possible to
minimize engine damage.
Note: Driving your vehicle without repair
increases the chance of engine damage.
Engine Coolant Temperature
Management (If Equipped) WARNING:
To reduce the risk of
crash and injury, be prepared that the
vehicle speed may reduce and the
vehicle may not be able to accelerate
with full power until the coolant
temperature reduces.
If you tow a trailer with your vehicle, the
engine may temporarily reach a higher
temperature during severe operating
conditions, for example ascending a long
or steep grade in high ambient
temperatures.
At this time, you may notice the coolant
temperature gauge moves toward the red
zone and a message may appear in the
information display.
You may notice a reduction in vehicle
speed caused by reduced engine power in
order to manage the engine coolant
temperature. Your vehicle may enter this
mode if certain high-temperature and
high-load conditions take place. The
amount of speed reduction depends on
vehicle loading, grade and ambient
temperature. If this occurs, there is no
need to stop your vehicle. You can
continue to drive. The air conditioning may automatically
turn on and off during severe operating
conditions to protect the engine from
overheating. When the coolant
temperature decreases to the normal
operating temperature, the air conditioning
turns on.
If the coolant temperature gauge moves
fully into the red zone, or if the coolant
temperature warning or service engine
soon messages appear in your information
display, do the following:
1. Stop your vehicle as soon as it is safe
to do so. Fully apply the parking brake,
shift into park (P) or neutral (N).
2. Leave the engine running until the coolant temperature gauge needle
returns to the normal position. If the
temperature does not drop after
several minutes, follow the remaining
steps.
3. Switch the engine off and wait for it to
cool. Check the coolant level.
4. If the coolant level is at or below the minimum mark, add prediluted coolant
immediately.
5. If the coolant level is normal, restart the engine and continue.
AUTOMATIC TRANSMISSION
FLUID CHECK
If required, have an authorized dealer check
and change the transmission fluid at the
correct service interval. See
Scheduled
Maintenance (page 475).
The automatic transmission does not have
a transmission fluid dipstick.
333
Expedition (TB8) Canada/United States of America, enUSA, Edition date: 201907, Third-Printing- Maintenance
Page 339 of 542
WARNING: Battery posts,
terminals and related accessories
contain lead and lead compounds,
chemicals known to the State of
California to cause cancer and
reproductive harm. Wash your hands
after handling
. WARNING:
This vehicle may have
more than one battery. Removing the
battery cables from only one battery
does not disconnect your vehicle
electrical system. Make sure you
disconnect the battery cables from all
batteries when disconnecting power.
Failure to do so may cause serious
personal injury or property damage.
Your vehicle is fitted with a Motorcraft
maintenance-free battery which normally
does not require additional water.
When a battery replacement is required,
you must use a recommended
replacement battery that matches the
electrical requirements of the vehicle.
Note: After cleaning or replacing the
battery, make sure you reinstall the battery
vent tube, battery cover or shield.
For longer, trouble-free operation, keep the
top of the battery clean and dry.
If you see any corrosion on the battery or
terminals, remove the cables from the
terminals and clean with a wire brush. You
can neutralize the acid with a solution of
baking soda and water. Because your vehicle
’s engine is
electronically controlled by a computer,
some control conditions are maintained
by power from the battery. When the
battery is disconnected or a new battery
is installed, the engine must relearn its idle
and fuel trim strategy for optimum
driveability and performance. Flexible fuel
vehicles (FFV) must also relearn the
ethanol content of the fuel for optimum
driveability and performance.
To restore the settings, do the following:
1. Apply the parking brake.
2. Shift into park (P) or neutral (N).
3. Switch off all accessories.
4. Press the brake pedal and start your vehicle.
5. Run the engine until it reaches normal operating temperature. While the
engine is warming up, complete the
following: Reset the clock. Reset the
power windows bounce-back feature.
See Windows and Mirrors (page 101).
Reset the radio station presets. See
Audio System
(page 398).
6. Allow the engine to idle for at least one
minute.
7. Drive the vehicle at least 10 mi (16 km)
to completely relearn the idle trim and
fuel trim strategy.
Note: If you do not allow the engine to
relearn the idle and fuel trim strategy, the
idle quality of your vehicle may be adversely
affected until the engine computer
eventually relearns the idle trim and fuel
trim strategy.
Note: For flexible fuel vehicles, if you are
operating on E85, you may experience poor
starts or an inability to start the engine and
driveability problems until the fuel trim and
ethanol content have been relearned.
336
Expedition (TB8) Canada/United States of America, enUSA, Edition date: 201907, Third-Printing- Maintenance
Page 351 of 542
REPAIRING MINOR PAINT
DAMAGE
Authorized dealers have touch-up paint to
match your vehicle
’s color. Your vehicle
color code is printed on a sticker on the
front, left-hand side door jamb. Take your
color code to your authorized dealer to
make sure you get the correct color.
Before repairing minor paint damage, use
a cleaner such as Motorcraft Bug and Tar
Remover to remove particles such as bird
droppings, tree sap, insect deposits, tar
spots, road salt and industrial fallout.
Read the instructions before using cleaning
products.
CLEANING THE WHEELS
1. Regularly clean them with a wheel cleaner. We recommend that you use
Ford approved wheel cleaner if
available.
2. Remove dirt and brake dust with a sponge.
3. Remove tar and grease with a bug and
tar remover. We recommend that you
use Ford approved bug and tar remover
if available.
4. Thoroughly rinse the wheels with water
after cleaning.
If you intend on parking your vehicle for an
extended period after cleaning the wheels
with a wheel cleaner, drive your vehicle for
a few minutes before doing so. This
reduces the risk of corrosion of the brake
discs, brake pads and linings.
Do not clean the wheels when they are hot.
Note: Some car washes could damage
wheel rims and covers. Note:
Using non-recommended cleaners,
harsh cleaning products, chrome wheel
cleaners or abrasive materials could
damage wheel rims and covers.
VEHICLE STORAGE
If you plan on storing your vehicle for 30
days or more, read the following
maintenance recommendations to make
sure your vehicle stays in good operating
condition.
We engineer and test all motor vehicles
and their components for reliable, regular
driving. Under various conditions,
long-term storage may lead to degraded
engine performance or failure unless you
use specific precautions to preserve engine
components.
General
• Store all vehicles in a dry, ventilated
place.
• Protect from sunlight, if possible.
• If vehicles are stored outside, they
require regular maintenance to protect
against rust and damage.
Body
• Wash your vehicle thoroughly to
remove dirt, grease, oil, tar or mud from
exterior surfaces, rear-wheel housing
and the underside of front fenders.
• Periodically wash your vehicle if it is
stored in exposed locations.
• Touch-up exposed or primed metal to
prevent rust.
• Cover chrome and stainless steel parts
with a thick coat of auto wax to prevent
discoloration. Re-wax as necessary
when you wash your vehicle.
• Lubricate all hood, door and luggage
compartment hinges and latches with
a light grade oil.
348
Expedition (TB8) Canada/United States of America, enUSA, Edition date: 201907, Third-Printing- Vehicle Care