2020 FORD EXPEDITION four wheel drive
[x] Cancel search: four wheel drivePage 300 of 542
Note:
If your vehicle has intelligent access,
you can keep your vehicle on while switching
the engine off by pressing the
START/STOP button two times slowly
without pressing the brake pedal.
5. Press and hold the brake pedal.
6. Enable neutral tow through the information display by selecting
Settings
from the menu. See General
Information (page 114).
7. Then select
Advanced Settings.
8. Then select
Vehicle.
9. Then select
Neutral Tow.
10. Press and hold the
OK button until
the information display confirms
neutral tow is enabled.
Note: If completed successfully, the
information display shows
Neutral Tow
Enabled Leave Transmission in Neutral.
This indicates that your vehicle is safe to
tow with all wheels on the ground.
Note: If you do not see the message in the
display, you must perform the procedure
again from the beginning.
Note: You may hear an audible noise as the
transfer case shifts into its neutral position.
This is normal.
11. Leave the transmission in neutral (N).
If your vehicle has intelligent access,
press the engine
START/STOP
button once without pressing the
brake pedal to switch the ignition off.
You do not need to leave your keys in
the vehicle. You can lock and unlock
your vehicle as you normally do. If
your vehicle has a physical ignition
key, turn the ignition as far as it can
go toward the off position. It does not
turn to the off position when the
transmission is in neutral (N). You
must leave the key in the ignition
when towing. To lock and unlock your
vehicle, use the keyless entry keypad
or an extra set of keys. 12. Release the brake pedal. WARNING:
Do not disconnect the
battery during recreational towing. It
prevents the transfer case from shifting
properly and may cause the vehicle to
roll, even if the transmission is in park
(P). WARNING:
Shifting the transfer
case to its neutral position for
recreational towing may cause the
vehicle to roll, even if the transmission is
in park (P). It may injure the driver and
others. Make sure you press the foot
brake and the vehicle is in a secure, safe
position when you shift to neutral (N).
Note: Failing to put the transfer case in its
neutral position may damage vehicle
components.
Note: You can check four-wheel-down
towing status at any time by opening the
driver door or turning the ignition to the
accessory or on position and verifying the
message displays in the cluster.
Exiting Four-wheel-down Towing
To exit four-wheel-down towing and return
the transfer case to its
2H position:
1. With your vehicle still properly secured
to the tow vehicle, start the engine.
2. After starting your vehicle, switch the engine off but leave the key in the on
position.
Note: If your vehicle has intelligent access,
you can keep the vehicle on when switching
the engine off by pressing the
START/STOP
button two times slowly
without pressing the brake pedal.
3. Press and hold the brake pedal.
4. Shift the transmission out of neutral (N) and into park (P).
5. Release the brake pedal.
297
Expedition (TB8) Canada/United States of America, enUSA, Edition date: 201907, Third-Printing- Towing
Page 310 of 542
We recommend the use of a wheel lift and
dollies or flatbed equipment to tow your
vehicle. Do not tow with a slingbelt. We do
not approve a slingbelt towing procedure.
If you tow your vehicle incorrectly, or by
any other means, vehicle damage may
occur.
We produce a towing manual for all
authorized tow truck operators. Have your
tow truck operator refer to this manual for
proper hook-up and towing procedures for
your vehicle.
Towing an all-wheel or four-wheel drive
vehicle requires that all wheels be off the
ground, such as using a wheel lift and
dollies or flatbed equipment. This prevents
damage to the transmission, all-wheel or
four-wheel drive system and vehicle.
If your vehicle becomes inoperable without
access to wheel dollies, a car-hauling
trailer or a flatbed transport vehicle, you
can flat-tow with all wheels on the ground
under limited conditions. See Towing the
Vehicle on Four Wheels (page 296).
TOWING POINTS WARNING:
Using recovery hooks
is dangerous and should only be done by
a person familiar with proper vehicle
recovery safety practices. Improper use
of recovery hooks may cause hook failure
or separation from the vehicle and could
result in serious injury or death. WARNING:
Always slowly remove
the slack from the recovery strap prior
to pulling. Failure to do so can introduce
significantly higher loads which can
cause the recovery hooks to break off, or
the recovery strap to fail which can cause
serious injury or death. WARNING:
Never link two straps
together with a clevis pin. These heavy
metal objects could become projectiles
if the strap breaks and can cause serious
injury or death.
Your vehicle comes equipped with
frame-mounted front recovery hooks.
These hooks should never have a load
applied to them greater than the gross
vehicle weight rating of your vehicle.
Before using recovery hooks:
• Make sure all attaching points are
secure and capable of withstanding
the applied load.
• Never use chains, cables or tow straps
with metal hook ends.
• Only use recovery straps that have a
minimum breaking strength two to
three times the gross vehicle weight of
the stuck vehicle.
• Make sure the recovery strap is in good
condition and free of visible cuts, tears
or damage.
• Use a damper device such as a tarp,
heavy blanket or piece of carpet
draped over the recovery strap to help
absorb the energy in the event the
strap breaks.
• Make sure the stuck vehicle is not
loaded heavier than its gross vehicle
weight rating specified on the
certification label.
• Always align the tow vehicle and stuck
vehicle in a straight line (within 10
degrees).
• Keep bystanders to the
sides of the
vehicle, at a distance of at least twice
the length of the recovery strap. This
helps avoid injury from the hazard of a
recovery hook or strap breaking, or a
vehicle lurching into their path.
307
Expedition (TB8) Canada/United States of America, enUSA, Edition date: 201907, Third-Printing- Roadside Emergencies
Page 354 of 542
GENERAL INFORMATION
Use only approved wheel and tire sizes,
using other sizes could damage your
vehicle. If you change the diameter of the
tires from that fitted at the factory, the
speedometer may not display the correct
speed. If you intend to change the size of
the wheels from that fitted by the
manufacturer, you can check the suitability
with an authorized dealer.
Additional information related to the
functionality and maintenance of your tires
can be found later in this chapter. See Tire
Care (page 353).
You can find the recommended tire
inflation pressures can on the Tire Label,
which is on the B-pillar or the edge of the
driver door. You can also find this
information on the Safety Compliance
Certification Label, affixed to either the
door hinge pillar, door-latch post, or the
door edge that meets the door latch post;
next to the driver seating position.
We strongly recommend maintaining these
tire pressures at all times. Failure to follow
the tire pressure recommendations can
cause uneven treadwear patterns, reduced
fuel economy, and adversely affect the
way your vehicle handles.
Note: Check and set the tire pressure at the
ambient temperature in which you are
intending to drive your vehicle and when the
tires are cold.
Note: Check your tire pressures at least
once per month.
If your vehicle has a spare tire, set the
pressure to the highest value given for your
vehicle and tire size combination. Notice to utility vehicle and truck
owners WARNING:
Utility vehicles have a
significantly higher rollover rate than
other types of vehicles. WARNING:
Vehicles with a higher
center of gravity (utility and four-wheel
drive vehicles) handle differently than
vehicles with a lower center of gravity
(passenger cars). Avoid sharp turns,
excessive speed and abrupt steering in
these vehicles. Failure to drive cautiously
increases the risk of losing control of your
vehicle, vehicle rollover, personal injury
and death. WARNING:
In a rollover crash, an
unbelted person is significantly more
likely to die than a person wearing a
seatbelt. WARNING:
Do not become
overconfident in the ability of four-wheel
drive vehicles. Although a four-wheel
drive vehicle may accelerate better than
a two-wheel drive vehicle in low traction
situations, it won't stop any faster than
two-wheel drive vehicles. Always drive
at a safe speed.
Utility vehicles and trucks handle
differently than passenger cars in the
various driving conditions that are
encountered on streets, highways and
off-road. Utility vehicles and trucks are not
designed for cornering at speeds as high
as passenger cars any more than low-slung
sports cars are designed to perform
satisfactorily under off-road conditions.
351
Expedition (TB8) Canada/United States of America, enUSA, Edition date: 201907, Third-Printing- Wheels and Tires
Page 355 of 542
Study your owner's manual and any
supplements for specific information about
equipment features, instructions for safe
driving and additional precautions to
reduce the risk of an accident or serious
injury.
Four-wheel drive system (If Equipped)
WARNING:
Do not become
overconfident in the ability of four-wheel
drive vehicles. Although a four-wheel
drive vehicle may accelerate better than
a two-wheel drive vehicle in low traction
situations, it won't stop any faster than
two-wheel drive vehicles. Always drive
at a safe speed.
A vehicle equipped with four-wheel drive,
when selected, has the ability to use all
four wheels to power itself. This increases
traction which may enable you to safely
drive over terrain and road conditions that
a conventional two-wheel drive vehicle
cannot.
Power is supplied to all four wheels
through a transfer case or power transfer
unit. Four-wheel drive vehicles allow you
to select different modes as necessary. For
information on transfer case operation and
shifting procedures, See
Four-Wheel
Drive (page 200). For information on
transfer case maintenance, See
Maintenance (page 325). You should
become thoroughly familiar with this
information before you operate your
vehicle.
On some four-wheel drive vehicles, the
initial shift from two-wheel to four-wheel
drive when the vehicle is moving can cause
a momentary clunk and ratcheting sound.
These sounds are normal and are not
cause for concern. In four-wheel drive vehicles, the size of the
spare tire relative to the remaining tires can
have an effect on the 4x4 system. If there
is a significant difference between the size
of a spare and the remaining tires,
four-wheel drive functionality may be
limited.
See Using Four-Wheel Drive
(page 200).
How your vehicle differs from
other vehicles
Sport utility vehicles and trucks can differ
from some other vehicles in a few
noticeable ways. Your vehicle may be:
• Higher - to allow higher load carrying
capacity and to allow it to travel over
rough terrain without getting hung up
or damaging underbody components.
• Shorter - to give it the capability to
approach inclines and drive over the
crest of a hill without getting hung up
or damaging underbody components.
All other things held equal, a shorter
wheelbase may make your vehicle
quicker to respond to steering inputs
than a vehicle with a longer wheelbase.
• Narrower - to provide greater
maneuverability in tight spaces,
particularly in off-road use.
As a result of the above dimensional
differences, Sport utility vehicles and
trucks often have a higher center of gravity
and a greater difference in center of gravity
between the loaded and unloaded
condition. These differences that make
your vehicle so versatile also make it
handle differently than an ordinary
passenger car.
352
Expedition (TB8) Canada/United States of America, enUSA, Edition date: 201907, Third-Printing- Wheels and Tires
Page 360 of 542
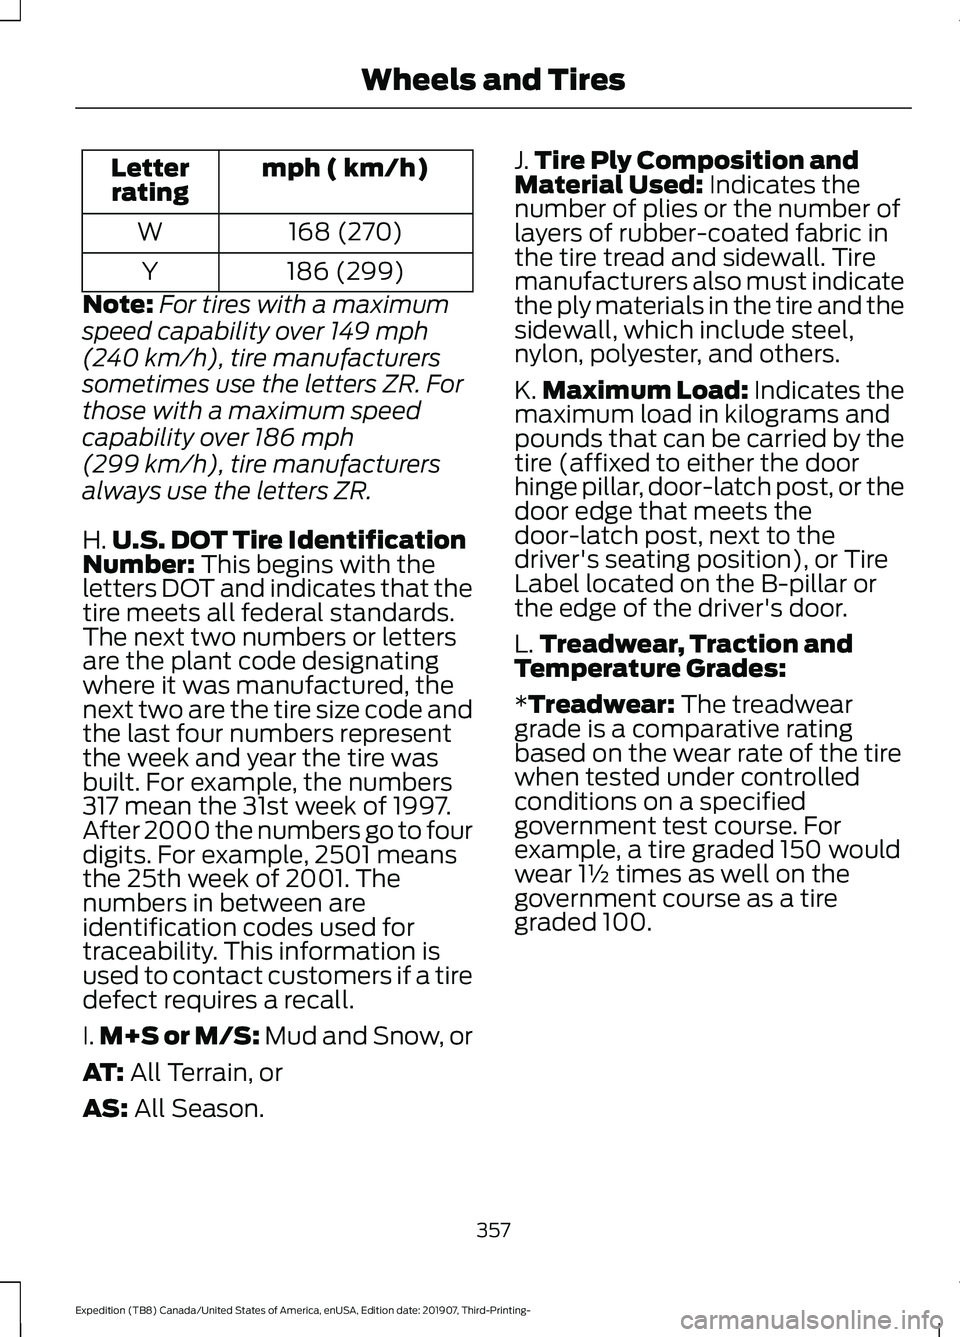
mph ( km/h)
Letter
rating
168 (270)
W
186 (299)
Y
Note: For tires with a maximum
speed capability over 149 mph
(240 km/h)
, tire manufacturers
sometimes use the letters ZR. For
those with a maximum speed
capability over
186 mph
(299 km/h)
, tire manufacturers
always use the letters ZR.
H. U.S. DOT Tire Identification
Number:
This begins with the
letters DOT and indicates that the
tire meets all federal standards.
The next two numbers or letters
are the plant code designating
where it was manufactured, the
next two are the tire size code and
the last four numbers represent
the week and year the tire was
built. For example, the numbers
317 mean the 31st week of 1997.
After 2000 the numbers go to four
digits. For example, 2501 means
the 25th week of 2001. The
numbers in between are
identification codes used for
traceability. This information is
used to contact customers if a tire
defect requires a recall.
I. M+S or M/S:
Mud and Snow, or
AT:
All Terrain, or
AS:
All Season. J.
Tire Ply Composition and
Material Used:
Indicates the
number of plies or the number of
layers of rubber-coated fabric in
the tire tread and sidewall. Tire
manufacturers also must indicate
the ply materials in the tire and the
sidewall, which include steel,
nylon, polyester, and others.
K. Maximum Load: Indicates the
maximum load in kilograms and
pounds that can be carried by the
tire (affixed to either the door
hinge pillar, door-latch post, or the
door edge that meets the
door-latch post, next to the
driver's seating position), or Tire
Label located on the B-pillar or
the edge of the driver's door.
L. Treadwear, Traction and
Temperature Grades:
*
Treadwear: The treadwear
grade is a comparative rating
based on the wear rate of the tire
when tested under controlled
conditions on a specified
government test course. For
example, a tire graded 150 would
wear 1½ times as well on the
government course as a tire
graded 100.
357
Expedition (TB8) Canada/United States of America, enUSA, Edition date: 201907, Third-Printing- Wheels and Tires
Page 367 of 542
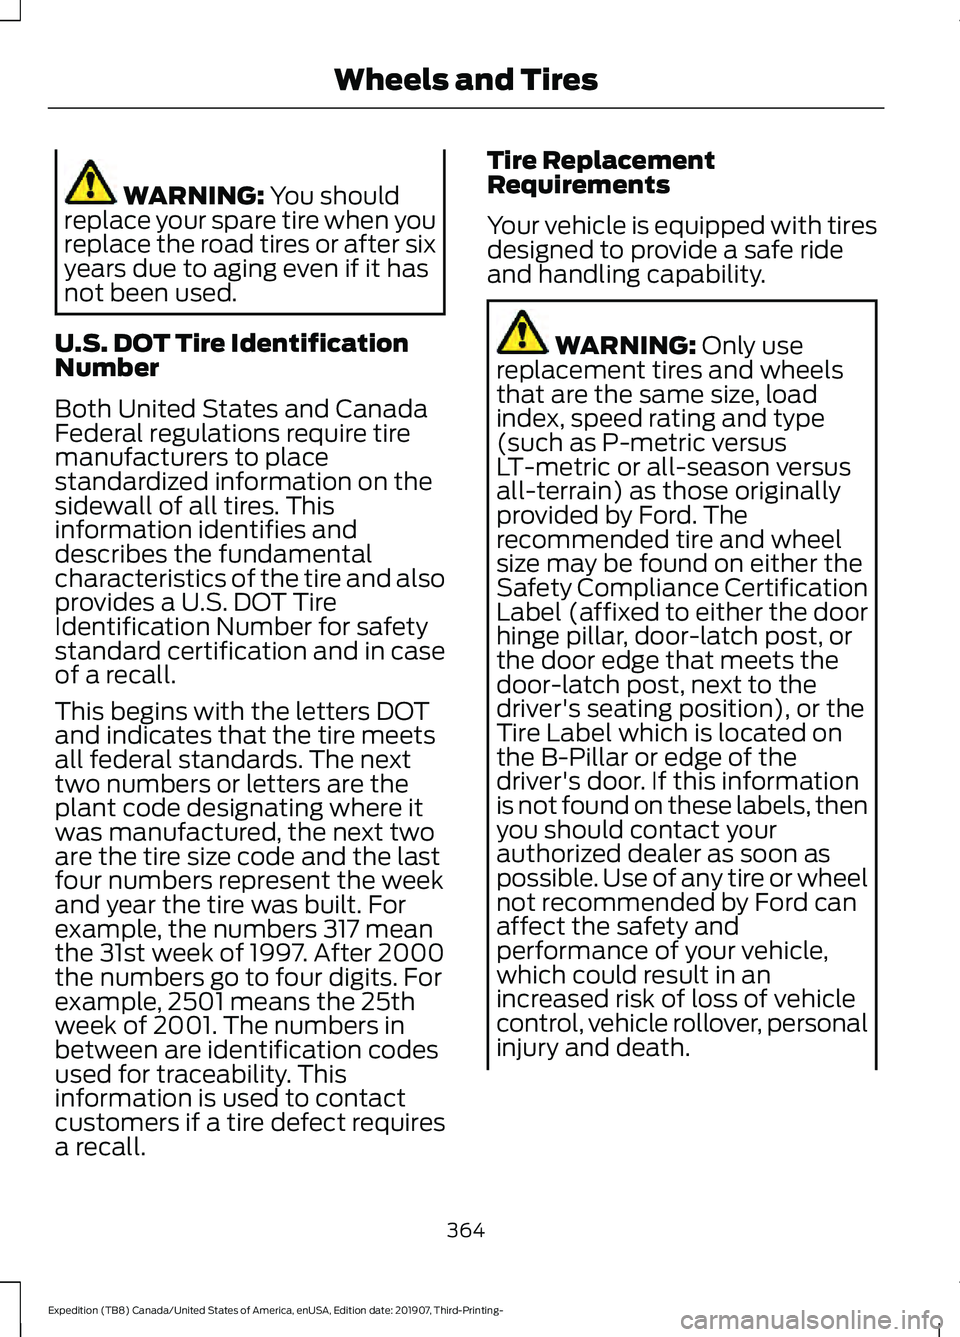
WARNING: You should
replace your spare tire when you
replace the road tires or after six
years due to aging even if it has
not been used.
U.S. DOT Tire Identification
Number
Both United States and Canada
Federal regulations require tire
manufacturers to place
standardized information on the
sidewall of all tires. This
information identifies and
describes the fundamental
characteristics of the tire and also
provides a U.S. DOT Tire
Identification Number for safety
standard certification and in case
of a recall.
This begins with the letters DOT
and indicates that the tire meets
all federal standards. The next
two numbers or letters are the
plant code designating where it
was manufactured, the next two
are the tire size code and the last
four numbers represent the week
and year the tire was built. For
example, the numbers 317 mean
the 31st week of 1997. After 2000
the numbers go to four digits. For
example, 2501 means the 25th
week of 2001. The numbers in
between are identification codes
used for traceability. This
information is used to contact
customers if a tire defect requires
a recall. Tire Replacement
Requirements
Your vehicle is equipped with tires
designed to provide a safe ride
and handling capability.
WARNING:
Only use
replacement tires and wheels
that are the same size, load
index, speed rating and type
(such as P-metric versus
LT-metric or all-season versus
all-terrain) as those originally
provided by Ford. The
recommended tire and wheel
size may be found on either the
Safety Compliance Certification
Label (affixed to either the door
hinge pillar, door-latch post, or
the door edge that meets the
door-latch post, next to the
driver's seating position), or the
Tire Label which is located on
the B-Pillar or edge of the
driver's door. If this information
is not found on these labels, then
you should contact your
authorized dealer as soon as
possible. Use of any tire or wheel
not recommended by Ford can
affect the safety and
performance of your vehicle,
which could result in an
increased risk of loss of vehicle
control, vehicle rollover, personal
injury and death.
364
Expedition (TB8) Canada/United States of America, enUSA, Edition date: 201907, Third-Printing- Wheels and Tires
Page 368 of 542

WARNING: To reduce the
risk of serious injury, when
mounting replacement tires and
wheels, you should not exceed
the maximum pressure indicated
on the sidewall of the tire to set
the beads without additional
precautions listed below. If the
beads do not seat at the
maximum pressure indicated,
re-lubricate and try again. WARNING:
When inflating
the tire for mounting pressures
up to
20 psi (1.38 bar) greater
than the maximum pressure on
the tire sidewall, the following
precautions must be taken to
protect the person mounting the
tire:
• Make sure that you have the
correct tire and wheel size.
• Lubricate the tire bead and
wheel bead seat area again.
• Stand at a minimum of
12 ft
(3.66 m) away from the wheel
and tire assembly.
• Use both eye and ear
protection. WARNING: For a mounting
pressure more than
20 psi
(1.38 bar) greater than the
maximum pressure, a Ford
dealer or other tire service
professional should do the
mounting. WARNING:
Always inflate
steel carcass tires with a remote
air fill with the person inflating
standing at a minimum of
12 ft
(3.66 m) away from the wheel
and tire assembly.
Important: Remember to replace
the wheel valve stems when the
road tires are replaced on your
vehicle.
The two front tires or two rear tires
should generally be replaced as a
pair, except if the vehicle is
equipped with four wheel drive.
Vehicles equipped with four wheel
drive should have all four tires
replaced simultaneously.
Unevenly worn tires, mismatched
makes, models or brands can be
different in size, resulting in
potential damage to the four
wheel drive system.
The tire pressure sensors mounted
in the wheels are not designed to
be used in aftermarket wheels.
The use of wheels or tires not
recommended by us may affect
the operation of your tire pressure
monitoring system.
If the tire pressure monitoring
system indicator is flashing, the
system is malfunctioning. Your
replacement tire might be
incompatible with your tire
pressure monitoring system, or
some component of the system
may be damaged.
365
Expedition (TB8) Canada/United States of America, enUSA, Edition date: 201907, Third-Printing- Wheels and Tires
Page 369 of 542
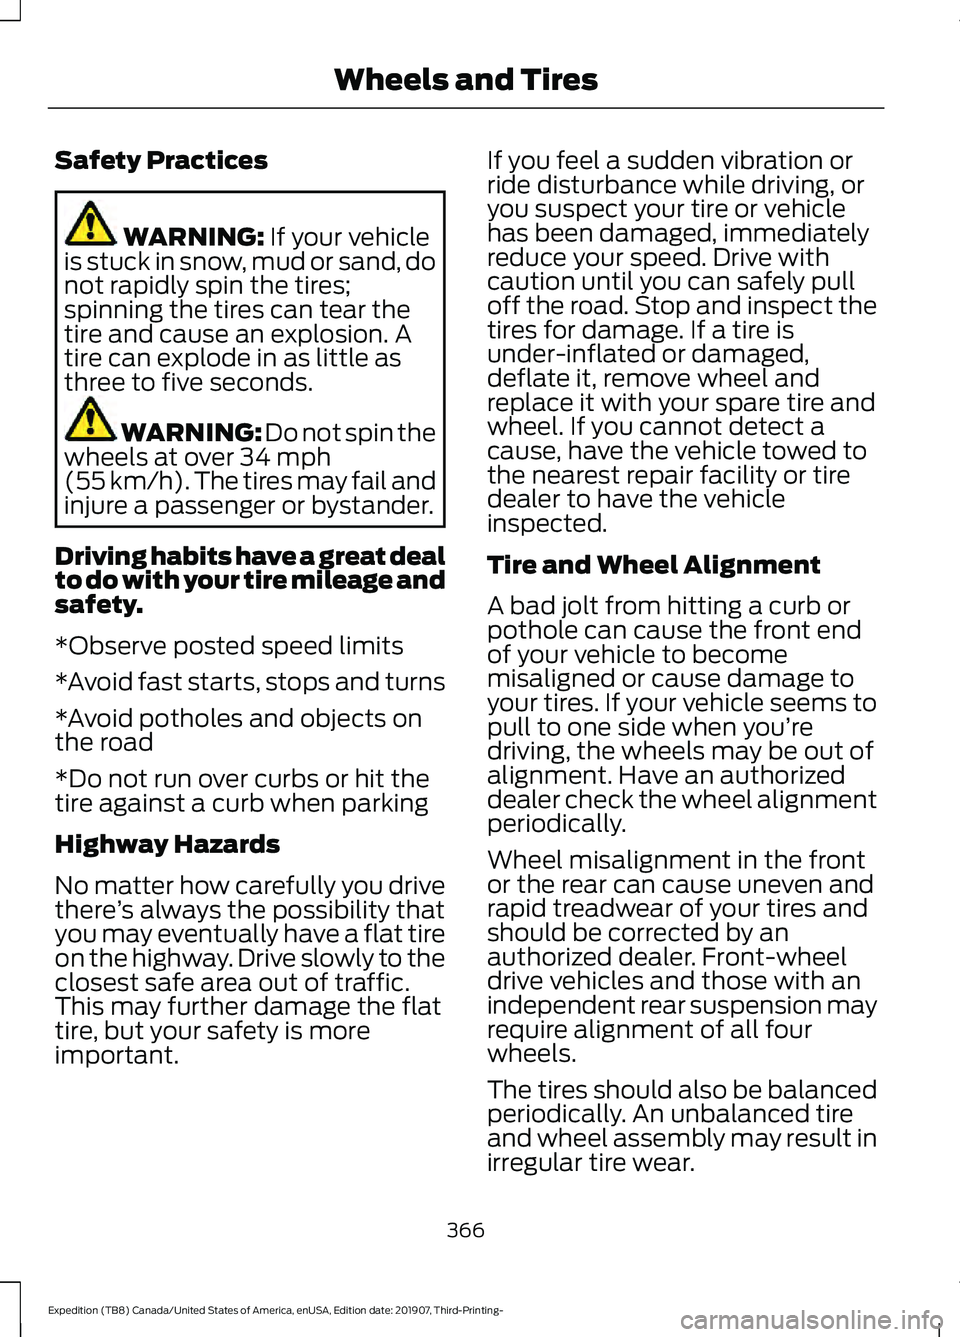
Safety Practices
WARNING: If your vehicle
is stuck in snow, mud or sand, do
not rapidly spin the tires;
spinning the tires can tear the
tire and cause an explosion. A
tire can explode in as little as
three to five seconds. WARNING:
Do not spin the
wheels at over 34 mph
(55 km/h). The tires may fail and
injure a passenger or bystander.
Driving habits have a great deal
to do with your tire mileage and
safety.
*Observe posted speed limits
*Avoid fast starts, stops and turns
*Avoid potholes and objects on
the road
*Do not run over curbs or hit the
tire against a curb when parking
Highway Hazards
No matter how carefully you drive
there ’s always the possibility that
you may eventually have a flat tire
on the highway. Drive slowly to the
closest safe area out of traffic.
This may further damage the flat
tire, but your safety is more
important. If you feel a sudden vibration or
ride disturbance while driving, or
you suspect your tire or vehicle
has been damaged, immediately
reduce your speed. Drive with
caution until you can safely pull
off the road. Stop and inspect the
tires for damage. If a tire is
under-inflated or damaged,
deflate it, remove wheel and
replace it with your spare tire and
wheel. If you cannot detect a
cause, have the vehicle towed to
the nearest repair facility or tire
dealer to have the vehicle
inspected.
Tire and Wheel Alignment
A bad jolt from hitting a curb or
pothole can cause the front end
of your vehicle to become
misaligned or cause damage to
your tires. If your vehicle seems to
pull to one side when you’re
driving, the wheels may be out of
alignment. Have an authorized
dealer check the wheel alignment
periodically.
Wheel misalignment in the front
or the rear can cause uneven and
rapid treadwear of your tires and
should be corrected by an
authorized dealer. Front-wheel
drive vehicles and those with an
independent rear suspension may
require alignment of all four
wheels.
The tires should also be balanced
periodically. An unbalanced tire
and wheel assembly may result in
irregular tire wear.
366
Expedition (TB8) Canada/United States of America, enUSA, Edition date: 201907, Third-Printing- Wheels and Tires