2020 FORD EXPEDITION change time
[x] Cancel search: change timePage 170 of 542
3.
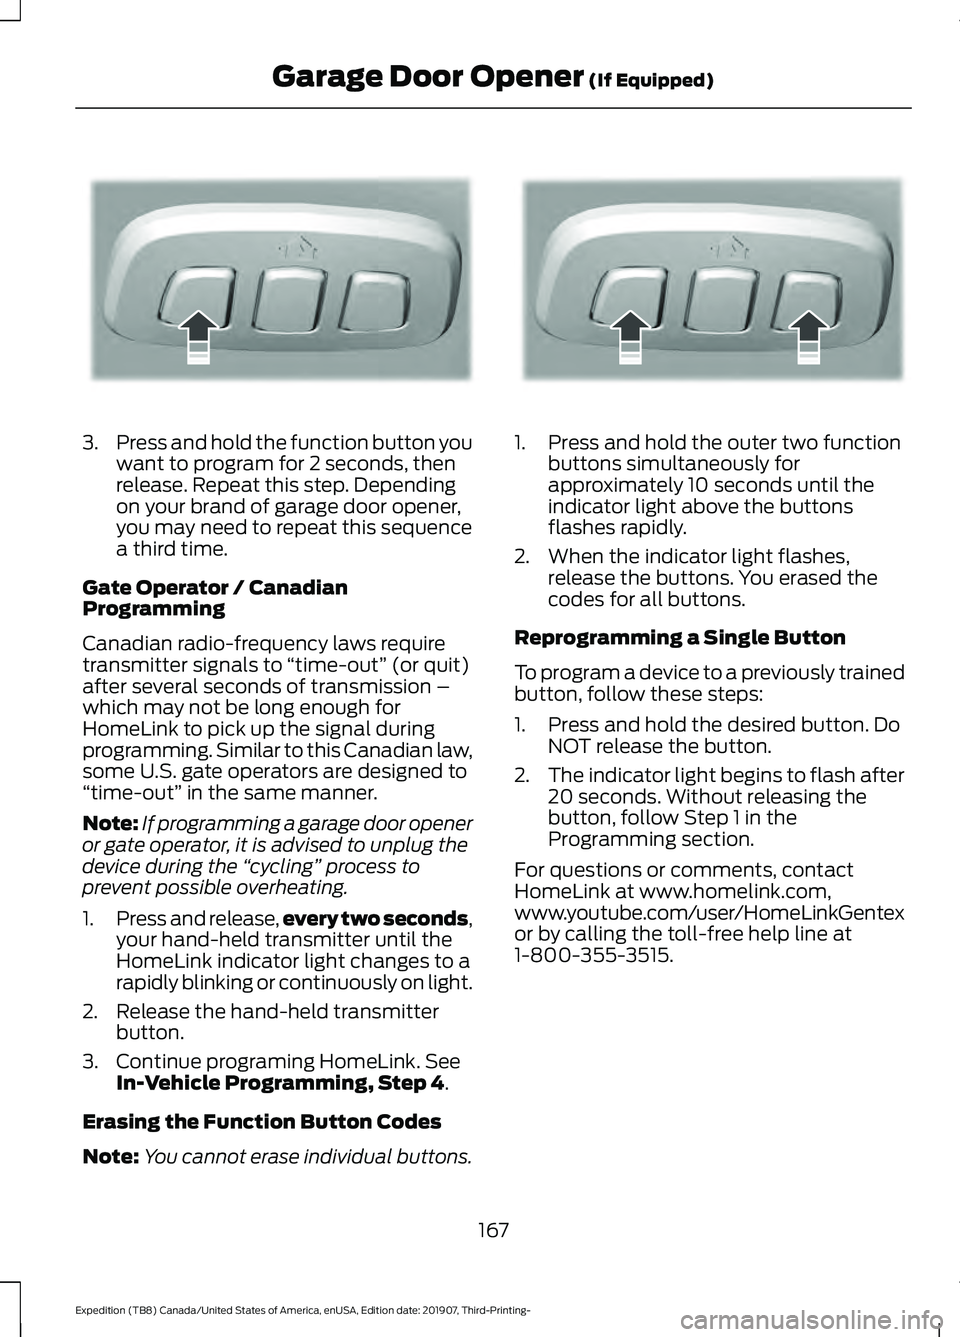
Press and hold the function button you
want to program for 2 seconds, then
release. Repeat this step. Depending
on your brand of garage door opener,
you may need to repeat this sequence
a third time.
Gate Operator / Canadian
Programming
Canadian radio-frequency laws require
transmitter signals to “time-out” (or quit)
after several seconds of transmission –
which may not be long enough for
HomeLink to pick up the signal during
programming. Similar to this Canadian law,
some U.S. gate operators are designed to
“time-out” in the same manner.
Note: If programming a garage door opener
or gate operator, it is advised to unplug the
device during the “cycling” process to
prevent possible overheating.
1. Press and release, every two seconds,
your hand-held transmitter until the
HomeLink indicator light changes to a
rapidly blinking or continuously on light.
2. Release the hand-held transmitter button.
3. Continue programing HomeLink. See In-Vehicle Programming, Step 4.
Erasing the Function Button Codes
Note: You cannot erase individual buttons. 1. Press and hold the outer two function
buttons simultaneously for
approximately 10 seconds until the
indicator light above the buttons
flashes rapidly.
2. When the indicator light flashes, release the buttons. You erased the
codes for all buttons.
Reprogramming a Single Button
To program a device to a previously trained
button, follow these steps:
1. Press and hold the desired button. Do NOT release the button.
2. The indicator light begins to flash after
20 seconds. Without releasing the
button, follow Step 1 in the
Programming section.
For questions or comments, contact
HomeLink at www.homelink.com,
www.youtube.com/user/HomeLinkGentex
or by calling the toll-free help line at
1-800-355-3515.
167
Expedition (TB8) Canada/United States of America, enUSA, Edition date: 201907, Third-Printing- Garage Door Opener
(If Equipped)E188212 E188213
Page 183 of 542
•
Hill descent control is not active.
• You have not selected Tow haul, Sport,
Sand or Mud/Rut modes.
Note: Note when in Sport mode it can be
enabled by pressing the Auto-Start-Stop
button. The green Auto-Start-Stop
indicator light on the instrument
cluster will illuminate to indicate
when the automatic engine stop occurs. If the instrument cluster is
equipped with a grey
Auto-Start-Stop indicator light,
it illuminates when automatic engine stop
is not available due to one of the above
noted conditions not being met.
Automatic Engine Restart
Any of the following conditions will result
in an automatic restart of the engine:
• You have removed your foot from the
brake pedal.
• You press the accelerator pedal.
• You press the accelerator and the
brake pedal at the same time.
• The driver safety belt becomes
unfastened or the driver door is ajar.
• Your vehicle is moving.
• The interior compartment does not
meet customer comfort when air
conditioning or heat is on.
• Fogging of the windows could occur
and the air conditioning is on.
• The battery is not within optimal
operating conditions.
• You have exceeded the maximum
engine off time.
• When you press the Auto-Start-Stop
button with the engine automatically
stopped. •
The front defroster is turned to the Max
setting.
• When you shift into park (P), the engine
will restart.
Any of the following conditions may result
in an automatic restart of the engine:
• You have increased the blower fan
speed or changed the climate control
temperature.
• You have an electrical accessory
turned on or plugged in.
Note: You may notice that the climate seat
fan fluctuates during an automatic restart.
Disabling Auto-Start-Stop Press the Auto-Start-Stop button on the
center console to switch the system off.
The button will illuminate. Deactivating
using the button lasts only 1 key cycle.
Press the button again to restore
Auto-Start-Stop function.
Note:
If the Shift to park (P), Restart Engine
message appears and the amber
Auto-Start-Stop indicator light flashes, this
indicates automatic restart is unavailable.
You must restart the vehicle manually. See
Information Displays (page 114).
180
Expedition (TB8) Canada/United States of America, enUSA, Edition date: 201907, Third-Printing- Unique Driving Characteristics E146361 E181352
Page 194 of 542

Illumination of the service engine soon
indicator, charging system warning light or
the temperature warning light, fluid leaks,
strange odors, smoke or loss of engine
power could indicate that the emission
control system is not working properly.
An improperly operating or damaged
exhaust system may allow exhaust to
enter the vehicle. Have a damaged or
improperly operating exhaust system
inspected and repaired immediately.
Do not make any unauthorized changes to
your vehicle or engine. By law, vehicle
owners and anyone who manufactures,
repairs, services, sells, leases, trades
vehicles, or supervises a fleet of vehicles
are not permitted to intentionally remove
an emission control device or prevent it
from working. Information about your
vehicle
’s emission system is on the Vehicle
Emission Control Information Decal
located on or near the engine. This decal
also lists engine displacement.
Please consult your warranty information
for complete details.
On-Board Diagnostics (OBD-II)
Your vehicle has a computer known as the
on-board diagnostics system (OBD-II) that
monitors the engine ’s emission control
system. The system protects the
environment by making sure that your
vehicle continues to meet government
emission standards. The OBD-II system
also assists a service technician in properly
servicing your vehicle. When the service engine soon
indicator illuminates, the OBD-II
system has detected a
malfunction. Temporary malfunctions may
cause the service engine soon indicator to
illuminate. Examples are: 1. Your vehicle has run out of fuel
—the
engine may misfire or run poorly.
2. Poor fuel quality or water in the fuel —the engine may misfire or run
poorly.
3. The fuel fill inlet may not have closed properly. See Refueling (page 185).
4. Driving through deep water —the
electrical system may be wet.
You can correct these temporary
malfunctions by filling the fuel tank with
good quality fuel, properly closing the fuel
fill inlet or letting the electrical system dry
out. After three driving cycles without these
or any other temporary malfunctions
present, the service engine soon indicator
should stay off the next time you start the
engine. A driving cycle consists of a cold
engine startup followed by mixed city and
highway driving. No additional vehicle
service is required.
If the service engine soon indicator remains
on, have your vehicle serviced at the first
available opportunity. Although some
malfunctions detected by the OBD-II may
not have symptoms that are apparent,
continued driving with the service engine
soon indicator on can result in increased
emissions, lower fuel economy, reduced
engine and transmission smoothness and
lead to more costly repairs.
Readiness for Inspection and
Maintenance (I/M) Testing
Some state and provincial and local
governments may have
Inspection/Maintenance (I/M) programs
to inspect the emission control equipment
on your vehicle. Failure to pass this
inspection could prevent you from getting
a vehicle registration. If the service engine soon
indicator is on or the bulb does
not work, your vehicle may need
service. See On-Board Diagnostics.
191
Expedition (TB8) Canada/United States of America, enUSA, Edition date: 201907, Third-Printing- Engine Emission Control
Page 200 of 542
The tow/haul feature:
•
Moves upshifts to higher engine speeds
to reduce the frequency of
transmission shifting.
• Provides engine braking in all forward
gears, which slows your vehicle and
assists you in controlling your vehicle
when descending a slope.
• Depending on driving conditions and
load conditions, may downshift the
transmission, and slow your vehicle to
help control your vehicle speed when
descending a hill. The amount of
downshift braking provided varies
based upon the amount you press the
brake pedal.
The tow haul feature improves
transmission operation when towing a
trailer or a heavy load.
To deactivate the tow haul feature for
column shifter and return to normal driving
mode, press the button on the gearshift
lever twice. The indicator light deactivates
when the system turns off. Tow haul mode
also deactivates when you power down
your vehicle.
To deactivate the tow haul feature for
vehicles with console shifter, cycle through
the available drive modes with the drive
modes button or rotary dial to select an
alternate mode. See Drive Control (page
261). The indicator light deactivates when
the system turns off.
SelectShift™ Automatic
Transmission
Your vehicle has a SelectShift Automatic
transmission. The SelectShift Automatic
transmission gives you the ability to
change gears up or down without a clutch
as desired. To prevent the engine from running at too
low of an RPM, which may cause it to stall,
SelectShift still makes some downshifts
if it determines that you have not
downshifted in time. Although SelectShift
makes some downshifts for you, it still
allows you to downshift at any time as long
as the SelectShift determines that damage
to the engine does not occur from
over-revving.
Note:
Engine damage could occur if you
maintain excessive engine revving without
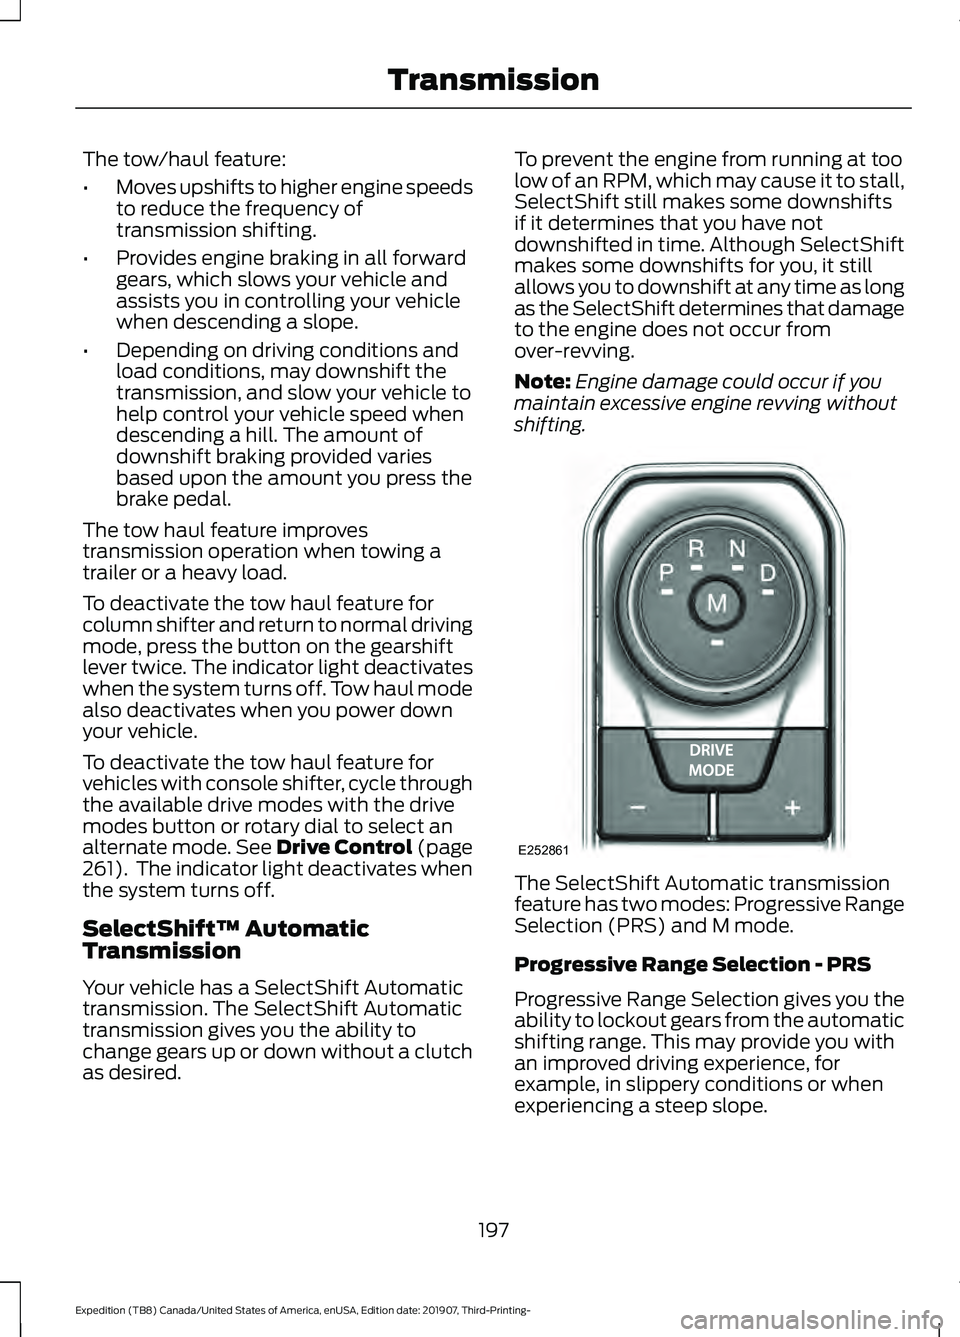
shifting. The SelectShift Automatic transmission
feature has two modes: Progressive Range
Selection (PRS) and M mode.
Progressive Range Selection - PRS
Progressive Range Selection gives you the
ability to lockout gears from the automatic
shifting range. This may provide you with
an improved driving experience, for
example, in slippery conditions or when
experiencing a steep slope.
197
Expedition (TB8) Canada/United States of America, enUSA, Edition date: 201907, Third-Printing- TransmissionE252861
Page 206 of 542
The differences that make your vehicle so
versatile also make it handle differently
than an ordinary passenger car.
Maintain steering wheel control at all
times, especially in rough terrain. Since
sudden changes in terrain can result in
abrupt steering wheel motion, make sure
you grip the steering wheel from the
outside. Do not grip the spokes.
Drive cautiously to avoid vehicle damage
from concealed objects such as rocks and
stumps.
You should either know the terrain or
examine maps of the area before driving.
Map out your route before driving in the
area. To maintain steering and braking
control of your vehicle, you must have all
four wheels on the ground and they must
be rolling, not sliding or spinning.
Driving Off-Road With Truck and
Utility Vehicles
Note:
On some models, the initial shift from
two-wheel drive to four-wheel drive when
your vehicle is moving can cause some
momentary clunk and ratcheting sounds.
This is the front drivetrain coming up to
speed and the automatic locking hubs
engaging and is not cause for concern.
Note: Your vehicle may have a front air dam
that can become damaged, due to reduced
ground clearance, when taking your vehicle
off-road. You may remove this air dam by
removing eight bolts.
Four-wheel drive vehicles are specially
equipped for driving on sand, snow, mud
and rough terrain and have operating
characteristics that are somewhat
different from conventional vehicles, both
on and off the road. The transfer case supples power to all four
wheels. On four-wheel drive vehicles, the
transfer case allows you to select different
4WD modes when necessary. You can find
information on transfer case operation and
shifting procedures in this chapter. You can
find information on transfer case
maintenance in the Maintenance chapter.
You should become thoroughly familiar
with this information before you operate
your vehicle.
Four-wheel drive, when you select a 4WD
mode, uses all four wheels to power your
vehicle. This increases traction, enabling
you to drive over terrain and road
conditions that a conventional two-wheel
drive vehicle cannot.
Basic Operating Principles
•
Drive slower in strong crosswinds which
can affect the normal steering
characteristics of your vehicle.
• When driving your vehicle on surfaces
made slippery by loose sand, water,
gravel, snow or ice proceed with care.
• Do not use 4H or 4L on dry, hard
surfaced roads. Doing so can produce
excessive noise, increase tire wear and
may damage drive components. 4H or
4L modes are only for consistently
slippery or loose surfaces.
If Your Vehicle leaves the Road
If your vehicle leaves the road, reduce your
vehicle speed and avoid severe braking.
When your vehicle speed decreases, ease
your vehicle back onto the road. Do not
turn the steering wheel sharply when
returning your vehicle to the road.
It may be safer to stay on the shoulder of
the road and slow down gradually before
returning to the road. You may lose control
if you do not slow down or if you turn the
steering wheel too sharply or abruptly.
203
Expedition (TB8) Canada/United States of America, enUSA, Edition date: 201907, Third-Printing- Four-Wheel Drive (If Equipped)
Page 217 of 542
PRINCIPLE OF OPERATION
WARNING: Vehicle modifications
involving braking system, aftermarket
roof racks, suspension, steering system,
tire construction and wheel and tire size
may change the handling characteristics
of your vehicle and may adversely affect
the performance of the electronic
stability control system. In addition,
installing any stereo loudspeakers may
interfere with and adversely affect the
electronic stability control system. Install
any aftermarket stereo loudspeaker as
far as possible from the front center
console, the tunnel, and the front seats
in order to minimize the risk of interfering
with the electronic stability control
sensors. Reducing the effectiveness of
the electronic stability control system
could lead to an increased risk of loss of
vehicle control, vehicle rollover, personal
injury and death. WARNING:
Remember that even
advanced technology cannot defy the
laws of physics. It’ s always possible to
lose control of a vehicle due to
inappropriate driver input for the
conditions. Aggressive driving on any
road condition can cause you to lose
control of your vehicle increasing the risk
of personal injury or property damage.
Activation of the electronic stability
control system is an indication that at
least some of the tires have exceeded
their ability to grip the road; this could
reduce the operator ’s ability to control
the vehicle potentially resulting in a loss
of vehicle control, vehicle rollover,
personal injury and death. If your
electronic stability control system
activates, SLOW DOWN.
The system automatically turns on each
time you switch the ignition on. If a fault occurs in either the stability
control or the traction control system, you
may experience the following conditions:
•
The stability and traction control light
illuminates steadily.
• The stability control and traction
control systems do not enhance your
vehicle's ability to maintain traction of
the wheels.
If a driving condition activates either the
stability control or the traction control
system you may experience the following
conditions:
• The stability and traction control light
flashes.
• Your vehicle slows down.
• Reduced engine power.
• A vibration in the brake pedal.
• The brake pedal is stiffer than usual.
• If the driving condition is severe and
your foot is not on the brake, the brake
pedal may move as the system applies
higher brake force.
The stability control system has several
features built into it to help you maintain
control of your vehicle:
Electronic Stability Control
The system enhances your vehicle ’s ability
to prevent skids or lateral slides by
applying brakes to one or more of the
wheels individually and, if necessary,
reducing engine power.
Roll Stability Control
The system enhances your vehicle ’s ability
to prevent rollovers by detecting your
vehicle ’s roll motion and the rate at which
it changes by applying the brakes to one
or more wheels individually.
214
Expedition (TB8) Canada/United States of America, enUSA, Edition date: 201907, Third-Printing- Stability Control
Page 227 of 542

WARNING: Active park assist does
not apply the brakes under any
circumstances. WARNING: You are responsible for
controlling your vehicle at all times. The
system is designed to be an aid and does
not relieve you of your responsibility to
drive with due care and attention. Failure
to follow this instruction could result in
the loss of control of your vehicle,
personal injury or death.
Active park assist is a multi-step process
and may require you to shift the
transmission multiple times. Follow the
onscreen instructions until the parking
maneuver is complete.
If you are uncomfortable with the proximity
to any vehicle or object, you may choose
to override the system by grabbing the
steering wheel, or by taking full control of
your vehicle after pressing the active park
assist button.
Keep your hands, hair, clothing and any
loose items clear of the steering wheel
when using active park assist.
The sensors are on the front and rear
bumpers.
Note: Keep the sensors free from snow, ice
and large accumulations of dirt.
Note: Do not cover up the sensors.
Note: Do not clean the sensors with sharp
objects.
Note: The sensors may not detect objects
with surfaces that absorb ultrasonic waves.
The sensors may falsely detect objects due
to ultrasonic interference caused by
motorcycle exhausts, truck air brakes or
horns, for example.
Note: If you change any tires, the system
must recalibrate and may not correctly
operate for a short time. The system may not correctly operate in
any of the following conditions:
•
You use a spare tire or a tire that is
significantly worn more than the other
tires.
• One or more tires are incorrectly
inflated.
• You try to park on a tight curve.
• Something passes between the front
bumper and the parking space. For
example, a pedestrian or cyclist.
• The edge of the neighboring parked
vehicle is high off the ground. For
example, a bus, tow truck or flatbed
truck.
• The weather conditions are poor. For
example, during heavy rain, snow, fog,
high humidity and high temperatures.
Do not use the system if:
• You have attached an add-on
accessory close to the sensors on the
front or rear of your vehicle. For
example, a bike rack or trailer.
• You have attached an overhanging
object to the roof. For example, a
surfboard.
• The front bumper, rear bumper or the
side sensors are damaged.
• The correct tire size is not in use on your
vehicle. For example, a mini-spare tire.
Using Active Park Assist
Selecting an Active Park Assist Mode Press the button once to
activate parallel parking. Press
the button a second time to
activate perpendicular parking. If you press
the button again the system switches off.
224
Expedition (TB8) Canada/United States of America, enUSA, Edition date: 201907, Third-Printing- Parking AidsE146186
Page 232 of 542

Note:
You are responsible for controlling
your vehicle and making sure the path is
clear prior to pulling into traffic.
Troubleshooting Possible Cause
Symptom
You may have switched the traction control off.
The system does not search for
a parking space.
The transmission is in reverse (R). Your vehicle must
be moving forward to be able to detect a parking space.
The sensors may be blocked. For example, snow, ice
or dirt buildup. Blocked sensors can affect how the
system functions.
The system does not offer a
parking space.
There is not enough room in the parking space for your
vehicle to safely park.
There is not enough space for the parking maneuver on
the opposite side of the parking space.
The parking space is more than 5 ft (1.5 m) or less than
2 ft (0.5 m) away.
The vehicle speed is greater than
22 mph (35 km/h)
for parallel parking or greater than 19 mph (30 km/h)
for perpendicular parking.
You recently disconnected or replaced the battery. After
you reconnect the battery you must drive your vehicle
on a straight road for a short period of time.
Your vehicle is rolling in the opposite direction of the
current transmission position. For example, rolling
forward when in reverse (R).
The system does not correctly
position your vehicle in a
parking space.
An irregular curb along the parking space prevents the
system from correctly aligning your vehicle.
Vehicles or objects bordering the space may not be
correctly parked.
Your vehicle stopped too far past the parking space.
The tires may not be correctly installed or maintained.
For example, not inflated correctly, improper size, or of
different sizes.
A repair or alteration changes the detection capabilities.
229
Expedition (TB8) Canada/United States of America, enUSA, Edition date: 201907, Third-Printing- Parking Aids