2020 DODGE GRAND CARAVAN navigation
[x] Cancel search: navigationPage 324 of 380

322MULTIMEDIA
Viewing A List Of Recently Found Locations
Your navigation system stores the last 50
locations you have found.
From the main menu, press Where To? >
Recently Found .
Clearing The List Of Recently Found Locations
From the main menu, press Where To? >
Recently Found > > Clear > Yes.
About Favorites
You can save locations in your Favorites so you
can quickly find them and create routes to
them. Your home location is also stored in
Favorites.
Saving Your Current Location To Favorites
1. From the map, press the vehicle icon.
2. Press Save .
3. Enter a name.
4. Press Done .
The location is saved in Favorites. Saving Locations To Favorites
1. Search for the location.
2. From the Go! page, press > Save > OK
.
Finding Favorites
1. From the main menu, press
Where To? >
Favorites
.
2. If necessary, select a category.
3. Select a saved location.
Editing Favorites
1. From the main menu, press
Where To? >
Favorites
.
2. Select a category.
3. Select a favorite.
4. Press the information box.
5. Press > Edit . 6. Select an option:
Name
Phone Number
Categories
Change Map Symbol
7. Edit the information.
8. Press Done .
Planning A Trip
You can use Trip Planner to create and save a
trip with multiple destinations.
1. From the main menu, press
Where To? >
Trip Planner
.
2. Press .
3. Press Select Start Location .
4. Search for a location.
5. Press Select .
6. Press to add an additional location.
7. Press Select .
20_RT_OM_EN_USC_t.book Page 322
Page 326 of 380

324MULTIMEDIA
Setting A Simulated Location
You can use the GPS simulator to select another
location, near which you can search for and
save points of interest. This may be helpful
when planning trips.
1. From the main menu, press
Tools >
Settings > System > GPS Simulator > On
.
2. From the main menu, press Where To? >
Browse Map .
3. Press an area on the map.
4. Press > Set Location .
Entering Coordinates
If you know the geographic coordinates of your
destination, you can use your navigation system
to navigate to the destination using the latitude
and longitude coordinates.
1. From the main menu, press
Where To? >
Coordinates
.
2. Press a field to enter the latitude and longitude data.
3. Press View on Map .
4. Press Go! Changing The Map Coordinate Format
1. From the Home Screen, press
Where To? >
Coordinates > > Format
.
2. Select a format.
About Map Pages
Viewing The Map While Navigating
NOTICE
In no event shall Garmin be liable for any
incidental, special, indirect, or consequential
damages, including, without limitation,
damages for any traffic fines or citations,
whether resulting from the use, misuse, or
inability to use the product or from defects in
the product. Some states do not allow the
exclusion of incidental or consequential
damages, so the above limitations may not
apply to you.
Your route is marked with a magenta line. A
checkered flag marks your destination. As you travel, your navigation system guides you
to your destination with voice prompts, arrows
on the map, and directions at the top of the
map. If you depart from the original route, your
navigation system recalculates the route and
provides new directions.
A speed limit icon displaying the current speed
limit may appear as you travel on major
roadways.
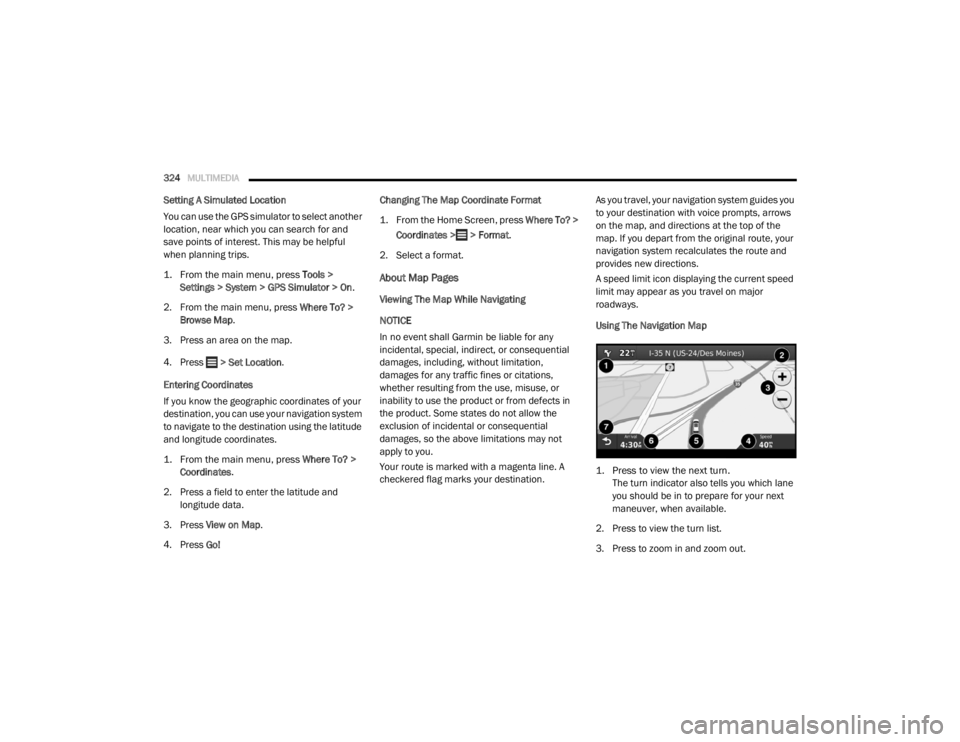
Using The Navigation Map
1. Press to view the next turn.
The turn indicator also tells you which lane
you should be in to prepare for your next
maneuver, when available.
2. Press to view the turn list.
3. Press to zoom in and zoom out.
20_RT_OM_EN_USC_t.book Page 324
Page 327 of 380

MULTIMEDIA325
4. Press to view trip information.
5. Press to view information for the location.
6. Press to display a different data field.
7. Press to return to the main menu.
About myTrends
When the myTrends feature is enabled, your
estimated time of arrival for your frequent
destinations, like your workplace, automatically
appear in the navigation bar at the top of the
map.
When myTrends information appears in the
navigation bar, you can press the navigation bar
to view route options for the suggested
destination.
Enabling myTrends
From the main menu press Settings >
Navigation > myTrends > Enabled .
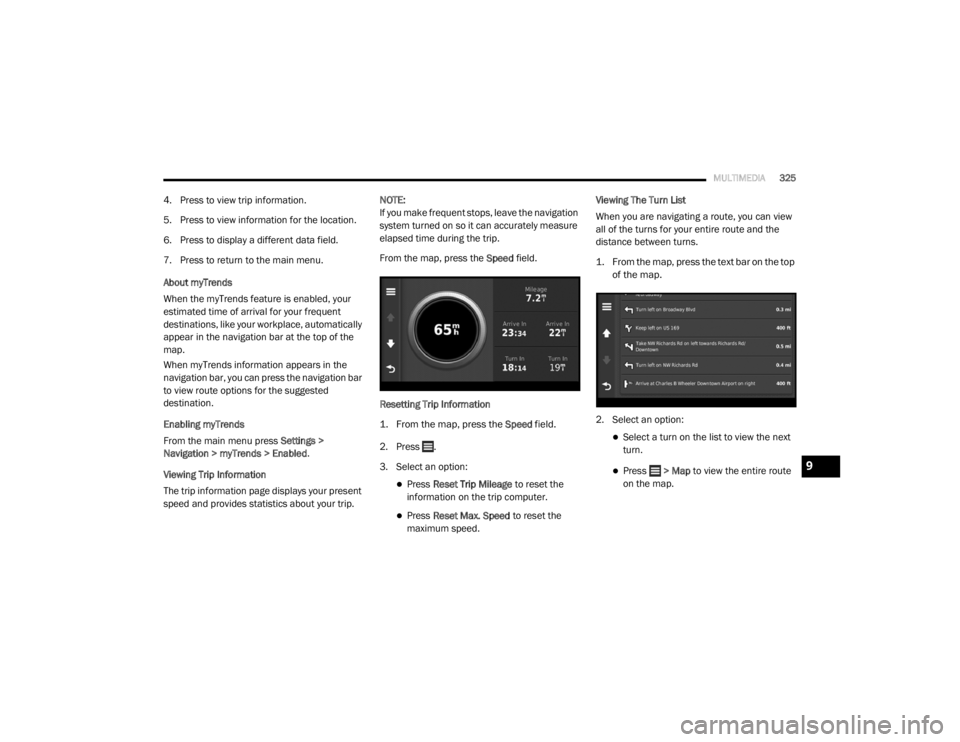
Viewing Trip Information
The trip information page displays your present
speed and provides statistics about your trip. NOTE:
If you make frequent stops, leave the navigation
system turned on so it can accurately measure
elapsed time during the trip.
From the map, press the
Speed field.
Resetting Trip Information
1. From the map, press the
Speed
field.
2. Press .
3. Select an option:
Press Reset Trip Mileage to reset the
information on the trip computer.
Press Reset Max. Speed to reset the
maximum speed. Viewing The Turn List
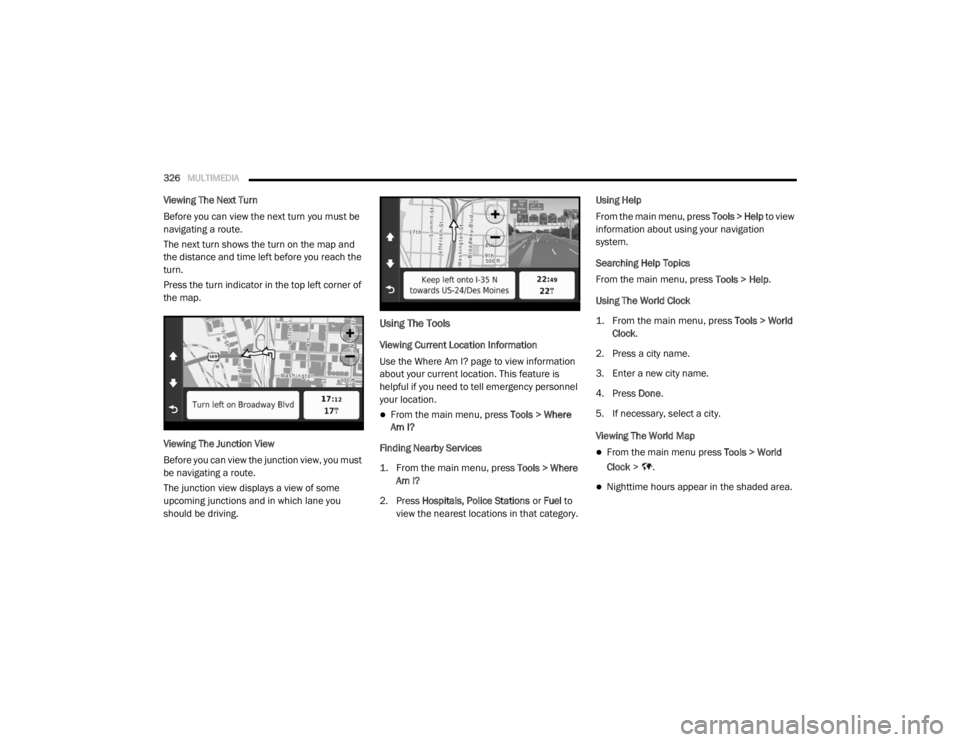
When you are navigating a route, you can view
all of the turns for your entire route and the
distance between turns.
1. From the map, press the text bar on the top
of the map.
2. Select an option:
Select a turn on the list to view the next
turn.
Press > Map to view the entire route
on the map.9
20_RT_OM_EN_USC_t.book Page 325
Page 328 of 380

326MULTIMEDIA
Viewing The Next Turn
Before you can view the next turn you must be
navigating a route.
The next turn shows the turn on the map and
the distance and time left before you reach the
turn.
Press the turn indicator in the top left corner of
the map.
Viewing The Junction View
Before you can view the junction view, you must
be navigating a route.
The junction view displays a view of some
upcoming junctions and in which lane you
should be driving.
Using The Tools
Viewing Current Location Information
Use the Where Am I? page to view information
about your current location. This feature is
helpful if you need to tell emergency personnel
your location.
From the main menu, press Tools > Where
Am I?
Finding Nearby Services
1. From the main menu, press
Tools > Where
Am I?
2. Press Hospitals, Police Stations or Fuel to
view the nearest locations in that category. Using Help
From the main menu, press
Tools > Help to view
information about using your navigation
system.
Searching Help Topics
From the main menu, press Tools > Help.
Using The World Clock
1. From the main menu, press
Tools > World
Clock
.
2. Press a city name.
3. Enter a new city name.
4. Press Done .
5. If necessary, select a city.
Viewing The World Map
From the main menu press Tools > World
Clock > .
Nighttime hours appear in the shaded area.
20_RT_OM_EN_USC_t.book Page 326
Page 329 of 380

MULTIMEDIA327
Using The Calculator
From the main menu press Tools > Calculator.
Using The Unit Converter
1. From the main menu press
Tools > Unit
Converter
.
2. Press the box with a unit of measurement listed.
3. Select a unit of measurement.
4. Press Save .
Two units of measurement are listed.
5. Press a unit of measurement to change.
6. Select a unit of measurement.
7. Press Done .
8. Repeat steps five to six, if necessary.
9. Enter a value.
10. Press Done . Setting Currency Conversion Rates Manually
You can update the currency conversion rates
manually so that you are always using the most
current rates.
1. From the main menu press
Tools > Unit
Converter
.
2. Press the box with a currency listed.
3. Select Currency.
4. Press Save .
5. Press a currency box.
6. Select the currency you want to update.
7. Repeat steps three to six to select a currency to convert to, if necessary.
8. Press a box under a currency.
9. Enter a new value for the currency.
10. Press Done .
11. Repeat steps eight to nine, if necessary.Customizing The Navigation System
1. From the main menu, press “Settings.”
2. Press a setting category.
3. Press the setting to change it.
System Settings
From the main menu press Settings > System.
GPS Simulator— stops the navigation system
from receiving a GPS signal, and saves
battery power.
About — displays the software version
number, the unit ID number and information
on several other software features.
9
20_RT_OM_EN_USC_t.book Page 327
Page 330 of 380

328MULTIMEDIA
NOTE:
You need this information when you update the
system software or purchase additional map
data.
Restoring The System Settings
From the main menu, press Settings > System
> > Restore .
Changing The Map Settings
From the main menu press Settings > Map.
Map Detail — sets the level of detail on the
map. More detail may result in slower map
drawing.
Map View — sets the perspective on the Map
page.
Map Theme — changes the color of the map
data.
Map Data Layout — changes the amount of
data visible on the map.
Vehicle — changes the icon to represent your
position on the map.
Trip Log
Show on Map — displays the path of your
travels on the map.
Clear Trip Log
Changing The Map Perspective
1. From the main menu press
Settings > Map
> Map View
.
2. Select an option:
Press Track Up to display the map in two
dimensions (2-D), with your direction of
travel at the top.
Press North Up to display the map in 2-D
with North at the top.
Press 3-D to display the map in three
dimensions. Route Preferences
From the main menu, press
Settings >
Navigation > Route Preference .
The route calculation is based on road speeds
and vehicle acceleration data for a given route.
Faster Time — Calculates routes that are
faster to drive but can be longer in distance.
Shorter Distance — Calculates routes that are
shorter in distance but can take more time to
drive.
Prompted — Select the faster time and
shorter distance for your route.
Avoiding Road Features
1. From the main menu press
Settings >
Navigation > Avoidances
.
2. Select the road features to avoid on your routes.
3. Press “Save.”
Restoring The Original Navigation Settings
From the main menu press Settings >
Navigation > > Restore.
20_RT_OM_EN_USC_t.book Page 328
Page 331 of 380

MULTIMEDIA329
Language Settings
From the main menu press Settings >
Language .
Voice Personality — sets the language for
voice prompts.
Keyboard — sets the language for your
keyboard.
Keyboard Layout — sets the keyboard layout.
Restoring The Original Language Settings
From the main menu press Settings >
Language > > Restore.
Restoring All Original Settings
From the main menu, press Settings > >
Restore > Yes .
Appendix
About GPS Satellite Signals
The navigation system must acquire satellite
signals in order to navigate.
When the navigation system has acquired
satellite signals, the signal strength bars on the
main menu are full . When it loses satellite
signals, the bars are clear . For more information about GPS, go to
www.garmin.com/aboutGPS
.
Updating The Software
To update the navigation system software, you
must have a USB mass storage device and an
Internet connection.
1. Go to
auto-update.garmin.com
.
2. Find your model and select Software
Updates > Download .
3. Read and accept the terms of the Software License Agreement.
4. Follow the instructions on the Web site to complete the installation of the software
update.
Updating The Map Data
To update the navigation system map, you must
have a USB mass storage device and an
Internet connection, or visit your local dealer for
assistance. A map update can be purchased
once a year.
1. Go to
auto-update.garmin.com
.
2. Select your vehicle from the drop-down lists. 3. Select
Order Map Updates for your unit.
4. Follow the Web site instructions to update your map.
CAUTION
Garmin and FCA US LLC are not responsible for
the accuracy of, or the consequences of using,
a safety camera database.
Safety camera information is available in some
locations. Go to http://www.garmin.com for
availability. For these locations, the navigation
system includes the locations of hundreds of
safety cameras. Your navigation system alerts
you when you are approaching a safety camera
and can warn you if you are driving too fast. The
data is updated at least weekly, so you always
have access to the most up-to-date information.
You can purchase a new region or extend an
existing subscription at any time. Each region
that you purchase has an expiration date.9
20_RT_OM_EN_USC_t.book Page 329
Page 332 of 380

330MULTIMEDIA
Custom POIs (Points of Interest)
NOTE:
Custom POI files must be named “poi.gpi”. and
located on the USB storage device in a folder
named “POI” within a folder named “Garmin”
(Garmin/POI/).
You can manually load custom Points Of
Interest (POI) databases, available from various
companies on the Internet. Some custom POI
databases contain alert information for points
such as safety cameras and school zones. The
navigation system can notify you when you
approach one of these points. You are
responsible for ensuring that your use of safety
camera information is lawful in your area.
CAUTION
Garmin and FCA US LLC are not responsible for
the consequences of using custom POI
databases, or for the accuracy of custom POI
databases. After downloading your POI database, use the
Garmin POI Loader to install the POIs onto a
USB mass storage device. Use the USB mass
storage device to load the POIs. The POI Loader
is available at
garmin.com/products/poiloader.
Refer to the POI Loader Help file for more
information; click Help to open the Help file. The
file name can only be POI.gpi. No other file
name or extension should be used.
NOTE:
Each time you load custom POIs to the
navigation system, any other custom POIs
already saved in the system will be overwritten.
Finding Custom POIs
You can view a list of the custom POIs loaded in
your navigation system.
Press Where To? > Extras > Custom POIs .
Deleting Custom POIs
1. Press
Tools > My Data > Delete Custom
POI(s)
.
2. Press Yes to confirm. NOTE:
All custom POIs will be deleted from your
navigation system.
Saving Trip Logs
Trip logs are recorded while you navigate a
route.
SiriusXM® Travel Link (Radio 430 NAV Only)
Now, in addition to delivering over 130
channels of the best sports, entertainment, talk
and 100% commercial-free music, SiriusXM®
now offers premium infotainment services that
work in conjunction with compatible navigation
systems.
To access SiriusXM® Travel Link, push the
Menu button then press the Travel Link button.
20_RT_OM_EN_USC_t.book Page 330