2020 DODGE DURANGO audio
[x] Cancel search: audioPage 239 of 464

STARTING AND OPERATING237
CHANGING LANESENSE STATUS
The LaneSense system has settings to adjust
the intensity of the torque warning and the
warning zone sensitivity (early/late) that you
can configure through the Uconnect system
screen. Refer to “Uconnect Settings” in
“Multimedia” for further information.
NOTE:
When enabled the system operates above
37 mph (60 km/h) and below 112 mph
(180 km/h).
Use of the turn signal suppresses the
warnings.
The system will not apply torque to the
steering wheel whenever a safety system
engages (Anti-Lock Brakes, Traction Control
System, Electronic Stability Control, Forward
Collision Warning, etc.).
PARKVIEW REAR BACK UP CAMERA
Your vehicle is equipped with the ParkView Rear
Back Up Camera that allows you to see an
on-screen image of the rear surroundings of
your vehicle whenever the gear selector is put
into REVERSE. The image will be displayed on
the Navigation/Multimedia radio display screen
along with a caution note to “check entire
surroundings” across the top of the screen.
After five seconds this note will disappear. The
ParkView camera is located on the rear of the
vehicle above the rear license plate.
When the vehicle is shifted out of REVERSE
(with camera delay turned off), the rear camera
mode is exited and the navigation or audio
screen appears again.
Manual Activation Of The Backup Camera
1. Press the “Controls” button located on the
bottom of the Uconnect display.
2. Press the “Backup Camera” button to turn the Rear View Camera system on. NOTE:
The ParkView Rear Back Up Camera has
programmable modes of operation that may be
selected through the Uconnect System.
Refer to “Uconnect Settings” in “Multimedia”
for further information.
When the vehicle is shifted out of REVERSE
(with camera delay turned off), the rear camera
mode is exited and the previous screen appears
again. When the vehicle is shifted out of
REVERSE (with camera delay turned on), the
camera image will continue to be displayed for
up to ten seconds, unless the vehicle speed
exceeds 8 mph (13 km/h), the vehicle is shifted
into PARK, the vehicle’s ignition is placed in the
OFF position, or the user presses image defeat
“X” to exit out of the camera video display.
When enabled, active guidelines are overlaid on
the image to illustrate the width of the vehicle
and its projected backup path based on the
steering wheel position. A dashed center line
overlay indicates the center of the vehicle to
assist with parking or aligning to a hitch/
receiver. Different colored zones indicate the
distance to the rear of the vehicle.
5
20_WD_OM_EN_USC_t.book Page 237
Page 264 of 464

262IN CASE OF EMERGENCY
NOTE:
Your vehicle may be transmitting data as
authorized by the subscriber.
The SOS and ASSIST buttons will only func -
tion if you are connected to an operable LTE
(voice/data) or 4G (data) network. Other
Uconnect services will only be operable if
your SiriusXM Guardian™ service is active
and you are connected to an operable LTE
(voice/data) or 4G (data) network. ASSIST Call
The ASSIST Button is used to automatically
connect you to any one of the following support
centers:
Roadside Assistance – If you get a flat tire, or
need a tow, just push the ASSIST button and
you will be connected to a representative for
assistance. Roadside Assistance will know
what vehicle you’re driving and its location.
Additional fees may apply for roadside assis
-
tance.
SiriusXM Guardian™ Customer Care –
In-vehicle support for SiriusXM Guardian™.
Vehicle Customer Care – Total support for all
other vehicle issues.
SOS Call
1. Push the SOS Call button on the Rearview Mirror.
NOTE:
In case the SOS Call button is pushed in error,
there will be a 10 second delay before the SOS
Call system initiates a call to a SOS operator. To cancel the SOS Call connection, push the
SOS call button on the Rearview Mirror or press
the cancellation button on the Device Screen.
Termination of the SOS Call will turn off the
green LED light on the Rearview Mirror.
2. The LED light located between the ASSIST
and SOS buttons on the Rearview Mirror will
turn green once a connection to a SOS
operator has been made.
3. Once a connection between the vehicle and a SOS operator is made, the SOS Call
system may transmit the following
important vehicle information to a SOS
operator: Indication that the occupant placed a
SOS Call
The vehicle brand
The last known GPS coordinates of the
vehicle
4. You should be able to speak with the SOS operator through the vehicle audio system
to determine if additional assistance is
needed.
WARNING!
ALWAYS obey traffic laws and pay attention to
the road. ALWAYS drive safely with your hands
on the steering wheel. You have full
responsibility and assume all risks related to
the use of the features and applications in
this vehicle. Only use the features and
applications when it is safe to do so. Failure
to do so may result in an accident involving
serious injury or death.
20_WD_OM_EN_USC_t.book Page 262
Page 266 of 464

264IN CASE OF EMERGENCY
SOS Call System Limitations
Vehicles sold in Mexico DO NOT have SOS Call
system capabilities.
SOS or other emergency line operators in
Mexico may not answer or respond to SOS
system calls.
If the SOS Call system detects a malfunction,
any of the following may occur at the time the
malfunction is detected, and at the beginning of
each ignition cycle:
The Rearview Mirror light located between
the ASSIST and SOS buttons will continuously
illuminate red.
The Device Screen will display the following
message “Vehicle device requires service.
Please contact an authorized dealer.”
An In-Vehicle Audio message will state
“Vehicle device requires service. Please
contact an authorized dealer.” Even if the SOS Call system is fully functional,
factors beyond FCA US LLC’s control may
prevent or stop the SOS Call system operation.
These include, but are not limited to, the
following factors:
The ignition is in the OFF position
The vehicle’s electrical systems are not intact
The SOS Call system software and/or hard
-
ware are damaged during a crash
The vehicle battery loses power or becomes
disconnected during a vehicle crash
LTE (voice/data) or 4G (data) network and/or
Global Positioning Satellite signals are
unavailable or obstructed
Equipment malfunction at the SOS operator
facility
Operator error by the SOS operator
LTE (voice/data) or 4G (data) network
congestion
Weather
Buildings, structures, geographic terrain, or
tunnels
WARNING!
Ignoring the Rearview Mirror light could
mean you will not have SOS Call services. If
the Rearview Mirror light is illuminated,
have an authorized dealer service the SOS
Call system immediately.
The Occupant Restraint Control module
turns on the air bag Warning Light on the
instrument panel if a malfunction in any
part of the system is detected. If the Air Bag
Warning Light is illuminated, have an
authorized dealer service the Occupant
Restraint Control system immediately.
WARNING!
ALWAYS obey traffic laws and pay attention to
the road. ALWAYS drive safely with your hands
on the steering wheel. You have full
responsibility and assume all risks related to
the use of the features and applications in
this vehicle. Only use the features and
applications when it is safe to do so. Failure
to do so may result in an accident involving
serious injury or death.
20_WD_OM_EN_USC_t.book Page 264
Page 365 of 464

MULTIMEDIA363
CUSTOMER PROGRAMMABLE FEATURES
— U
CONNECT 4 SETTINGS
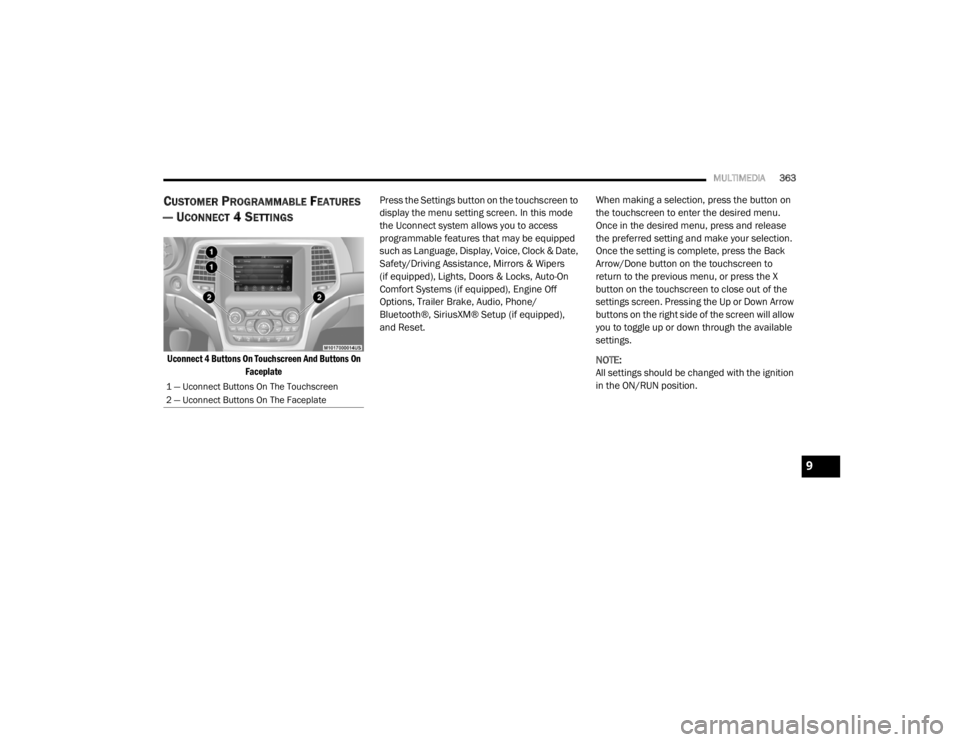
Uconnect 4 Buttons On Touchscreen And Buttons On
Faceplate
Press the Settings button on the touchscreen to
display the menu setting screen. In this mode
the Uconnect system allows you to access
programmable features that may be equipped
such as Language, Display, Voice, Clock & Date,
Safety/Driving Assistance, Mirrors & Wipers
(if equipped), Lights, Doors & Locks, Auto-On
Comfort Systems (if equipped), Engine Off
Options, Trailer Brake, Audio, Phone/
Bluetooth®, SiriusXM® Setup (if equipped),
and Reset.
When making a selection, press the button on
the touchscreen to enter the desired menu.
Once in the desired menu, press and release
the preferred setting and make your selection.
Once the setting is complete, press the Back
Arrow/Done button on the touchscreen to
return to the previous menu, or press the X
button on the touchscreen to close out of the
settings screen. Pressing the Up or Down Arrow
buttons on the right side of the screen will allow
you to toggle up or down through the available
settings.
NOTE:
All settings should be changed with the ignition
in the ON/RUN position.
1 — Uconnect Buttons On The Touchscreen
2 — Uconnect Buttons On The Faceplate
9
20_WD_OM_EN_USC_t.book Page 363
Page 376 of 464

374MULTIMEDIA
Audio
After pressing the Audio button on the touchscreen, the following settings will be available:
Setting Name Selectable Options
EqualizerBassMidTreble
NOTE:
When in this display, you may adjust the “Bass”, “Mid”, and “Treble” settings. Adjust the settings with the + and – setting buttons on the touchscreen
or by selecting any point on the scale between the + and – buttons on the touchscreen. Bass/Mid/Treble also allow you to simply slide your finger up
or down to change the setting as well as press directly on the desired setting.
Balance/Fade Up Arrow
Button Down Arrow
Button Left Arrow
Button Right Arrow
Button Center C Button
NOTE:
When in this display, you may adjust the “Balance/Fade” of the audio by using the Arrow button on the touchscreen to adjust the sound level from
the front and rear or right and left side speakers. Press the Center C button on the touchscreen to reset the balance and fade to the factory setting. Speed Adjusted Volume Off123
Surround Sound — If Equipped OnOff
Loudness — If Equipped YesNo
NOTE:
This feature improves sound quality at lower volumes when enabled. AUX Volume Offset — If Equipped OnOff
NOTE:
This feature provides the ability to tune the audio level for portable devices connected through the AUX input.
20_WD_OM_EN_USC_t.book Page 374
Page 379 of 464

MULTIMEDIA377
CUSTOMER PROGRAMMABLE FEATURES
— U
CONNECT 4C/4C NAV SETTINGS
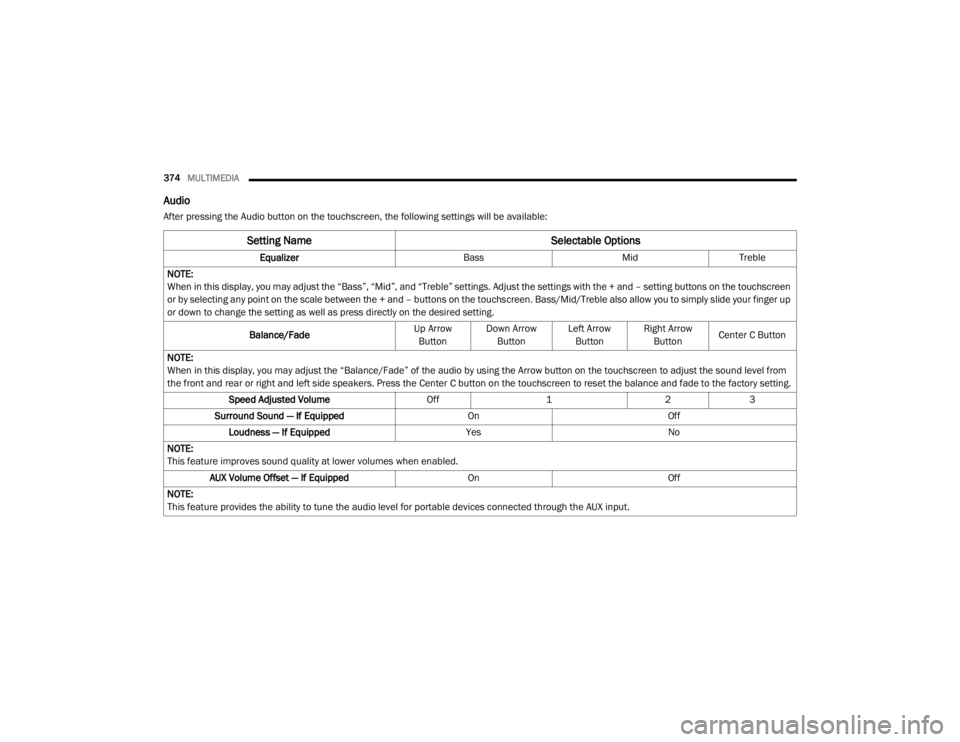
Uconnect 4C/4C NAV Buttons On Faceplate And
Buttons On Touchscreen
Press the Apps button, then press the
Settings button on the touchscreen to display
the menu setting screen. In this mode the
Uconnect system allows you to access
programmable features that may be equipped
such as Language, Display, Voice, Clock,
Camera, Safety & Driving Assistance, Mirrors &
Wipers, Lights, Doors & Locks, Seats & Comfort
(if equipped), Key Off Options, Trailer, Audio,
Phone/Bluetooth®, SiriusXM® Setup (if
equipped), Accessibility (if equipped), Reset,
and System Information (if equipped).
NOTE:
Depending on the vehicles options, feature
settings may vary. When making a selection, press the button on
the touchscreen to enter the desired menu.
Once in the desired menu, press and release
the preferred setting “option” until a check
mark appears next to the setting, showing that
setting has been selected. Once the setting is
complete, either press the Back Arrow button
on the touchscreen to return to the previous
menu, or press the X button on the touchscreen
to close out of the settings screen. Pressing the
Up or Down Arrow button on the right side of the
screen will allow you to toggle up or down
through the available settings.
1 — Uconnect Buttons On The Touchscreen
2 — Uconnect Buttons On The Faceplate
9
20_WD_OM_EN_USC_t.book Page 377
Page 391 of 464

MULTIMEDIA389
Audio
After pressing the Audio button on the touchscreen, the following settings will be available: Trailer Name
List of Trailer Names
NOTE:
You can select and personalize your trailer name depending on the type of trailer you are hauling. Select the trailer name from the following list: trailer,
boat, car, cargo, equipment, flat, livestock, horse, motorcycle, snowmobile, travel, and utility.
Setting Name Selectable Options
Setting NameSelectable Options
Balance/Fade Speaker Icon
NOTE:
When in this display, you may adjust the “Balance/Fade” of the audio by pressing and dragging the Speaker Icon toward any location in the box. Equalizer BassMid Treble
NOTE:
When in this display, you may adjust the “Bass”, “Mid”, and “Treble” settings. Adjust the settings with the + and – setting buttons on the touchscreen
or by selecting any point on the scale between the + and – buttons on the touchscreen. Bass/Mid/Treble also allow you to simply slide your finger up
or down to change the setting as well as press directly on the desired setting. Speed Adjusted Volume Off123
Surround Sound — If Equipped On
Off
AUX Volume Offset — If Equipped +
-
NOTE:
This feature provides the ability to tune the audio level for portable devices connected through the AUX input.
9
20_WD_OM_EN_USC_t.book Page 389
Page 392 of 464

390MULTIMEDIA
Phone/Bluetooth®
After pressing the Phone/Bluetooth® button on the touchscreen, the following settings will be available:Auto Play
On Off
Setting Name Selectable Options
Setting NameSelectable Options
Phone Pop-ups Displayed in Cluster OnOff
Do Not Disturb List of Settings
NOTE:
Press “Do Not Disturb” to access the available settings. The following settings are: Auto Reply (Both, Text, Call), Auto Reply Message (Custom, Default),
and Custom Auto Reply Message (Create Message). Paired Phones and Audio Devices List Of Paired Phones and Audio Sources
NOTE:
The “Paired Phones and Audio Devices” feature shows which phones and audio sources are paired to the Phone and Audio Sources Settings system.
For further information, refer to the Uconnect Owner’s Manual Supplement. Smartphone Projection Manager List Of Connected Phones
NOTE:
Pressing “Smartphone Projection Manager” feature allows you to see a list of all connected phones and gives you the option to determine which phone
will be used for projection (Apple CarPlay® or Android Auto™).
20_WD_OM_EN_USC_t.book Page 390