2020 CITROEN RELAY light
[x] Cancel search: lightPage 123 of 196

121
In the event of a breakdown
8
► Tilt lever 1 downwards to release the
terminals.
► Remove terminals 2 from the negative (-)
terminal.
Wait approximately 6 minutes after
switching off the ignition before
disconnecting the battery.
Do not disconnect the terminals while the
engine is running.
Do not charge a battery without disconnecting
the terminals first.
Close the windows and the doors before
disconnecting the battery.
After reconnecting the battery, turn on the
ignition and wait 1 minute before starting the
engine, to enable the electronic systems to
initialise. If minor problems nevertheless persist
following this operation, contact a CITROËN
dealer or a qualified workshop.
It is recommended to disconnect the (-)
terminal of the battery if the vehicle is to
be left unused for more than one month.
The description of the battery charging
procedure is only indicative.
After prolonged battery disconnection, it may be
necessary to reinitialise the following functions:
– the display parameters (date, time, language,
distance and temperature units),
– the stations of the audio system,
– the central locking.
Some settings are cancelled and must be
entered once again; contact a CITROËN dealer.
If the vehicle is equipped with a tachograph or
an alarm, it is recommended that the (-) terminal
of the battery (located under the floor on the
left-hand side, in the cab) be disconnected if the
vehicle is not going to be used for more than 5
days.
Starting using another
battery
Never start the engine by connecting a
battery charger.
Never use a 24 V or higher battery booster.
Check beforehand that the backup battery
has a nominal voltage of 12 V and a capacity
at least equal to that of the discharged
battery.
The two vehicles must not be in contact with
each other.
Switch off all the electrical consumers on both
vehicles (audio system, wipers, lighting, etc.).
Make sure that the jump leads are not close
to the moving parts of the engine (fan, belt,
etc.).
Do not disconnect the (+) terminal while the
engine is running.
A. Positive metallic terminal of your vehicle
B. Backup battery
C. Earth of your vehicle
The positive metallic terminal A is accessible
through a flap located on the side of the fuse
box.
Connect only to the terminals indicated
and illustrated above. In case of
non-compliance, risk of short circuit!
Page 126 of 196

124
Technical data
Engine technical data and
towed loads
Engines
The engine characteristics are given in the
vehicle's registration document, as well as in
sales brochures.
The maximum power corresponds to the value type-approved on a test bed, under
conditions defined in European legislation
(Directive 1999/99/EC).
For more information, contact a CITROËN dealer
or a qualified workshop.
Weights and towed loads
The weights and towed loads relating to
the vehicle are indicated on the registration
document, as well as in sales brochures.
These values are also indicated on the
manufacturer's plate or label.
For more information, contact a CITROËN dealer
or a qualified workshop.
The GTW (Gross Train Weight) values and the
towable loads listed are valid for a maximum
altitude of 1,000 metres. The towable load must
be reduced by steps of 10% for each additional
1,000 metres.
The maximum authorised nose weight
corresponds to the weight permitted on the
towball.
When exterior temperatures are high, the
vehicle performance may be limited in
order to protect the engine. When the exterior
temperature is higher than 37°C, reduce the
towed weight.
Towing even with a lightly loaded vehicle can adversely affect its road holding.
Braking distances are increased when towing
a trailer.
When using a vehicle to tow, never exceed
a speed of 62 mph (100 km/h) (observe the
local legislation in force).
Diesel engines
Euro 6.2 Diesel engines
Engines 2.2 BlueHDi 120 S&S2.2 BlueHDi 140 S&S2.2 BlueHDi 165 S&S
Gearbox Manual 6-speed (BVM6)
Cubic capacity (cc) 2,1972,1972,197
Max. power - EC standard (kW) 88103121
Fuel DieselDieselDiesel
Euro 6.1 Diesel engines
Engines 2.0 BlueHDi 110
2.0 BlueHDi 110 S&S 2.0 BlueHDi 130
2.0 BlueHDi 130 S&S 2.0 BlueHDi 160
2.0 BlueHDi 160 S&S
Gearbox Manual 6-speed (BVM6)
Cubic capacity (cc) 1,9971,9971,997
Engines 2.0 BlueHDi 110
2.0 BlueHDi 110 S&S 2.0 BlueHDi 130
2.0 BlueHDi 130 S&S 2.0 BlueHDi 160
2.0 BlueHDi 160 S&S
Max. power - EC standard (kW) 8196120
Fuel DieselDieselDiesel
Euro 4/Euro 5 Diesel engines
(Depending on country of sale)
Engines 2.2 HDi 1102.2 HDi 130
2.2 e-HDi 130 2.2 HDi 150
2.2 e-HDi 150 3 HDi 180
Gearbox Manual 6-speed (BVM6)
Cubic capacity (cc) 2,1982,1982,1982,999
Max. power - EC standard (kW) 819611 0130
Fuel DieselDieselDieselDiesel
Weights and towed loads
These tables present the approved weight values (in kg) according to the dimensions and designations of the vehicle.
Minibus
Dimensions DesignationsGVWUnbraked trailerMaximum authorised
nose weight
L3 H2 4404,005XX
L4 H2 4424,250XX
For Combi versions, the maximum weight of the Braked trailer (within the GTW limit), on a 10% or 12% gradient, is: 2,500 kg.
Page 148 of 196
146
Special features
Specifications
EquipmentDetails
Tipper truck Tipper truck bed consisting of 2 high strength steel blanks, 2.5 mm thickness, zinc-coated, joined by central and
longitudinal laser welding.
Body-coloured tipper truck.
Structure of the tipper truck 2 main sidemembers in galvanised high strength steel.
1 ram-head crossmember made of steel tube.
Galvanised high strength steel crossmembers. Assembly protected against corrosion by the application of a
powder paint coating.
Sub-frame 2 “C”-shaped sidemembers in high strength steel, 2.5 mm thickness, secured internally by widened lower wing.
Mounted on base vehicle with high strength steel stamped brackets.
1 ram-foot crossmember made of steel and mechanically-welded tube, hot-dip galvanised.
1 rear hinge crossmember in galvanised steel.
Support stops on sidemember ends.
Rear lamp protection grille.
Truck side guards and wing supports in galvanised steel.
Boards High strength steel boards, 15/10 thickness, cold-formed and assembled by continuous laser welding.
Anti-corrosion protection guaranteed by a powder coating treatment.
Locking handles with reinforced zinc coating, integrated in the recess of the board.
Ladder-carrier Galvanised steel rails. Panels and crossmembers in lacquered steel with crimped bolts.
Electropump unit 12 Volts/2 kW.
Operating temperature: -20 to +70°C.
Hydraulic ram Expansion, nitride rod, 3 bodies, Diam: 107 mm.
Maximum pressure: 20 bar.
Hydraulic oil ISO HV 46 type mineral or equivalent.
Dimensions
This adaptation is available only on L2 single
cab; refer to the table below for the specifications
of the tipper truck.
Tipper truck (in mm)
Useable length 3,200
Overall length 3,248
Useable width 2,000
Overall width 2,100
Height of boards 350
Weight of the conversion (in
kg) 550
For the L2 chassis cab specifications,
refer to the Dimensions section of the
platform version.
Weights and towed loads
(kg)
The braked trailer weight with load transfer can
be increased, provided that the equivalent of this
load is removed from the vehicle so as not to
exceed the GTW. Warning! Towing using a lightly
loaded vehicle can adversely affect roadholding.
The kerb weight is equal to the unladen weight +
driver (75 kg) + tank full to 90%.
Page 149 of 196
147
Special features
10Dimensions
This adaptation is available only on L2 single
cab; refer to the table below for the specifications
of the tipper truck.
Tipper truck (in mm)
Useable length 3,200
Overall length 3,248
Useable width 2,000
Overall width 2,100
Height of boards 350
Weight of the conversion (in
kg) 550
For the L2 chassis cab specifications,
refer to the Dimensions section of the
platform version.
Weights and towed loads
(kg)
The braked trailer weight with load transfer can
be increased, provided that the equivalent of this
load is removed from the vehicle so as not to
exceed the GTW. Warning! Towing using a lightly
loaded vehicle can adversely affect roadholding.
The kerb weight is equal to the unladen weight +
driver (75 kg) + tank full to 90%.
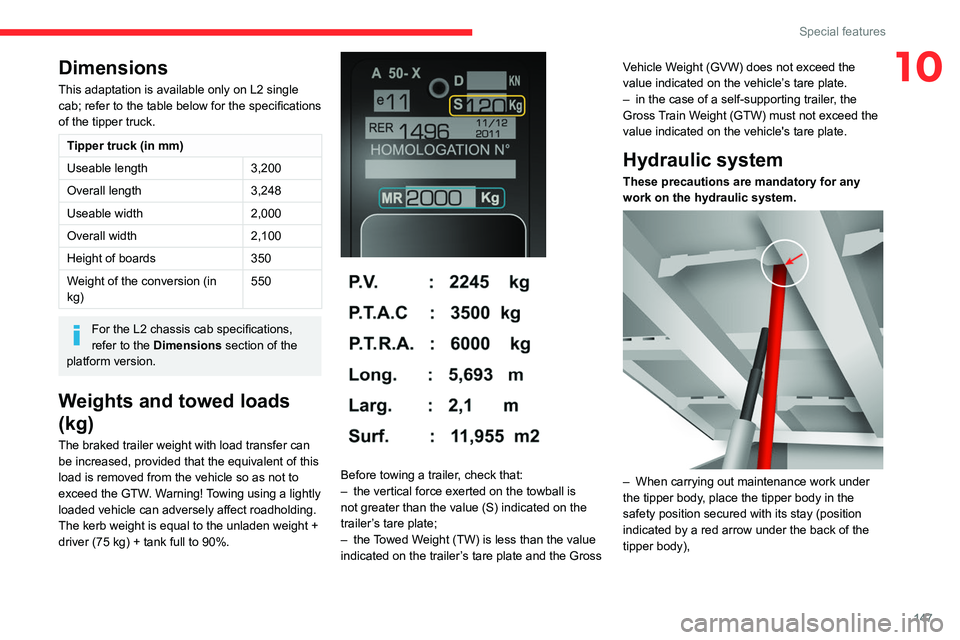
Before towing a trailer, check that:
– the vertical force exerted on the towball is
not greater than the value (S) indicated on the
trailer’s tare plate;
– the Towed Weight (TW) is less than the value
indicated on the trailer’s tare plate and the Gross Vehicle Weight (GVW) does not exceed the
value indicated on the vehicle’s tare plate.
– in the case of a self-supporting trailer, the
Gross Train Weight (GTW) must not exceed the
value indicated on the vehicle's tare plate.
Hydraulic system
These precautions are mandatory for any
work on the hydraulic system.
– When carrying out maintenance work under
the tipper body, place the tipper body in the
safety position secured with its stay (position
indicated by a red arrow under the back of the
tipper body),
Page 160 of 196
158
Touch screen audio and telematics system
Touch screen audio and telematics system
Multimedia audio system -
Bluetooth
® telephone - GPS
navigation
The system is protected in such a way
that it will only operate in your vehicle.
For safety reasons, the driver must only
carry out operations that require close
attention with the vehicle stationary.
When the engine is switched off and to
prevent discharging of the battery, the
system switches off after activation of energy
economy mode.
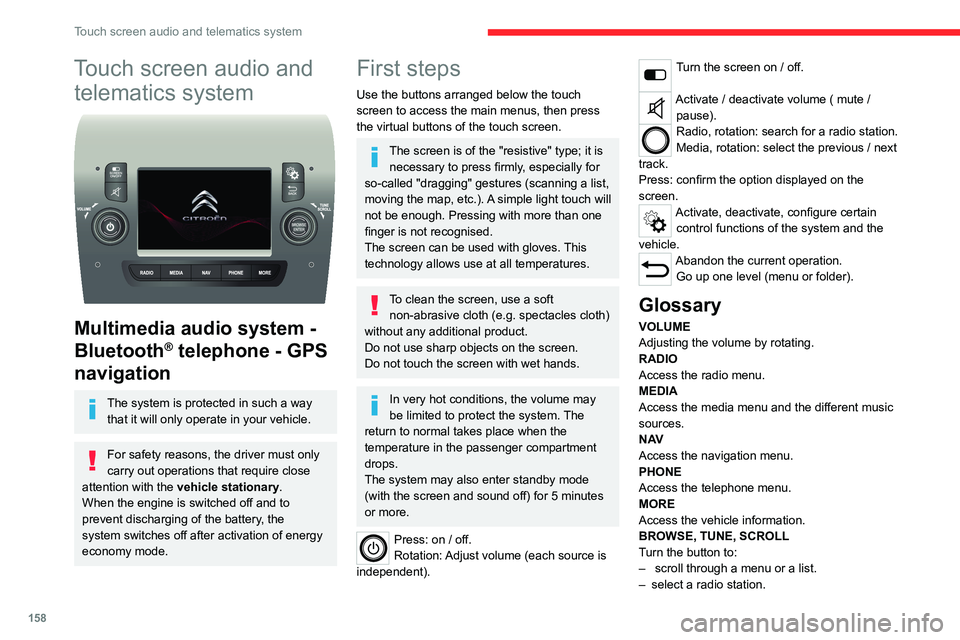
First steps
Use the buttons arranged below the touch
screen to access the main menus, then press
the virtual buttons of the touch screen.
The screen is of the "resistive" type; it is necessary to press firmly, especially for
so-called "dragging" gestures (scanning a list,
moving the map, etc.). A simple light touch will
not be enough. Pressing with more than one
finger is not recognised.
The screen can be used with gloves. This
technology allows use at all temperatures.
To clean the screen, use a soft non-abrasive cloth (e.g. spectacles cloth)
without any additional product.
Do not use sharp objects on the screen.
Do not touch the screen with wet hands.
In very hot conditions, the volume may
be limited to protect the system. The
return to normal takes place when the
temperature in the passenger compartment
drops.
The system may also enter standby mode
(with the screen and sound off) for 5 minutes
or more.
Press: on / off.
Rotation: Adjust volume (each source is
independent).
Turn the screen on / off.
Activate / deactivate volume ( mute / pause).
Radio, rotation: search for a radio station.
Media, rotation: select the previous / next
track.
Press: confirm the option displayed on the
screen.
Activate, deactivate, configure certain control functions of the system and the
vehicle.
Abandon the current operation. Go up one level (menu or folder).
Glossary
VOLUME
Adjusting the volume by rotating.
RADIO
Access the radio menu.
MEDIA
Access the media menu and the different music
sources.
N AV
Access the navigation menu.
PHONE
Access the telephone menu.
MORE
Access the vehicle information.
BROWSE, TUNE, SCROLL
Turn the button to:
– scroll through a menu or a list.
– select a radio station.
ENTER
Confirm an option displayed on the screen by
pressing.
Steering mounted controls
Activate / deactivate the pause function of USB/iPod and Bluetooth® sources.
Activate / deactivate the mute function of the
radio.
Activate / deactivate the microphone during a
telephone conversation.
Toggle up or down: increase or decrease volume for voice announcements, and
music sources, hands-free, and text message
reader.
Activate voice recognition. Pause a voice message to start a new
voice command.
Pause voice recognition.
Accept an incoming call. Accept a second incoming call and put
the active call on hold.
Activate voice recognition for the telephone
function.
Pause a voice message to give another voice
command.
Pause voice recognition.
Radio, toggle up or down: select next /
previous station.
Radio, toggle up or down continuously: scan up /
down frequencies until you release the button.
Page 162 of 196
160
Touch screen audio and telematics system
Vehicle information
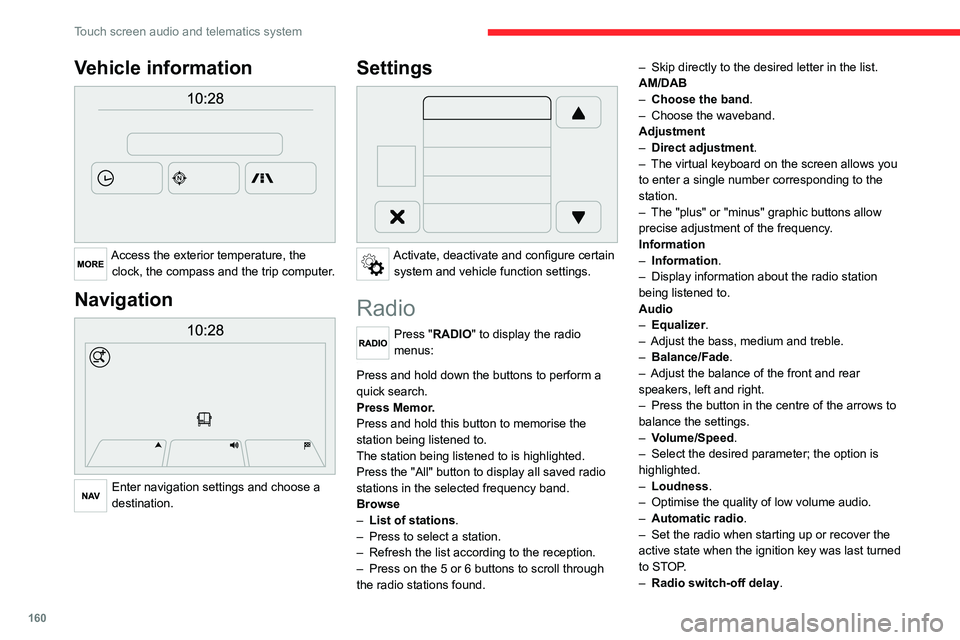
Access the exterior temperature, the clock, the compass and the trip computer.
Navigation
Enter navigation settings and choose a
destination.
Settings
Activate, deactivate and configure certain system and vehicle function settings.
Radio
Press "RADIO" to display the radio
menus:
Briefly press on the 9 or : buttons to perform an automatic search.
Press and hold down the buttons to perform a
quick search.
Press Memor.
Press and hold this button to memorise the
station being listened to.
The station being listened to is highlighted.
Press the "All" button to display all saved radio
stations in the selected frequency band.
Browse
– List of stations .
– Press to select a station.
– Refresh the list according to the reception.
– Press on the 5 or 6 buttons to scroll through
the radio stations found. –
Skip directly to the desired letter in the list.
AM/DAB
– Choose the band .
– Choose the waveband.
Adjustment
– Direct adjustment.
– The virtual keyboard on the screen allows you
to enter a single number corresponding to the
station.
– The "plus" or "minus" graphic buttons allow
precise adjustment of the frequency.
Information
– Information .
– Display information about the radio station
being listened to.
Audio
– Equalizer.
– Adjust the bass, medium and treble.
– Balance/Fade.
– Adjust the balance of the front and rear
speakers, left and right.
– Press the button in the centre of the arrows to
balance the settings.
– Volume/Speed.
– Select the desired parameter; the option is
highlighted.
– Loudness.
– Optimise the quality of low volume audio.
– Automatic radio.
– Set the radio when starting up or recover the
active state when the ignition key was last turned
to STOP.
– Radio switch-off delay .
– Set the parameter.
– AUX vol. setting .
– Set the parameters.
DAB (Digital Audio
Broadcasting) radio
Terrestrial Digital Radio
Digital radio
Digital radio provides higher quality
reception and also the graphical display
of current information on the radio station
being listened to.
The various "multiplexes/ensembles" offer
a choice of radio stations organised in
alphabetical order.
Press “RADIO” successively to display
the "DAB Radio".
Select the "Navigate" tab.
Select a list from the filters
offered: "All", "Types",
"Ensembles", then select a radio station.
Press the "Update" button to update the
list of "DAB Radio" stations received.
Page 164 of 196
162
Touch screen audio and telematics system
– Select the desired parameter; the option is
highlighted.
– Loudness.
– Optimise the quality of low volume audio.
– Automatic radio.
– Set the radio when starting up or recover the
active state when the ignition key was last turned
to STOP.
– Radio switch-off delay .
– Set the parameter.
– AUX vol. setting .
– Set the parameters.
USB socket
Insert the USB memory stick or connect
the device to the USB socket in the
central storage space , provided for transferring
data to the system, using a suitable cable (not
supplied).
To protect the system, do not use a USB hub.
The system builds playlists (in temporary
memory); this operation can take from a
few seconds to several minutes at the first
connection.
Reduce the number of non-music files and the
number of folders to reduce the waiting time.
The playlists are updated every time the ignition
is switched off or a USB memory stick is
connected. The lists are memorised: if they are
not modified, the subsequent loading time will
be shorter.
USB socket
Located on the central console, this
socket is used only to power and
recharge the connected portable device.
Auxiliary socket (AUX)
Connect a portable device (MP3 player,
etc.) to the auxiliary jack socket using an
audio cable (not supplied).
First adjust the volume on your portable device
(to a high level). Then adjust the volume on your
audio system.
Controls are managed via the portable device.
The functions of the device connected to the
“AUX” socket are managed directly by this
device: it is therefore not possible to change the
track/folder/playlist or manipulate the playback
start/end/pause using the controls on the control
panel or the steering wheel.
Do not leave the cable of your portable device
connected to the “AUX” socket when not in use,
to avoid possible noise from the speakers.
Selecting the source
Press on "MEDIA".
Select the "Source" tab to show the
rolling display of audio sources.
Select the source.
Use the play settings on the screen.
Press the "Rand." button and/or the
"Repeat" button to activate them, press again to
deactivate them.
Information and advice
The audio system will only play audio files with
".wav", ".wma" and ".mp3" file extensions, at bit
rates between 32 Kbps and 320 Kbps.
For audio files with ".aac", ".m4a", ".m4b" and
".mp4" file extensions, the supported sampling
rates are 8 - 96 kHz.
".m3u" and ".wpl" types are also supported.
The system does not manage devices with a
capacity greater than 64 GB.
It is advisable to restrict file names to 20
characters, without using special characters (e.g.
" " ? . ; ù) so as to avoid any reading or display
problems.
The system supports USB mass storage devices, BlackBerry® devices or Apple®
players via the USB sockets. The adapter
cable is not supplied.
Devices are managed using the audio system
controls.
Other devices, not recognised by the system
during connection, must be connected to
the auxiliary socket using a Jack cable (not
supplied).
Only use USB memory sticks formatted to FAT
32 (File Allocation Table).
To protect the system, do not use a USB hub.
The system does not support the simultaneous connection of two identical
devices (two memory sticks or two
Apple
® players) but it is possible to connect
one memory stick and one Apple® player at
the same time.
It is recommended that you use genuine
Apple® USB cables to guarantee correct
operation.
Bluetooth® Streaming
Streaming allows music files on the telephone to
be played via the vehicle's speakers.
Active the Bluetooth
® function on the device.Press "MEDIA".
If there is a media source active, press
the "Source" button.
Select the "Bluetooth®" media source
then press the "Add device” button.
If no device has yet been paired with the system,
a special page is displayed on the screen.
Select "Yes" to start the pairing procedure, and
then search for the name of the system on the
device.
Select the name of the system on the device
and, when requested by the audio system,
enter the PIN code displayed on the screen of
Page 170 of 196
168
Touch screen audio and telematics system
Enter the telephone number using the keypad,
then press the “Call” button to make the call.
Calling a contact
Press "PHONE".
Press the "Contacts" button or the
"Recent calls" button.
Select the desired contact from the list offered to
start the call.
Vehicle information
Press "MORE" to display the vehicle
information menus:
Exterior temp.
Display the exterior temperature.
Clock
Display the clock.
Compass
Display the direction that you are travelling in.
Trip
– Current info., Trip A, Trip B.
Display the trip computer.
Press and hold the "Trip A" or "Trip B" button to
reset the trip concerned.
Settings
Press this button to display the settings
menus:
Display
– Brightness. –
Set the brightness of the screen.
– Display mode.
– Set the display mode.
– Language.
– Choose the desired language.
– Unit of measurement.
– Set the display units for consumption, distance
and temperature.
– Touch screen beep.
– Activate or deactivate the audible signal when
touching a button on the screen.
– Display Trip B.
– Display Trip B on the driver's screen.
Voice commands
– Voice response time.
– Set the length of the voice system response.
– Display list of commands.
– Display suggestions with the different options
during a voice session.
Clock and Date
– Time setting and format.
– Setting the time.
– Display time mode.
– Activate or deactivate the display of the digital
clock on the status bar.
– Synchro time.
– Activate or deactivate the automatic time
display.
– Date setting.
– Set the date.
Safety/Assistance
– Reversing camera .
– Display the reversing camera in reverse. –
Camera delay .
– Maintain the on-screen display of the
reversing camera for a maximum of 10 seconds
or up to 11 mph (18 km/h).
Lighting
– Daytime running lamps.
– Activate or deactivate the automatic
illumination of the headlamps when starting.
Doors & locking
– Autoclose.
– Activate or deactivate the automatic locking of
the doors when the vehicle is moving.
Audio
– Equalizer.
– Adjust the bass, medium and treble.
– Balance/Fade.
– Adjust the balance of the front and rear
speakers, left and right.
– Press the button in the centre of the arrows to
balance the settings.
– Volume/Speed.
– Select the desired parameter; the option is
highlighted.
– Loudness.
– Optimise the quality of low volume audio.
– Automatic radio.
– Set the radio when starting up or recover the
active state when the ignition key was last turned
to STOP.
– Radio switch-off delay .
– Set the parameter.
– AUX vol. setting .
– Set the parameters.