2020 CHRYSLER 300 engine
[x] Cancel search: enginePage 162 of 328

160STARTING AND OPERATING
FUEL SAVER TECHNOLOGY 5.7L ONLY — IF
EQUIPPED
This feature offers improved fuel economy by
shutting off four of the engine's eight cylinders
during light load and cruise conditions. The
system is automatic with no driver inputs or
additional driving skills required.
NOTE:
This system may take some time to return to full
functionality after a battery disconnect.
POWER STEERING
The Electric Power Steering system will give you
good vehicle response and increased ease of
maneuverability in tight spaces. The system will
vary its assist to provide light efforts while
parking and good feel while driving. If the
electric steering system experiences a fault that
prevents it from providing assist, you will still
have the ability to steer the vehicle manually. Alternate electric power steering efforts can be
selected through the Uconnect System. Refer to
”Customer Programmable Features” within
“Uconnect Settings” in “Multimedia” for further
information.
If the Electric Power Steering Fault
Warning Light is displayed and the
“SERVICE POWER STEERING” or the
“POWER STEERING ASSIST OFF –
SERVICE SYSTEM” message is displayed within
the instrument cluster display, this indicates the
vehicle needs to be taken to the dealer for
service. Refer to “Warning Lights And
Messages” in “Getting To Know Your
Instrument Panel” for further information.
NOTE:
Even if the power steering assistance is no
longer operational, it is still possible to steer
the vehicle. Under these conditions there will be a substantial increase in steering effort,
especially at low speeds and during parking
maneuvers.
If the condition persists, see an authorized
dealer for service.
If the Electric Power Steering Fault Warning
Light is displayed and the “POWER STEERING
SYSTEM OVER TEMP” message is displayed on
the instrument cluster screen, they indicate that
extreme steering maneuvers may have
occurred which caused an over temperature
condition in the power steering system. Once
driving conditions are safe, pull over and let the
vehicle idle for a few moments until the Electric
Power Steering Fault Warning Light and
message turn off.
SPEED CONTROL — IF EQUIPPED
When engaged, the Speed Control system takes
over accelerator operations at speeds greater
than 25 mph (40 km/h), or 20 mph (32 km/h)
depending on the powertrain used.
The Speed Control buttons are located on the
right side of the steering wheel.
WARNING!
Continued operation with reduced assist
could pose a safety risk to yourself and
others. Service should be obtained as soon
as possible.
20_LX_OM_EN_USC_t.book Page 160
Page 165 of 328

STARTING AND OPERATING163
(Continued)
The following conditions will also deactivate the
Speed Control without erasing the set speed
from memory:
Vehicle parking brake is applied
Stability event occurs
Gear selector is moved out of DRIVE
Engine overspeed occurs
ADAPTIVE CRUISE CONTROL (ACC) — IF
EQUIPPED
Adaptive Cruise Control (ACC) increases the
driving convenience provided by cruise control
while traveling on highways and major
roadways. However, it is not a safety system
and not designed to prevent collisions. Speed
Control function performs differently. Please
refer to the proper section within this chapter.
ACC will allow you to keep cruise control
engaged in light to moderate traffic conditions
without the constant need to reset your cruise
control. ACC utilizes a radar sensor and a
forward facing camera designed to detect a
vehicle directly ahead of you. NOTE:
If the sensor does not detect a vehicle ahead
of you, ACC will maintain a fixed set speed.
If the ACC sensor detects a vehicle ahead,
ACC will apply limited braking or accelerate
(not to exceed the original set speed) auto
-
matically to maintain a preset following
distance, while matching the speed of the
vehicle ahead.
The Cruise Control system has two control
modes:
Adaptive Cruise Control mode for maintaining
an appropriate distance between vehicles.
Normal (Fixed Speed) Cruise Control mode for
cruising at a constant preset speed. For addi -
tional information, refer to “Normal (Fixed
Speed) Cruise Control Mode” in this section.
NOTE:
Normal (Fixed Speed) Cruise Control will not
react to preceding vehicles. Always be aware of
the mode selected. You can change the mode by using the Cruise
Control buttons. The two control modes
function differently. Always confirm which mode
is selected.
WARNING!
Adaptive Cruise Control (ACC) is a conve
-
nience system. It is not a substitute for
active driver involvement. It is always the
driver’s responsibility to be attentive of
road, traffic, and weather conditions,
vehicle speed, distance to the vehicle
ahead; and, most importantly, brake opera -
tion to ensure safe operation of the vehicle
under all road conditions. Your complete
attention is always required while driving to
maintain safe control of your vehicle.
Failure to follow these warnings can result
in a collision and death or serious personal
injury.
5
20_LX_OM_EN_USC_t.book Page 163
Page 170 of 328

168STARTING AND OPERATING
NOTE:
When you override and push the SET (+)
button or SET (-) button, the new set speed
will be the current speed of the vehicle.
When you use the SET (-) button to decel -
erate, if the engine’s braking power does not
slow the vehicle sufficiently to reach the set
speed, the brake system will automatically
slow the vehicle.
The ACC system decelerates the vehicle to a
full stop when following a target vehicle.
When you have ACC active and follow a target
vehicle to a standstill, after two seconds you
will either have to push the RES (resume)
button, or apply the accelerator pedal to
reengage the ACC to the existing set speed.
The ACC will bring the vehicle to a complete
stop while following a target vehicle and hold
the vehicle for two seconds in the stop posi -
tion. If the target vehicle does not start
moving within two seconds, the ACC system
will display a message that the system will
release the brakes and that the brakes must
be applied manually. An audible chime will
sound when the brakes are released.
The ACC system maintains set speed when
driving uphill and downhill. However, a slight
speed change on moderate hills is normal. In
addition, downshifting may occur while
climbing uphill or descending downhill. This
is normal operation and necessary to main -
tain set speed. When driving uphill and down -
hill, the ACC system will cancel if the braking
temperature exceeds normal range (over -
heated).
SETTING THE FOLLOWING DISTANCE IN
ACC
The specified following distance for ACC can be
set by varying the distance setting between four
bars (longest), three bars (long), two bars
(medium) and one bar (short). Using this
distance setting and the vehicle speed, ACC
calculates and sets the distance to the vehicle
ahead. This distance setting displays in the
instrument cluster display.
Distance Settings
To increase the distance setting, push the
Distance Setting Increase button and release.
Each time the button is pushed, the distance
setting increases by one bar (longer).
To decrease the distance setting, push the
Distance Setting Decrease button and release.
Each time the button is pushed, the distance
setting decreases by one bar (shorter).
If there is no vehicle ahead, the vehicle will
maintain the set speed. If a slower moving
vehicle is detected in the same lane, the
1 — Longest Distance Setting (Four Bars)
2 — Long Distance Setting (Three Bars)
3 — Medium Distance Setting (Two Bars)
4 — Short Distance Setting (One Bar)
20_LX_OM_EN_USC_t.book Page 168
Page 191 of 328

STARTING AND OPERATING189
(Continued)
7. Remove the fuel nozzle and close the fuel door.
NOTE:
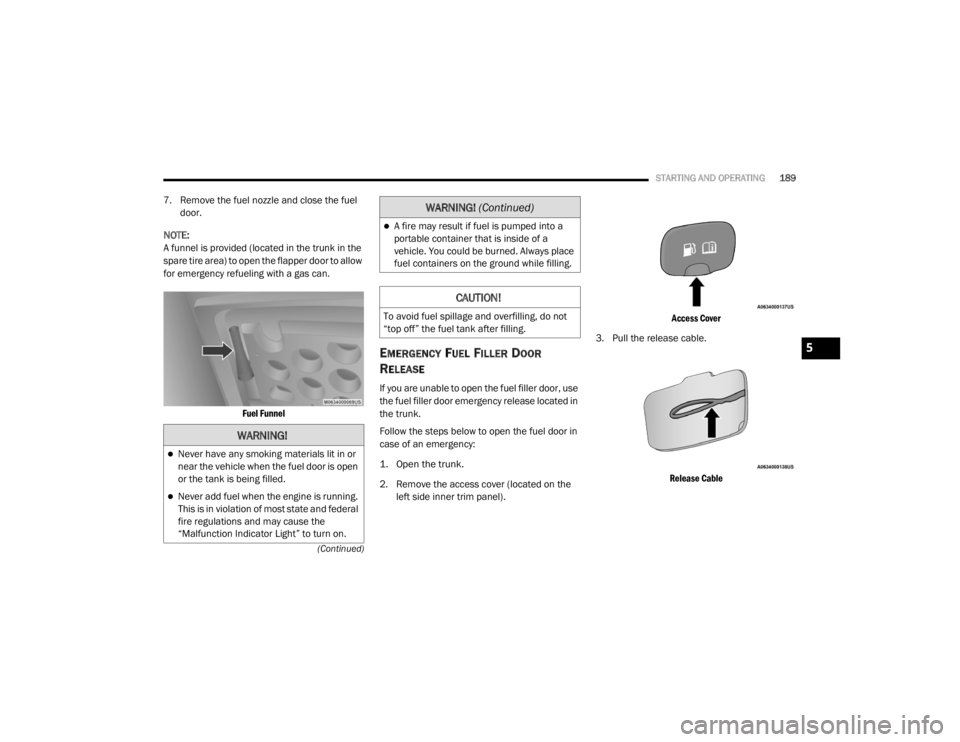
A funnel is provided (located in the trunk in the
spare tire area) to open the flapper door to allow
for emergency refueling with a gas can.
Fuel Funnel
EMERGENCY FUEL FILLER DOOR
R
ELEASE
If you are unable to open the fuel filler door, use
the fuel filler door emergency release located in
the trunk.
Follow the steps below to open the fuel door in
case of an emergency:
1. Open the trunk.
2. Remove the access cover (located on the
left side inner trim panel).
Access Cover
3. Pull the release cable.
Release Cable
WARNING!
Never have any smoking materials lit in or
near the vehicle when the fuel door is open
or the tank is being filled.
Never add fuel when the engine is running.
This is in violation of most state and federal
fire regulations and may cause the
“Malfunction Indicator Light” to turn on.
A fire may result if fuel is pumped into a
portable container that is inside of a
vehicle. You could be burned. Always place
fuel containers on the ground while filling.
CAUTION!
To avoid fuel spillage and overfilling, do not
“top off” the fuel tank after filling.
WARNING! (Continued)
5
20_LX_OM_EN_USC_t.book Page 189
Page 194 of 328

192STARTING AND OPERATING
Tongue Weight (TW)
The tongue weight is the downward force
exerted on the hitch ball by the trailer. You must
consider this as part of the load on your vehicle.
Trailer Frontal Area
The frontal area is the maximum height
multiplied by the maximum width of the front of
a trailer.
Trailer Sway Control
The Trailer Sway Control (TSC) can be a
mechanical telescoping link that can be
installed between the hitch receiver and the
trailer tongue that typically provides adjustable
friction associated with the telescoping motion
to dampen any unwanted trailer swaying
motions while traveling.
If equipped, the electronic TSC recognizes a
swaying trailer and automatically applies
individual wheel brakes and/or reduces engine
power to attempt to eliminate the trailer sway.
Weight-Carrying Hitch
A weight-carrying hitch supports the trailer
tongue weight, just as if it were luggage located
at a hitch ball or some other connecting point of
the vehicle. These kinds of hitches are the most
popular on the market today and they are
commonly used to tow small and medium sized
trailers.
Weight-Distributing Hitch
A weight-distributing system works by applying
leverage through spring (load) bars. They are
typically used for heavier loads to distribute
trailer tongue weight to the tow vehicle's front
axle and the trailer axle(s). When used in
accordance with the manufacturer's directions,
it provides for a more level ride, offering more
consistent steering and brake control thereby
enhancing towing safety. The addition of a
friction/hydraulic sway control also dampens
sway caused by traffic and crosswinds and
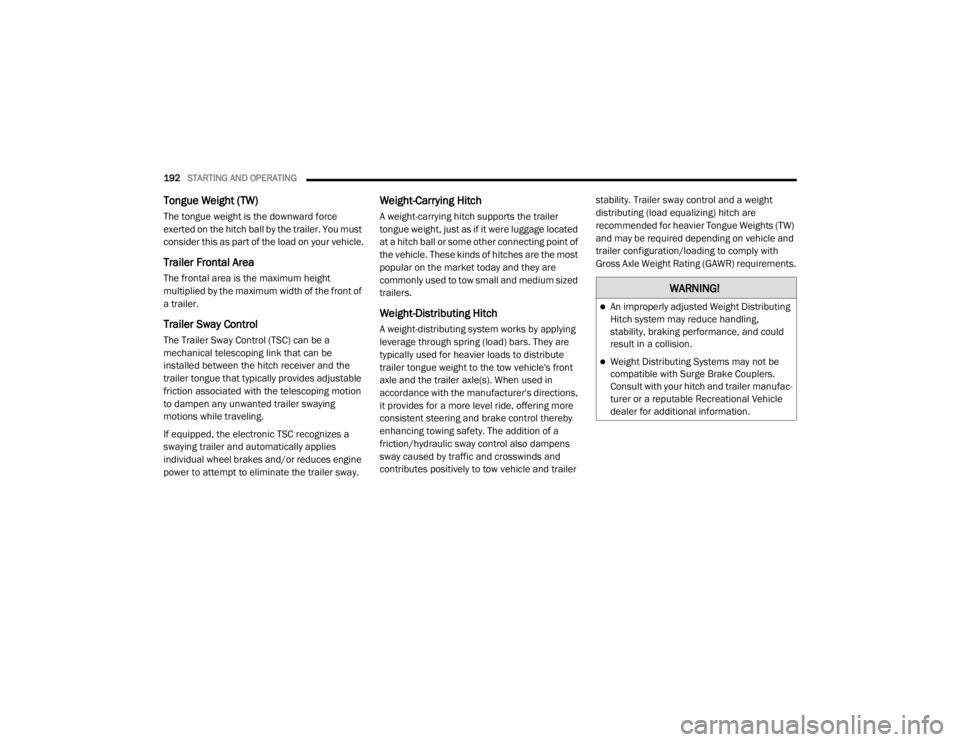
contributes positively to tow vehicle and trailer stability. Trailer sway control and a weight
distributing (load equalizing) hitch are
recommended for heavier Tongue Weights (TW)
and may be required depending on vehicle and
trailer configuration/loading to comply with
Gross Axle Weight Rating (GAWR) requirements.
WARNING!
An improperly adjusted Weight Distributing
Hitch system may reduce handling,
stability, braking performance, and could
result in a collision.
Weight Distributing Systems may not be
compatible with Surge Brake Couplers.
Consult with your hitch and trailer manufac
-
turer or a reputable Recreational Vehicle
dealer for additional information.
20_LX_OM_EN_USC_t.book Page 192
Page 196 of 328

194STARTING AND OPERATING
TRAILER TOWING WEIGHTS (MAXIMUM TRAILER WEIGHT RATINGS)
NOTE:
The trailer tongue weight must be considered as
part of the combined weight of occupants and
cargo, and it should never exceed the weight
referenced on the “Tire and Loading Informa -
tion” placard. Refer to “Tire Safety Information”
in “Servicing And Maintenance” for further infor -
mation.TRAILER AND TONGUE WEIGHT
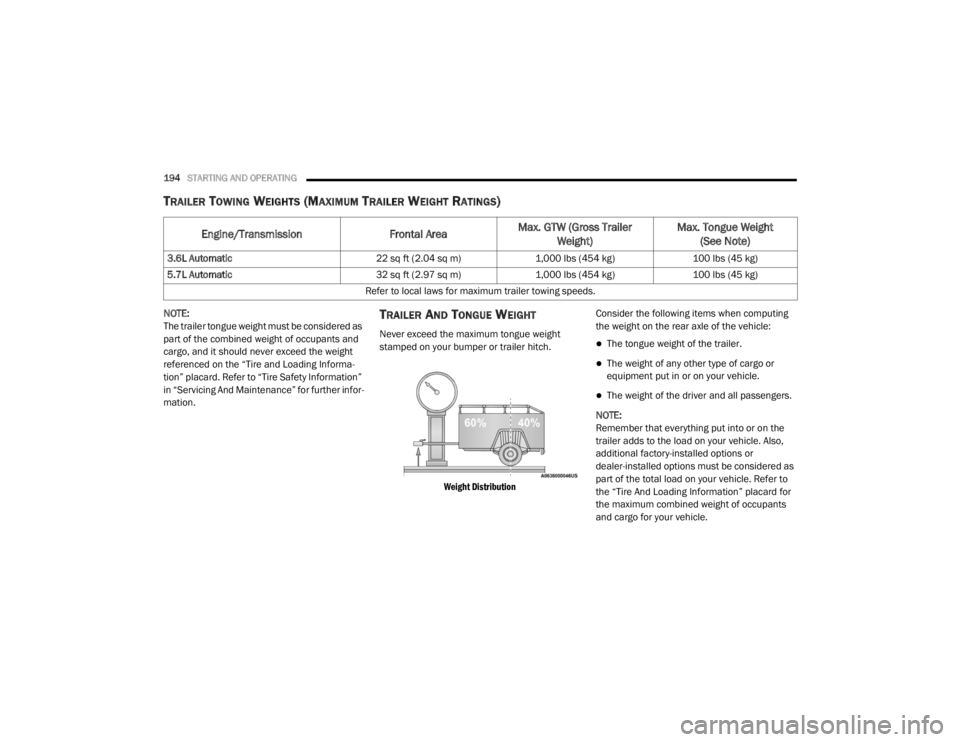
Never exceed the maximum tongue weight
stamped on your bumper or trailer hitch.
Weight Distribution
Consider the following items when computing
the weight on the rear axle of the vehicle:The tongue weight of the trailer.
The weight of any other type of cargo or
equipment put in or on your vehicle.
The weight of the driver and all passengers.
NOTE:
Remember that everything put into or on the
trailer adds to the load on your vehicle. Also,
additional factory-installed options or
dealer-installed options must be considered as
part of the total load on your vehicle. Refer to
the “Tire And Loading Information” placard for
the maximum combined weight of occupants
and cargo for your vehicle.
Engine/Transmission Frontal AreaMax. GTW (Gross Trailer
Weight) Max. Tongue Weight
(See Note)
3.6L Automatic 22 sq ft (2.04 sq m)1,000 lbs (454 kg)100 lbs (45 kg)
5.7L Automatic 32 sq ft (2.97 sq m)1,000 lbs (454 kg)100 lbs (45 kg)
Refer to local laws for maximum trailer towing speeds.
20_LX_OM_EN_USC_t.book Page 194
Page 197 of 328

STARTING AND OPERATING195
(Continued)
TOWING REQUIREMENTS
To promote proper break-in of your new vehicle
drivetrain components, the following guidelines
are recommended. Perform the maintenance listed in the
“Scheduled Servicing”. Refer to “Scheduled
Servicing” in “Servicing And Maintenance” for
the proper maintenance intervals. When towing
a trailer, never exceed the GAWR or GCWR
ratings.
Towing Requirements — Tires
Do not attempt to tow a trailer while using a
compact spare tire.
Do not drive more than 50 mph (80 km/h) when towing while using a full size spare tire.
Proper tire inflation pressures are essential
to the safe and satisfactory operation of your
vehicle. Refer to “Tires” in “Servicing And
Maintenance” for proper tire inflation proce -
dures.
Check the trailer tires for proper tire inflation
pressures before trailer usage.
WARNING!
Make certain that the load is secured in the
trailer and will not shift during travel. When
trailering cargo that is not fully secured,
dynamic load shifts can occur that may be diffi -
cult for the driver to control. You could lose
control of your vehicle and have a collision.
When hauling cargo or towing a trailer, do
not overload your vehicle or trailer. Over -
loading can cause a loss of control, poor
performance or damage to brakes, axle,
engine, transmission, steering, suspension,
chassis structure or tires.
Safety chains must always be used
between your vehicle and trailer. Always
connect the chains to the hook retainers of
the vehicle hitch. Cross the chains under
the trailer tongue and allow enough slack
for turning corners.
Vehicles with trailers should not be parked
on a grade. When parking, apply the
parking brake on the tow vehicle. Put the
tow vehicle transmission in PARK. Always,
block or "chock" the trailer wheels.
GCWR must not be exceeded.
Total weight must be distributed between
the tow vehicle and the trailer such that the
following four ratings are not exceeded :
Max loading as defined on the “Tire and
Loading Information” placard.
GTW
GAWR
Tongue weight rating for the trailer
hitch utilized.
WARNING! (Continued)CAUTION!
Do not tow a trailer at all during the first
500 miles (805 km) the new vehicle is
driven. The engine, axle or other parts could
be damaged.
Then, during the first 500 miles (805 km)
that a trailer is towed, do not drive over
50 mph (80 km/h) and do not make starts
at full throttle. This helps the engine and
other parts of the vehicle wear in at the
heavier loads.
5
20_LX_OM_EN_USC_t.book Page 195
Page 199 of 328

STARTING AND OPERATING197
Four-Pin Connector
Seven-Pin Connector
TOWING TIPS
Before setting out on a trip, practice turning,
stopping, and backing up the trailer in an area
located away from heavy traffic.
Automatic Transmission
Select the DRIVE range when towing. The
transmission controls include a drive strategy to
avoid frequent shifting when towing. However, if
frequent shifting does occur while in DRIVE, you
can use the AutoStick shift control (if equipped)
to manually select a lower gear.
NOTE:
Using a lower gear while operating the vehicle
under heavy loading conditions will improve
performance and extend transmission life by
reducing excessive shifting and heat buildup.
This action will also provide better engine
braking.
Speed Control — If Equipped
Do not use on hilly terrain or with heavy
loads.
When using the Speed Control, if you experi-
ence speed drops greater than 10 mph
(16 km/h), disengage until you can get back
to cruising speed.
Use Speed Control in flat terrain and with
light loads to maximize fuel efficiency.
1 — Ground
2 — Park
3 — Left Stop/Turn
4 — Right Stop/Turn1 — Battery
2 — Backup Lamps
3 — Right Stop/Turn
4 — Electric Brakes
5 — Ground
6 — Left Stop/Turn
7 — Running Lamps
5
20_LX_OM_EN_USC_t.book Page 197