2020 CHRYSLER 300 belt
[x] Cancel search: beltPage 167 of 328
STARTING AND OPERATING165
ACTIVATING ADAPTIVE CRUISE CONTROL
(ACC)
You can only engage ACC if the vehicle speed is
above 0 mph (0 km/h).
The minimum set speed for the ACC system is
20 mph (32 km/h).
When the system is turned on and in the ready
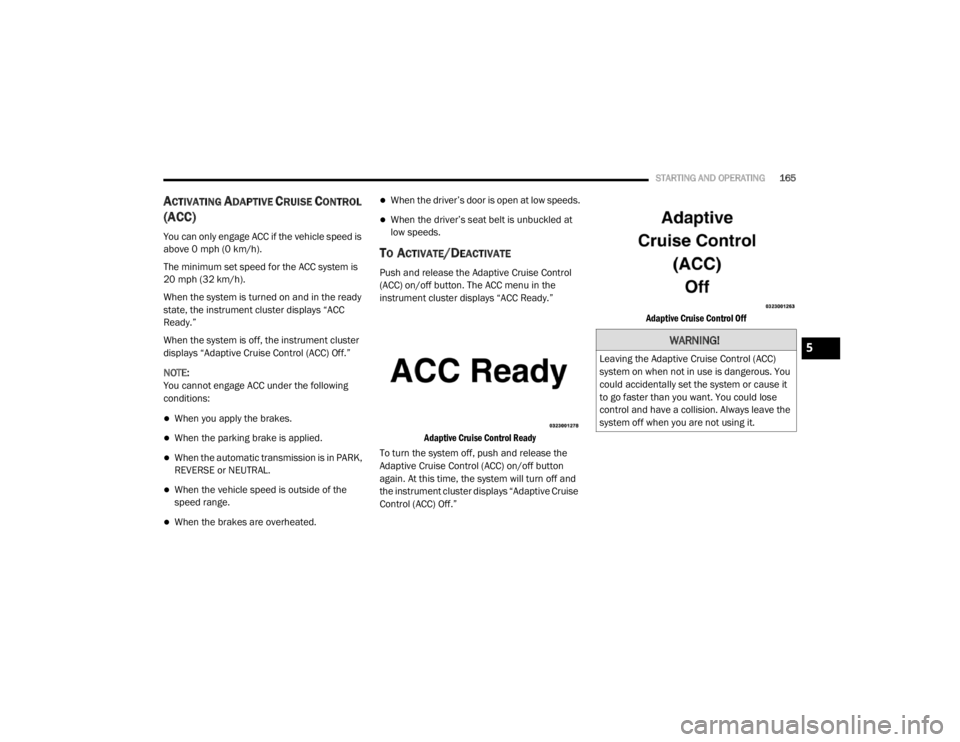
state, the instrument cluster displays “ACC
Ready.”
When the system is off, the instrument cluster
displays “Adaptive Cruise Control (ACC) Off.”
NOTE:
You cannot engage ACC under the following
conditions:
When you apply the brakes.
When the parking brake is applied.
When the automatic transmission is in PARK,
REVERSE or NEUTRAL.
When the vehicle speed is outside of the
speed range.
When the brakes are overheated.
When the driver’s door is open at low speeds.
When the driver’s seat belt is unbuckled at
low speeds.
TO ACTIVATE/DEACTIVATE
Push and release the Adaptive Cruise Control
(ACC) on/off button. The ACC menu in the
instrument cluster displays “ACC Ready.”
Adaptive Cruise Control Ready
To turn the system off, push and release the
Adaptive Cruise Control (ACC) on/off button
again. At this time, the system will turn off and
the instrument cluster displays “Adaptive Cruise
Control (ACC) Off.”
Adaptive Cruise Control Off
WARNING!
Leaving the Adaptive Cruise Control (ACC)
system on when not in use is dangerous. You
could accidentally set the system or cause it
to go faster than you want. You could lose
control and have a collision. Always leave the
system off when you are not using it.5
20_LX_OM_EN_USC_t.book Page 165
Page 168 of 328
166STARTING AND OPERATING
TO SET A DESIRED ACC SPEED
When the vehicle reaches the speed desired,
push the SET (+) button or the SET (-) button
and release. The instrument cluster display will
display the set speed.
If the system is set when the vehicle speed is
below 20 mph (32 km/h), the set speed shall
be defaulted to 20 mph (32 km/h). If the
system is set when the vehicle speed is above
20 mph (32 km/h), the set speed shall be the
current speed of the vehicle.
NOTE:
ACC cannot be set if there is a stationary vehicle
in front of your vehicle in close proximity.
Remove your foot from the accelerator pedal. If
you do not, the vehicle may continue to
accelerate beyond the set speed. If this occurs:
The message “DRIVER OVERRIDE” will
display in the instrument cluster display.
The system will not be controlling the
distance between your vehicle and the
vehicle ahead. The vehicle speed will only be
determined by the position of the accelerator
pedal.
TO CANCEL
The following conditions cancel the system:
The brake pedal is applied.
The CANC button is pushed.
An Anti-Lock Brake System (ABS) event
occurs.
The gear selector is removed from the DRIVE
position.
The braking temperature exceeds normal
range (overheated).
The Electronic Stability Control/Traction
Control System (ESC/TCS) activates.
The vehicle parking brake is applied.
Driver seat belt is unbuckled at low speeds.
Driver door is opened at low speeds.
NOTE:
If your vehicle stays at standstill for longer than
two seconds, then the system will cancel and
the brake force will be ramped-out. The driver
will have to apply the brakes to keep the vehicle
at a standstill.
TO TURN OFF
The system will turn off and clear the set speed
in memory if:
The Adaptive Cruise Control (ACC) on/off
button is pushed.
The Normal (Fixed Speed) Cruise Control on/
off button is pushed.
The ignition is placed in the OFF position.
TO RESUME
If there is a set speed in memory push the RES
(resume) button and then remove your foot
from the accelerator pedal. The instrument
cluster display will display the last set speed.
NOTE:
ACC cannot be resumed if there is a stationary
vehicle in front of your vehicle in close proximity.
20_LX_OM_EN_USC_t.book Page 166
Page 171 of 328

STARTING AND OPERATING169
instrument cluster displays the “Sensed Vehicle
Indicator” icon, and the system adjusts vehicle
speed automatically to maintain the distance
setting, regardless of the set speed.
The vehicle will then maintain the set distance
until:
The vehicle ahead accelerates to a speed
above the set speed.
The vehicle ahead moves out of your lane or
view of the sensor.
The distance setting is changed.
The system disengages. (Refer to the infor -
mation on ACC Activation).
The maximum braking applied by ACC is limited;
however, the driver can always apply the brakes
manually, if necessary.
NOTE:
The brake lights will illuminate whenever the
ACC system applies the brakes.
A Proximity Warning will alert the driver if ACC
predicts that its maximum braking level is not
sufficient to maintain the set distance. If this
occurs, a visual alert “BRAKE” will flash in the instrument cluster display and a chime will
sound while ACC continues to apply its
maximum braking capacity.
Brake Alert
NOTE:
The “BRAKE!” screen in the instrument cluster
display is a warning for the driver to take action
and does not necessarily mean that the
Forward Collision Warning system is applying
the brakes autonomously.
OVERTAKE AID
When driving with ACC engaged and following a
vehicle, the system will provide an additional
acceleration up to the ACC set speed to assist in
passing the vehicle. This additional acceleration
is triggered when the driver utilizes the left turn
signal (Lane Change Assist feature included) and will only be active when passing on the left
hand side. Switching lanes will not impact the
ACC system if the driver is already traveling at
the set speed.
ACC OPERATION AT STOP
If the ACC system brings your vehicle to a
standstill while following a target vehicle, if the
target vehicle starts moving within two seconds
of your vehicle coming to a standstill, your
vehicle will resume motion without the need for
any driver action.
If the target vehicle does not start moving within
two seconds of your vehicle coming to a
standstill, the ACC with Stop system will cancel
and the brakes will release. A cancel message
will display on the instrument cluster display
and produce a warning chime. Driver
intervention will be required at this moment.
While ACC with Stop is holding your vehicle at a
standstill, if the driver seat belt is unbuckled or
the driver door is opened, the ACC with Stop
system will cancel and the brakes will release. A
cancel message will display on the instrument
cluster display and produce a warning chime.
Driver intervention will be required at this
moment.
5
20_LX_OM_EN_USC_t.book Page 169
Page 244 of 328

242SERVICING AND MAINTENANCE
Engine Air Cleaner Filter Selection
The quality of replacement engine air cleaner
filters varies considerably. Only high quality
filters should be used to ensure most efficient
service. Mopar engine air cleaner filters are a
high quality filter and are recommended.
AIR CONDITIONER MAINTENANCE
For best possible performance, your air
conditioner should be checked and serviced by
an authorized dealer at the start of each warm
season. This service should include cleaning of
the condenser fins and a performance test. Drive belt tension should also be checked at
this time.
Refrigerant Recovery And Recycling
R-134a — If Equipped
R-134a Air Conditioning Refrigerant is a
hydrofluorocarbon (HFC) that is an
ozone-friendly substance. The manufacturer
recommends that air conditioning service be
performed by an authorized dealer or other
service facilities using recovery and recycling
equipment.
NOTE:
Use only manufacturer approved A/C system
PAG compressor oil and refrigerants.
Refrigerant Recovery And Recycling
R-1234yf — If Equipped
R-1234yf Air Conditioning Refrigerant is a
hydrofluoroolefin (HFO) that is endorsed by the
Environmental Protection Agency and is an
ozone-friendly substance with a low
global-warming potential. The manufacturer
recommends that air conditioning service be
performed by an authorized dealer using
recovery and recycling equipment.
WARNING!
The air induction system (air cleaner, hoses,
etc.) can provide a measure of protection in
the case of engine backfire. Do not remove
the air induction system (air cleaner, hoses,
etc.) unless such removal is necessary for
repair or maintenance. Make sure that no
one is near the engine compartment before
starting the vehicle with the air induction
system (air cleaner, hoses, etc.) removed.
Failure to do so can result in serious personal
injury.
WARNING!
Use only refrigerants and compressor lubri
-
cants approved by the manufacturer for
your air conditioning system. Some unap -
proved refrigerants are flammable and can
explode, injuring you. Other unapproved
refrigerants or lubricants can cause the
system to fail, requiring costly repairs.
Refer to Warranty Information Book, for
further warranty information.
The air conditioning system contains refrig -
erant under high pressure. To avoid risk of
personal injury or damage to the system,
adding refrigerant or any repair requiring
lines to be disconnected should be done by
an experienced technician.
CAUTION!
Do not use chemical flushes in your air
conditioning system as the chemicals can
damage your air conditioning components.
Such damage is not covered by the New
Vehicle Limited Warranty.
20_LX_OM_EN_USC_t.book Page 242
Page 245 of 328
SERVICING AND MAINTENANCE243
NOTE:
Use only manufacturer approved A/C system
PAG compressor oil, and refrigerants.
A/C Air Filter
The filter is located in the fresh air inlet under
the hood, behind a removable panel in the cowl
on the passenger side of the vehicle, next to the
windshield wipers. When installing a new filter,
ensure its proper orientation.
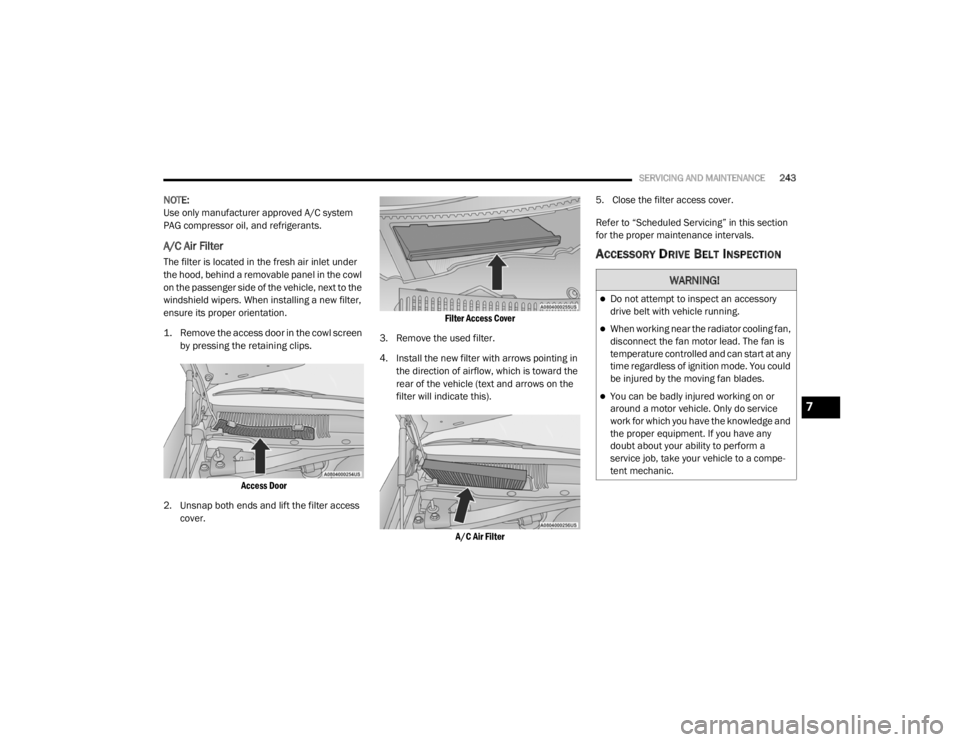
1. Remove the access door in the cowl screen
by pressing the retaining clips.
Access Door
2. Unsnap both ends and lift the filter access cover.
Filter Access Cover
3. Remove the used filter.
4. Install the new filter with arrows pointing in the direction of airflow, which is toward the
rear of the vehicle (text and arrows on the
filter will indicate this).
A/C Air Filter
5. Close the filter access cover.
Refer to “Scheduled Servicing” in this section
for the proper maintenance intervals.ACCESSORY DRIVE BELT INSPECTION
WARNING!
Do not attempt to inspect an accessory
drive belt with vehicle running.
When working near the radiator cooling fan,
disconnect the fan motor lead. The fan is
temperature controlled and can start at any
time regardless of ignition mode. You could
be injured by the moving fan blades.
You can be badly injured working on or
around a motor vehicle. Only do service
work for which you have the knowledge and
the proper equipment. If you have any
doubt about your ability to perform a
service job, take your vehicle to a compe
-
tent mechanic.7
20_LX_OM_EN_USC_t.book Page 243
Page 246 of 328
244SERVICING AND MAINTENANCE
When inspecting accessory drive belts, small
cracks that run across ribbed surface of belt
from rib to rib, are considered normal. These
are not a reason to replace belt. However,
cracks running along a rib (not across) are not
normal. Any belt with cracks running along a rib
must be replaced. Also have the belt replaced if
it has excessive wear, frayed cords or severe
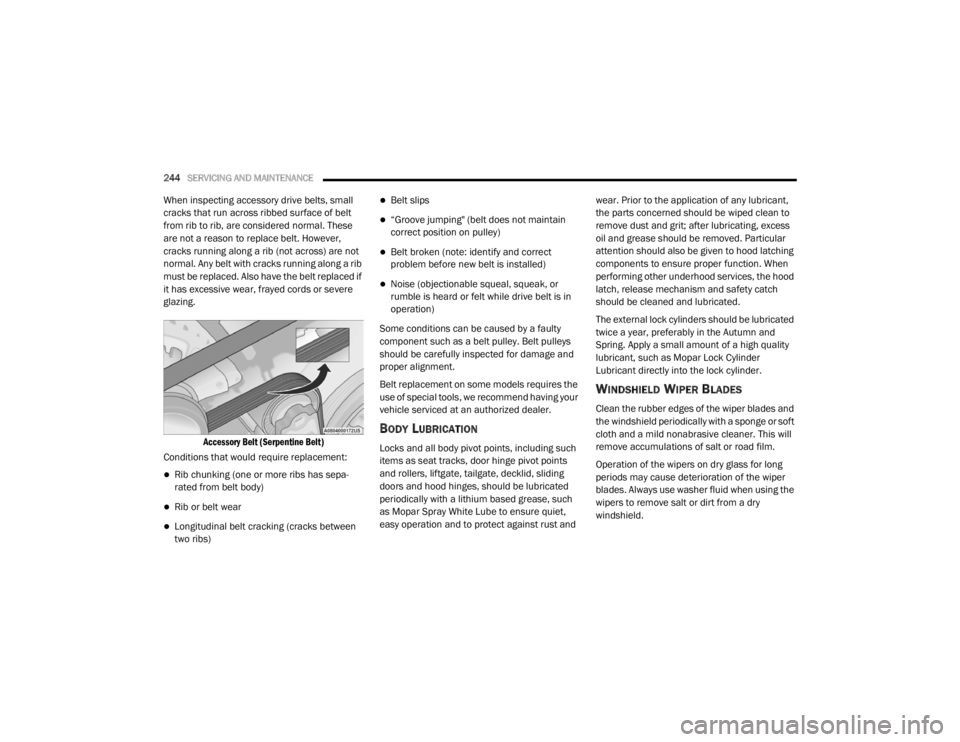
glazing.
Accessory Belt (Serpentine Belt)
Conditions that would require replacement:
Rib chunking (one or more ribs has sepa -
rated from belt body)
Rib or belt wear
Longitudinal belt cracking (cracks between
two ribs)
Belt slips
“Groove jumping" (belt does not maintain
correct position on pulley)
Belt broken (note: identify and correct
problem before new belt is installed)
Noise (objectionable squeal, squeak, or
rumble is heard or felt while drive belt is in
operation)
Some conditions can be caused by a faulty
component such as a belt pulley. Belt pulleys
should be carefully inspected for damage and
proper alignment.
Belt replacement on some models requires the
use of special tools, we recommend having your
vehicle serviced at an authorized dealer.
BODY LUBRICATION
Locks and all body pivot points, including such
items as seat tracks, door hinge pivot points
and rollers, liftgate, tailgate, decklid, sliding
doors and hood hinges, should be lubricated
periodically with a lithium based grease, such
as Mopar Spray White Lube to ensure quiet,
easy operation and to protect against rust and wear. Prior to the application of any lubricant,
the parts concerned should be wiped clean to
remove dust and grit; after lubricating, excess
oil and grease should be removed. Particular
attention should also be given to hood latching
components to ensure proper function. When
performing other underhood services, the hood
latch, release mechanism and safety catch
should be cleaned and lubricated.
The external lock cylinders should be lubricated
twice a year, preferably in the Autumn and
Spring. Apply a small amount of a high quality
lubricant, such as Mopar Lock Cylinder
Lubricant directly into the lock cylinder.
WINDSHIELD WIPER BLADES
Clean the rubber edges of the wiper blades and
the windshield periodically with a sponge or soft
cloth and a mild nonabrasive cleaner. This will
remove accumulations of salt or road film.
Operation of the wipers on dry glass for long
periods may cause deterioration of the wiper
blades. Always use washer fluid when using the
wipers to remove salt or dirt from a dry
windshield.
20_LX_OM_EN_USC_t.book Page 244
Page 275 of 328
SERVICING AND MAINTENANCE273
Special Care
If you drive on salted or dusty roads or if you
drive near the ocean, hose off the undercar -
riage at least once a month.
It is important that the drain holes in the
lower edges of the doors, rocker panels, and
trunk be kept clear and open.
If you detect any stone chips or scratches in
the paint, touch them up immediately. The
cost of such repairs is considered the respon -
sibility of the owner.
If your vehicle is damaged due to a collision
or similar cause that destroys the paint and
protective coating, have your vehicle repaired as soon as possible. The cost of such repairs
is considered the responsibility of the owner.
If you carry special cargo such as chemicals,
fertilizers, de-icer salt, etc., be sure that such
materials are well packaged and sealed.
If a lot of driving is done on gravel roads,
consider mud or stone shields behind each
wheel.
Use Mopar Touch Up Paint on scratches as
soon as possible. An authorized dealer has
touch up paint to match the color of your
vehicle.
INTERIORS
SEATS AND FABRIC PARTS
Use Mopar Total Clean to clean fabric
upholstery and carpeting.
Seat Belt Maintenance
Do not bleach, dye, or clean the belts with
chemical solvents or abrasive cleaners. This will
weaken the fabric. Sun damage can also
weaken the fabric.
If the belts need cleaning, use Mopar Total
Clean, a mild soap solution, or lukewarm water.
Do not remove the belts from the vehicle to
wash them. Dry with a soft cloth.
Replace the belts if they appear frayed or worn
or if the buckles do not work properly.CAUTION!
Do not use abrasive or strong cleaning
materials such as steel wool or scouring
powder that will scratch metal and painted
surfaces.
Use of power washers exceeding 1,200 psi
(8,274 kPa) can result in damage or
removal of paint and decals.
WARNING!
Do not use volatile solvents for cleaning
purposes. Many are potentially flammable,
and if used in closed areas they may cause
respiratory harm.
WARNING!
A frayed or torn belt could rip apart in a
collision and leave you with no protection.
Inspect the belt system periodically, checking
for cuts, frays, or loose parts. Damaged parts
must be replaced immediately. Do not
disassemble or modify the system. Seat belt
assemblies must be replaced after a collision
if they have been damaged (i.e., bent
retractor, torn webbing, etc.).
7
20_LX_OM_EN_USC_t.book Page 273
Page 318 of 328

316 AWD Towing
....................................................... 229Axle Fluid............................................. 281, 283Axle Lubrication................................... 281, 283
B
Back-Up......................................................... 186Battery.................................................... 86, 238Charging System Light................................. 86Keyless Key Fob Replacement.................... 13Location.................................................... 238Belts, Seat..................................................... 143Beverage Holder Cooled (Cupholder).............. 73Beverage Holder Heated (Cupholder).............. 73Body Mechanism Lubrication........................ 244B-Pillar Location............................................. 257Brake Assist System........................................ 96Brake Control System...................................... 96Brake Fluid................................. 251, 281, 283Brake System...................................... 250, 275Fluid Check............................ 251, 281, 283Master Cylinder......................................... 251Parking...................................................... 150Warning Light..................................... 85, 275Brake/Transmission Interlock....................... 153Break-In Recommendations, New Vehicle..... 150Brightness, Interior Lights................................ 48Bulb Replacement......................................... 206Bulbs, Light.......................................... 145, 206
C
Camera, Rear................................................ 186Capacities, Fluid........................................... 280Caps, FillerOil (Engine)...................................... 236, 241Radiator (Coolant Pressure)..................... 249Car Washes................................................... 272Carbon Monoxide Warning................... 143, 279CargoVehicle Loading........................................ 190Cargo Area Cover............................................. 64Cargo Compartment........................................ 64Cellular Phone.............................................. 303Certification Label......................................... 190Chains, Tire................................................... 269Changing A Flat Tire...................................... 253Chart, Tire Sizing........................................... 254Check Engine Light
(Malfunction Indicator Light)............................ 93Checking Your Vehicle For Safety................. 142Checks, Safety.............................................. 142Child Restraint.............................................. 130Child RestraintsBooster Seats........................................... 133Child Seat Installation.............................. 140How To Stow An unused ALR Seat Belt.... 138Infant And Child Restraints....................... 132Lower Anchors And Tethers For Children.. 135Older Children And Child Restraints......... 132
Seating Positions...................................... 134Child Safety Locks............................................28Clean Air Gasoline......................................... 277CleaningWheels...................................................... 268Climate Control................................................50Automatic....................................................50Coin Holder......................................................71Cold Weather Operation................................ 149Compact Spare Tire...................................... 266ConsoleFloor............................................................71Contract, Service........................................... 312Cooling Pressure Cap (Radiator Cap)............ 249Cooling System............................................. 247Adding Coolant (Antifreeze)...................... 248Coolant Capacity....................................... 280Coolant Level................................... 247, 250Disposal Of Used Coolant......................... 249Drain, Flush, And Refill............................. 248Inspection................................................. 250Points To Remember................................ 250Pressure Cap............................................ 249Radiator Cap............................................. 249Selection Of Coolant (Antifreeze)......................... 248, 280, 281Corrosion Protection..................................... 272Cruise Control (Speed Control)............. 160, 163Cruise Light............................................... 91, 92
20_LX_OM_EN_USC_t.book Page 316