2020 CHEVROLET SILVERADO 2500 power steering
[x] Cancel search: power steeringPage 239 of 500
Chevrolet Silverado Owner Manual (GMNA-Localizing-U.S./Canada/Mexico-
13337620) - 2020 - CRC - 4/11/19
238 Driving and Operating
If HDC is to be used for more than
three minutes or on grades steeper
than 25%, the transfer case should
be put into Four-Wheel Drive Low (4
n) to reduce the possibility of brake
overheating.
Noise from the Electronic Brake
Control Module (EBCM) is normal
when HDC is active.
When HDC is activated, the initial
HDC speed is set to the current
driving speed. It can be increased or
decreased by pressing +RES or
SET- on the steering wheel, or by
applying the accelerator or brake
pedal. This adjusted speed
becomes the new set speed.
HDC will remain enabled between
30 and 60 km/h (19 and 37 mph);
however, vehicle speed cannot be
set or maintained in this range. HDC
will automatically disable if the
vehicle speed is above 80 km/h
(50 mph) or above 60 km/h
(37 mph) for at least 30 seconds.
5must be pressed again to
re-enable HDC. HDC may disable
after an extended period of use. If this happens, HDC will require
time to cool down. The length of
time HDC remains active depends
on road conditions, grade, set
speed, vehicle loading, and outside
temperature.
When enabled, if the vehicle speed
is above 30 km/h (19 mph) and
below 60 km/h (37 mph), a DIC
message will display.
Driver Mode Control
This feature adds a sportier feel,
provides a more comfortable ride,
or assists in different weather
conditions or terrain. Depending on
the option package, available
features, and mode selected; the
suspension, steering, and
powertrain will change settings to
achieve the desired mode
characteristics. If the vehicle is
equipped with magnetic ride control,
selecting the various Driver Modes
enhances the ride performance for
the road conditions and the
selected mode.
Mode availability is dependent upon
vehicle trim level, region, and
optional features.
Not all drive modes are available
on. 1500 series vehicles may have
Normal, Sport, Snow/Ice, Off Road,
Terrain, and Tow Haul. 2500/3500
series vehicles may have Normal,
Off Road, Snow/Ice, and Tow/Haul.
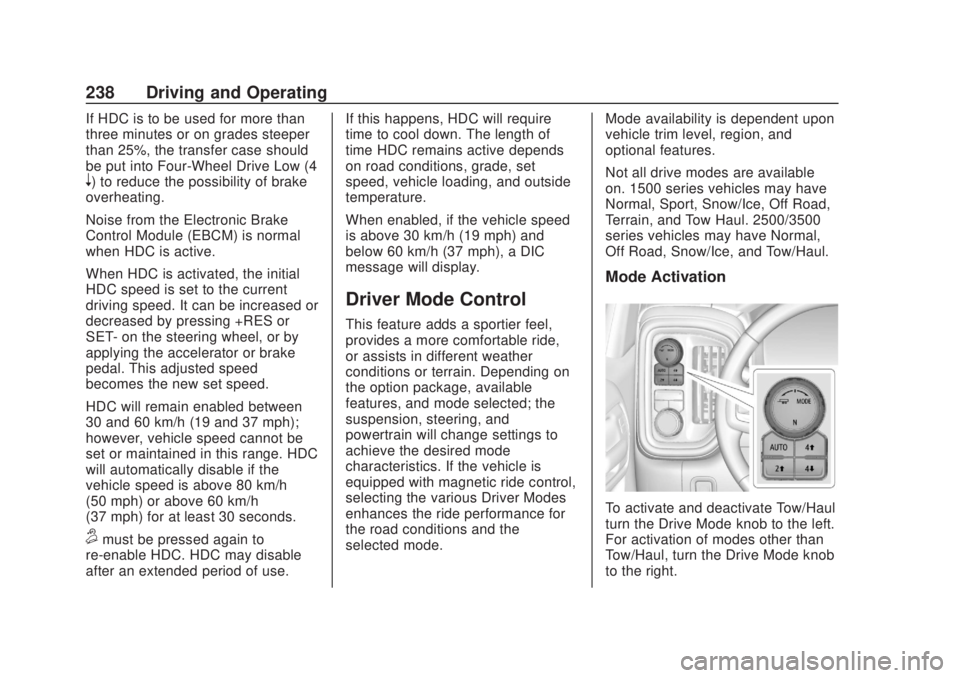
Mode Activation
To activate and deactivate Tow/Haul
turn the Drive Mode knob to the left.
For activation of modes other than
Tow/Haul, turn the Drive Mode knob
to the right.
Page 267 of 500
Chevrolet Silverado Owner Manual (GMNA-Localizing-U.S./Canada/Mexico-
13337620) - 2020 - CRC - 4/11/19
266 Driving and Operating
Troubleshooting
The Transparent Trailer calibration
may take longer than expected or
not calibrate if:
.The vehicle is driven too fast
during calibration. Speed should
be maintained below 50 km/h
(31 mph).
. The vehicle is not driven straight
during calibration. Steering
should be maintained as straight
as possible, excessive steering
during calibration may extend
calibration time.
. The calibration is attempted in
low light. Calibration should be
attempted when there is enough
light.
. The calibration is attempted
during adverse weather
conditions. Calibration during
conditions such as snow or
heavy rain should be avoided.
. The road surface is not ideal for
calibration. Calibration should be
attempted on an alternate road
surface. .
The accessory trailer cameras
are swapped at the hitch
connector. Ensure that the
camera mounted to the rear of
the trailer is connected to the
rear trailer camera input.
. The accessory trailer camera is
mounted, angled or rotated
outside of the defined mounting
location (see camera installation
instructions).
Distortion may be observed in the
calibrated Transparent Trailer
View if:
. The accessory trailer camera is
mounted, angled or rotated
outside of the defined mounting
location (see camera installation
instructions).
The Transparent Trailer icon may
appear grayed out if:
. A compatible trailer profile is not
configured or a non-compatible
trailer profile is selected.
. The vehicle is in R (Reverse).
. The trailer is not connected. .
The accessory rear trailer
camera is not connected or
connected to the incorrect input.
The preview may not be provided or
the wrong preview may be
provided if:
. The accessory cameras are not
recognized. Ensure that the
accessory camera(s) are
connected and power cycle the
vehicle.
. The accessory trailer cameras
are swapped at the hitch
connector. Ensure that the
accessory camera(s) are
connected to the correct input.
. The accessory trailer camera(s)
are connected to the correct
camera input.
. The accessory trailer camera(s)
are not installed according to the
installation instructions.
A feature may be unavailable or not
activating as expected if:
. The customization is disabled.
Check the customization settings
where applicable.
Page 305 of 500
Chevrolet Silverado Owner Manual (GMNA-Localizing-U.S./Canada/Mexico-
13337620) - 2020 - CRC - 4/11/19
304 Driving and Operating
lamp circuits on the trailer. DIC
messages and Trailering App alerts
may be displayed if lighting circuit
issues are detected on the trailer.
Pressing START LIGHT TEST in the
Trailering App automatically
activates the trailer lamps. The
Trailering App is not a substitute for
manually inspecting your trailer
lamps. SeeTrailering App 0310.
Turn Signals When Towing a
Trailer
When properly connected, the trailer
turn signals will illuminate to indicate
the vehicle is turning, changing
lanes, or stopping. When towing a
trailer, the arrows on the instrument
cluster will illuminate even if the
trailer is not properly connected or
the bulbs are burned out.
Tow/Haul Mode
For instructions on how to enter
Tow/Haul Mode, see Driver Mode
Control 0238.
Tow/Haul assists when pulling a
heavy trailer or a large or heavy
load. See Tow/Haul Mode 0226. Tow/Haul Mode is designed to be
most effective when the vehicle and
trailer combined weight is at least
75% of the vehicle's Gross
Combined Weight Rating (GCWR).
See
“Trailer Weight ”under Trailer
Towing 0292.
Tow/Haul Mode is most useful when
towing a heavy trailer or carrying a
large or heavy load:
. Through rolling terrain.
. In stop-and-go traffic.
. In busy parking lots.
Operating the vehicle in Tow/Haul
Mode when lightly loaded or not
towing will not cause damage;
however, it is not recommended and
may result in unpleasant engine and
transmission driving characteristics,
heavy or light steering efforts, and
reduced fuel economy.Integrated Trailer Brake
Control System
The vehicle may have an Integrated
Trailer Brake Control (ITBC) system
for use with electric trailer brakes or
most electric over hydraulic trailer brake systems. These instructions
apply to both types of electric trailer
brakes.
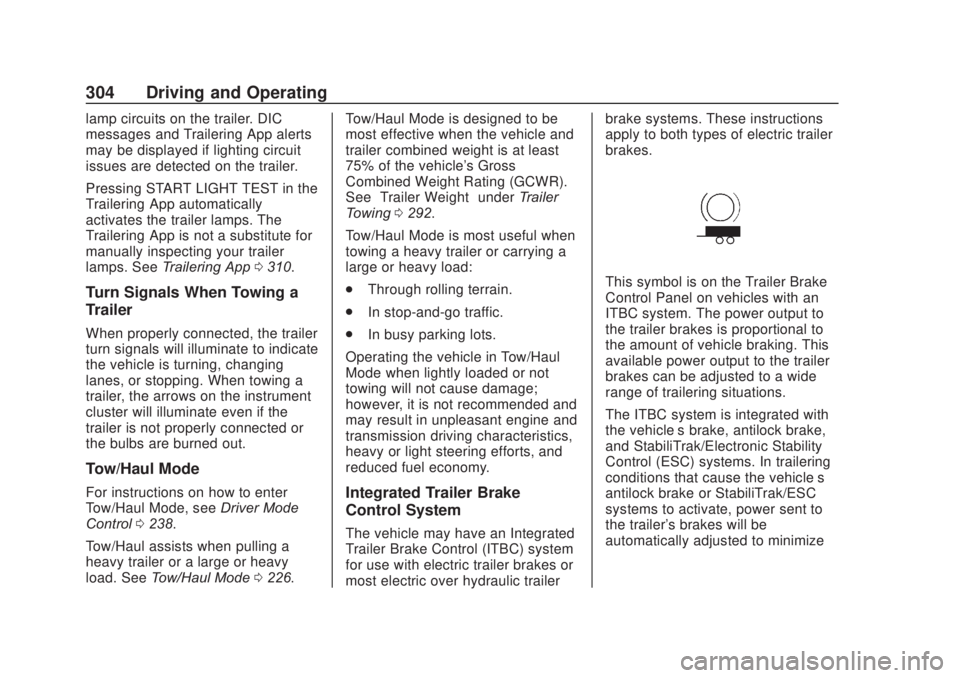
This symbol is on the Trailer Brake
Control Panel on vehicles with an
ITBC system. The power output to
the trailer brakes is proportional to
the amount of vehicle braking. This
available power output to the trailer
brakes can be adjusted to a wide
range of trailering situations.
The ITBC system is integrated with
the vehicle’
s brake, antilock brake,
and StabiliTrak/Electronic Stability
Control (ESC) systems. In trailering
conditions that cause the vehicle’s
antilock brake or StabiliTrak/ESC
systems to activate, power sent to
the trailer's brakes will be
automatically adjusted to minimize
Page 328 of 500
Chevrolet Silverado Owner Manual (GMNA-Localizing-U.S./Canada/Mexico-
13337620) - 2020 - CRC - 4/10/19
Vehicle Care 327
Vehicle Care
General Information
General Information . . . . . . . . . . 328
California Proposition65 Warning . . . . . . . . . . . . . . . . . 329
California Perchlorate Materials Requirements . . . . . 329
Accessories and Modifications . . . . . . . . . . . . . . . . 329
Vehicle Checks
Doing Your OwnService Work . . . . . . . . . . . . . . . 330
Hood . . . . . . . . . . . . . . . . . . . . . . . . . 330
Engine Compartment Overview . . . . . . . . . . . . . . . . . . . . 332
Engine Oil . . . . . . . . . . . . . . . . . . . . 339
Engine Oil Life System . . . . . . . 341
Automatic Transmission Fluid . . . . . . . . . . . . . . . . . . . . . . . . 343
Engine Air Filter Life System . . . . . . . . . . . . . . . . . . . . . . 343
Engine Air Cleaner/Filter . . . . . . 344
Cooling System . . . . . . . . . . . . . . 346
Engine Overheating . . . . . . . . . . 351
Overheated Engine Protection Operating Mode . . . . . . . . . . . . . 352
Engine Fan . . . . . . . . . . . . . . . . . . . 353 Power Steering Fluid . . . . . . . . . 353
Washer Fluid . . . . . . . . . . . . . . . . . 354
Brakes . . . . . . . . . . . . . . . . . . . . . . . 355
Brake Pad Life System . . . . . . . 356
Brake Fluid . . . . . . . . . . . . . . . . . . . 357
Battery - North America . . . . . . 358
Four-Wheel Drive . . . . . . . . . . . . . 360
Front Axle . . . . . . . . . . . . . . . . . . . . 361
Rear Axle . . . . . . . . . . . . . . . . . . . . 361
Noise Control System . . . . . . . . 361
Starter Switch Check . . . . . . . . . 362
Automatic Transmission Shift
Lock Control Function
Check . . . . . . . . . . . . . . . . . . . . . . . 363
Ignition Transmission Lock Check . . . . . . . . . . . . . . . . . . . . . . . 363
Park Brake and P (Park) Mechanism Check . . . . . . . . . . 363
Wiper Blade Replacement . . . . 364
Glass Replacement . . . . . . . . . . 365
Windshield Replacement . . . . . 365
Gas Strut(s) . . . . . . . . . . . . . . . . . . 365
Headlamp Aiming
Headlamp Aiming . . . . . . . . . . . . 366
Bulb Replacement
Bulb Replacement . . . . . . . . . . . . 366
Halogen Bulbs . . . . . . . . . . . . . . . . 366
LED Lighting . . . . . . . . . . . . . . . . . 367 Headlamps, Front Turn Signal,
Sidemarker, and Parking
Lamps . . . . . . . . . . . . . . . . . . . . . . 367
Taillamps, Turn Signal, Stoplamps, and Back-Up
Lamps . . . . . . . . . . . . . . . . . . . . . . 368
Center High-Mounted Stoplamp (CHMSL) and
Cargo Lamp . . . . . . . . . . . . . . . . . 369
License Plate Lamp . . . . . . . . . . 369
Electrical System
Electrical System Overload . . . 370
Fuses and Circuit Breakers . . . 370
Engine Compartment Fuse Block . . . . . . . . . . . . . . . . . . . . . . . . 371
Instrument Panel Fuse
Block (Left) . . . . . . . . . . . . . . . . . 374
Instrument Panel Fuse Block (Right) . . . . . . . . . . . . . . . . . . . . . . 376
Wheels and Tires
Tires . . . . . . . . . . . . . . . . . . . . . . . . . . 379
All-Season Tires . . . . . . . . . . . . . . 379
Winter Tires . . . . . . . . . . . . . . . . . . 380
Low-Profile Tires . . . . . . . . . . . . . 380
All-Terrain Tires . . . . . . . . . . . . . . . 381
Tire Sidewall Labeling . . . . . . . . 381
Tire Designations . . . . . . . . . . . . . 383
Tire Terminology andDefinitions . . . . . . . . . . . . . . . . . . 385
Page 340 of 500
Chevrolet Silverado Owner Manual (GMNA-Localizing-U.S./Canada/Mexico-
13337620) - 2020 - CRC - 4/10/19
Vehicle Care 339
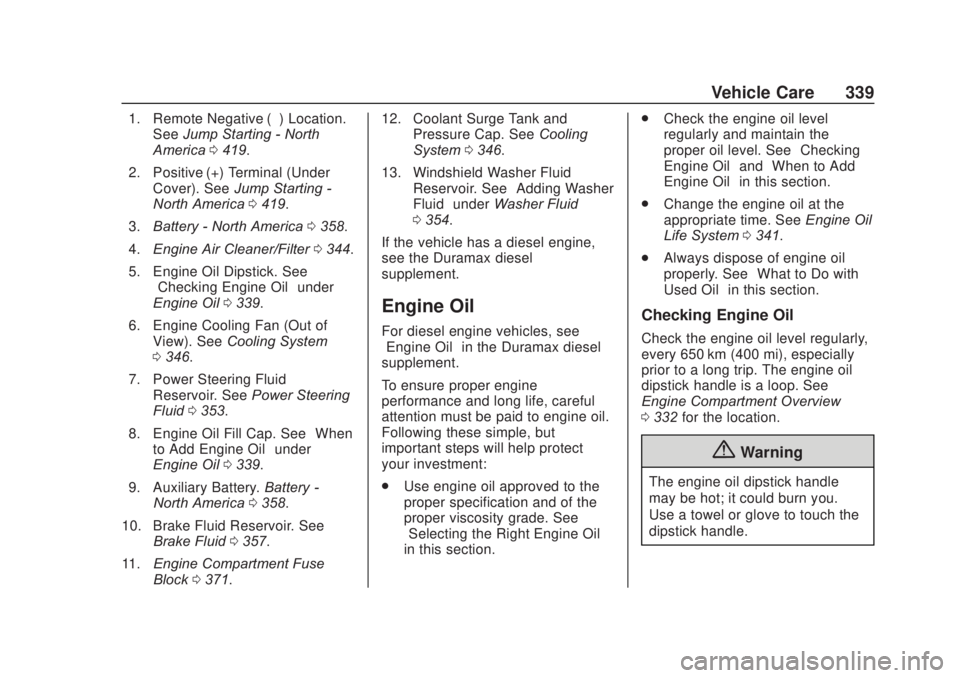
1. Remote Negative (–) Location.See Jump Starting - North
America 0419.
2. Positive (+) Terminal (Under Cover). See Jump Starting -
North America 0419.
3. Battery - North America 0358.
4. Engine Air Cleaner/Filter 0344.
5. Engine Oil Dipstick. See “Checking Engine Oil” under
Engine Oil 0339.
6. Engine Cooling Fan (Out of View). See Cooling System
0 346.
7. Power Steering Fluid Reservoir. See Power Steering
Fluid 0353.
8. Engine Oil Fill Cap. See “When
to Add Engine Oil” under
Engine Oil 0339.
9. Auxiliary Battery. Battery -
North America 0358.
10. Brake Fluid Reservoir. See Brake Fluid 0357.
11. Engine Compartment Fuse
Block 0371. 12. Coolant Surge Tank and
Pressure Cap. See Cooling
System 0346.
13. Windshield Washer Fluid Reservoir. See “Adding Washer
Fluid” under Washer Fluid
0 354.
If the vehicle has a diesel engine,
see the Duramax diesel
supplement.
Engine Oil
For diesel engine vehicles, see
“Engine Oil” in the Duramax diesel
supplement.
To ensure proper engine
performance and long life, careful
attention must be paid to engine oil.
Following these simple, but
important steps will help protect
your investment:
. Use engine oil approved to the
proper specification and of the
proper viscosity grade. See
“Selecting the Right Engine Oil”
in this section. .
Check the engine oil level
regularly and maintain the
proper oil level. See “Checking
Engine Oil” and“When to Add
Engine Oil” in this section.
. Change the engine oil at the
appropriate time. See Engine Oil
Life System 0341.
. Always dispose of engine oil
properly. See “What to Do with
Used Oil” in this section.Checking Engine Oil
Check the engine oil level regularly,
every 650 km (400 mi), especially
prior to a long trip. The engine oil
dipstick handle is a loop. See
Engine Compartment Overview
0332 for the location.
{Warning
The engine oil dipstick handle
may be hot; it could burn you.
Use a towel or glove to touch the
dipstick handle.
Page 354 of 500
Chevrolet Silverado Owner Manual (GMNA-Localizing-U.S./Canada/Mexico-
13337620) - 2020 - CRC - 4/10/19
Vehicle Care 353
vehicle to be driven to a safe place
in an emergency. Driving extended
distances and/or towing a trailer in
the overheat protection mode
should be avoided.
Caution
After driving in the overheated
engine protection operating
mode, the engine oil will be
severely degraded. Any repairs
performed before the engine is
cool may cause engine damage.
Allow the engine to cool before
attempting any repair. Repair the
cause of coolant loss, change the
oil, and reset the oil life system.
SeeEngine Oil 0339.
Engine Fan
If the vehicle has the Duramax
diesel engine, see the Duramax
diesel supplement.
All Engines Except 6.6L
V8 Engine (L8T)
The vehicle has electric cooling
fan(s). The fans may be heard
spinning at low speed during most
everyday driving. The fans may turn
off if no cooling is required. Under
heavy vehicle loading, trailer towing,
high outside temperatures,
or operation of the air conditioning
system, the fans may change to
high speed and an increase in fan
noise may be heard. This is normal
and indicates that the cooling
system is functioning properly. The
fans will change to low speed when
additional cooling is no longer
required.
The electric engine cooling fans
may run after the engine has been
turned off. This is normal and no
service is required.
6.6L V8 Engine (L8T) Only
The vehicle has a clutched engine
cooling fan. When the clutch is
engaged, the fan spins faster to
provide more air to cool the engine.
In most everyday driving conditions, the fan is spinning slower and the
clutch is not fully engaged. This
improves fuel economy and reduces
fan noise. Under heavy vehicle
loading, trailer towing, and/or high
outside temperatures, the fan speed
increases as the clutch more fully
engages, so an increase in fan
noise may be heard. This is normal
and should not be mistaken as the
transmission slipping or making
extra shifts. It is merely the cooling
system functioning properly. The fan
will slow down when additional
cooling is not required and the
clutch partially disengages.
This fan noise may be heard when
starting the engine. It will go away
as the fan clutch partially
disengages.
Power Steering Fluid
Page 355 of 500
Chevrolet Silverado Owner Manual (GMNA-Localizing-U.S./Canada/Mexico-
13337620) - 2020 - CRC - 4/10/19
354 Vehicle Care
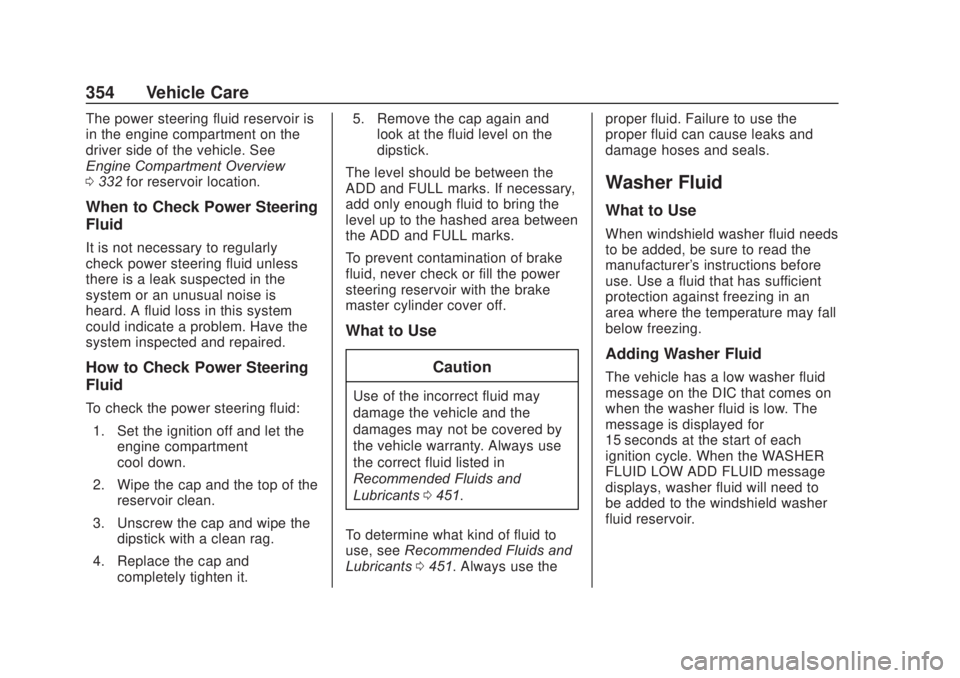
The power steering fluid reservoir is
in the engine compartment on the
driver side of the vehicle. See
Engine Compartment Overview
0332 for reservoir location.
When to Check Power Steering
Fluid
It is not necessary to regularly
check power steering fluid unless
there is a leak suspected in the
system or an unusual noise is
heard. A fluid loss in this system
could indicate a problem. Have the
system inspected and repaired.
How to Check Power Steering
Fluid
To check the power steering fluid:
1. Set the ignition off and let the engine compartment
cool down.
2. Wipe the cap and the top of the reservoir clean.
3. Unscrew the cap and wipe the dipstick with a clean rag.
4. Replace the cap and completely tighten it. 5. Remove the cap again and
look at the fluid level on the
dipstick.
The level should be between the
ADD and FULL marks. If necessary,
add only enough fluid to bring the
level up to the hashed area between
the ADD and FULL marks.
To prevent contamination of brake
fluid, never check or fill the power
steering reservoir with the brake
master cylinder cover off.
What to Use
Caution
Use of the incorrect fluid may
damage the vehicle and the
damages may not be covered by
the vehicle warranty. Always use
the correct fluid listed in
Recommended Fluids and
Lubricants0451.
To determine what kind of fluid to
use, see Recommended Fluids and
Lubricants 0451. Always use the proper fluid. Failure to use the
proper fluid can cause leaks and
damage hoses and seals.
Washer Fluid
What to Use
When windshield washer fluid needs
to be added, be sure to read the
manufacturer's instructions before
use. Use a fluid that has sufficient
protection against freezing in an
area where the temperature may fall
below freezing.
Adding Washer Fluid
The vehicle has a low washer fluid
message on the DIC that comes on
when the washer fluid is low. The
message is displayed for
15 seconds at the start of each
ignition cycle. When the WASHER
FLUID LOW ADD FLUID message
displays, washer fluid will need to
be added to the windshield washer
fluid reservoir.
Page 378 of 500
Chevrolet Silverado Owner Manual (GMNA-Localizing-U.S./Canada/Mexico-
13337620) - 2020 - CRC - 4/10/19
Vehicle Care 377
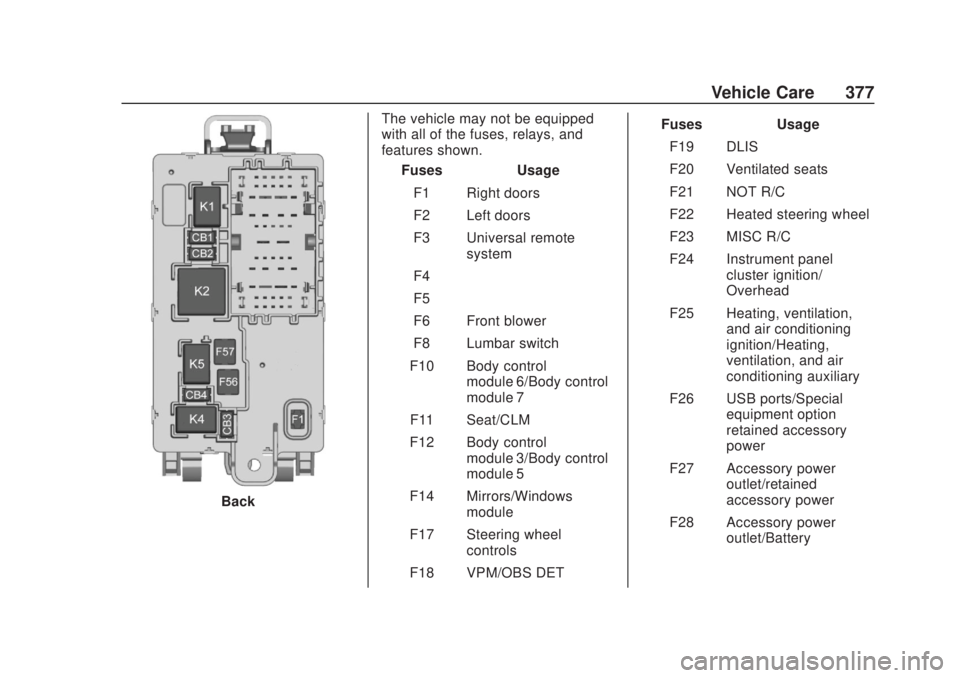
BackThe vehicle may not be equipped
with all of the fuses, relays, and
features shown.
Fuses Usage
F1 Right doors
F2 Left doors
F3 Universal remote system
F4 –
F5 –
F6 Front blower
F8 Lumbar switch
F10 Body control module 6/Body control
module 7
F11 Seat/CLM
F12 Body control module 3/Body control
module 5
F14 Mirrors/Windows module
F17 Steering wheel controls
F18 VPM/OBS DET Fuses Usage
F19 DLIS
F20 Ventilated seats
F21 NOT R/C
F22 Heated steering wheel
F23 MISC R/C
F24 Instrument panel cluster ignition/
Overhead
F25 Heating, ventilation, and air conditioning
ignition/Heating,
ventilation, and air
conditioning auxiliary
F26 USB ports/Special equipment option
retained accessory
power
F27 Accessory power outlet/retained
accessory power
F28 Accessory power outlet/Battery