2020 CHEVROLET MALIBU start
[x] Cancel search: startPage 85 of 358

Chevrolet Malibu Owner Manual (GMNA-Localizing-U.S./Canada/Mexico-
13555849) - 2020 - CRC - 8/16/19
84 Seats and Restraints
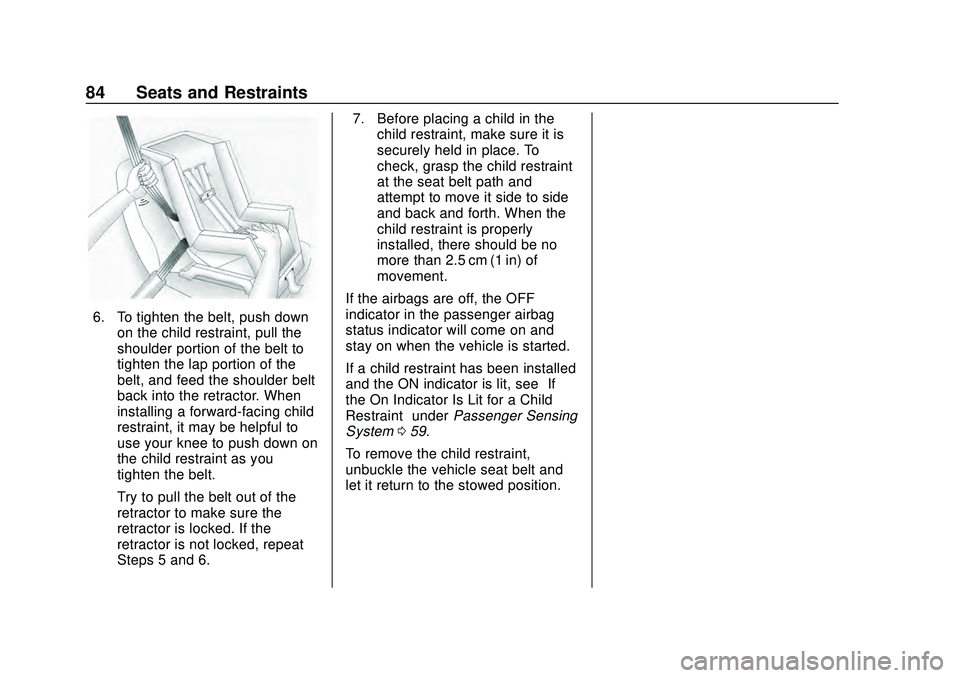
6. To tighten the belt, push downon the child restraint, pull the
shoulder portion of the belt to
tighten the lap portion of the
belt, and feed the shoulder belt
back into the retractor. When
installing a forward-facing child
restraint, it may be helpful to
use your knee to push down on
the child restraint as you
tighten the belt.
Try to pull the belt out of the
retractor to make sure the
retractor is locked. If the
retractor is not locked, repeat
Steps 5 and 6. 7. Before placing a child in the
child restraint, make sure it is
securely held in place. To
check, grasp the child restraint
at the seat belt path and
attempt to move it side to side
and back and forth. When the
child restraint is properly
installed, there should be no
more than 2.5 cm (1 in) of
movement.
If the airbags are off, the OFF
indicator in the passenger airbag
status indicator will come on and
stay on when the vehicle is started.
If a child restraint has been installed
and the ON indicator is lit, see “If
the On Indicator Is Lit for a Child
Restraint” underPassenger Sensing
System 059.
To remove the child restraint,
unbuckle the vehicle seat belt and
let it return to the stowed position.
Page 91 of 358

Chevrolet Malibu Owner Manual (GMNA-Localizing-U.S./Canada/Mexico-
13555849) - 2020 - CRC - 8/16/19
90 Instruments and Controls
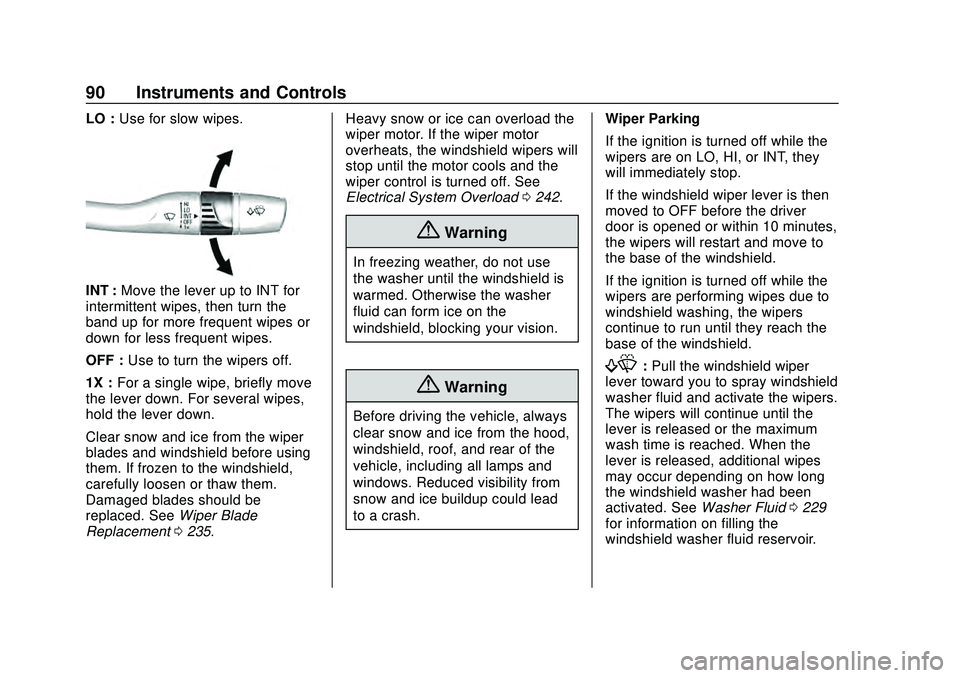
LO :Use for slow wipes.
INT : Move the lever up to INT for
intermittent wipes, then turn the
band up for more frequent wipes or
down for less frequent wipes.
OFF : Use to turn the wipers off.
1X : For a single wipe, briefly move
the lever down. For several wipes,
hold the lever down.
Clear snow and ice from the wiper
blades and windshield before using
them. If frozen to the windshield,
carefully loosen or thaw them.
Damaged blades should be
replaced. See Wiper Blade
Replacement 0235. Heavy snow or ice can overload the
wiper motor. If the wiper motor
overheats, the windshield wipers will
stop until the motor cools and the
wiper control is turned off. See
Electrical System Overload
0242.
{Warning
In freezing weather, do not use
the washer until the windshield is
warmed. Otherwise the washer
fluid can form ice on the
windshield, blocking your vision.
{Warning
Before driving the vehicle, always
clear snow and ice from the hood,
windshield, roof, and rear of the
vehicle, including all lamps and
windows. Reduced visibility from
snow and ice buildup could lead
to a crash. Wiper Parking
If the ignition is turned off while the
wipers are on LO, HI, or INT, they
will immediately stop.
If the windshield wiper lever is then
moved to OFF before the driver
door is opened or within 10 minutes,
the wipers will restart and move to
the base of the windshield.
If the ignition is turned off while the
wipers are performing wipes due to
windshield washing, the wipers
continue to run until they reach the
base of the windshield.
f:
Pull the windshield wiper
lever toward you to spray windshield
washer fluid and activate the wipers.
The wipers will continue until the
lever is released or the maximum
wash time is reached. When the
lever is released, additional wipes
may occur depending on how long
the windshield washer had been
activated. See Washer Fluid0229
for information on filling the
windshield washer fluid reservoir.
Page 93 of 358

Chevrolet Malibu Owner Manual (GMNA-Localizing-U.S./Canada/Mexico-
13555849) - 2020 - CRC - 8/16/19
92 Instruments and Controls
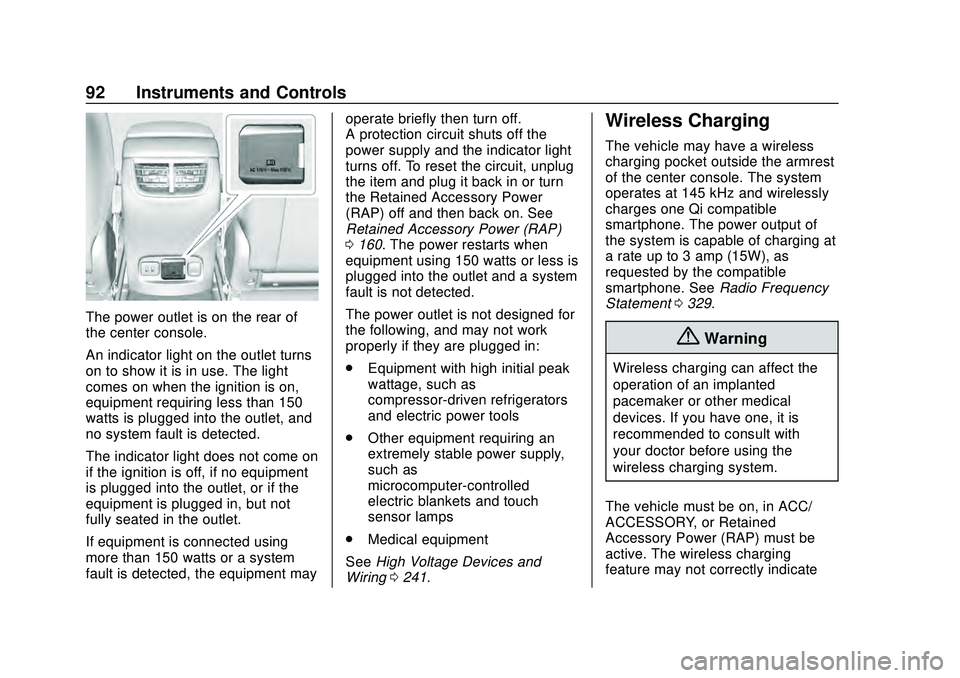
The power outlet is on the rear of
the center console.
An indicator light on the outlet turns
on to show it is in use. The light
comes on when the ignition is on,
equipment requiring less than 150
watts is plugged into the outlet, and
no system fault is detected.
The indicator light does not come on
if the ignition is off, if no equipment
is plugged into the outlet, or if the
equipment is plugged in, but not
fully seated in the outlet.
If equipment is connected using
more than 150 watts or a system
fault is detected, the equipment mayoperate briefly then turn off.
A protection circuit shuts off the
power supply and the indicator light
turns off. To reset the circuit, unplug
the item and plug it back in or turn
the Retained Accessory Power
(RAP) off and then back on. See
Retained Accessory Power (RAP)
0
160. The power restarts when
equipment using 150 watts or less is
plugged into the outlet and a system
fault is not detected.
The power outlet is not designed for
the following, and may not work
properly if they are plugged in:
. Equipment with high initial peak
wattage, such as
compressor-driven refrigerators
and electric power tools
. Other equipment requiring an
extremely stable power supply,
such as
microcomputer-controlled
electric blankets and touch
sensor lamps
. Medical equipment
See High Voltage Devices and
Wiring 0241.
Wireless Charging
The vehicle may have a wireless
charging pocket outside the armrest
of the center console. The system
operates at 145 kHz and wirelessly
charges one Qi compatible
smartphone. The power output of
the system is capable of charging at
a rate up to 3 amp (15W), as
requested by the compatible
smartphone. See Radio Frequency
Statement 0329.
{Warning
Wireless charging can affect the
operation of an implanted
pacemaker or other medical
devices. If you have one, it is
recommended to consult with
your doctor before using the
wireless charging system.
The vehicle must be on, in ACC/
ACCESSORY, or Retained
Accessory Power (RAP) must be
active. The wireless charging
feature may not correctly indicate
Page 96 of 358

Chevrolet Malibu Owner Manual (GMNA-Localizing-U.S./Canada/Mexico-
13555849) - 2020 - CRC - 8/16/19
Instruments and Controls 95
Warning Lights,
Gauges, and
Indicators
Warning lights and gauges can
signal that something is wrong
before it becomes serious enough
to cause an expensive repair or
replacement. Paying attention to the
warning lights and gauges could
prevent injury.
Some warning lights come on briefly
when the engine is started to
indicate they are working. When
one of the warning lights comes on
and stays on while driving, or when
one of the gauges shows there may
be a problem, check the section that
explains what to do. Waiting to do
repairs can be costly and even
dangerous.
Page 100 of 358

Chevrolet Malibu Owner Manual (GMNA-Localizing-U.S./Canada/Mexico-
13555849) - 2020 - CRC - 8/16/19
Instruments and Controls 99
Units :Presspwhile Units is
displayed to enter the Units menu.
Choose U.S. or metric units by
pressing
Vwhile the desired item is
highlighted.
Display Themes : Press
pwhile
Display Themes is displayed to
enter the menu. Choose Sport or
Touring by pressing
Vwhile the
desired item is highlighted.
Pocket Gauges : Press
pwhile
Pocket Gauges is displayed to enter
the menu and select gauges that
can be displayed on the left or right
of the display area. If equipped,
choose oil temperature, battery
voltage, fuel range, or fuel economy.
Info Pages : Press
pwhile Info
Pages is displayed to enter the Info
Pages menu and select the items to be displayed in the Info app. See
Driver Information Center (DIC)
(Base Level)
0113 or
Driver Information Center (DIC)
(Uplevel) 0116.
Speed Warning : The Speed
Warning display allows the driver to
set a speed that they do not want to
exceed. To set the Speed Warning,
press
pwhen Speed Warning is
displayed. Press
worxto adjust
the value. Press
Vto set the speed.
Once the speed is set, this feature
can be turned off by pressing
V
while viewing this page. If the
selected speed limit is exceeded, a
pop-up warning is displayed with a
chime.
Speedometer
The speedometer shows the
vehicle's speed in either kilometers
per hour (km/h) or miles per
hour (mph).
Odometer
The odometer shows how far the
vehicle has been driven, in either
kilometers or miles.
Trip Odometer
The trip odometer shows how far
the vehicle has been driven since
the trip odometer was last reset.
The trip odometer is accessed and
reset through the Driver Information
Center (DIC). See Driver
Information Center (DIC) (Base
Level) 0113 or
Driver Information Center (DIC)
(Uplevel) 0116.
Tachometer
The tachometer displays the engine
speed in revolutions per
minute (rpm).
For vehicles with the Stop/Start
system, when the ignition is on, the
tachometer indicates the vehicle
status. When pointing to AUTO
STOP, the engine is off but the
vehicle is on and can move. The
Page 101 of 358

Chevrolet Malibu Owner Manual (GMNA-Localizing-U.S./Canada/Mexico-
13555849) - 2020 - CRC - 8/16/19
100 Instruments and Controls
engine could auto start at any time.
When the indicator points to OFF,
the vehicle is off.
When the engine is on, the
tachometer will indicate the engine’s
revolutions per minute (rpm). The
tachometer may vary by several
hundred rpm’s, during Auto Stop
mode, when the engine is shutting
off and restarting.
Caution
If the engine is operated with the
rpm’s in the warning area at the
high end of the tachometer, the
vehicle could be damaged, and
the damage would not be covered
by the vehicle warranty. Do not
operate the engine with the rpm’s
in the warning area.
Fuel Gauge
Uplevel Metric
Uplevel English
When the ignition is on, the fuel
gauge indicates about how much
fuel is left in the tank.
An arrow on the fuel gauge
indicates the side of the vehicle the
fuel door is on.
When the indicator nears empty, the
low fuel light comes on. There is still
a little fuel left, but the fuel tank
should be filled soon.
Here are four things that some
owners ask about. None of these
show a problem with the fuel gauge:
Page 103 of 358

Chevrolet Malibu Owner Manual (GMNA-Localizing-U.S./Canada/Mexico-
13555849) - 2020 - CRC - 8/16/19
102 Instruments and Controls
conditions, pull off the road, stop the
vehicle, and turn off the engine as
soon as possible. SeeEngine
Overheating 0228.
Seat Belt Reminders
Driver Seat Belt Reminder
Light
There is a driver seat belt reminder
light on the instrument cluster.
When the vehicle is started, this
light flashes and a chime may come
on to remind the driver to fasten
their seat belt. Then the light stays
on solid until the belt is buckled.
This cycle may continue several
times if the driver remains or
becomes unbuckled while the
vehicle is moving. If the driver seat belt is buckled,
neither the light nor the chime
comes on.
Passenger Seat Belt Reminder
Light
There is a passenger seat belt
reminder light near the passenger
airbag status indicator. See
Passenger Sensing System
059.
When the vehicle is started, this
light flashes and a chime may come
on to remind passengers to fasten
their seat belt. Then the light stays
on solid until the belt is buckled.
This cycle continues several times if
the passenger remains or becomes
unbuckled while the vehicle is
moving.
If the passenger seat belt is
buckled, neither the chime nor the
light comes on. The front passenger seat belt
reminder light and chime may turn
on if an object is put on the seat
such as a briefcase, handbag,
grocery bag, laptop, or other
electronic device. To turn off the
reminder light and/or chime, remove
the object from the seat or buckle
the seat belt.
Airbag Readiness Light
This light shows if there is an
electrical problem with the airbag
system. The system check includes
the airbag sensor(s), passenger
sensing system, the pretensioners,
the airbag modules, the wiring, and
the crash sensing and diagnostic
module. For more information on the
airbag system, see
Airbag System
0 53.
Page 104 of 358

Chevrolet Malibu Owner Manual (GMNA-Localizing-U.S./Canada/Mexico-
13555849) - 2020 - CRC - 8/16/19
Instruments and Controls 103
The airbag readiness light comes on
for several seconds when the
vehicle is started. If the light does
not come on then, have it fixed
immediately.
{Warning
If the airbag readiness light stays
on after the vehicle is started or
comes on while driving, it means
the airbag system might not be
working properly. The airbags in
the vehicle might not inflate in a
crash, or they could even inflate
without a crash. To help avoid
injury, have the vehicle serviced
right away.
Passenger Airbag Status
Indicator
The vehicle has a passenger
sensing system. SeePassenger
Sensing System 059 for important
safety information. The overhead
console has a passenger airbag
status indicator.
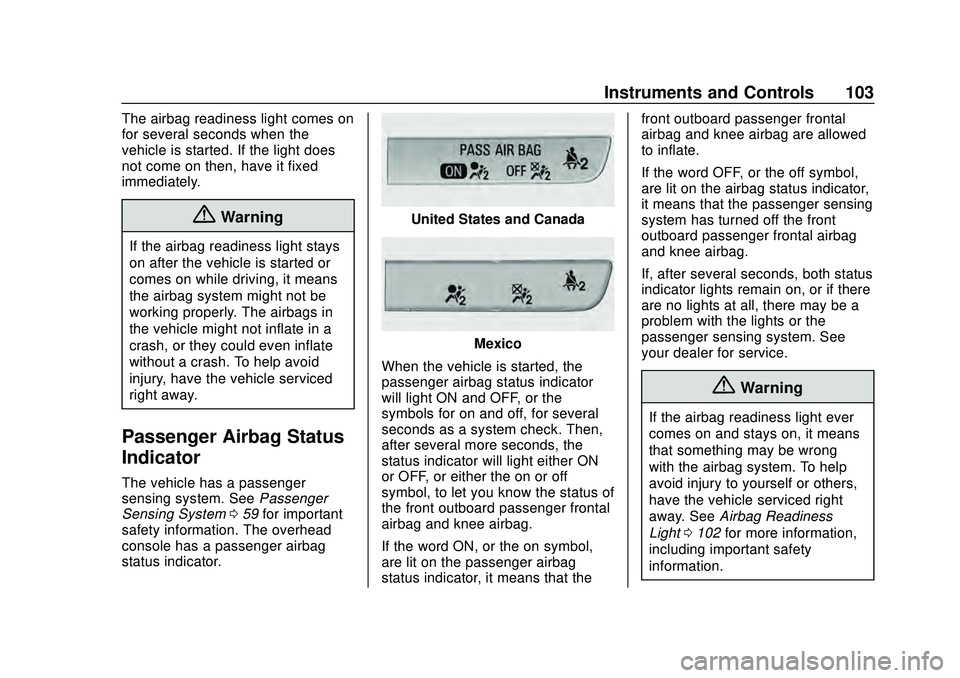
United States and Canada
Mexico
When the vehicle is started, the
passenger airbag status indicator
will light ON and OFF, or the
symbols for on and off, for several
seconds as a system check. Then,
after several more seconds, the
status indicator will light either ON
or OFF, or either the on or off
symbol, to let you know the status of
the front outboard passenger frontal
airbag and knee airbag.
If the word ON, or the on symbol,
are lit on the passenger airbag
status indicator, it means that the front outboard passenger frontal
airbag and knee airbag are allowed
to inflate.
If the word OFF, or the off symbol,
are lit on the airbag status indicator,
it means that the passenger sensing
system has turned off the front
outboard passenger frontal airbag
and knee airbag.
If, after several seconds, both status
indicator lights remain on, or if there
are no lights at all, there may be a
problem with the lights or the
passenger sensing system. See
your dealer for service.
{Warning
If the airbag readiness light ever
comes on and stays on, it means
that something may be wrong
with the airbag system. To help
avoid injury to yourself or others,
have the vehicle serviced right
away. See
Airbag Readiness
Light 0102 for more information,
including important safety
information.