2020 CHEVROLET MALIBU instrument cluster
[x] Cancel search: instrument clusterPage 176 of 358
Chevrolet Malibu Owner Manual (GMNA-Localizing-U.S./Canada/Mexico-
13555849) - 2020 - CRC - 8/16/19
Driving and Operating 175
Electronic Stability Control (ESC)
system activates, the ACC may
automatically disengage. See
Traction Control/Electronic Stability
Control0170. When road
conditions allow ACC to be safely
used, the ACC can be turned
back on.
ACC will not engage if the TCS or
StabiliTrak/ESC system is disabled.
{Warning
ACC has limited braking ability
and may not have time to slow
the vehicle down enough to avoid
a collision with another vehicle
you are following. This can occur
when vehicles suddenly slow or
stop ahead, or enter your lane.
Also see “Alerting the Driver” in
this section. Complete attention is
always required while driving and
you should be ready to take
action and apply the brakes. See
Defensive Driving 0145.
{Warning
ACC will not detect or brake for
children, pedestrians, animals,
or other objects.
Do not use ACC when:
. On winding and hilly roads
or when the sensors are
blocked by snow, ice, or dirt.
The system may not detect
a vehicle ahead. Keep the
entire front of the vehicle
clean.
. Visibility is low, such as in
fog, rain, or snow
conditions. ACC
performance is limited under
these conditions.
. On slippery roads where
fast changes in tire traction
can cause excessive
wheel slip.
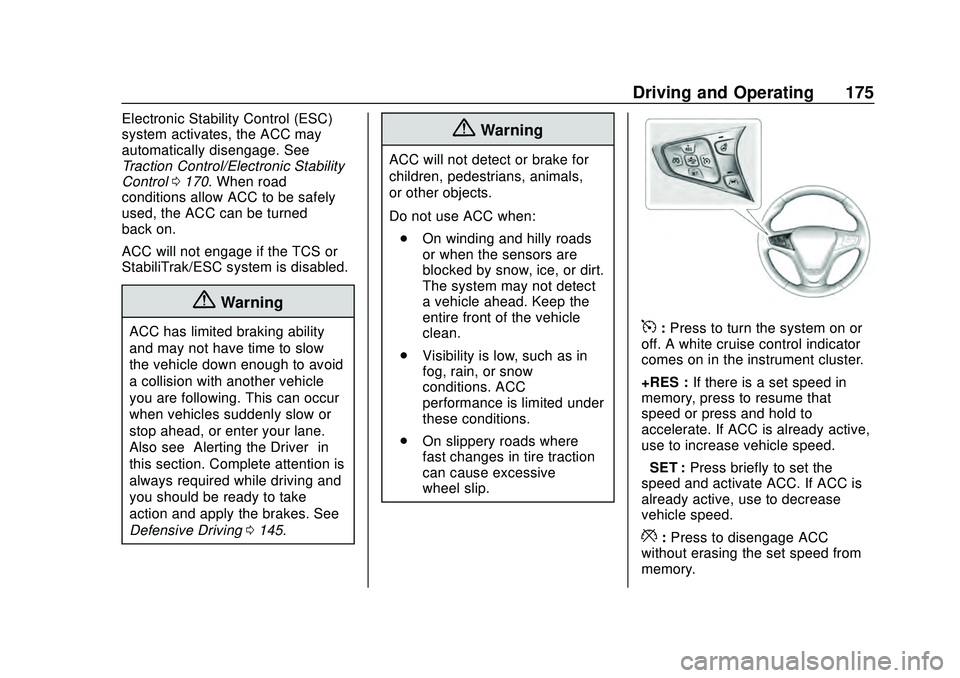
5:Press to turn the system on or
off. A white cruise control indicator
comes on in the instrument cluster.
+RES : If there is a set speed in
memory, press to resume that
speed or press and hold to
accelerate. If ACC is already active,
use to increase vehicle speed.
−SET : Press briefly to set the
speed and activate ACC. If ACC is
already active, use to decrease
vehicle speed.
*: Press to disengage ACC
without erasing the set speed from
memory.
Page 177 of 358
Chevrolet Malibu Owner Manual (GMNA-Localizing-U.S./Canada/Mexico-
13555849) - 2020 - CRC - 8/16/19
176 Driving and Operating
[:Press to select a following gap
time (or distance) setting for ACC of
Far, Medium, or Near.
Switching Between ACC and
Regular Cruise Control
To switch between ACC and regular
cruise control, press and hold
*.
A Driver Information Display (DIC)
message displays. See Vehicle
Messages 0119.
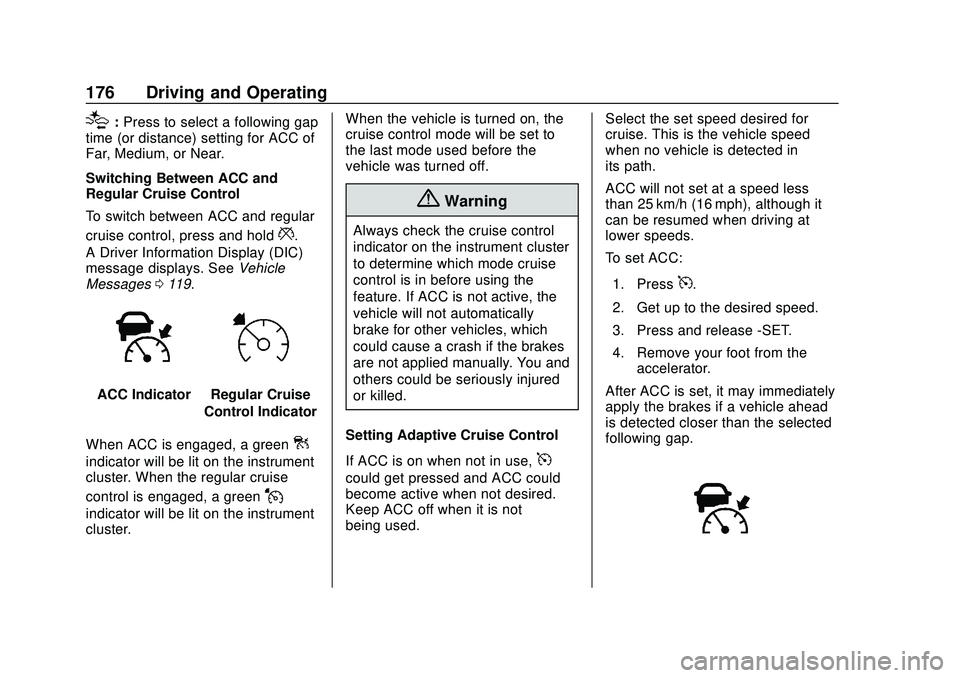
ACC IndicatorRegular Cruise
Control Indicator
When ACC is engaged, a green
]
indicator will be lit on the instrument
cluster. When the regular cruise
control is engaged, a green
J
indicator will be lit on the instrument
cluster. When the vehicle is turned on, the
cruise control mode will be set to
the last mode used before the
vehicle was turned off.
{Warning
Always check the cruise control
indicator on the instrument cluster
to determine which mode cruise
control is in before using the
feature. If ACC is not active, the
vehicle will not automatically
brake for other vehicles, which
could cause a crash if the brakes
are not applied manually. You and
others could be seriously injured
or killed.
Setting Adaptive Cruise Control
If ACC is on when not in use,
5
could get pressed and ACC could
become active when not desired.
Keep ACC off when it is not
being used. Select the set speed desired for
cruise. This is the vehicle speed
when no vehicle is detected in
its path.
ACC will not set at a speed less
than 25 km/h (16 mph), although it
can be resumed when driving at
lower speeds.
To set ACC:
1. Press
5.
2. Get up to the desired speed.
3. Press and release -SET.
4. Remove your foot from the accelerator.
After ACC is set, it may immediately
apply the brakes if a vehicle ahead
is detected closer than the selected
following gap.
Page 178 of 358
Chevrolet Malibu Owner Manual (GMNA-Localizing-U.S./Canada/Mexico-
13555849) - 2020 - CRC - 8/16/19
Driving and Operating 177
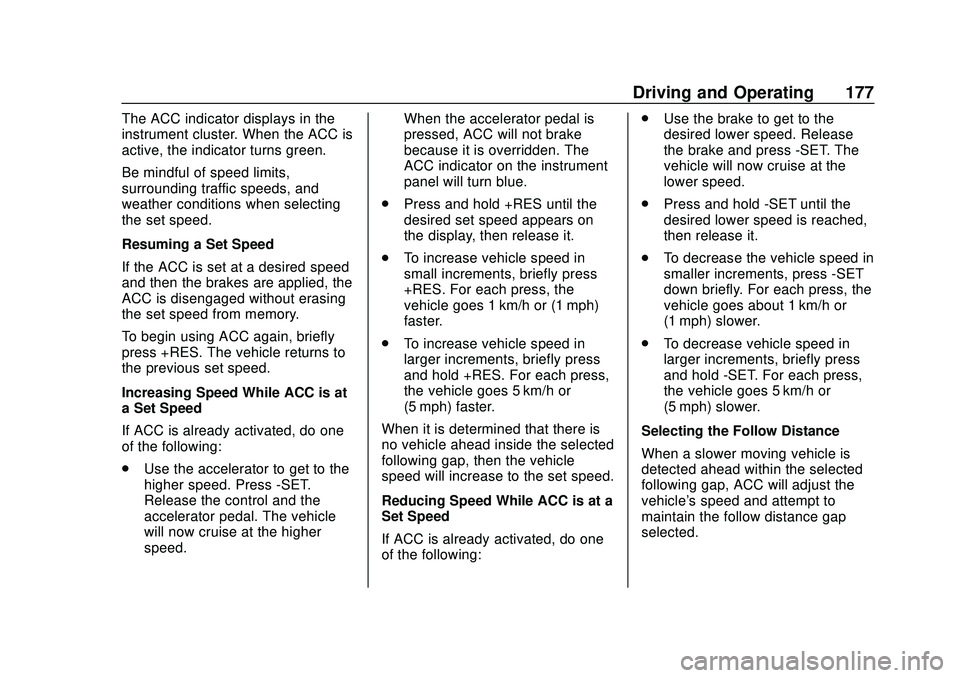
The ACC indicator displays in the
instrument cluster. When the ACC is
active, the indicator turns green.
Be mindful of speed limits,
surrounding traffic speeds, and
weather conditions when selecting
the set speed.
Resuming a Set Speed
If the ACC is set at a desired speed
and then the brakes are applied, the
ACC is disengaged without erasing
the set speed from memory.
To begin using ACC again, briefly
press +RES. The vehicle returns to
the previous set speed.
Increasing Speed While ACC is at
a Set Speed
If ACC is already activated, do one
of the following:
.Use the accelerator to get to the
higher speed. Press -SET.
Release the control and the
accelerator pedal. The vehicle
will now cruise at the higher
speed. When the accelerator pedal is
pressed, ACC will not brake
because it is overridden. The
ACC indicator on the instrument
panel will turn blue.
. Press and hold +RES until the
desired set speed appears on
the display, then release it.
. To increase vehicle speed in
small increments, briefly press
+RES. For each press, the
vehicle goes 1 km/h or (1 mph)
faster.
. To increase vehicle speed in
larger increments, briefly press
and hold +RES. For each press,
the vehicle goes 5 km/h or
(5 mph) faster.
When it is determined that there is
no vehicle ahead inside the selected
following gap, then the vehicle
speed will increase to the set speed.
Reducing Speed While ACC is at a
Set Speed
If ACC is already activated, do one
of the following: .
Use the brake to get to the
desired lower speed. Release
the brake and press -SET. The
vehicle will now cruise at the
lower speed.
. Press and hold -SET until the
desired lower speed is reached,
then release it.
. To decrease the vehicle speed in
smaller increments, press -SET
down briefly. For each press, the
vehicle goes about 1 km/h or
(1 mph) slower.
. To decrease vehicle speed in
larger increments, briefly press
and hold -SET. For each press,
the vehicle goes 5 km/h or
(5 mph) slower.
Selecting the Follow Distance
When a slower moving vehicle is
detected ahead within the selected
following gap, ACC will adjust the
vehicle's speed and attempt to
maintain the follow distance gap
selected.
Page 179 of 358
Chevrolet Malibu Owner Manual (GMNA-Localizing-U.S./Canada/Mexico-
13555849) - 2020 - CRC - 8/16/19
178 Driving and Operating
Press[on the steering wheel to
adjust the following gap. When
pressed, the current gap setting
displays briefly on the instrument
cluster. Subsequent presses cycle
the gap button through three
settings: Far, Medium, or Near. The
gap setting will be maintained until it
is changed.
Since each gap setting corresponds
to a following time (Far, Medium,
or Near), the following distance will
vary based on vehicle speed. The
faster the vehicle speed, the further
back your vehicle will follow a
vehicle detected ahead. Consider
traffic and weather conditions when
selecting the following gap. The
range of selectable gaps may not be
appropriate for all drivers and
driving conditions.
Changing the gap setting
automatically changes the alert
timing sensitivity (Far, Medium,
or Near) for the Forward Collision
Alert (FCA) feature. See Forward
Collision Alert (FCA) System 0188. Alerting the Driver
If ACC is engaged, driver action
may be required when ACC cannot
apply sufficient braking because of
approaching a vehicle too rapidly.
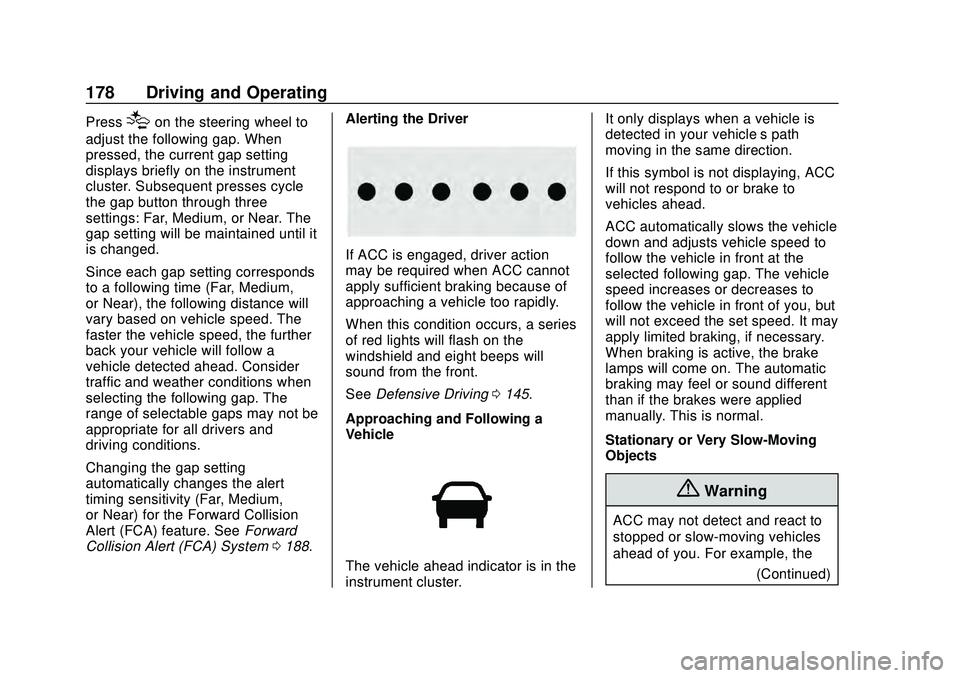
When this condition occurs, a series
of red lights will flash on the
windshield and eight beeps will
sound from the front.
See
Defensive Driving 0145.
Approaching and Following a
Vehicle
The vehicle ahead indicator is in the
instrument cluster. It only displays when a vehicle is
detected in your vehicle’s path
moving in the same direction.
If this symbol is not displaying, ACC
will not respond to or brake to
vehicles ahead.
ACC automatically slows the vehicle
down and adjusts vehicle speed to
follow the vehicle in front at the
selected following gap. The vehicle
speed increases or decreases to
follow the vehicle in front of you, but
will not exceed the set speed. It may
apply limited braking, if necessary.
When braking is active, the brake
lamps will come on. The automatic
braking may feel or sound different
than if the brakes were applied
manually. This is normal.
Stationary or Very Slow-Moving
Objects
{Warning
ACC may not detect and react to
stopped or slow-moving vehicles
ahead of you. For example, the
(Continued)
Page 181 of 358
Chevrolet Malibu Owner Manual (GMNA-Localizing-U.S./Canada/Mexico-
13555849) - 2020 - CRC - 8/16/19
180 Driving and Operating
{Warning
Leaving the vehicle without
placing it in P (Park) can be
dangerous. Do not leave the
vehicle while it is being held at a
stop by ACC. Always place the
vehicle in P (Park) and turn off
the ignition before leaving the
vehicle.
ACC Override
If using the accelerator pedal while
ACC is active, the ACC indicator
turns blue on the instrument cluster
to indicate that automatic braking
will not occur. ACC will resume
operation when the accelerator
pedal is not being pressed.
{Warning
The ACC will not automatically
apply the brakes if your foot is
resting on the accelerator pedal.
You could crash into a vehicle
ahead of you. Curves in the Road
{Warning
On curves, ACC may not detect a
vehicle ahead in your lane. You
could be startled if the vehicle
accelerates up to the set speed,
especially when following a
vehicle exiting or entering exit
ramps. You could lose control of
the vehicle or crash. Do not use
ACC while driving on an entrance
or exit ramp. Always be ready to
use the brakes if necessary.
{Warning
On curves, ACC may respond to
a vehicle in another lane, or may
not have time to react to a vehicle
in your lane. You could crash into
a vehicle ahead of you, or lose
control of your vehicle. Give extra
attention in curves and be ready
(Continued)
Warning (Continued)
to use the brakes if necessary.
Select an appropriate speed while
driving in curves.
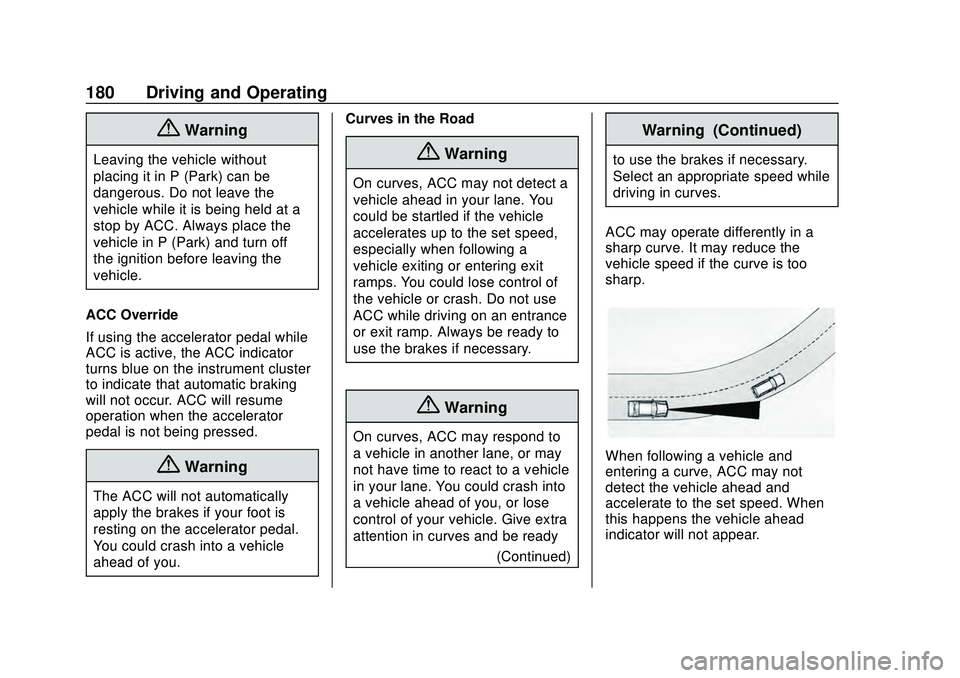
ACC may operate differently in a
sharp curve. It may reduce the
vehicle speed if the curve is too
sharp.
When following a vehicle and
entering a curve, ACC may not
detect the vehicle ahead and
accelerate to the set speed. When
this happens the vehicle ahead
indicator will not appear.
Page 186 of 358
Chevrolet Malibu Owner Manual (GMNA-Localizing-U.S./Canada/Mexico-
13555849) - 2020 - CRC - 8/16/19
Driving and Operating 185
warmer or humid weather. Blocked
sensors will not detect objects and
can also cause false detections.
Keep the sensors clean of mud, dirt,
snow, ice, and slush; and clean
sensors after a car wash in freezing
temperatures.
{Warning
The Park Assist system does not
detect children, pedestrians,
bicyclists, animals, or objects
located below the bumper or that
are too close or too far from the
vehicle. It is not available at
speeds greater than 8 km/h
(5 mph). To prevent injury, death,
or vehicle damage, even with
Park Assist, always check the
area around the vehicle and
check all mirrors before moving
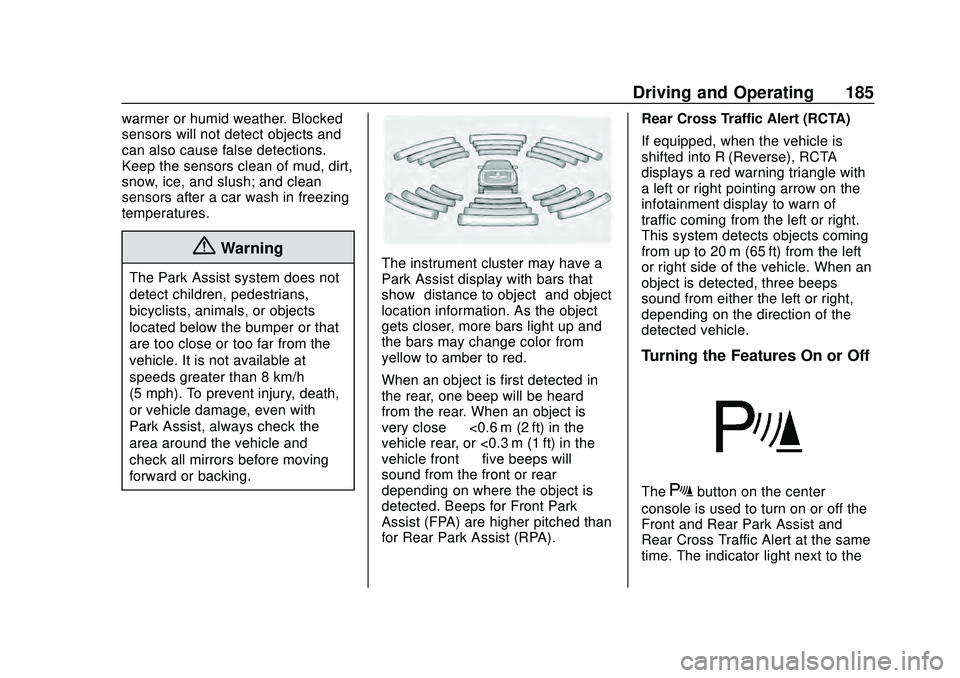
forward or backing.The instrument cluster may have a
Park Assist display with bars that
show“distance to object” and object
location information. As the object
gets closer, more bars light up and
the bars may change color from
yellow to amber to red.
When an object is first detected in
the rear, one beep will be heard
from the rear. When an object is
very close —<0.6 m (2 ft) in the
vehicle rear, or <0.3 m (1 ft) in the
vehicle front —five beeps will
sound from the front or rear
depending on where the object is
detected. Beeps for Front Park
Assist (FPA) are higher pitched than
for Rear Park Assist (RPA). Rear Cross Traffic Alert (RCTA)
If equipped, when the vehicle is
shifted into R (Reverse), RCTA
displays a red warning triangle with
a left or right pointing arrow on the
infotainment display to warn of
traffic coming from the left or right.
This system detects objects coming
from up to 20 m (65 ft) from the left
or right side of the vehicle. When an
object is detected, three beeps
sound from either the left or right,
depending on the direction of the
detected vehicle.
Turning the Features On or Off
TheXbutton on the center
console is used to turn on or off the
Front and Rear Park Assist and
Rear Cross Traffic Alert at the same
time. The indicator light next to the
Page 210 of 358
Chevrolet Malibu Owner Manual (GMNA-Localizing-U.S./Canada/Mexico-
13555849) - 2020 - CRC - 8/16/19
Driving and Operating 209
State or local regulations may
require trailers to have their own
braking system if the loaded weight
of the trailer exceeds certain
minimums that can vary from state
to state. Read and follow the
instructions for the trailer brakes so
they are installed, adjusted, and
maintained properly. Never attempt
to tap into your vehicle's hydraulic
brake system. If you do, both the
vehicle anti-lock brakes and the
trailer brakes may not function,
which could result in a crash.
Trailer Lamps
Always check all trailer lamps are
working at the beginning of each
trip, and periodically on longer trips.
Turn Signals When Towing a
Trailer
When properly connected, the trailer
turn signals will illuminate to indicate
the vehicle is turning, changing
lanes, or stopping. When towing a
trailer, the arrows on the instrument
cluster will illuminate even if the
trailer is not properly connected or
the bulbs are burned out.
Trailer Tires
Special Trailer (ST) tires differ from
vehicle tires. Trailer tires are
designed with stiff sidewalls to help
prevent sway and to support heavy
loads. These features can make it
difficult to determine if the trailer tire
pressures are low only based on a
visual inspection.
Always check all trailer tire
pressures before each trip when the
tires are cool. Low trailer tire
pressure is a leading cause of trailer
tire blow-outs.
Trailer tires deteriorate over time.
The trailer tire sidewall will show the
week and year the tire was
manufactured. Many trailer tire
manufacturers recommend
replacing tires more than six
years old.
Overloading is another leading
cause of trailer tire blow-outs. Never
load your trailer with more weight
than the tires are designed to
support. The load rating is located
on the trailer tire sidewall.Always know the maximum speed
rating for the trailer tires before
driving. This may be significantly
lower than the vehicle tire speed
rating. The speed rating may be on
the trailer tire sidewall. If the speed
rating is not shown, the default
trailer tire speed rating is 105 km/h
(65 mph).
Page 229 of 358
Chevrolet Malibu Owner Manual (GMNA-Localizing-U.S./Canada/Mexico-
13555849) - 2020 - CRC - 8/21/19
228 Vehicle Care
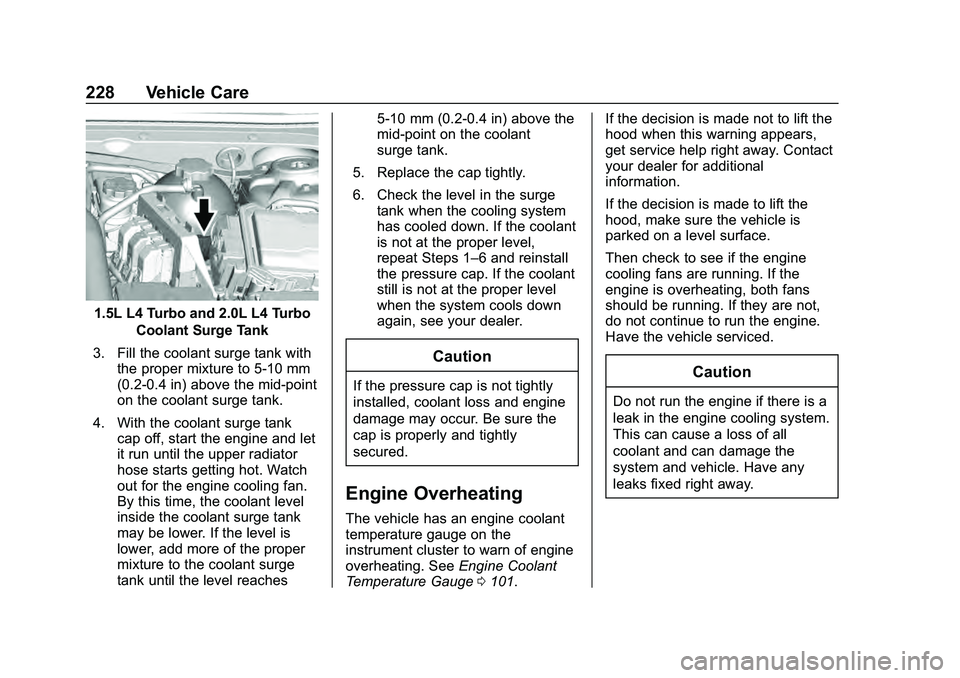
1.5L L4 Turbo and 2.0L L4 TurboCoolant Surge Tank
3. Fill the coolant surge tank with the proper mixture to 5-10 mm
(0.2-0.4 in) above the mid-point
on the coolant surge tank.
4. With the coolant surge tank cap off, start the engine and let
it run until the upper radiator
hose starts getting hot. Watch
out for the engine cooling fan.
By this time, the coolant level
inside the coolant surge tank
may be lower. If the level is
lower, add more of the proper
mixture to the coolant surge
tank until the level reaches 5-10 mm (0.2-0.4 in) above the
mid-point on the coolant
surge tank.
5. Replace the cap tightly.
6. Check the level in the surge tank when the cooling system
has cooled down. If the coolant
is not at the proper level,
repeat Steps 1–6 and reinstall
the pressure cap. If the coolant
still is not at the proper level
when the system cools down
again, see your dealer.
Caution
If the pressure cap is not tightly
installed, coolant loss and engine
damage may occur. Be sure the
cap is properly and tightly
secured.
Engine Overheating
The vehicle has an engine coolant
temperature gauge on the
instrument cluster to warn of engine
overheating. See Engine Coolant
Temperature Gauge 0101. If the decision is made not to lift the
hood when this warning appears,
get service help right away. Contact
your dealer for additional
information.
If the decision is made to lift the
hood, make sure the vehicle is
parked on a level surface.
Then check to see if the engine
cooling fans are running. If the
engine is overheating, both fans
should be running. If they are not,
do not continue to run the engine.
Have the vehicle serviced.
Caution
Do not run the engine if there is a
leak in the engine cooling system.
This can cause a loss of all
coolant and can damage the
system and vehicle. Have any
leaks fixed right away.