2020 CHEVROLET EQUINOX how to turn on
[x] Cancel search: how to turn onPage 264 of 415
Chevrolet Equinox Owner Manual (GMNA-Localizing-U.S./Canada/Mexico-
13555863) - 2020 - CRC - 8/2/19
Driving and Operating 263
Trailer Lamps
Always check all trailer lamps are
working at the beginning of each
trip, and periodically on longer trips.
Turn Signals When Towing a
Trailer
When properly connected, the trailer
turn signals should will illuminate to
indicate the vehicle is turning,
changing lanes, or stopping. When
towing a trailer, the arrows on the
instrument cluster will illuminate
even if the trailer is not properly
connected or the bulbs are
burned out.
Trailer Tires
Special Trailer (ST) tires differ from
vehicle tires. Trailer tires are
designed with stiff sidewalls to help
prevent sway and to support heavy
loads. These features can make it
difficult to determine if the trailer tire
pressures are low only based on a
visual inspection.Always check all trailer tire
pressures before each trip when the
tires are cool. Low trailer tire
pressure is a leading cause of trailer
tire blow-outs.
Trailer tires deteriorate over time.
The trailer tire sidewall will show the
week and year the tire was
manufactured. Many trailer tire
manufacturers recommend
replacing tires more than six
years old.
Overloading is another leading
cause of trailer tire blow-outs. Never
load your trailer with more weight
than the tires are designed to
support. The load rating is located
on the trailer tire sidewall.
Always know the maximum speed
rating for the trailer tires before
driving. This may be significantly
lower than the vehicle tire speed
rating. The speed rating may be on
the trailer tire sidewall. If the speed
rating is not shown, the default
trailer tire speed rating is 105 km/h
(65 mph).
Conversions and
Add-Ons
Add-On Electrical
Equipment
{Warning
The Data Link Connector (DLC) is
used for vehicle service and
Emission Inspection/Maintenance
testing. See
Malfunction Indicator
Lamp (Check Engine Light) 0114.
A device connected to the DLC —
such as an aftermarket fleet or
driver-behavior tracking device —
may interfere with vehicle
systems. This could affect vehicle
operation and cause a crash.
Such devices may also access
information stored in the vehicle’s
systems.
Page 284 of 415

Chevrolet Equinox Owner Manual (GMNA-Localizing-U.S./Canada/Mexico-
13555863) - 2020 - CRC - 8/2/19
Vehicle Care 283
2.0L Gas Engine
1. Engine Cooling Fan (Outof View)
2. Engine Coolant Surge Tank and Pressure Cap
{Warning
An underhood electric fan can
start up even when the engine is
not running and can cause injury.
Keep hands, clothing, and tools
away from any underhood
electric fan. If the coolant inside the coolant
surge tank is boiling, do not do
anything else until it cools down.
The vehicle should be parked on a
level surface.
The coolant level should be at the
top rib on the middle of the tank. If it
is not, the vehicle may have a leak
at the radiator hoses, heater hoses,
radiator, water pump, or somewhere
else in the cooling system.
{Warning
Do not touch heater or radiator
hoses, or other engine parts.
They can be very hot and can
burn you. Do not run the engine if
there is a leak; all coolant could
leak out. That could cause an
engine fire and can burn you. Fix
any leak before driving the
vehicle.
If there seems to be no leak, with
the engine on, check to see if the
electric engine cooling fan is
running. If the engine is overheating, the fan should be
running. If it is not, the vehicle
needs service. Turn off the engine.
Engine Coolant
The engine cooling system in the
vehicle is filled with DEX-COOL
engine coolant mixture. This coolant
needs to be checked and changed
at appropriate levels. See
Recommended Fluids and
Lubricants
0369 and
Maintenance Schedule 0360.
The following explains the cooling
system and how to check and add
coolant when it is low. If there is a
problem with engine overheating,
see Engine Overheating 0286.
What to Use
{Warning
Plain water, or other liquids such
as alcohol, can boil before the
proper coolant mixture will. With
plain water or the wrong mixture,
the engine could get too hot but
(Continued)
Page 286 of 415
Chevrolet Equinox Owner Manual (GMNA-Localizing-U.S./Canada/Mexico-
13555863) - 2020 - CRC - 8/2/19
Vehicle Care 285
The coolant surge tank is located in
the engine compartment on the
driver side of the vehicle. See
Engine Compartment Overview
0270.
How to Add Coolant to the
Surge Tank
{Warning
Spilling coolant on hot engine
parts can burn you. Coolant
contains ethylene glycol and it will
burn if the engine parts are hot
enough.
{Warning
Steam and scalding liquids from a
hot cooling system are under
pressure. Turning the pressure
cap, even a little, can cause them
to come out at high speed and
you could be burned. Never turn
the cap when the cooling system,
(Continued)
Warning (Continued)
including the pressure cap, is hot.
Wait for the cooling system and
pressure cap to cool.
Caution
Failure to follow the specific
coolant fill procedure could cause
the engine to overheat and could
cause system damage. If coolant
is not visible in the surge tank,
contact your dealer.
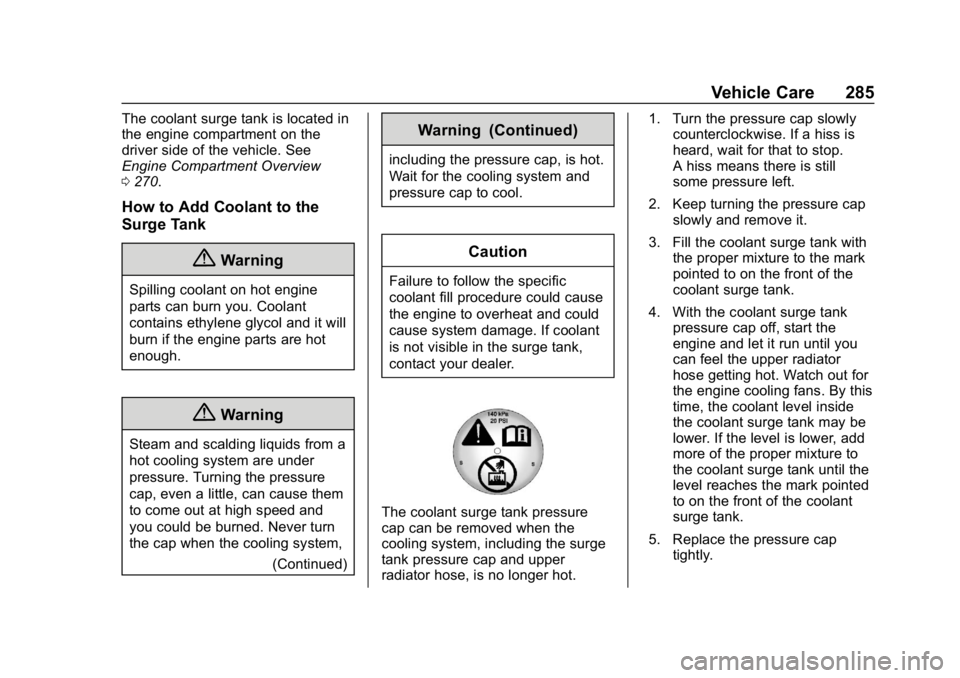
The coolant surge tank pressure
cap can be removed when the
cooling system, including the surge
tank pressure cap and upper
radiator hose, is no longer hot. 1. Turn the pressure cap slowly
counterclockwise. If a hiss is
heard, wait for that to stop.
A hiss means there is still
some pressure left.
2. Keep turning the pressure cap slowly and remove it.
3. Fill the coolant surge tank with the proper mixture to the mark
pointed to on the front of the
coolant surge tank.
4. With the coolant surge tank pressure cap off, start the
engine and let it run until you
can feel the upper radiator
hose getting hot. Watch out for
the engine cooling fans. By this
time, the coolant level inside
the coolant surge tank may be
lower. If the level is lower, add
more of the proper mixture to
the coolant surge tank until the
level reaches the mark pointed
to on the front of the coolant
surge tank.
5. Replace the pressure cap tightly.
Page 297 of 415
Chevrolet Equinox Owner Manual (GMNA-Localizing-U.S./Canada/Mexico-
13555863) - 2020 - CRC - 8/2/19
296 Vehicle Care
High Intensity Discharge
(HID) Lighting
{Warning
The High Intensity Discharge
(HID) lighting system operates at
a very high voltage. If you try to
service any of the system
components, you could be
seriously injured. Have your
dealer or a qualified technician
service them.
After an HID headlamp bulb has
been replaced, the beam might be a
slightly different shade than it was
originally. This is normal.
LED Lighting
This vehicle has several LED lamps.
For replacement of any LED lighting
assembly, contact your dealer.
Headlamps
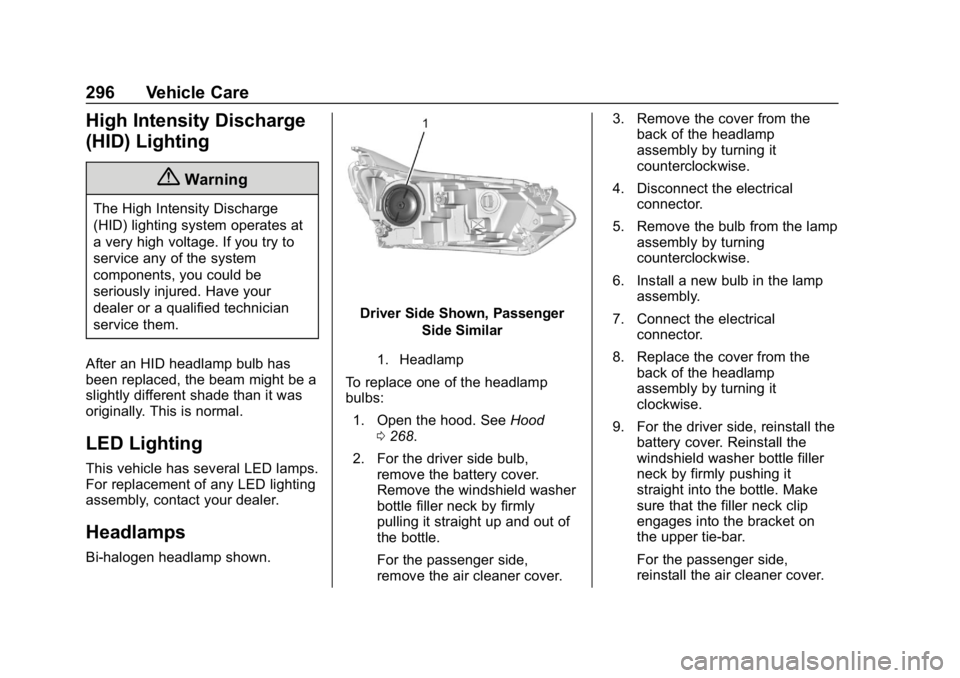
Bi-halogen headlamp shown.
Driver Side Shown, Passenger Side Similar
1. Headlamp
To replace one of the headlamp
bulbs:
1. Open the hood. See Hood
0 268.
2. For the driver side bulb, remove the battery cover.
Remove the windshield washer
bottle filler neck by firmly
pulling it straight up and out of
the bottle.
For the passenger side,
remove the air cleaner cover. 3. Remove the cover from the
back of the headlamp
assembly by turning it
counterclockwise.
4. Disconnect the electrical connector.
5. Remove the bulb from the lamp assembly by turning
counterclockwise.
6. Install a new bulb in the lamp assembly.
7. Connect the electrical connector.
8. Replace the cover from the back of the headlamp
assembly by turning it
clockwise.
9. For the driver side, reinstall the battery cover. Reinstall the
windshield washer bottle filler
neck by firmly pushing it
straight into the bottle. Make
sure that the filler neck clip
engages into the bracket on
the upper tie-bar.
For the passenger side,
reinstall the air cleaner cover.
Page 298 of 415
Chevrolet Equinox Owner Manual (GMNA-Localizing-U.S./Canada/Mexico-
13555863) - 2020 - CRC - 8/2/19
Vehicle Care 297
Front Turn Signal and
Fog Lamps
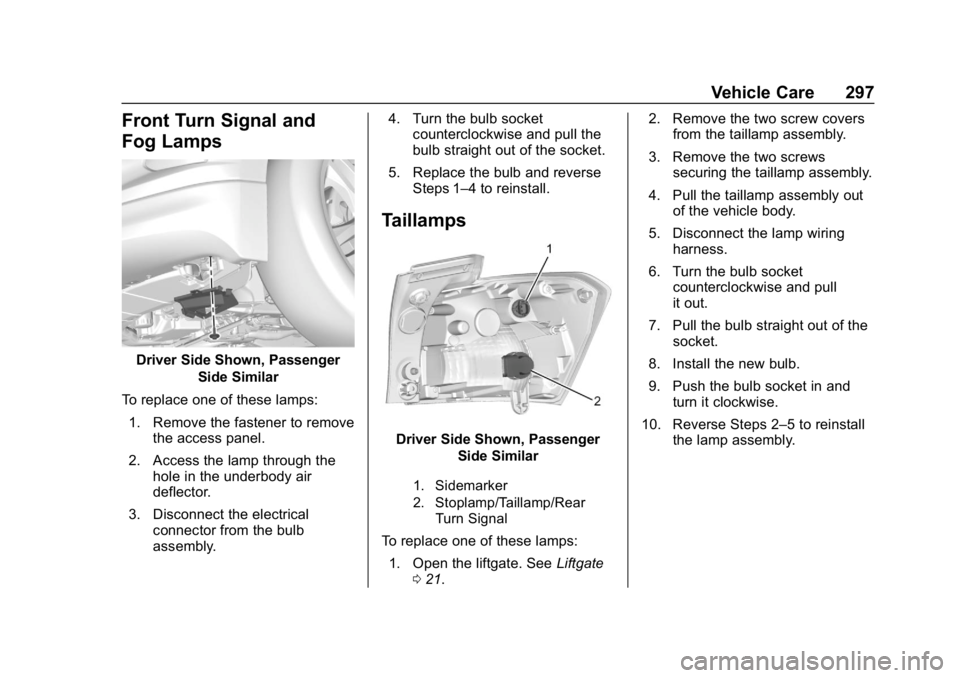
Driver Side Shown, PassengerSide Similar
To replace one of these lamps: 1. Remove the fastener to remove the access panel.
2. Access the lamp through the hole in the underbody air
deflector.
3. Disconnect the electrical connector from the bulb
assembly. 4. Turn the bulb socket
counterclockwise and pull the
bulb straight out of the socket.
5. Replace the bulb and reverse Steps 1–4 to reinstall.
Taillamps
Driver Side Shown, Passenger
Side Similar
1. Sidemarker
2. Stoplamp/Taillamp/RearTurn Signal
To replace one of these lamps:
1. Open the liftgate. See Liftgate
0 21. 2. Remove the two screw covers
from the taillamp assembly.
3. Remove the two screws securing the taillamp assembly.
4. Pull the taillamp assembly out of the vehicle body.
5. Disconnect the lamp wiring harness.
6. Turn the bulb socket counterclockwise and pull
it out.
7. Pull the bulb straight out of the socket.
8. Install the new bulb.
9. Push the bulb socket in and turn it clockwise.
10. Reverse Steps 2–5 to reinstall the lamp assembly.
Page 317 of 415

Chevrolet Equinox Owner Manual (GMNA-Localizing-U.S./Canada/Mexico-
13555863) - 2020 - CRC - 8/2/19
316 Vehicle Care
alternate tires and wheels allow the
TPMS to continue to function
properly.
SeeTire Pressure Monitor
Operation 0316.
See Radio Frequency Statement
0 387.
Tire Pressure Monitor
Operation
This vehicle may have a Tire
Pressure Monitor System (TPMS).
The TPMS is designed to warn the
driver when a low tire pressure
condition exists. TPMS sensors are
mounted onto each tire and wheel
assembly, excluding the spare tire
and wheel assembly. The TPMS
sensors monitor the air pressure in
the tires and transmit the tire
pressure readings to a receiver
located in the vehicle.
When a low tire pressure condition
is detected, the TPMS illuminates
the low tire pressure warning light
located on the instrument cluster.
If the warning light comes on, stop
as soon as possible and inflate the
tires to the recommended pressure
shown on the Tire and Loading
Information label. See Vehicle Load
Limits 0176.
A message to check the pressure in
a specific tire displays in the Driver
Information Center (DIC). The low
tire pressure warning light and the
DIC warning message come on at
each ignition cycle until the tires are
inflated to the correct inflation
pressure. Using the DIC, tire
pressure levels can be viewed. For
additional information and details
about the DIC operation and displays see
Driver Information
Center (DIC) (Base Level and
Midlevel) 0123 or
Driver Information Center (DIC)
(Uplevel) 0129.
The low tire pressure warning light
may come on in cool weather when
the vehicle is first started, and then
turn off as the vehicle is driven. This
could be an early indicator that the
air pressure is getting low and
needs to be inflated to the proper
pressure.
A Tire and Loading Information
label, attached to your vehicle,
shows the size of the original
equipment tires and the correct
inflation pressure for the tires when
they are cold. See Vehicle Load
Limits 0176, for an example of the
Tire and Loading Information label
and its location. Also see Tire
Pressure 0313.
The TPMS can warn about a low
tire pressure condition but it does
not replace normal tire
maintenance. See Tire Inspection
0 320, Tire Rotation 0320 and
Tires 0307.
Page 321 of 415

Chevrolet Equinox Owner Manual (GMNA-Localizing-U.S./Canada/Mexico-
13555863) - 2020 - CRC - 8/2/19
320 Vehicle Care
9. Proceed to the passenger siderear tire, and repeat the
procedure in Step 7.
10. Proceed to the driver side rear tire, and repeat the procedure
in Step 7. The horn sounds two
times to indicate the sensor
identification code has been
matched to the driver side rear
tire, and the TPMS sensor
matching process is no longer
active. The TIRE LEARNING
ACTIVE message on the DIC
display goes off.
11. Turn the vehicle off.
12. Set all four tires to the recommended air pressure
level as indicated on the Tire
and Loading Information label.
Tire Inspection
We recommend that the tires,
including the spare tire, if the
vehicle has one, be inspected
for signs of wear or damage at
least once a month.
Replace the tire if:
.The indicators at three or
more places around the tire
can be seen.
.There is cord or fabric
showing through the tire's
rubber.
.The tread or sidewall is
cracked, cut, or snagged
deep enough to show cord or
fabric.
.The tire has a bump, bulge,
or split.
.The tire has a puncture, cut,
or other damage that cannot
be repaired well because of
the size or location of the
damage.
Tire Rotation
Tires should be rotated every
12 000 km (7,500 mi). See
Maintenance Schedule 0360. Tires are rotated to achieve a
more uniform wear for all tires.
The first rotation is the most
important.
Anytime unusual wear is
noticed, rotate the tires as soon
as possible, check for proper tire
inflation pressure, and check for
damaged tires or wheels. If the
unusual wear continues after the
rotation, check the wheel
alignment. See
When It Is Time
for New Tires 0321 and
Wheel Replacement 0326.
Page 329 of 415
Chevrolet Equinox Owner Manual (GMNA-Localizing-U.S./Canada/Mexico-
13555863) - 2020 - CRC - 8/2/19
328 Vehicle Care
{Warning
Changing a tire can be
dangerous. The vehicle can slip
off the jack and roll over or fall
causing injury or death. Find a
level place to change the tire. To
help prevent the vehicle from
moving:1. Set the parking brake firmly.
2. Put an automatictransmission in P (Park) or a
manual transmission in
1 (First) or R (Reverse).
3. Turn off the engine and do not restart while the vehicle
is raised.
4. Do not allow passengers to remain in the vehicle.
5. Place wheel blocks, if equipped, on both sides of
the tire at the opposite
corner of the tire being
changed. This vehicle may come with a jack
and spare tire or a tire sealant and
compressor kit. To use the jacking
equipment to change a spare tire
safely, follow the instructions below.
Then see
Tire Changing 0335. To
use the tire sealant and compressor
kit, see Tire Sealant and
Compressor Kit 0328.
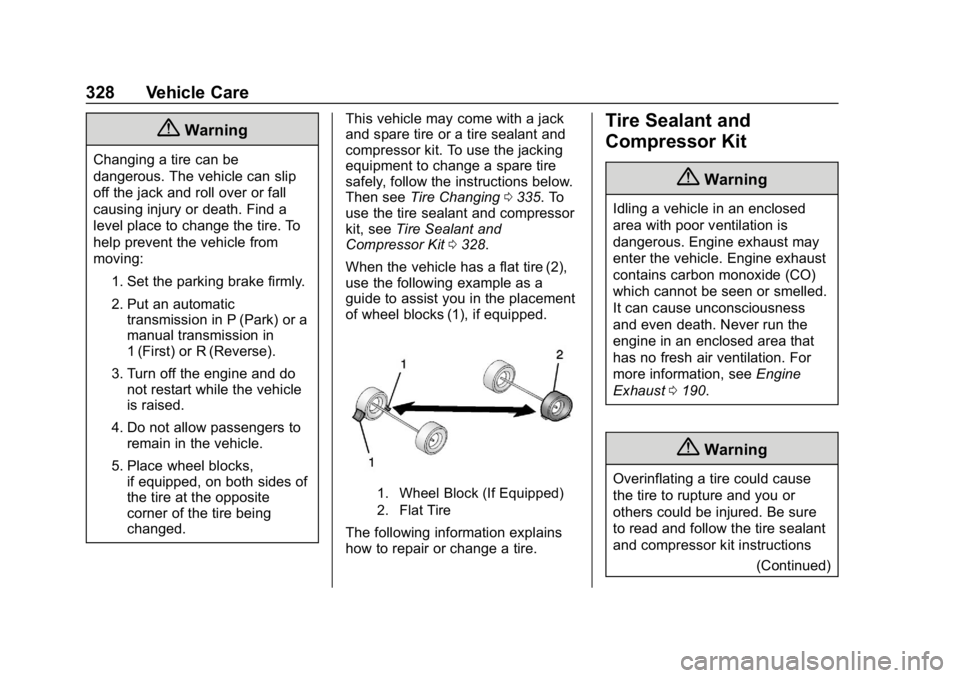
When the vehicle has a flat tire (2),
use the following example as a
guide to assist you in the placement
of wheel blocks (1), if equipped.
1. Wheel Block (If Equipped)
2. Flat Tire
The following information explains
how to repair or change a tire.
Tire Sealant and
Compressor Kit
{Warning
Idling a vehicle in an enclosed
area with poor ventilation is
dangerous. Engine exhaust may
enter the vehicle. Engine exhaust
contains carbon monoxide (CO)
which cannot be seen or smelled.
It can cause unconsciousness
and even death. Never run the
engine in an enclosed area that
has no fresh air ventilation. For
more information, see Engine
Exhaust 0190.
{Warning
Overinflating a tire could cause
the tire to rupture and you or
others could be injured. Be sure
to read and follow the tire sealant
and compressor kit instructions
(Continued)