2020 AUDI TT COUPE length
[x] Cancel search: lengthPage 48 of 280

Sitting correctly and safely
— You can press the pedals down completely —To reduce the risk of an accident, never place
while your legs are slightly bent additional floor mats or other floor covers
— The distance between your upper body and the over the installed floor mats, because this
steering wheel or instrument panel is at least reduces the pedal's range of motion and can
10 inches (25 cm) impair pedal operation.
— The distance between your knees and the in- —To reduce the risk of injury, never place your
strument panel is at least 4 inches (10 cm) feet on the instrument panel, out of the
— Your thighs are lightly supported by the front window, or on the seat surfaces. This also
surface of the seat applies to passengers in the rear seats.
— The backrest is in an upright position and your
back is resting against it () Note
— You have a sufficient view of the area around To reduce the risk of damage, be very careful
when adjusting the seat to make sure the
head restraints do not come into contact with
and indicator lights cheiheadiinen
Power seat adjustment
Applies to: vehicles with power adjustable seats
the vehicle
— You have a clear view of the instrument cluster
ZA WARNING
— If you are too close to the steering wheel or
instrument panel, the airbag system cannot
provide the optimal protection, which in-
creases the risk of injury and death.
—To reduce the risk of injury in the event of
sudden braking maneuvers or accidents,
never drive with the backrest reclined very
far. The airbag system and seat belts can on-
ly provide optimal protection when the back-
rest is in an upright position and the driver
is wearing the seat belt correctly. If the
2 & q
g Pd i o
backrest is angled back too far, the safety Fig. 51 Front seat: power seat adjustment
belt can shift to soft areas of the body, such / /
as the stomach, which increases the risk of @- Lumbar support or multifunction button*
injury. = page 47. To adjust the lumbar support, press
—To reduce the risk of an accident, only adjust the button in the applicable location.
the seats when the vehicle is stationary. @- Moving the seat up/down: push the rear part
— Be careful when adjusting the seat. Lack of of the button upward or downward. To adjust the
control or attention when adjusting can re- seat surface, press the front part of the button
sult in injuries due to pinching to vehicle oc- upward or downward.
cupants both in the front seats and rear
ae @- Moving the seat forward/back: press the but-
: f d/back.
— Never place objects in the driver's footwell. fon Torwaresbac
Objects could shift and enter the area @- Adjusting the backrest angle: press the but-
around the pedals, which could prevent you ton forward/back.
from using them. You would then be unable
to use the pedals if sudden driving or brak-
ing maneuvers were needed, which increas-
es the risk of an accident.
— Make sure that the floor mats are always se-
curely attached.
@- Lengthening/shortening the upper thigh sup-
port*: lift the grip handle.
46
Page 154 of 280
![AUDI TT COUPE 2020 Owners Manual Navigation
> Press the LNAV/MAP] button repeatedly until
the Enter destination menu is displayed
=> page 149, fig. 136.
> Select: left control button > Directory > a con-
tact.
The AUDI TT COUPE 2020 Owners Manual Navigation
> Press the LNAV/MAP] button repeatedly until
the Enter destination menu is displayed
=> page 149, fig. 136.
> Select: left control button > Directory > a con-
tact.
The](/manual-img/6/57658/w960_57658-153.png)
Navigation
> Press the LNAV/MAP] button repeatedly until
the Enter destination menu is displayed
=> page 149, fig. 136.
> Select: left control button > Directory > a con-
tact.
The directory/contacts are shown in alphabetical
order and are marked with symbols to indicate
the storage location:
@ Business address
@ Private address
@® Business destination
@ Private destination
— Select and confirm an address or a destination.
When you have selected a destination, the
route guidance can be started directly.
— Check the address input again when selecting
an address.
— Then select and confirm Start route guidance.
Additional directory functions in the navigation
system can be found under > page 155.
@) Tips
— Addresses that have been imported from
your mobile device into the MMI can also be
used as a destination.
— If a contact is grayed out in the directory,
this contact does not have a destination or
an address assigned to it.
el elm eas -T- La)
Applies to: vehicles with navigation system
Opening the POI search
> Press the LNAV/MAP] button repeatedly until
the Enter destination menu is displayed
=> page 149, fig. 136.
> Select: left control button > Points of interest.
Change search area
> Select and confirm: Search area > a search area
from the list.
The following search categories are available:
Nearby: points of interest can be selected from
different categories. The points of interest are
listed starting from the immediate vicinity of the
152
vehicle up to a radius of approximately 124 miles
(200 km).
Along the route: points of interest along the
route can only be selected during active route
guidance. The points of interest are located di-
rectly along or in the immediate vicinity of the
calculated route.
Near destination/Near stopover: points of inter-
est near a destination or a stopover can only be
selected during active route guidance. The points
of interest can likewise be selected from various
categories. For example, you can search for a ho-
tel or parking lot at the destination.
In new city: enter the name of the desired city.
Points of interest can be selected from various
categories. This function allows you to search for
points of interest in any city regardless of the ac-
tive route guidance or the vehicle position.
Searching for the name of a point of interest
in the selected search area
> Select: Find entry > Enter point of interest.
> Enter the name of the point of interest.
Searching for a point of interest in a specific
category
> Select Select category.
> Select and confirm a category, such as Restau-
rants.
G) Tips
— Distances to points of interest are displayed
as a straight-line distance from your current
location. The actual distance from your cur-
rent location to the point of interest is up-
dated automatically. The list of points of in-
terest that were found is not resorted when
this happens.
— There may be entries in the list that cannot
be displayed completely due to their length.
Select the corresponding entry from the list.
Select: right control button > Show destina-
tion details. Detailed information for the se-
lected entry in the list is then displayed.
Page 161 of 280

8S1012721BB
Navigation
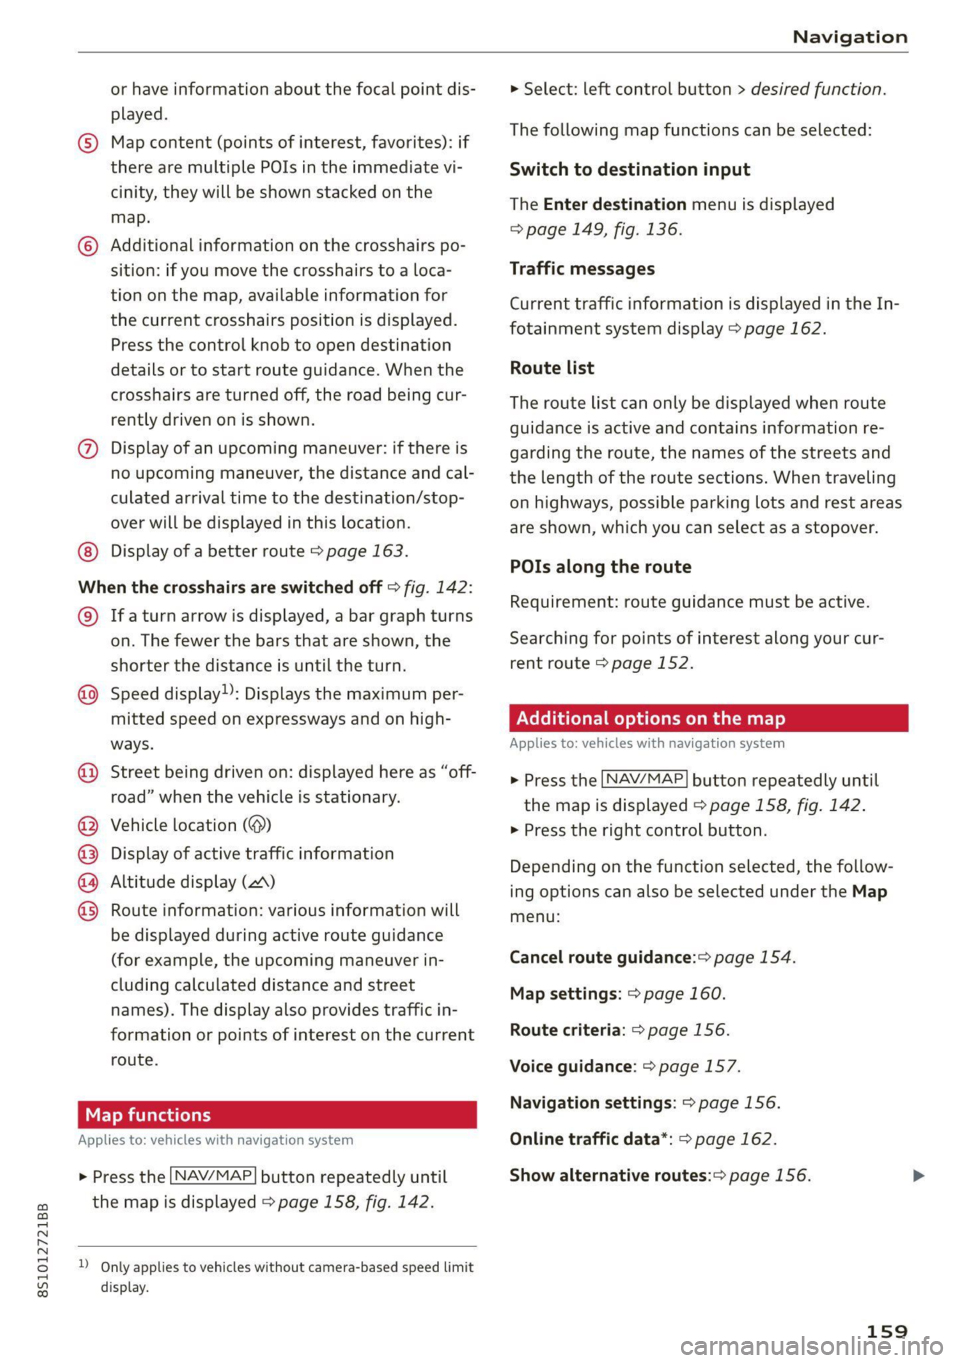
or have information about the focal point dis- > Select: left control button > desired function.
played. . .
© Map content (points of interest, favorites): if The-fallening map tinctibns can Betsalected:
there are multiple POIs in the immediate vi- Switch to destination input
cinity, they will be shown stacked on the
The Enter destination menu is displayed
map.
=> page 149, fig. 136.
© Additional information on the crosshairs po-
sition: if you move the crosshairs to a loca- Traffic messages
tion on the map, available information for
the current crosshairs position is displayed.
Press the control knob to open destination
details or to start route guidance. When the Route list
crosshairs are turned off, the road being cur-
rently driven on is shown.
Current traffic information is displayed in the In-
fotainment system display > page 162.
The route list can only be displayed when route
guidance is active and contains information re-
@ Display of an upcoming maneuver: if there is garding the route, the names of the streets and
no upcoming maneuver, the distance and cal- the length of the route sections. When traveling
culated arrival time to the destination/stop- on highways, possible parking lots and rest areas
over will be displayed in this location. are shown, which you can select as a stopover.
Display of a better route > page 163.
ey pag POIs along the route
When the crosshairs are switched off > fig. 142:
© Ifa turn arrow is displayed, a bar graph turns
on. The fewer the bars that are shown, the Searching for points of interest along your cur-
shorter the distance is until the turn. rent route > page 152.
Speed display): Displays the maximum per-
mitted speed on expressways and on high- PNeCel iter] Me) Lael mel maa Mit] e)
ways. Applies to: vehicles with navigation system
Requirement: route guidance must be active.
©
Street being driven on: displayed here as “off-
road” when the vehicle is stationary.
> Press the [NAV/MAP] button repeatedly until
the map is displayed > page 158, fig. 142.
Vehicle location (@) > Press the right control button.
Display of active traffic information
Altitude display (2)
Route information: various information will
be displayed during active route guidance
(for example, the upcoming maneuver in- Cancel route guidance: page 154.
cluding calculated distance and street
names). The display also provides traffic in-
formation or points of interest on the current Route criteria: > page 156.
route.
Depending on the function selected, the follow-
ing options can also be selected under the Map
menu: OOOO
©
Map settings: > page 160.
Voice guidance: > page 157.
ea Navigation settings: > page 156.
Applies to: vehicles with navigation system Online traffic data*: > page 162.
>» Press the [NAV/MAP] button repeatedly until Show alternative routes:> page 156.
the map is displayed > page 158, fig. 142.
D_ Only applies to vehicles without camera-based speed limit
display.
159
Page 162 of 280

Navigation
Parking along the route: parking options along
the route will be displayed.
Save current position: you can save your current
vehicle position as a favorite > page 155 or save
it as a contact in the directory > page 155.
Audi connect at this location*: allows you to
search for travel information at the entered loca-
tion (events, weather at the destination, etc.).
Country information: you can display the appli-
cable urban and rural speed limits for any coun-
try/state. This information will be automatically
shown to you in the route information (5)
=> page 158, fig. 142 when the speed limit is ex-
ceeded, if this function is activated > page 160.
Avoid route*: when route guidance is active, the
calculated route will avoid the area you have
specified (maximum: 12 mi (20 km)), if possible.
The navigation system calculates an alternative
route. The route to be avoided that you have en-
tered applies only to the current route and must
be set again, if needed. The areas you have se-
lected to avoid will appear with red and white
shading on the map.
Map settings
Applies
to: vehicles with navigation system
> Press the [NAV/MAP] button repeatedly until
the map is displayed > page 158, fig. 142.
> Select: right control button > Map settings.
Depending on the selected function, the follow-
ing settings can be selected:
Map colors
Day/Night: the map is displayed with a light/
dark background.
Automatic: when the lights switch on, the map
colors switch from day to night.
Map display
Standard > page 158, fig. 141.
Satellite map*)) > page 161, fig. 143.
2) AUDI AG provides access to services from third party pro-
viders. Permanent availability cannot be guaranteed, be-
cause that depends on the third party provider.
160
Traffic > page 162.
Map orientation
Destination map: the map indicates the destina-
tion and is oriented to the north.
2D heading up map/2D north up map: the cur-
rent vehicle position is displayed. The map is ori-
ented in the direction of travel or to the north.
3D heading-up map: when this function is
switched on, the current vehicle position is
shown on a three-dimensional map and oriented
in the direction of travel. At a scale of 62 mi
(100 km) and larger, the map orientation is to
the north.
Overview map: the entire route from the vehicle
position to the destination or the next stopover is
displayed on the map. The map scale depends on
the length of the route and adapts automatically.
The map is oriented to the north.
Route information
The display of route information such as the cur-
rent road being driven on, upcoming maneuvers,
traffic information or points of interest along the
route can be switched on/off.
Automatic zoom
On: the map scale is adapted automatically de-
pending on the type of road being traveled (ex-
pressway, highway, other roads) so that you al-
ways have an optimal overview of the road ahead.
The scale will also be automatically adapted
when there are upcoming maneuvers to provide a
better detailed view.
Off: the map scale you have chosen is main-
tained.
Map content
Map content, such as traffic information, favor-
ites or restaurants, can be displayed or hidden
(™).
Page 164 of 280

Navigation
Accessing traffic information
(OPN Maelarreleeleurl dela)
Applies to: vehicles with navigation system and Audi connect Infotainment
a icon better route is available. —@
slay along the route:
Nogales St, Northbound
Northbound
eel
i) Northbound
cory
C)
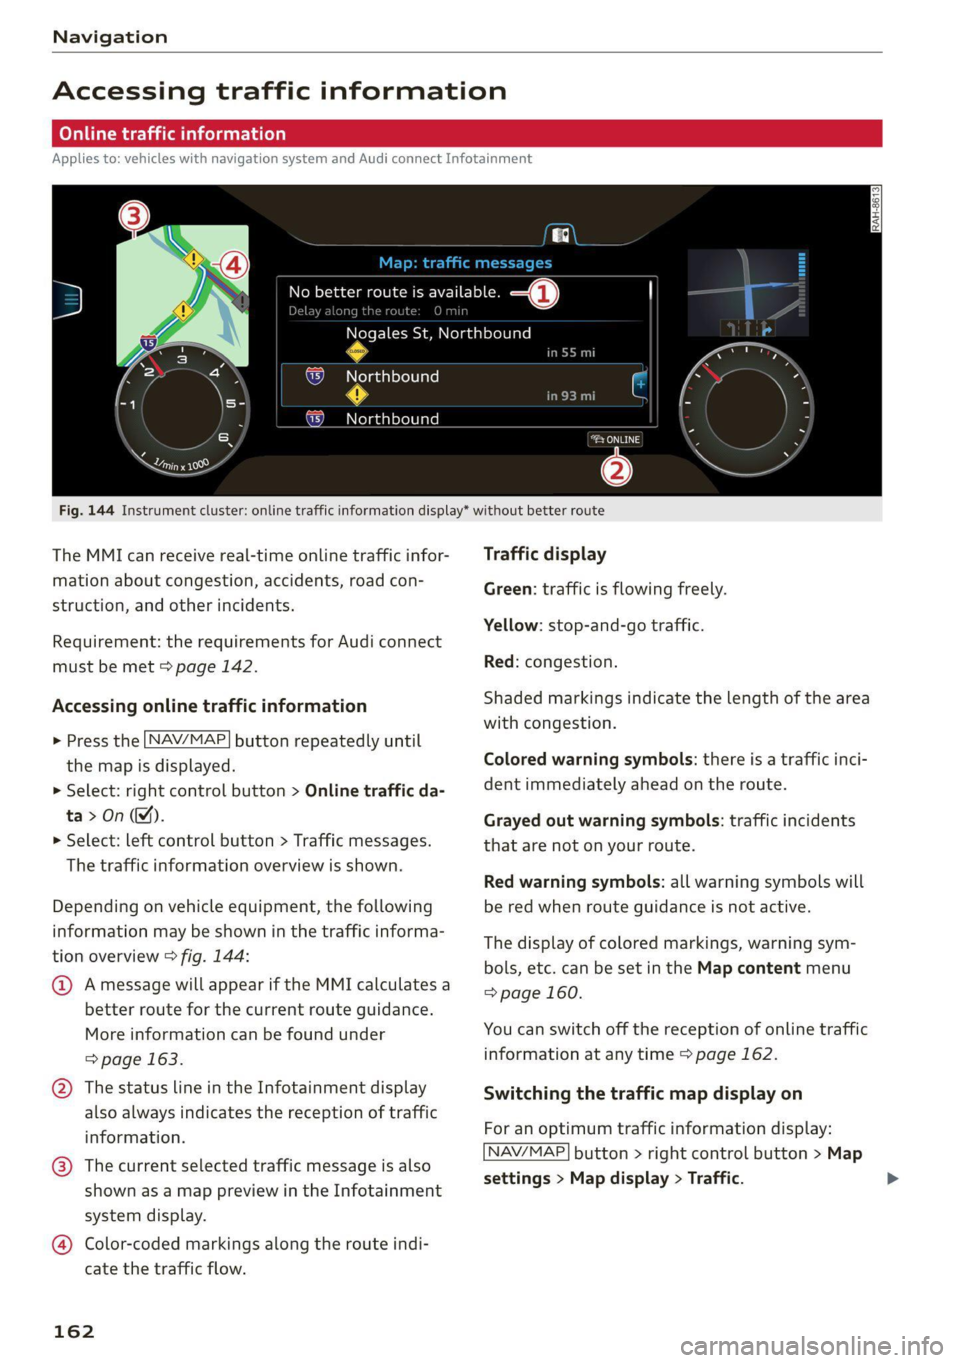
Fig. 144 Instrument cluster: online traffic information display* without better route
The MMI can receive real-time online traffic infor-
mation about congestion, accidents, road con-
struction, and other incidents.
Requirement: the requirements for Audi connect
must be met > page 142.
Accessing online traffic information
> Press the [NAV/MAP] button repeatedly until
the map is displayed.
> Select: right control button > Online traffic da-
ta>On(M).
> Select: left control button > Traffic messages.
The traffic information overview is shown.
Depending on vehicle equipment, the following
information may be shown in the traffic informa-
tion overview > fig. 144:
@ Amessage will appear if the MMI calculates a
better route for the current route guidance.
More
information can be found under
=> page 163.
@ The status line in the Infotainment display
also always indicates the reception of traffic
information.
@® The current selected traffic message is also
shown as a map preview in the Infotainment
system display.
@® Color-coded markings along the route indi-
cate the traffic flow.
162
Traffic display
Green: traffic is flowing freely.
Yellow: stop-and-go traffic.
Red: congestion.
Shaded markings indicate the length of the area
with congestion.
Colored warning symbols: there is a traffic inci-
dent immediately ahead on the route.
Grayed out warning symbols: traffic incidents
that are not on your route.
Red warning symbols: all warning symbols will
be red when route guidance is not active.
The display of colored markings, warning sym-
bols, etc. can be set in the Map content menu
=> page 160.
You can switch off the reception of online traffic
information at any time > page 162.
Switching the traffic map display on
For an optimum traffic information display:
NAV/MAP] button > right control button > Map
settings > Map display > Traffic.
Page 194 of 280

System settings
Bluetooth settings
— Bluetooth: select and confirm a setting for the
Bluetooth connection visibility. Select Visible
for the MMI to be visible to other devices. Se-
lect Invisible for the MMI to not be visible to
other devices. However, it is still possible to es-
tablish a Bluetooth connection with paired de-
vices when the visibility is switched off. Select
Off to turn visibility off. Then a Bluetooth con-
nection is not possible.
— Bluetooth audio player: when this function is
switched on M, the Bluetooth audio player is
available as a source in the Media menu.
— Bluetooth name: the MMI Bluetooth name (for
example "AUDI MMI") is displayed and can be
changed.
Online settings*
— Data connection settings: See > page 146, Cell
phone network.
— Data usage counter: the amount of data pack-
ets that are sent and received through the MMI
is displayed. You can reset the data usage infor-
mation to zero using the Reset data counter
option.
— Network status: the mobile network provider
for data service as well as the network status
are displayed.
Wi-Fi settings*
See > page 147.
SIM PIN settings*
— Automatic PIN entry: when this function is
switched on [M, the SIM PIN is automatically
saved in the MMI after it is entered for the first
time. The SIM PIN for four different SIM cards
can be saved in the MMI. With the function
switched off {_J, the SIM PIN that is currently
stored will be deleted from the MMI. When the
automatic PIN entry is switched on, there are
no SIM PIN prompts.
— Disable PIN query: when switched on, there are
no SIM PIN queries. The automatic PIN entry is
not used in this case.
— Change PIN: you can change the PIN on your
SIM card. First enter the current SIM PIN. The
SIM PIN may only contain digits 0-9. The new
192
SIM PIN must be entered twice for security and
then it will be saved to the SIM card.
Apple CarPlay sound settings/Android Auto
sound settings
Applies to: vehicles with Audi smartphone interface
See > page 193.
About Apple CarPlay/About Android Auto
Applies to: vehicles with Audi smartphone interface
Here you will find legal information regarding the
use of Apple CarPlay or Android Auto and infor-
mation about device-specific data exchange.
Delete Apple CarPlay device/Delete Android
Auto device
Applies to: vehicles with Audi smartphone interface
Requirement: your cell phone must not be con-
nected to the Audi music interface with a USB
adapter.
Select: Audi smartphone interface > a device
from the list > right control button.
To remove your mobile device from the list, select
and confirm Delete Apple CarPlay device or De-
lete Android Auto device.
(i) Tips
Some SIM cards do not allow the SIM PIN
queries to be switched off.
System update
> Select: [MENU] button > Settings > left control
button > System maintenance.
— System update: insert the storage device with
the update data into the appropriate drive
= page 171. Select and confirm: the respective
drive > Start update. The length of the process
depends on the size of the update.
— Reset driver installation: the selected media
driver package is reset to the settings at the
time of delivery.
— Version information: information on the MMI
software version and the navigation database*
software version is displayed. The Software in-
formation function also provides information >
Page 225 of 280

8S1012721BB
Wheels
Tire rotation
Rotating the tires regularly is rec-
ommended to ensure the tires
wear evenly. To rotate the tires,
install the tires from the rear axle
on the front axle and vice versa.
This will allow the tires to have
approximately the same length of
service life.
For unidirectional tires, make sure
the tires are installed according to
the running direction indicated on
the tire sidewall > page 246.
Hidden damage
Damage to tires and rims can of-
ten occur in locations that are hid-
den. Unusual vibrations in the ve-
hicle or pulling to one side may
indicate that there is tire damage.
Reduce your speed immediately.
Check the tires for damage. If no
damage is visible from the out-
side, drive slowly and carefully to
the nearest authorized Audi deal-
er or authorized Audi Service Fa-
cility to have the vehicle inspect-
ed.
Z\ WARNING
Tread that has worn too low or
uneven tread depths on the
tires can reduce driving safety.
This can increase the risk of an
accident because it has a nega-
tive effect on handling, driving
through curves, and braking,
and because it increases the
risk of hydroplaning when driv-
ing through deep puddles.
Tire pressure
5
Fig. 179 Driver's side B-pillar: tire pres-
sure label
0 ‘SEATING CAPACITY TOTAL NOMBRE DE PLACES TOTAL
‘Tho combined weight of occupants and cargo should never exceer l
BFV-0295
B8K-1151
TIRE SIZE
PNEU _| DIMENSIONS
FRONT
AVANT
REAR
ARRIERE
‘SPARE
DE SECOURS
COLD TIRE PRESSURE
PRESSION DES PNEUS A FROID
as KPA, BM PSI
al KPA, I PSI
a KPA, MM PSI
Fig. 180 Tire pressure label
The correct tire pressure for tires
mounted at the factory and for
the spare tire* is indicated on a la-
bel. The label is located on the B-
pillar > fig. 179, > fig. 180.
Use the tire pressure specified for
a normal vehicle load when the
223
>
Page 264 of 280
![AUDI TT COUPE 2020 Owners Manual Technical data
Technical data
Identification data
Vehicle identification label
—S>SSESESES>S>S>E>E>>—s FA
WOOK X-XOK KKK)
(Hae osccn XX x XXKKKNKK
Fim = YXX XXX
27] XX XXXXXXX XX. X. AUDI TT COUPE 2020 Owners Manual Technical data
Technical data
Identification data
Vehicle identification label
—S>SSESESES>S>S>E>E>>—s FA
WOOK X-XOK KKK)
(Hae osccn XX x XXKKKNKK
Fim = YXX XXX
27] XX XXXXXXX XX. X.](/manual-img/6/57658/w960_57658-263.png)
Technical data
Technical data
Identification data
Vehicle identification label
—S>SSESESES>S>S>E>E>>—s FA
WOOK X-XOK KKK)
(Hae osccn XX x XXKKKNKK
Fim = YXX XXX
27] XX XXXXXXX XX. X.X XX
XXX KW x
(3)—-Wwoee / GER. 1B
ENG. CODE / TRANS. CODE
XX
XXXX XXX XXX
@ i XK XKNK XK XX
EOA 7D5
2EH JOZ
3FC
FOA
TL6 = 3KA
1XW
716 CV7
3L4
1SA
4UB
1LB
6XM 5SG 1AS
SMU 7X1
0G7 OYH OJF
U1A X9B QZ7
9Q8
824 D2D
4X3 2K2
3Y0 413
QIA
SRW
1BA
9G3
8EH
8Q3
7KO
AKC 7GB
6)
5D2
4GQ
et
Fig. 203 Vehicle identification label
The vehicle identification label > fig. 203 is locat-
ed in the luggage compartment under the cargo
floor cover.
The vehicle identification label information can
also be found in the Warranty & Maintenance
booklet.
Vehicle data
The sticker contains the following vehicle data:
@ Vehicle Identification Number (VIN)
@ Vehicle type, engine output, transmission
@® Engine and transmission codes
@ Paint and interior codes
© Optional equipment numbers
Vehicle identification number (VIN)
The VIN is located in the following areas:
MENU — Select: button > left control button >
Service & checks > Vehicle information.
— On the vehicle identification label
— At the front behind the windshield*
— On the right side of the engine compartment
under a cover
Notes about technical data
The values may vary based on special equipment
as well as market-specific equipment and meas-
uring methods.
Please note that the specifications listed in the
vehicle documentation always take precedence.
@ Tips
Any technical data that is missing was not
available at the time of printing.
Length (in (mm)) Width (in (mm)) Width across the
mirrors (in (mm))
Height at curb
weight (in (mm))
TT Coupe 165.0 (4,191) 72.1 (1,832) 77.4 (1,966) 53.3 (1,353)
TTS Coupe 165.0 (4,191) 72.1.(1,832) 77.4 (1,966) 53,3 (1,353)
TT Roadster 165.0 (4,191) 72.1.(1,832) 77.4 (1,966) 53.4 (1,355)
262