2020 AUDI Q7 steering
[x] Cancel search: steeringPage 150 of 316

Driver assistance
— In trailer mode, the braking behavior of the
trailer can be different than usual during au-
tomatic braking.
Gi) Tips
Certain pre sense front functions are switched
off when the hill descent assist is actively con-
trolling the vehicle.
NOC eRe
Applies to: vehicles with Audi pre sense rear
Within the limits of the system, Audi pre sense
rear uses data from radar sensors in the rear area
of the vehicle and calculates the probability of a
rear-end collision with the vehicle behind you.
Audi pre sense preemptive safety measures can
be initiated if the risk of a collision with the vehi-
cle behind you is detected.
ZA WARNING
— Follow the safety precautions and note the
limits of the assist systems, sensors, and
cameras > page 118.
— Audi pre sense rear does not react to pedes-
trians, animals, crossing objects, and ob-
jects not detected as vehicles.
@ Tips
— Audi pre sense rear functions switch off
when trailer mode is detected. There is no
guarantee the functions will switch off
when using a retrofitted trailer hitch.
— Audi pre sense rear functions may also
switch off if there is a malfunction in the
side assist system.
ONT eee
Applies to: vehicles with Audi pre sense side
Audi pre sense side uses data from the extra ra-
dar sensors installed in the front and rear areas
of the vehicle, and other sensors can react to side
) In preparation at the time of printing. The speed range
may be within approximately 30 mph - 90 mph (50 km/h -
150 km/h) depending on the vehicle production date.
148
impacts from cross-traffic and vehicles coming
from the side.
Audi pre sense side is active at speeds up to ap-
proximately 35 mph (60 km/h). The Audi pre
sense preemptive safety measures can be trig-
gered when a collision risk is detected.
ZA\ WARNING
— Follow the safety precautions and note the
limits of the assist systems, sensors, and
cameras > page 118.
— Audi pre sense side does not react to pedes-
trians, animals, and objects not detected as
vehicles.
G) Tips
— The Audi pre sense side functions are limit-
ed when trailer mode is detected.
— The Audi pre sense side functions may also
switch off if there is a malfunction in the in-
tersection assistant*.
Saree cid
Applies to: vehicles with swerve assist
The swerve assist can help you to steer the vehi-
cle around an obstacle detected in a critical area.
If you avoid an obstacle after the acute warning,
then swerve assist assists you by specifically
braking individual wheels and applying slight
steering adjustment to correct the steering
wheel angle as long as you are actively steering.
The swerve assist is available at speeds between
approximately 20 mph and 90 mph (30 km/h -
150 km/h) Y.
ZA\ WARNING
— Follow the safety precautions and note the
limits of the assist systems, sensors, and
cameras > page 118.
— Swerve assist does not react to pedestrians,
animals, crossing objects, and objects not
detected as vehicles. >
Page 152 of 316

Driver assistance
Facility immediately to have the malfunction cor-
rected.
Side assist
Descript
Applies to: vehicles with side assist
2
|
g ie
Fig. 123 Diagram: driving situations and displays in the ex-
terior mirror (example)
General information
Side assist monitors the blind spot and traffic in
the adjacent lanes behind the vehicle. Within sys-
tem limits, side assist can detect traffic that is
approaching from behind and provide a warning
when you are changing lanes and turning. The
system uses the data from the radar sensors at
the rear corners of the vehicle.
The side assist is active at walking speeds and
higher. If an object that is classified as critical is
approaching, the display in the exterior mirror @)
on the corresponding side of the vehicle will light
up.
Driving situations
The system can provide warnings about the fol-
lowing risks:
@ Approaching vehicles: a vehicle may be clas-
sified as critical in some cases, even if it is
150
farther away. The faster a vehicle ap-
proaches, the sooner the display will turn on.
Vehicles traveling in the same direction: the
display will turn on if vehicles traveling in the
same direction as your vehicle are classified
as critical. The side assist warns you of all de-
tected vehicles when they are in the “blind
spot” or before they reach that point.
@® Vehicles you are passing: the display only
turns on if you slowly pass a detected vehicle
(difference in speed between the two vehicles
is less than 9 mph (15 km/h)). There is no
display if you pass a vehicle more quickly.
Information stage
At the information level, the side assist informs
you of detected objects that are classified as criti-
cal. This is even possible when your vehicle is sta-
tionary and the turn signal is turned on, so that
the system can also assist you when turning.
From speeds of approximately 6 mph (10 km/h)
and higher, the system will warn you of detected
objects that are classified as critical, even if the
turn signal is not turned on.
The display remains dim in the information stage
so that you are not distracted while looking for-
ward.
Warning stage
If you activate a turn signal and the display flash-
es brightly, side assist is warning about objects
that have been classified as critical.
Depending on the vehicle equipment and other
driver assistance systems, the display may also
flash if you have not activated a turn signal. If
you are approaching a detected lane marker line
and it appears you will be leaving the lane, the
display will warn you about detected vehicles
that are classified as critical. You can also be
warned with corrective steering > page 144,
Lane departure warning.
Detection range
The radar sensors are designed to detect the left
and right adjacent lanes when the road lanes are
the normal width. In some situations, the display
may turn on even though there is no vehicle >
Page 156 of 316

Driver assistance
as well as the vehicle's surroundings with di-
rect eye contact.
— The system may not react if vehicles are ap-
Proaching very fast.
@ Tips
For an explanation on conformity with the
FCC regulations in the United States and the
Industry Canada regulations, see > page 295.
Emergency assist
Applies to: vehicles with emergency assist
General information
Within the limits of the system, the emergency
assist detects if the driver is inactive. In these in-
stances, the system warns the driver, assumes
control of the vehicle if necessary, and brings the
vehicle automatically to a stop in the lane.
Regardless of the speed, the emergency assist is
automatically available when the adaptive cruise
assist* is activated. When the adaptive cruise as-
sist® is deactivated, the system is only active at
speeds higher than approximately 40 mph
(65 km/h).
Emergency assist functions
Within the limits of the system, the emergency
assist monitors the driver’s steering, accelerator,
and brake pedal activity. Depending on the se-
verity of the situation, it may initiate visual, au-
dio, and haptic warnings in stages:
— Reduces the speed
— Messages
— Lowers the volume of the Infotainment system
— Audible warning
— Tightening of the safety belt
—A brief application of the brakes
D_ This function is not available in every market and on all ve-
hicle equipment levels.
154
If the driver remains inactive despite the warn-
ings, the emergency assist controls the vehicle
within the limits of the system:
— The Audi pre sense preemptive safety measures
are triggered > page 146.
— The vehicle will stay in the lane and will be
braked to a stop.
— As soon as the vehicle comes to a full stop, the
emergency flashers are activated and the vehi-
cle prepares for the vehicle passengers to be
rescued. The parking brake is set, “P” gear is
engaged, the doors are unlocked, and the inte-
rior lighting is activated. If there is no move-
ment for several seconds, the emergency call ))
will be made if necessary.
Overriding the emergency assist
You can override the emergency assist > A\:
— Move the steering wheel. Or
— Press the brake pedal. Or
— Press the accelerator pedal distinctly.
When stationary, you can end the emergency as-
sist by leaving the "P" position or releasing the
parking brake > page 104.
Switching the emergency assist on and off
The system can be switched on and off in the
MMI & page 121.
Messages
1f E or EB is displayed when there is a malfunc-
tion, the emergency assist functions may be un-
available or may be limited.
A message that indicates the cause and possible
solution may appear with some displays. The
weather conditions may be too poor or a sensor
may be covered. Clean the area in front of the
sensors > page 120 and try to turn on the sys-
tems again later.
If the malfunction remains, drive to an author-
ized Audi dealer or authorized Audi Service Facili-
ty immediately to have the malfunction correct-
ed.
Page 159 of 316

4M1012721BA
Parking and maneuvering
Automatic deactivation
The distance indicator for the parking system
plus will deactivate automatically when driving
forward faster than 6 mph (10 km/h).
Z\ WARNING
Follow the safety precautions and note the
limits of the assist systems, sensors, and
cameras > page 118.
@ Note
Keep enough distance from the curb to avoid
damage to the rims.
@ Tips
— Certain settings are stored automatically in
the active personal profile.
—If the parking aid is deactivated, it can only
be reactivated automatically when one of
the following conditions is met:
— The vehicle speed exceeds 6 mph
(10 km/h)
— The ignition is switched off and back on
again
— The parking brake is set and then released
— The “P” gear is engaged and released
again
Applies to: vehicles with parking system plus
Fig. 129 Upper display: distance indicator
If the sensors detect an obstacle, audible and vis-
ual signals will warn you.
Visual warnings
The visual warnings in the upper display help you
to detect the critical vehicle area and to estimate
the distance to an obstacle.
Red segments (@) show detected obstacles that
are in your vehicle's path. The red lines 2) mark
the expected direction of travel based on the
steering angle. A white segment (8) indicates a
detected obstacle that is outside of the vehicle's
path. The closer your vehicle comes to the obsta-
cle, the closer the segments will move to the ve-
hicle. The collision area has been reached when
the next to last segment is displayed. Obstacles
in the collision area, including those outside of
the vehicle's path, are shown in red. Do not con-
tinue driving farther.
Audio signals
The closer your vehicle gets to a detected obsta-
cle, the shorter the time between the audible sig-
nals. A continuous tone sounds when an obstacle
is less than approximately 1 foot (0.30 m) away
from the front or rear of the vehicle. Do not con-
tinue driving forward or in reverse >@).
> To deactivate audio signals while parking, press
(Jin the upper display. The audio signals will be
automatically activated again the next time the
parking aid is activated.
Adjusting the volume
You can adjust the volume to your preferences.
The settings depend on the vehicle equipment.
> Applies to MMI: Select on the home screen: VE-
HICLE > Parking aid. Or
> Press |---| in the upper display when the parking
system is active.
Possible settings:
Front volume - Volume for the front area.
Rear volume - Volume for the rear area.
Entertainment fader - The volume of the audio/
video source is lowered when the parking aid is
activated.
The new level is demonstrated briefly* when the
volume is adjusted.
Error messages
If P4 appears, the sensor in the respective area
or the speaker is faulty. Drive immediately toan >
157
Page 162 of 316

Parking and maneuvering
@ You should stop driving in reverse when the
red orientation line touches the edge of an
object, at the latest.
Trailer view
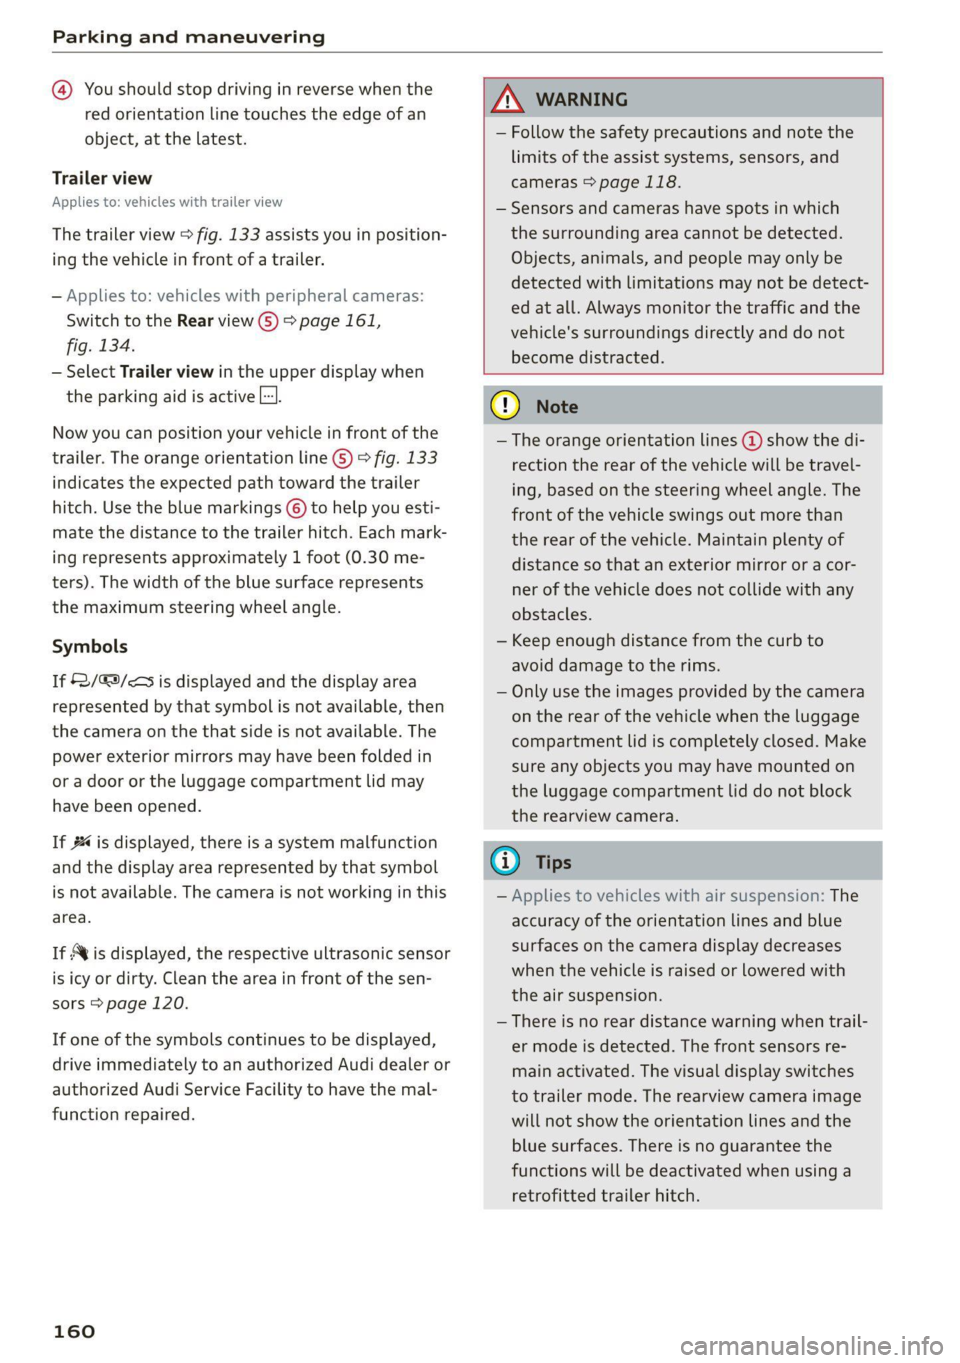
Applies to: vehicles with trailer view
The trailer view > fig. 133 assists you in position-
ing the vehicle in front of a trailer.
— Applies to: vehicles with peripheral cameras:
Switch to the Rear view G) > page 161,
fig. 134.
— Select Trailer view in the upper display when
the parking aid is active |].
Now you can position your vehicle in front of the
trailer. The orange orientation line ©) ° fig. 133
indicates the expected path toward the trailer
hitch. Use the blue markings © to help you esti-
mate the distance to the trailer hitch. Each mark-
ing represents approximately 1 foot (0.30 me-
ters). The width of the blue surface represents
the maximum steering wheel angle.
Symbols
If $2/€9/< is displayed and the display area
represented by that symbol is not available, then
the camera on the that side is not available. The
power exterior mirrors may have been folded in
or a door or the luggage compartment lid may
have been opened.
If # is displayed, there is a system malfunction
and the display area represented by that symbol
is not available. The camera is not working in this
area.
If Nvis displayed, the respective ultrasonic sensor
is icy or dirty. Clean the area in front of the sen-
sors > page 120.
If one of the symbols continues to be displayed,
drive immediately to an authorized Audi dealer or
authorized Audi Service Facility to have the mal-
function repaired.
160
Z\ WARNING
— Follow the safety precautions and note the
limits of the assist systems, sensors, and
cameras > page 118.
— Sensors and cameras have spots in which
the surrounding area cannot be detected.
Objects, animals, and people may only be
detected with limitations may not be detect-
ed at all. Always monitor the traffic and the
vehicle's surroundings directly and do not
become distracted.
@) Note
— The orange orientation lines @) show the di-
rection the rear of the vehicle will be travel-
ing, based on the steering wheel angle. The
front of the vehicle swings out more than
the rear of the vehicle. Maintain plenty of
distance so that an exterior mirror or a cor-
ner of the vehicle does not collide with any
obstacles.
— Keep enough distance from the curb to
avoid damage to the rims.
— Only use the images provided by the camera
on the rear of the vehicle when the luggage
compartment lid is completely closed. Make
sure any objects you may have mounted on
the luggage compartment lid do not block
the rearview camera.
@ Tips
— Applies to vehicles with air suspension: The
accuracy of the orientation lines and blue
surfaces on the camera display decreases
when the vehicle is raised or lowered with
the air suspension.
— There is no rear distance warning when trail-
er mode is detected. The front sensors re-
main activated. The visual display switches
to trailer mode. The rearview camera image
will not show the orientation lines and the
blue surfaces. There is no guarantee the
functions will be deactivated when using a
retrofitted trailer hitch.
Page 164 of 316

Parking and maneuvering
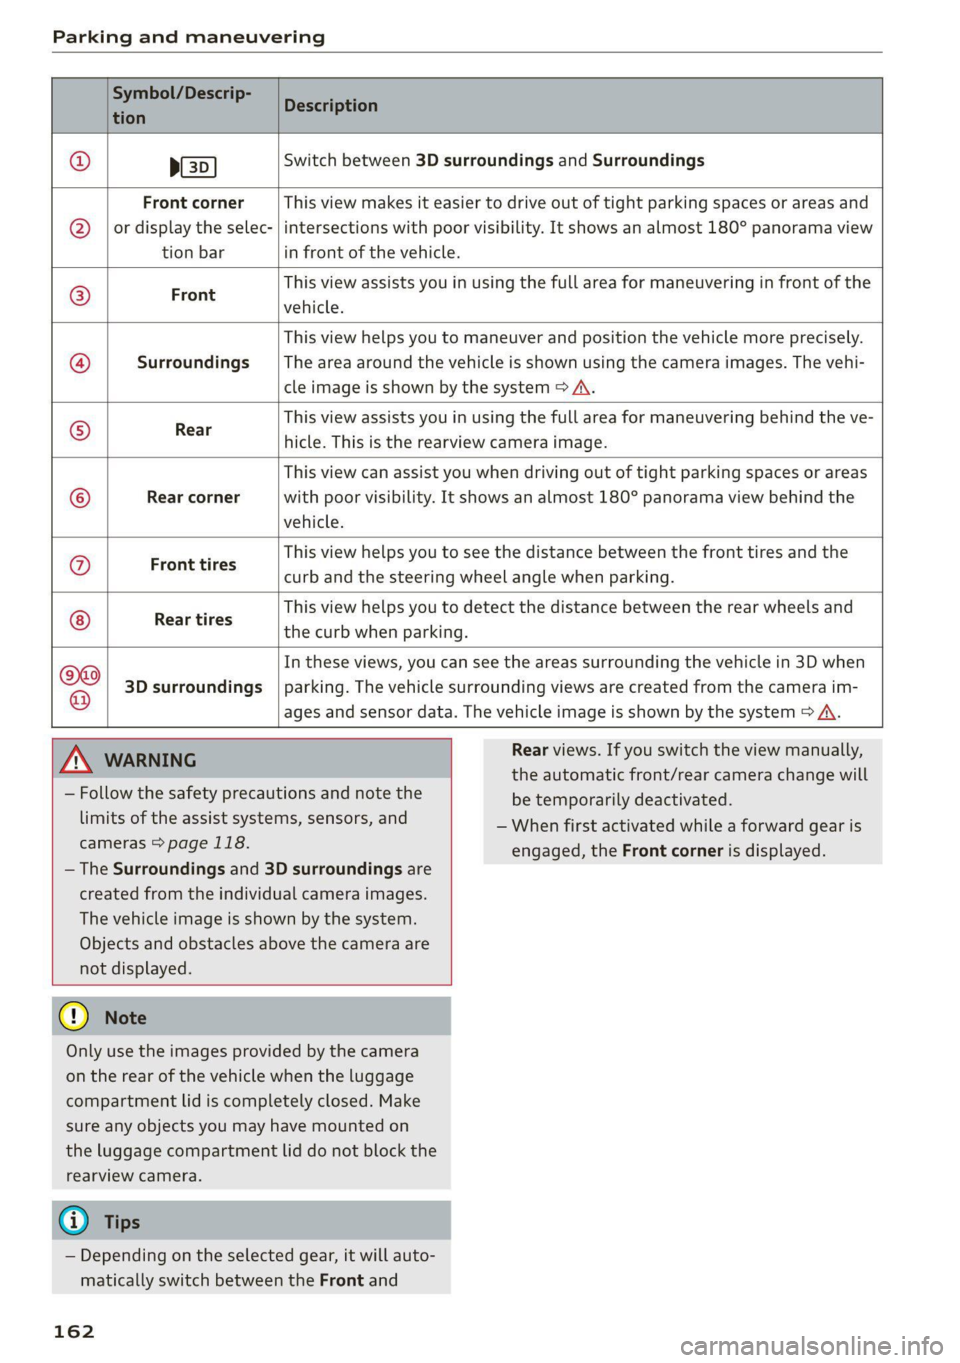
Symbol/Descrip-
tion
Description
psp
Switch between 3D surroundings and Surroundings
Front corner
or display the selec-
tion bar
This view makes it easier to drive out of tight parking spaces or areas and
intersections with poor visibility. It shows an almost 180° panorama view
in front of the vehicle.
Front
This view assists you in using the full area for maneuvering in front of the
vehicle.
Surroundings
This view helps you to maneuver and position the vehicle more precisely.
The area around the vehicle is shown using the camera images. The vehi-
cle image is shown by the system > A\.
Rear
This view assists you in using the full area for maneuvering behind the ve-
hicle. This is the rearview camera image.
Rear corner
This view can assist you when driving out of tight parking spaces or areas
with poor visibility. It shows an almost 180° panorama view behind the
vehicle.
Front tires
This view helps you to see the distance between the front tires and the
curb and the steering wheel angle when parking.
Rear tires
This view helps you to detect the distance between the rear wheels and
the curb when parking.
3D surroundings
In these views, you can see the areas surrounding the vehicle in 3D when
parking. The vehicle surrounding views are created from the camera im-
©f$;/@/e|
@
|o|/e
|e]
oe
|e
ages and sensor data. The vehicle image is shown by the system > A\.
Z\ WARNING
— Follow the safety precautions and note the
limits of the assist systems, sensors, and
cameras > page 118.
— The Surroundings and 3D surroundings are
created from the individual camera images.
The vehicle image is shown by the system.
Objects and obstacles above the camera are
not displayed.
@) Note
Only use the images provided by the camera
on the rear of the vehicle when the luggage
compartment lid is completely closed. Make
sure any objects you may have mounted on
the luggage compartment lid do not block the
rearview camera.
@) Tips
— Depending on the selected gear, it will auto-
matically switch between the Front and
162
Rear views. If you switch the view manually,
the automatic front/rear camera change will
be temporarily deactivated.
— When first activated while a forward gear is
engaged, the Front corner is displayed.
Page 173 of 316

4M1012721BA
Telephone
— Deleting imported contacts: requirement: you
must have imported at least one contact. Se-
lect: Contacts > Z > one or more contacts, or
Select all > Delete imported contacts > Done.
The imported contacts are deleted.
G) Tips
— Pay attention to any synchronization
prompts on your mobile device when down-
loading contacts.
— Only the contacts of the mobile device being
actively used are displayed.
— The contacts from the mobile device may
not be transferred in alphabetical order. If
there are too many entries, contacts with
different first letters may be missing in the
MMI.
— If contacts are loaded from the mobile de-
vice into the MMI, the contacts on the SIM
card will no longer be displayed in the MMI.
— The contacts in the local MMI memory are
always visible and can be accessed by other
users.
— After switching off the ignition and exiting
the vehicle, the mobile device directory will
be loaded when the MMI is started again if
the mobile device is within range and the
Bluetooth function is switched on in the mo-
bile device and the MMI.
— Only the contacts in the local MMI memory
can be deleted.
Listening to voicemail
Applies to: vehicles with telephone
> Applies to: MMI: Select on the home screen:
PHONE > Voicemail.
Requirement: there must be no voicemail num-
ber stored.
> Entering the voicemail number: enter the de-
sired number. Press OK.
Requirement: a voicemail number must be stor-
ed.
> Dialing the voicemail number: press Voice-
mail. The call begins immediately.
@) Tips
This service must be set up and activated in
advance by the cell phone service provider.
Dialing a phone number
Applies to: vehicles with telephone
Depending on the vehicle equipment, you may
have the following options for dialing a phone
number:
— Using text input in the MMI > page 22.
— Using voice operation > page 25.
Making an emergency call
Applies to: vehicles with telephone
Requirement: a mobile device must be connected
to the MMI via Bluetooth.
> Applies to: MMI: Select on the home screen:
PHONE > Dial number > the emergency call
number specific to the country (for example,
911) > Dial.
Z\ WARNING
— Because your phone works with radio sig-
nals, a connection cannot be guaranteed un-
der all circumstances. Do not rely on only
your phone when it comes to essential com-
munication (such as during a medical emer-
gency).
— Always follow the instructions given by the
emergency personnel during an emergency
call and only end the call when they instruct
you to do so.
Answering/ending a call
Applies to: vehicles with telephone
> To accept or end a call, press the @ button on
the multifunction steering wheel. Operating
=> page 12.
You can use the following options on the MMI
when there is an incoming call:
> Answering an incoming call: press Answer.
> Declining a call: press Decline.
171
Page 178 of 316

Telephone
— To delete all paired Bluetooth devices, the
Bluetooth function can be reset to the fac-
tory default settings > page 226.
Directory settings
Applies to: vehicles with telephone
> Applies to: MMI: Select on the home screen:
PHONE > Contacts > ©.
Switching between two mobile devices
Requirement: telephone 1 and telephone 2 must
be connected.
Switch telephones: the device name of the avail-
able mobile device is displayed. You can switch
the phone by pressing the button.
The directory for the selected phone will be dis-
played.
Hide grayed-out contacts
When this function is switched on, contacts that
have no phone numbers stored for them will be
hidden.
Sort order
You can sort the contacts by Last name or First
name.
Download contacts
Requirement: a mobile device must be connected
to the MMI.
To update the contacts in the MMI, you can man-
ually download your mobile device contacts. De-
pending on the mobile device, you may need to
disconnect and reconnect the Bluetooth connec-
tion to update the contacts.
Memory capacity
You can manage up to 23,000 contacts. You can
also download up to 5,000 contacts from maxi-
mum four mobile devices. You can also import up
to 3,000 contacts from a storage medium.
Importing and exporting contacts
Requirement: an SD card must be in the SD card
reader* = page 210 or a USB storage device must
176
be connected to the Audi music interface
=> page 213.
Contacts in vCard format (.vcf) can be imported
or exported from the MMI.
— Applies to: MMI: Importing contacts from a
storage medium: Select: Import contacts >
Search for import data > SD card 1 or USB de-
vice 1/USB device 2 > desired contacts or Se-
lect all contacts > Start import.
— Applies to: MMI: Exporting contacts to a stor-
age device: Requirement: Only previously im-
ported contacts can be exported. Select: Export
contacts > Find source for exporting > SD card
1 or USB device 1/USB device 2 > desired con-
tacts or Select all contacts > Start export.
@ Tips
— For more information about the myAudi ac-
count, visit my.audi.com.
— The imported contacts are stored in the lo-
cal MMI memory.
— Contacts that were downloaded from a mo-
bile device cannot be exported.
— There should be no other files or folders on
the storage medium containing the contacts
to be imported.
— Apple devices and MTP devices (such as
smartphones) are not recognized as USB
storage devices.
Mobile phone network settings
Applies to: vehicles with telephone
> Applies to: MMI: Select on the home screen:
SETTINGS > Connection settings > Mobile
phone network.
Switching the car phone or data module on
Applies to: vehicles with car phone/data module
See > page 175.
Instrument cluster
Bo) afedaT)
Applies to: vehicles with multifunction steering wheel and
telephone
In the instrument cluster display, you can control
the MMI functions with the multifunction