2019 VOLVO XC60 TWIN ENGINE buttons
[x] Cancel search: buttonsPage 126 of 695

DISPLAYS AND VOICE CONTROL
124
Moving apps and buttons in thecenter display
The apps and buttons for vehicle functions canbe moved and organized in the App and Func-tion views.
1. Swipe from right to left9 to access App view
or swipe from left to right9 to access Func-tion view.
2.Press and hold an app or button.
> The app or button will change size andbecome slightly transparent. It can thenbe moved.
3. Drag the app or button to an available posi-tion in the view.
A maximum of 48 rows can be used to positionapps or buttons. To move an app or button out-side the visible view, drag it to the bottom of theview. New rows will be added and the app or but-ton can be placed in one of these.
Apps or buttons placed below the view's normaldisplay will not be visible on the screen.
Swipe the screen to scroll up or down in the viewto display information outside the view.
NOTE
Hide the apps that are rarely or never used bymoving them far down, outside of the visibleview. This makes it easier to find the appsused more frequently.
NOTE
Apps and vehicle function buttons cannot besituated at spots already in use.
Related information
Function view in the center display (p. 122)
Apps (p. 494)
Handling the center display (p. 112)
Symbols in the center display statusbar
Overview of symbols displayed in the center dis-play status bar.
The status bar shows current vehicle activitiesand in certain cases, also their status. Due to thelimited space in the status bar, not all symbolswill be displayed at all times.
SymbolMeaning
Connected to the Internet.
Could not connect to Internet.
Roaming activated.
Cell phone network signal strength.
Bluetooth device connected.
Bluetooth activated but no deviceconnected.
Information sent to and from GPS.
Connected to Wi-Fi network.
9Applies for left-hand drive vehicles. For right-hand drive vehicles, swipe in the other direction.
Page 129 of 695

DISPLAYS AND VOICE CONTROL
}}
127
The illustration shows an overview of some of the buttons that may be shown on the keyboard. The appearance may vary depending on language settings and the context in whichthe keyboard is used.
Page 130 of 695

||
DISPLAYS AND VOICE CONTROL
128
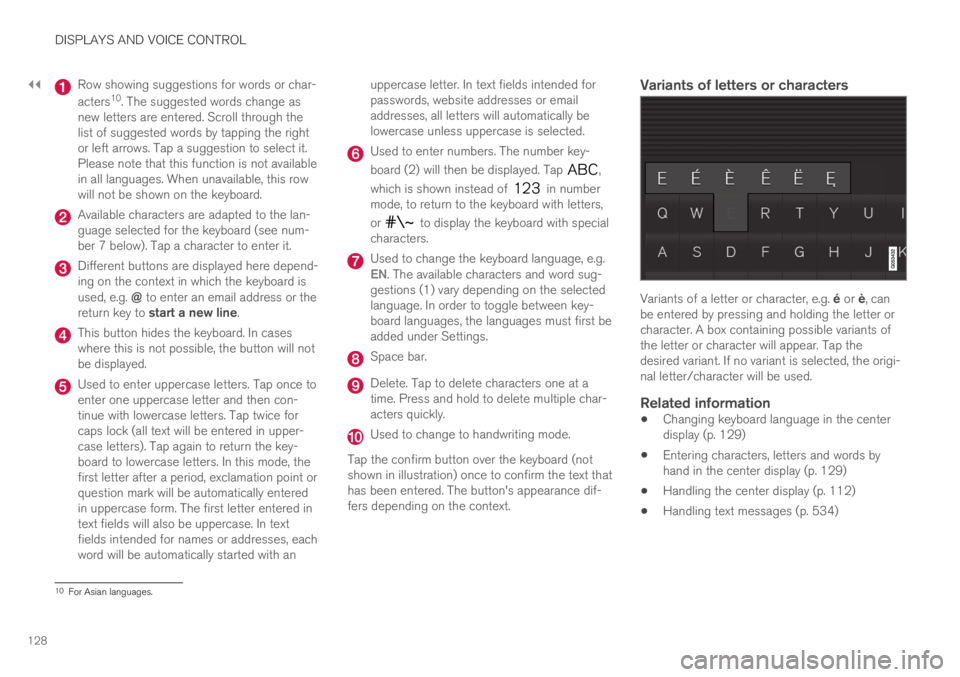
Row showing suggestions for words or char-
acters10. The suggested words change asnew letters are entered. Scroll through thelist of suggested words by tapping the rightor left arrows. Tap a suggestion to select it.Please note that this function is not availablein all languages. When unavailable, this rowwill not be shown on the keyboard.
Available characters are adapted to the lan-guage selected for the keyboard (see num-ber 7 below). Tap a character to enter it.
Different buttons are displayed here depend-ing on the context in which the keyboard isused, e.g. @ to enter an email address or thereturn key to start a new line.
This button hides the keyboard. In caseswhere this is not possible, the button will notbe displayed.
Used to enter uppercase letters. Tap once toenter one uppercase letter and then con-tinue with lowercase letters. Tap twice forcaps lock (all text will be entered in upper-case letters). Tap again to return the key-board to lowercase letters. In this mode, thefirst letter after a period, exclamation point orquestion mark will be automatically enteredin uppercase form. The first letter entered intext fields will also be uppercase. In textfields intended for names or addresses, eachword will be automatically started with an
uppercase letter. In text fields intended forpasswords, website addresses or emailaddresses, all letters will automatically belowercase unless uppercase is selected.
Used to enter numbers. The number key-
board (2) will then be displayed. Tap ,
which is shown instead of in numbermode, to return to the keyboard with letters,
or to display the keyboard with specialcharacters.
Used to change the keyboard language, e.g.EN. The available characters and word sug-gestions (1) vary depending on the selectedlanguage. In order to toggle between key-board languages, the languages must first beadded under Settings.
Space bar.
Delete. Tap to delete characters one at atime. Press and hold to delete multiple char-acters quickly.
Used to change to handwriting mode.
Tap the confirm button over the keyboard (notshown in illustration) once to confirm the text thathas been entered. The button's appearance dif-fers depending on the context.
Variants of letters or characters
Variants of a letter or character, e.g. é or è, canbe entered by pressing and holding the letter orcharacter. A box containing possible variants ofthe letter or character will appear. Tap thedesired variant. If no variant is selected, the origi-nal letter/character will be used.
Related information
Changing keyboard language in the centerdisplay (p. 129)
Entering characters, letters and words byhand in the center display (p. 129)
Handling the center display (p. 112)
Handling text messages (p. 534)
10For Asian languages.
Page 142 of 695

DISPLAYS AND VOICE CONTROL
140
Messages in the center display
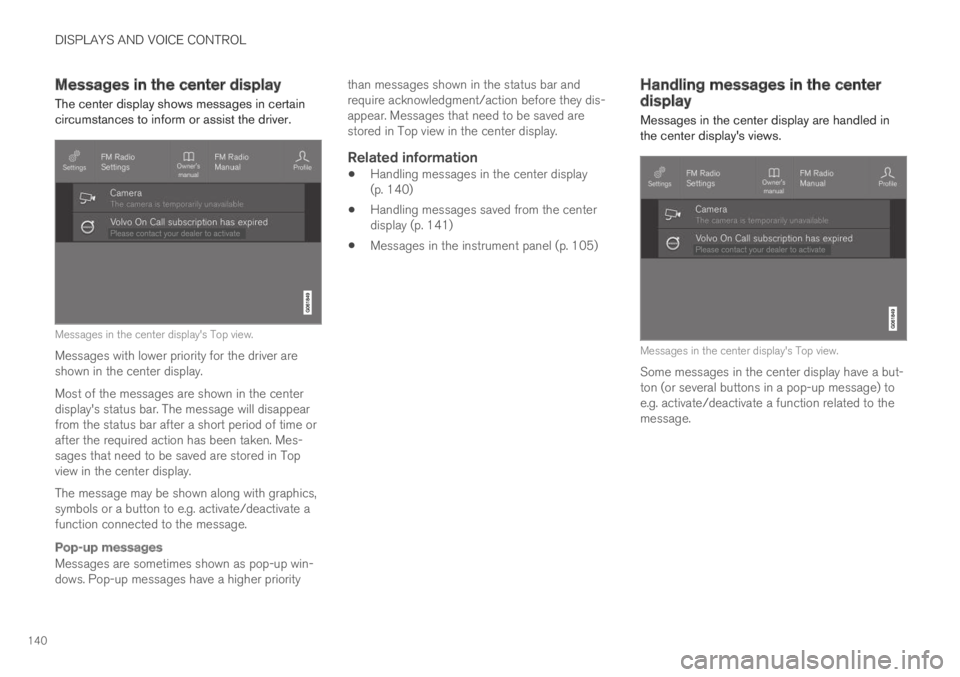
The center display shows messages in certaincircumstances to inform or assist the driver.
Messages in the center display's Top view.
Messages with lower priority for the driver areshown in the center display.
Most of the messages are shown in the centerdisplay's status bar. The message will disappearfrom the status bar after a short period of time orafter the required action has been taken. Mes-sages that need to be saved are stored in Topview in the center display.
The message may be shown along with graphics,symbols or a button to e.g. activate/deactivate afunction connected to the message.
Pop-up messages
Messages are sometimes shown as pop-up win-dows. Pop-up messages have a higher priority
than messages shown in the status bar andrequire acknowledgment/action before they dis-appear. Messages that need to be saved arestored in Top view in the center display.
Related information
Handling messages in the center display(p. 140)
Handling messages saved from the centerdisplay (p. 141)
Messages in the instrument panel (p. 105)
Handling messages in the centerdisplay
Messages in the center display are handled inthe center display's views.
Messages in the center display's Top view.
Some messages in the center display have a but-ton (or several buttons in a pop-up message) toe.g. activate/deactivate a function related to themessage.
Page 143 of 695

DISPLAYS AND VOICE CONTROL
141
Handling new messages
For messages with buttons:
–Tap the button to perform the action or letthe message automatically time-out after ashort period.
>The message will disappear from the sta-tus bar.
For messages without buttons:
–Close the message by tapping it or let themessage automatically time-out after a shortperiod.
>The message will disappear from the sta-tus bar.
Messages that need to be saved are stored inTop view in the center display.
Related information
Messages in the center display (p. 140)
Handling messages saved from the centerdisplay (p. 141)
Messages in the instrument panel (p. 105)
Handling messages saved from thecenter display
Messages saved from the instrument panel andcenter displays are handled in the center display.
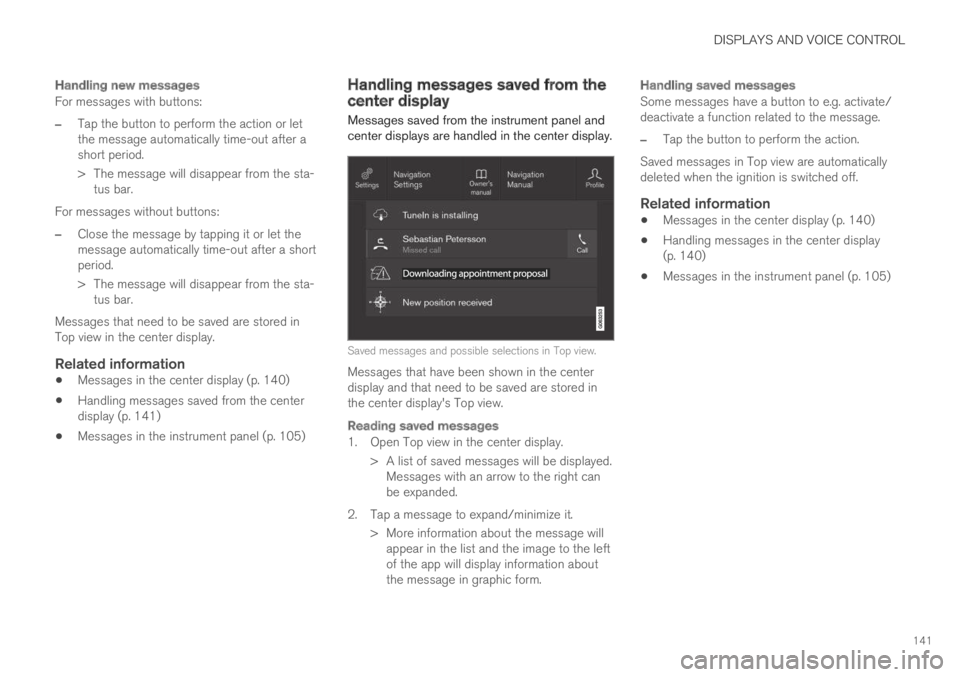
Saved messages and possible selections in Top view.
Messages that have been shown in the centerdisplay and that need to be saved are stored inthe center display's Top view.
Reading saved messages
1. Open Top view in the center display.
> A list of saved messages will be displayed.Messages with an arrow to the right canbe expanded.
2. Tap a message to expand/minimize it.
> More information about the message willappear in the list and the image to the leftof the app will display information aboutthe message in graphic form.
Handling saved messages
Some messages have a button to e.g. activate/deactivate a function related to the message.
–Tap the button to perform the action.
Saved messages in Top view are automaticallydeleted when the ignition is switched off.
Related information
Messages in the center display (p. 140)
Handling messages in the center display(p. 140)
Messages in the instrument panel (p. 105)
Page 171 of 695

WINDOWS, GLASS AND MIRRORS
* Option/accessory.169
WARNING
Make sure that no child or other passengercomes into contact with the windows as theyare closing with keyless closing*.
NOTE
One way to reduce the pulsating wind noiseheard when the rear windows are open is toalso open the front windows slightly.
NOTE
The windows cannot be opened at speedsover approx. 180 km/h (ca112 mph), but theycan be closed.
The driver is always responsible for followingapplicable traffic regulations.
Related information
Power windows (p. 167)
Pinch protection for windows and sun cur-tains (p. 166)
Reset procedure for pinch protection(p. 167)
Keyless locking and unlocking* (p. 253)
Locking and unlocking using the remote key(p. 240)
Rearview/door mirrors
The rearview mirror and door mirrors can beused to improve the driver's visibility behind thevehicle.
Rearview mirror
The rearview mirror can be easily adjusted man-ually. The rearview mirror can be equipped withHomeLink*, auto-dim* and compass*.
Door mirrors
WARNING
The door mirror on the passenger side iscurved to improve visibility. Objects in the mir-ror may appear farther away than they actuallyare.
The joystick in the drivers' door control panel isused to adjust the position of the door mirrors.There are also several automatic settings thatcan also be connected to the memory functionbuttons for the power seat*.
Related information
HomeLink®* (p. 485)
Compass* (p. 489)
Adjusting the rearview mirror dimming func-tion (p. 170)
Adjusting the door mirrors (p. 170)
Storing positions for seats, mirrors and head-up display* (p. 186)
Activating and deactivating the heated rearwindow and door mirrors (p. 221)
Page 172 of 695

WINDOWS, GLASS AND MIRRORS
* Option/accessory.170
Adjusting the rearview mirrordimming function
Bright light entering the vehicle from behind, e.g.from the headlights of following vehicles, couldreflect in the rearview mirror and door mirrorsand cause a glare. Use the dimming functionwhen light from behind is distracting.
Auto-dim
If bright light enters the vehicle from behind, thedoor mirrors will automatically dim. Auto-dim isalways active when the engine is running, exceptwhen reverse gear is engaged.
NOTE
Adjustments to the sensitivity level will not benoticeable immediately but will instead takeeffect after a short period of time.
The sensitivity level for dimming will affect boththe rearview mirror and door mirrors.
To change the dimming sensitivity level:
1.Tap Settings in the Top view in the centerdisplay.
2.Tap My CarMirrors and Convenience.
3.Under Rearview Mirror Auto Dimming,select Normal, Dark or Light.
The rearview mirror instead has two sensors -one pointing forward and one pointing rearward -
which work together to identify and eliminateglare. The forward-pointing sensor monitorsambient light, while the rearward-pointing sensormonitors light from the headlights of followingvehicles.
For the door mirrors to be equipped with auto-dim, the rearview mirror must also be equippedwith auto-dim.
NOTE
If the sensors are obstructed by e.g. a parkingpermit, transponder, sunshade or objects onthe seats or in the cargo compartment in away that prevents light from reaching the sen-sors, the auto-dim function in the door andrearview mirrors will be reduced.
Related information
Rearview/door mirrors (p. 169)
Adjusting the door mirrors (p. 170)
Adjusting the door mirrors
To improve visibility to the rear, the door mirrorsneed to be adjusted to the driver's height andseating position. There are several automaticsettings that can also be connected to the mem-ory function buttons for the power seat*.
Controls used for door mirrors
Door mirror controls.
The joystick in the drivers' door control panel isused to adjust the position of the door mirrors.The ignition must be in at least mode I.
1.Press the L button for the left door mirror orR for the right door mirror. The button willlight up.
2.Adjust the position using the joystick locatedbetween the buttons.
3.Press the L or R button again. The light inthe button will go out.
Page 173 of 695

WINDOWS, GLASS AND MIRRORS
* Option/accessory.171
Automatically folding door mirrors *
The door mirrors can be automatically foldedwhen driving or parking in tight spaces.
1.Press the L and R buttons at the same time.
2. Release the buttons after about 1 second.The mirrors will automatically stop when theyare completely folded in.
Open the mirrors by pressing L and R at thesame time. The mirrors will automatically stopwhen they are completely open.
Resetting the mirrors' position
A mirror that has been moved out of positionmanually (e.g. hit or bumped into) must be electri-cally returned to its normal position for automaticfolding* to function properly.
1.Fold in the mirrors by pressing the L and Rbuttons at the same time.
2.Open them again by pressing the L and Rbuttons at the same time.
3. Repeat the above procedure as needed.
The mirrors are now reset to their original posi-tions.
Tilting when parking 3
The door mirrors can be tilted down to help givethe driver a better view along the sides of thevehicle, e.g. of the curb when parking.
–Select reverse gear and press the L or R mir-ror button.
Please note that the button may need to bepressed twice depending on settings. When thedoor mirror is tilted down, the light in the buttonwill flash. When reverse gear is engaged, thedoor mirrors will automatically start to move after3 seconds and will reach their original positionafter about 8 seconds.
Automatically tilting when parking 3
With this setting, the door mirrors will automati-cally tilt down when reverse gear is engaged. Thefolded position is preset and cannot be adjusted.To immediately return the door mirrors to theiroriginal position, press the L or R button twice.
1.Tap Settings in the center display's Topview.
2.Tap My CarMirrors and Convenience.
3.Under Exterior Mirror Tilt at Reverse,select Off, Driver, Passenger or Both toactivate/deactivate and to select which mir-ror to tilt.
Automatic folding when the vehicle is
locked *
The door mirrors can automatically fold in whenthe vehicle is locked and open when the vehicleis unlocked using the remote key.
1.Tap Settings in the center display's Topview.
2.Tap My CarMirrors and Convenience.
3.Select Fold Mirror When Locked to acti-vate/deactivate.
Related information
Rearview/door mirrors (p. 169)
Adjusting the rearview mirror dimming func-tion (p. 170)
Storing positions for seats, mirrors and head-up display* (p. 186)
Activating and deactivating the heated rearwindow and door mirrors (p. 221)
3
Only on models equipped with a power driver's seat with memory buttons * .