2019 VOLKSWAGEN TRANSPORTER headlights
[x] Cancel search: headlightsPage 110 of 486

Automatic headlight control AUTO
The automatic headlight control is merely an aid and will not always be able to detect all driving sit-uations.
If the light switch is in position AUTO, the vehicle lights and the lighting in instruments and switches will switch on and off automatically in the following situations => .&.:
Automatically switched on
• When the rain sensor detects darkness, e.g. when driving through tunnels.
• When the rain sensor detects that it is raining and switches the wipers on.
Automatically switched off
• When the rain sensor detects that there is enough light.
• When the wipers have not been used for a few minutes.
Static cornering light
When cornering slowly or travelling around very tight bends, a static cornering light is switched on automatically to illuminate the inside of the bend.
The static cornering light is integrated into the fog lights and only lights up at speeds below approxi-mately 40 km/h (25 mph).
When reverse gear is engaged, the static corner-ing light on both sides of the vehicle may switch on to provide better illumination of the area when ma-noeuvring.
Main beam assist
r-("'n First read and observe the introductory 1..-JcJl Information and safety warnings.&. on page 106.
Main beam assist can help to prevent other road users from being dazzled.
Main beam assist (Light Assist)
Within the limits of the system, the main beam as-sist automatically switches the main beam on at speeds of over approximately 60 kmlh (37 m ph),
110 I Before the journey
A WARNING
Accidents can occur if roads are not suffi-ciently Illuminated and other road users have difficulty seeing the vehicle, or cannot see it at all.
• The automatic headlight control (AUTO) only switches on the dipped beam headlights when there is a change In the level of bright-ness and not, for example, if it Is foggy.
• Never drive with daytime running lights if the street Is not sufficiently lit due to weather and lighting conditions. The daytime running lights are not bright enough to Illuminate the road ahead and to ensure that other road users are able to see you.
• The rear lights will not be switched on with the daytime running lights. If the rear lights are not switched on, the vehicle may not be visible to other road users If it Is dark, raining, or If visibility Is poor.
m In cool or damp weather, the interior of the l..!J headlights, rear lights and turn signals may mist up briefly. This is normal and does not affect the service life of the lighting system of your vehi-cle.
Main beam assist normally recognises illuminated areas such as towns and deactivates the main beam while driving through them. .,.
Page 111 of 486

Switching main beam assist on and off manually
Function Action
Switching on -Switch on the ignition and turn the light switch to position AUTO. -Push the turn signal and main beam lever forwards from its initial position =:-page 107.
When the main beam assist is switched on, the indicator lamp w lights up in the instru-ment cluster display.
-Switch off the ignition. -OR: turn the light switch to a position other than AUTO =>page 108.
Switching off -OR: with the main beam switched on, pull the turn signal and main beam lever back-wards. -OR: push the turn signal and main beam lever forwards to switch on the manual main beam. The main beam assist is then switched off.
Fault
it may not be possible to switch off the main beam quickly enough or at all using main beam assist due to the following:
• In poorly lit streets where there are highly-re-flective signs.
• When encountering other road users with insuf-ficient lighting, such as pedestrians or cydists.
• In tight bends, brows of hills or depressions in the land or half-hidden oncoming traffic.
• With oncoming traffic on streets with a central barrier where the driver can see clearly over the central barrier e. . truck drivers. g
• If the camera is broken or the power supply is interrupted.
• In fog, snow or heavy rain.
• In dusty or sandy areas.
• Damage to the windscreen in the camera's vi-sion field.
• If the viewing field of the camera is misted up, dirty, covered by a sticker, snow or ice.
A WARNING
Do not let the extra convenience afforded by main beam control tempt you into taking any risks when driving-this can cause acci-dents. The system is not a substitute for the full concentration of the driver.
A WARNING (Continued)
• Always check the lights yourself and ad-just them to the prevailing conditions for lights, vision and road traffic.
• The main beam control may not be able to recognise all driving situations correctly and may not work properly in certain situations.
• If the camera's field of view is dirty, cov-ered or damaged, the function of the main beam assist may be impaired. This also ap-plies If changes are made to the vehicle's lighting system, for example if additional headlights are fitted.
CD
Please observe the following points in order to avoid impairing the proper function of the sys-tem:
• Regularly clean the camera's field of view, and keep it free from snow and ice.
• Do not cover the camera's field of view.
• Check the area of the windscreen that Is in the camera's field of view for damage.
m The headlight flasher and the main beam can W be switched on and off manually at any time with the turn signal and main beam lever =>page 107.
m Light-emitting objects in the camera's field of W operation, e.g. mobile navigation devices, could impair the functions of the main beam assist system (Light Assist).
1"1'11 First read and observe the introductory L-lo:J.J Information and safety warnings & on page 106.
Lights and vision 1111
Page 112 of 486

If you have to drive a right-hand drive vehicle in a left-hand drive country, or vice versa, the asymmet-ric dipped beam halogen headlights may dazzle oncoming traffic. Therefore, the headlights must be masked over if you are driving abroad.
Therefore you must apply stickers to certain parts of the headlighllenses if you are driving abroad. A qualified workshop can provide you with further in-formation. Volkswagen Commercial Vehicles rec-ommends using a Volkswagen Commercial Vehi-cles dealership for this purpose.
m The use of the stickers on the headlights is L!J only permissible if the period of use is limited. Please contact a qualified workshop for a perma-nent alteration. Volkswagen Commercial Vehicles recommends using a Volkswagen Commercial Ve-hicles dealership for this purpose.
,.....-.(')1 First read and observe the introductory l....-.lo:.l.l Information and safety warnings & on page 106.
The Coming Home function is switched on manual-ly. However, the "Leaving Home" function is con-trolled automatically by a rain sensor.
"Coming Home"
Switching on
Switching off
"Leaving Home"
Switching on
Switching off
!Action
-Switch off the ignition. -Activate the headlight flasher for approximately one second 107. The Coming Home lighting is switched on when the driver door is opened. The switch-off delay starts when the last vehicle door or the tailgate has been closed.
-Automatically after the set switch-off delay has elapsed. -Automatically if a door or the tailgate is opened approximately 30 seconds after switch on. -Turn light switch to position 0. -Switch on the ignition.
Action
-Unlock vehicle when light switch is in position AUTO and rain sensor has detected that it is dark.
-Automatically after the switch-off delay. -Lock the vehicle. -Turn light switch to position 0. -Switch on the ignition.
m When the Coming Home function is switched L!J on, no signal tone will be given as a reminder that a light is still switched on when the driver door is opened.
Page 113 of 486

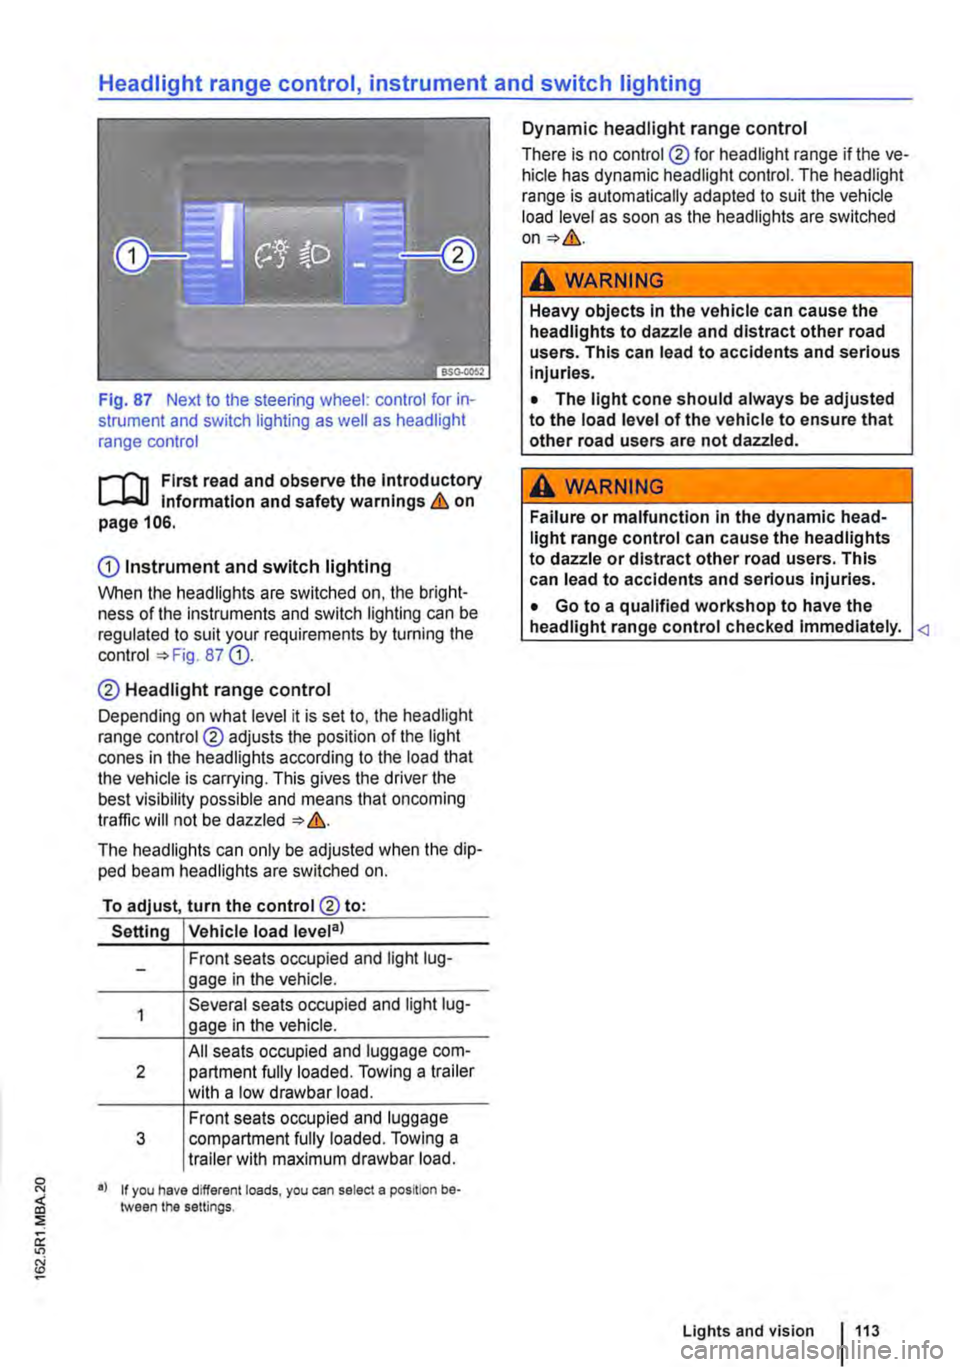
Fig. 87 Next to the steering wheel: control for in-strument and switch lighting as well as headlight range control
,....-('n First read and observe the Introductory l-Jo:-1.1 information and safety warnings & on page 106.
CD Instrument and switch lighting
When the headlights are switched on. the bright-ness of the instruments and switch lighting can be regulated to suit your requirements by turning the control =>Fig. 87 Q).
0 Headlight range control
Depending on what level it is set to. the headlight range control ® adjusts the position of the light cones in the headlights according to the load that the vehicle is carrying. This gives the driver the best visibility possible and means that oncoming traffic will not be dazzled => &.
The headlights can only be adjusted when the dip-ped beam headlights are switched on.
To adjust, turn the control® to:
Setting Vehicle load level3l
Front seats occupied and light lug-gage in the vehicle.
Several seats occupied and light lug-gage in the vehicle.
All seats occupied and luggage com-2 partment fully loaded. Towing a trailer with a low drawbar load.
Front seats occupied and luggage 3 compartment fully loaded. Towing a trailer with maximum drawbar load.
•l If you have different loads, you can select a position be-;:j tween the settings. :::;; a: "'
Dynamic headlight range control
There is no control ® for headlight range if the ve-hicle has dynamic headlight control. The headlight range is automatically ad a pled to suit the vehicle load level as soon as the headlights are switched on=>&.
,A WARNING
Heavy objects in the vehicle can cause the headlights to dazzle and distract other road users. This can lead to accidents and serious Injuries.
• The light cone should always be adjusted to the load level of the vehicle to ensure that other road users are not dazzled.
,A WARNING
Failure or malfunction in the dynamic head-light range control can cause the headlights to dazzle or distract other road users. This can lead to accidents and serious injuries.
• Go to a qualified workshop to have the headlight range control checked immediately.
Lights and vision 113
Page 118 of 486

Move the lever into the required position
0 lx Flick wipe -wipes briefly. Push and hold the lever down for longer to wipe more quickly.
® ,··.··· \X:) Pulling the lever aclivates the wash and wipe system for cleaning the windscreen.
® CQ Interval wipe for the rear window. The wiper will wipe the window approximately every 6 seconds .
0 ........ Pushing the lever activates the wash and wipe system for cleaning the rear window.
Q)
If the ignition is switched off while the wipers are still switched on, the wipers will continue to wipe on the same setting when the ignition Is switched on again. If there Is frost, snow or other obstructions on the windscreen or rear window, the wipers and wiper motor could be-come damaged.
• Remove any snow and ice from the wipers before setting off.
Wiper functions
Q)
Do not switch on the wipers when the window is dry. Using the wipers when the windscreen Is dry can damage the windscreen.
m The wipers will only function when the igni-W lion is switched on and the bonnet and tail-gate are closed.
m The rear window wiper is switched on auto-W matically if the front wipers are switched on and reverse gear is engaged.
Wiper response in various situations:
When the vehicle is stationary. When switched on, the wipers will temporarily be switched to the next setting down.
While the wash and wipe system is run-ning.
The Climatronic will switch to air recirculation mode for approxi-mately 30 seconds to prevent the smell of the windscreen wash-er fluid from entering the vehicle interior.
When the interval wipe is switched on. The wiper intervals vary according to the vehicle speed. The faster the vehicle is travelling, the shorter the interval.
Headlight washer system
The headlight washer system cleans the lenses on the headlights.
Once the ignition has been switched on, the head-lights will be washed the first time the windscreen washer system is used, and every fifth time there-after. To do this, pull the wiper lever towards the steering wheel when the dipped beam headlights or main beam are switched on. Clean off stubborn dirt (insects, etc.) from the headlights at regular in-tervals, for instance when filling the tank.
118 Before the journey
In winter, you should remove any snow from the headlight washer nozzles in the bumper to keep the headlight washer system in working order. Re-move any ice with a de-icer spray.
m The wipers will try to wipe away any obsta-W cles that are on the windscreen. The wipers will stop moving if the obstacle blocks their path. Remove the obstacle and switch the wipers back on again.
Page 301 of 486

Several warning and indicator lamps will light up briefly as a functional check when the ignition is switched on. They will go out after a few seconds.
A WARNING
Failure to observe the warning lamps and text messages could lead to accidents and seri-ous Injuries.
Radar sensor
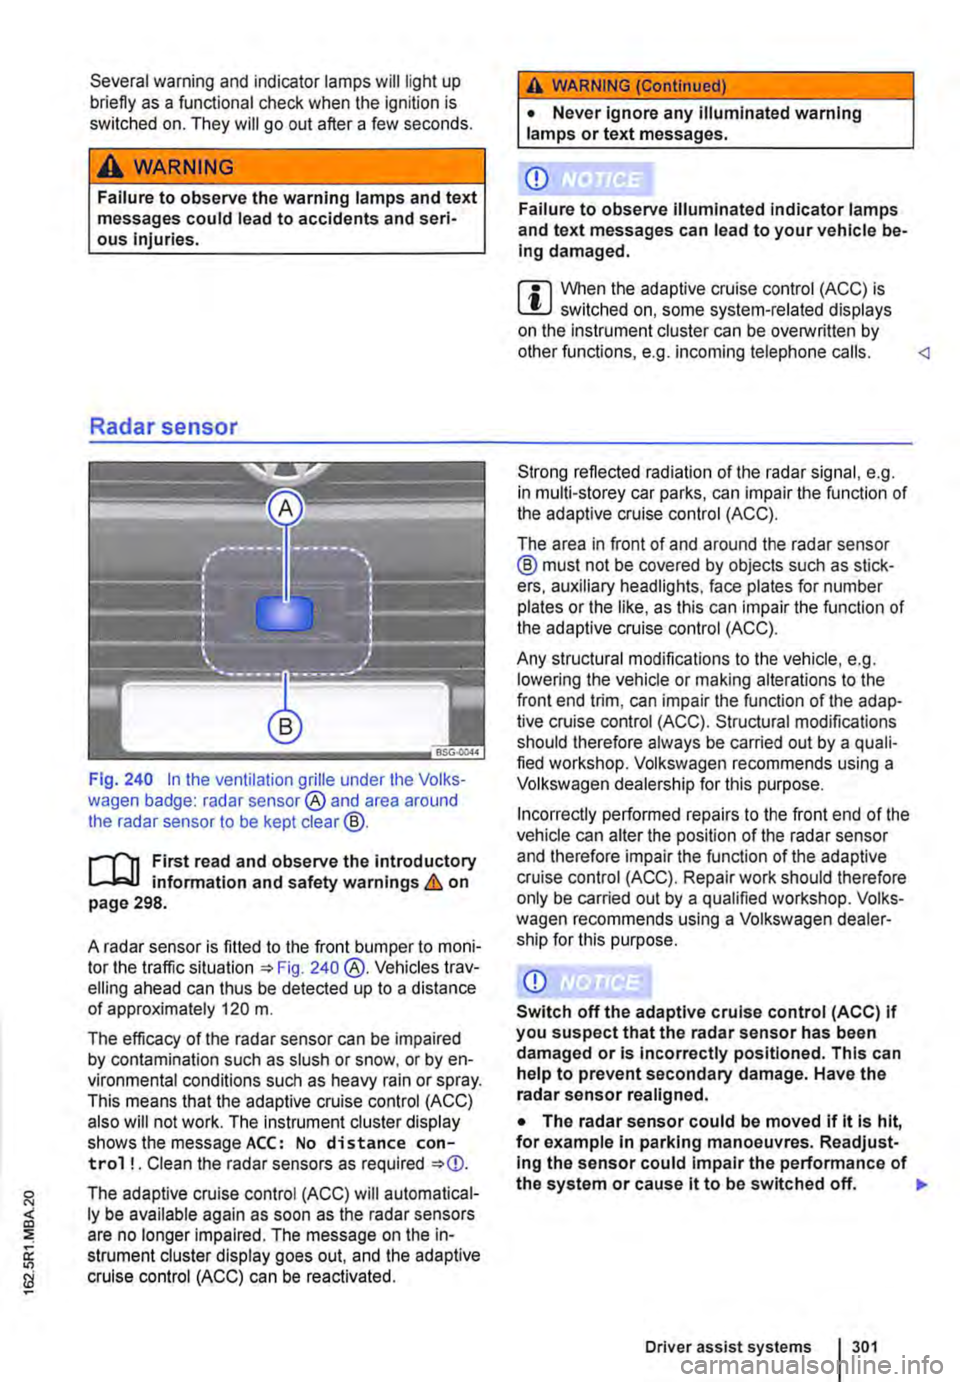
Fig. 240 In the ventilation grille under the Volks-wagen badge: radar sensor® and area around the radar sensor to be kept clear@.
r--('n First read and observe the introductory L-J,:.U information and safety warnings & on page 298.
A radar sensor is fitted to the front bumper to moni-tor the traffic situation 240 @.Vehicles trav-elling ahead can thus be detected up to a distance of approximately 120 m.
The efficacy of the radar sensor can be impaired by contamination such as slush or snow. or by en-vironmental conditions such as heavy rain or spray. This means that the adaptive cruise control (ACC) also will not work. The instrument cluster display shows the message ACC: No distance con-trol ! . Clean the radar sensors as required
The adaptive cruise control (ACC) will automatical-ly be available again as soon as the radar sensors are no longer impaired. The message on the in-strument cluster display goes out. and the adaptive cruise control (ACC) can be reactivated.
A WARNING (Continued)
• Never ignore any illuminated warning lamps or text messages.
CD
Failure to observe illuminated indicator lamps and text messages can lead to your vehicle be-Ing damaged.
m When the adaptive cruise control (ACC) is L!..J switched on, some system-related displays on the instrument cluster can be overwritlen by other functions, e.g. incoming telephone calls.
The area in front of and around the radar sensor ® must not be covered by objects such as stick-ers, auxiliary headlights, face plates for number plates or the like, as this can impair the function of the adaptive cruise control (ACC).
Any structural modifications to the vehicle, e.g. lowering the vehicle or making alterations to the front end trim, can impair the function of the adap-tive cruise control (ACC). Structural modifications should therefore always be carried out by a quali-fied workshop. Volkswagen recommends using a Volkswagen dealership for this purpose.
Incorrectly performed repairs to the front end of the vehicle can alter the position of the radar sensor and therefore impair the function of the adaptive cruise control (ACC). Repair work should therefore only be carried out by a qualified workshop. Volks-wagen recommends using a Volkswagen dealer-ship for this purpose.
CD
Switch off the adaptive cruise control (ACC) If you suspect that the radar sensor has been damaged or is incorrectly positioned. This can help to prevent secondary damage. Have the radar sensor realigned.
• The radar sensor could be moved if it is hit, for example in parking manoeuvres. Readjust-Ing the sensor could impair the performance of the system or cause it to be switched off. 11>
Driver assist systems 301
Page 309 of 486

m When Front Assist is switched on, the display L!J in the instrument cluster can be overwritten by displays related to other functions, e.g. an in-coming telephone call.
Fig. 246 In the bumper under the Volkswagen badge: radar sensor® and area around the radar sensor to be kept clear@.
r-f"'n First read and observe the Introductory l.-lo:-1.1 Information and safety warnings & on page 307.
A radar sensor is fitted to the front bumper to moni-tor the traffic situation =>Fig. 246 @.Vehicles trav-elling ahead can thus be detected up to a distance of approximately 120 m.
The efficacy of the radar sensor can be impaired by contamination such as slush or snow, or by en-vironmental conditions such as heavy rain or spray. In this case the area monitoring system (Front As-sist) will not work. The instrument cluster display shows the message Front Assist: no sensor view!. Clean the radar sensors as required =>
Strong reflected radiation of the radar signal, e.g. in multi-storey car parks, can impair the function of Front Assist.
Front scan system (Front Assist)
r-f"'n First read and observe the introductory l.-lo:-1.1 information and safety warnings & on page 307.
The area in front of and around the radar sensor @ must not be covered by objects such as stick-ers, auxiliary headlights, face plates for number plates or the like, as this can impair the function of the Front Assist.
Any structural modifications to the vehicle, e.g. lowering the vehicle or making alterations to the front end trim, can impair the function of Front As-sist. Structural modifications should therefore al-ways be carried out by a qualified workshop. Volkswagen recommends using a Volkswagen dealership for this purpose.
Incorrectly performed repairs to the front end of the vehicle can alter the position of the radar sensor and therefore impair the function of Front Assist. Repair work should therefore only be carried out by a qualified workshop. Volkswagen recommends using a Volkswagen dealership for this purpose.
• The radar sensor could be moved if it is hit, for example In parking manoeuvres. Readjust-Ing the sensor could impair the performance of the system or cause it to be switched off.
• Repair work on the radar sensor will require special knowledge and tools. Volkswagen rec-ommends using a Volkswagen dealership for this purpose.
• Remove snow with a brush, and remove Ice preferably with a solvent-free de-leer spray.
The system also retains the programmed setting when the ignition is next switched on. 1>
Driver assist systems 309
Page 310 of 486

Volkswagen recommends that Front Assist is switched on at all times. Exceptions =>page 310, Temporarily switch off the front scan system (Front Assist) in the following situations.
Activating and deactivating the front scan system
The front scan system can be activated and deacti-vated using the Front Assist option in the As-sistant submenu of the Settings menu. A tick indicates that a driver assist system is switched on.
The advance warning and distance warning are deactivated as well when the front scan system is deactivated.
If the front scan system is deactivated, a confirma-tory symbol is shown in the instrument cluster dis-play =>page 308
Activating and deactivating the advanced warning
The advance warning can be activated and deacti-vated using the Front Assist option in the As-sistant submenu of the Settings menu.
Activating or deactivating the distance warning
Depending on the vehicle equipment, the distance warning can be activated and deactivated using the Front Assist option in the Assistant sub-menu of the Settings menu.
Volkswagen recommends that the distance warn-ing is switched on at all times.
following situations
r-T'n First read and observe the introductory l-J,::JJ information and safety warnings & on page 307.
The area monitoring system (Front Assist) should be switched off in the following situations due to system limitations => &:
• If the vehicle is being towed.
• If the vehicle is on a rolling road test bed.
• If the vehide is utilised in a capacity beyond us-age on public roads, e.g. off-road or racing.
• If the radar sensor is faulty.
310 I While drivtng
• On external force on the radar sensor, e.g. after a rear-end collision.
• In the event of multiple unwanted interventions.
• If the radar sensor is covered temporarily by any auxiliary equipment, e.g. auxiliary headlights.
• If the vehicle is being loaded onto a truck, car ferry or motorail train.
A WARNING
Failure to switch off Front Assist in the situa-tions mentioned can cause accidents and se-rious Injuries.