2019 VOLKSWAGEN T-ROC engine coolant
[x] Cancel search: engine coolantPage 14 of 502

Introduction
This chapter contains information on the followingsubjects:
Analogue instrument cluster
Rev counter
Digital instrument cluster (Active Info Display)
Displays
Instrument cluster menus
Service menu
Driving data display (multifunction display)
Warning and information messages
Driver Alert System (recommendation for rest breaks)
Dynamic Road Sign Display (Sign Assist)
Time
Lap timer
Fuel gauge
Coolant temperature display
Service interval display
The vehicle is equipped either with an analogue or a digital instrument cluster (Active Info Display).
When you start the engine after the 12-volt battery has been totally discharged or changed, you may
find that system settings (time, date, personal convenience settings and programming) have been
changed or deleted. Check and correct the settings as necessary once the 12-volt vehicle battery has
been sufficiently charged.
WARNING
Accidents and injuries can occur if the driver is distracted.
Never press the buttons on the instrument cluster while the vehicle is in motion.
Any settings for the instrument cluster display and displays in the Infotainment system should be
made only when the vehicle is stationary in order to reduce the risk of accidents and serious injuries.
Page 15 of 502

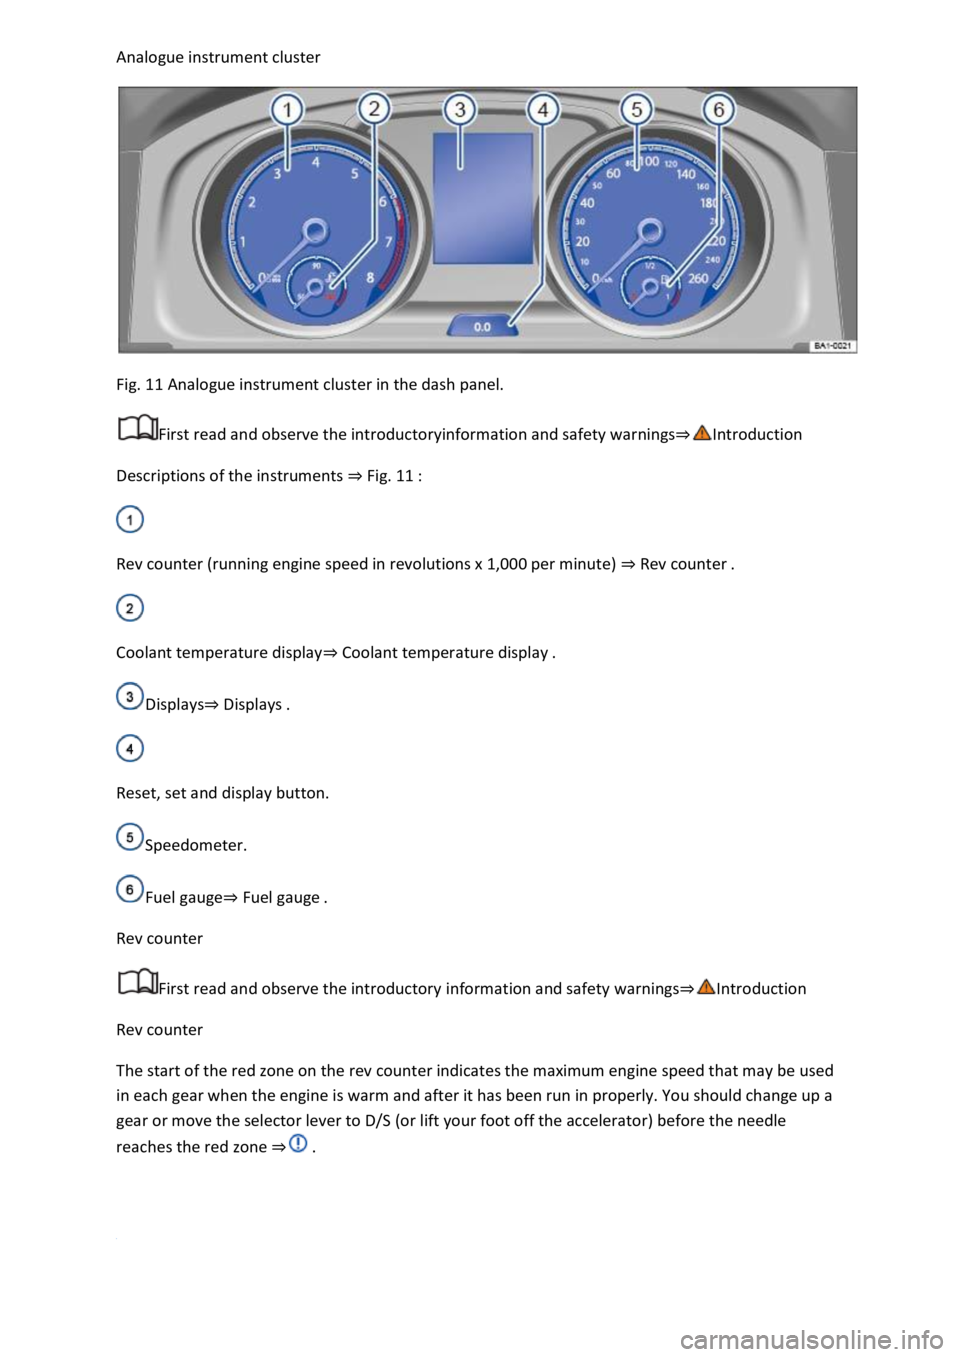
Fig. 11 Analogue instrument cluster in the dash panel.
First read and observe the introductoryinformation and safety warnings
Descriptions of the instruments Fig. 11
Rev counter (running engine speed in revolutions x 1,000 per minute) Rev counter
Coolant temperature displayCoolant temperature display
DisplaysDisplays
Reset, set and display button.
Speedometer.
Fuel gaugeFuel gauge
Rev counter
First read and observe the introductory information and safety warnings
Rev counter
The start of the red zone on the rev counter indicates the maximum engine speed that may be used
in each gear when the engine is warm and after it has been run in properly. You should change up a
gear or move the selector lever to D/S (or lift your foot off the accelerator) before the needle
reaches the red zone
Page 33 of 502

RNING
Driving when the fuel level is too low can lead to the vehicle coming to a standstill in traffic,
potentially causing accidents and serious injuries.
When the fuel level is too low, the fuel supply to the engine could be irregular, especially when
driving up or down hills and inclines.
The steering, all driver assist systems and brake support systems stop working if the engine sputters
or goes off due to fuel shortage or irregular fuel supply.
Always fill the tank when it is still 1/4 full. This reduces the risk of running out of fuel and breaking
down.
NOTICE
Do not run the tank empty. The irregular fuel supply can cause misfiring and allow unburnt fuel to
enter the exhaust system. The catalytic converter or particulate filter could be damaged as a result.
The small arrow next to the petrol pump symbol in the fuel gauge shows you the side of the vehicle
on which the tank flap is located.
Coolant temperature display
Fig. 17 Coolant temperature display in the analogue instrument cluster.
Page 34 of 502

18 Coolant temperature gauge in the Active Info Display.
First read and observe the introductory information and safety warnings
Cold area. The engine has not yet reached operating temperature. Avoid high engine revs and
heavy engine loads until the engine is warm.
Normal area.
Warning area. The temperature may also rise to the hot area when the engine is working hard,
especially at high ambient temperatures.
Coolant
The indicator lamp lights up and the central warning lamp flashes red.
The coolant level is not correct or there is a fault in the coolant system.
Do not drive on!
Stop the vehicle, switch off the engine and allow it to cool down.
Check the coolant level Coolant
Seek expert assistance if the warning lamp does not go out although the coolant level is adequate.
Service interval display
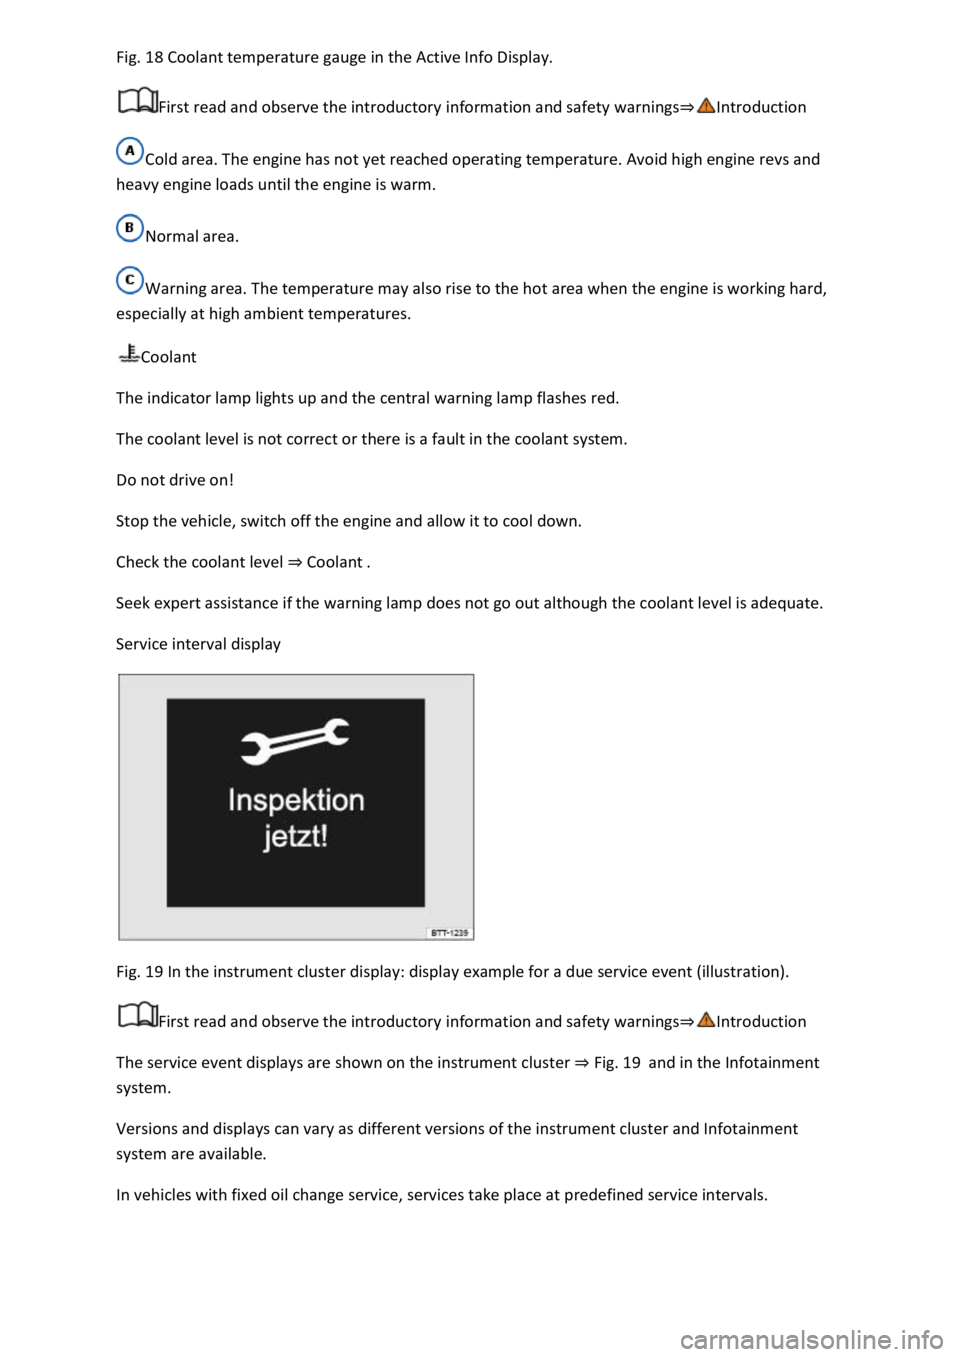
Fig. 19 In the instrument cluster display: display example for a due service event (illustration).
First read and observe the introductory information and safety warnings
The service event displays are shown on the instrument cluster Fig. 19and in the Infotainment
system.
Versions and displays can vary as different versions of the instrument cluster and Infotainment
system are available.
In vehicles with fixed oil change service, services take place at predefined service intervals.
Page 42 of 502

Fig. 23
Display areas.
Arrow buttons for changing to the lap timer.
Opening the performance monitor
Press the MENU button or function button on the Infotainment system.
Touch the Vehicle function button.
Touch the Selection function button.
Touch the Sport function button.
If you would like to switch between the performance monitor and the lap timer Lap timer
one of the arrow buttons on the left and right above the instruments Fig. 23
Selecting instruments and setting units
The display can show a maximum of three instruments at the same time. Each instrument can be
selected for each display area Fig. 23
To change between instruments, swipe vertically over the display. The currently selected instrument
will then disappear and a new instrument will appear.
The units can be adjusted for some instruments in the Infotainment system Vehicle settings
menu
The following instruments can be displayed:
Charge pressure display: the charge pressure display Fig. 23
ar). The further to the right the
needle on the scale, the higher the engine power output.
Accelerometer (G-meter): the accelerometer (G-meter) Fig. 23
-type area shows the
acceleration level and the direction of the acting force (in the opposite direction according to
physical laws). If you drive to the left, for example, the red marking will move in the right area of the
instrument (and vice versa). If you accelerate, the red marking will move down. If you brake, the red
marking will move up. The level of acceleration is indicated by the position of the red marking which
moves outwards. If the acceleration increases, the red marking will move away from the centre area.
Power display: the power display Fig. 23
Coolant temperature display: the needle may move further in a clockwise direction under high
engine loads and with high outside temperatures. This is no cause for concern unless the
indicator lamp in the instrument cluster display is lit up or flashing Coolant temperature display
Oil temperature display: the needle is in the middle area under normal driving conditions. If the
needle is in the bottom left area, this means that the engine has not yet reached its operating
temperature. Avoid excessively high speeds and acceleration when the engine has not yet reached
Page 49 of 502

Is fuel in the adequate quality available Fuel and emission control?
Are the correct service fluids that comply with Volkswagen specifications available in the destination
country Service fluids and consumables?
Will the navigation function in the factory-fitted Infotainment system work with the available
navigation data in the destination country?
Are special tyres necessary for travelling in the destination country?
Is a fire extinguisher a requirement in your destination country?
Which requirements must be observed regarding high-visibility waistcoats?
Checklist
Do not work on the engine and in the engine compartment unless you are familiar with the task, are
aware of the general safety procedures and have the correct equipment, service fluids and suitable
tools In the engine compartment
are uncertain. Make sure you check the following on a regular basis:
Washer fluid level Washer fluid
Engine oil level Engine oil
Coolant level Coolant
Brake fluid level Brake fluid
Tyre pressure Wheels and tyres
Page 215 of 502

splay on the instrument
cluster Coolant temperature display
Oil temperature display: the display corresponds with the oil temperature display on the instrument
cluster Engine oil
Adapting the display areas to the driving situation
The displayed instruments can be selected according to the driving situation, the ambient conditions
and the offroad conditions:
Sandy terrain: oil, steering angle and coolant temperature display
Inclines: steering angle and coolant temperature display, altimeter
Alpine terrain: steering angle display, altimeter, compass
Offroad driving situations
Introduction
This chapter contains information on the followingsubjects:
Safety instructions for offroad driving
Explanation of some technical terms
Checklist
General rules and driving tips
Useful accessories for offroad driving
Changing gear correctly
Driving on rough terrain
Driving through water
Offroad driving in snow
Driving on sand an
Driving on steep terrain
Traversing a slope
Driving through ditches
Stuck vehicle
After offroad driving
You can also drive vehicles with all-wheel drive offroad in addition to on normal roads. It is very
important to read the contents of this section before driving offroad.
The vehicle is not built for expedition-type journeys.
Page 309 of 502

WARNING
The start/stop system must always be switched off manually when towing a trailer using towing
brackets that have not been retrofitted by Volkswagen. Otherwise faults can occur in the brake
system, possibly resulting in accidents and serious injuries.
NOTICE
Observe the instructions and information for vehicles with an N1 approval Information about
vehicles wit
Always switch off the anti-theft alarm before a trailer is hitched or unhitched or a bicycle carrier is
loaded or unloaded Anti-theft alarm
unintentionally.
With a new engine, do not tow a trailer during the first 1,000 km Running in the engine
Some retrofitted towing brackets may cover the aperture for fitting the towing eye. If so, the towing
eye cannot be used for towing or tow-starting other vehicles. For this reason, the removed ball head
of a retrofitted towing bracket should be kept in the vehicle at all times.
Technical requirements
First read and observe the introductoryinformation and safety warnings
Cooling system
There is an increased load on the engine and the cooling system when towing a trailer. The cooling
system must contain sufficient coolant and be able to cope with the extra load due to trailer towing.
Trailer brake
If the trailer is equipped with its own brake system, comply with the relevant regulations.
Trailer tail light clusters
The trailer tail light clusters must work correctly and meet legal requirements. Do not exceed the
maximum power consumption for the trailer.
Exterior mirrors
If you are unable to see the traffic behind the trailer using the vehicle's standard exterior mirrors,
additional exterior mirrors should be fitted in accordance with any country-specific regulations.
Before setting off, adjust the exterior mirrors so that you have a sufficient view towards the rear.