2019 VOLKSWAGEN T-ROC turn signal
[x] Cancel search: turn signalPage 208 of 502
the vehicle speed, steering wheel torque and steering wheel angle. The electromechanical steering
functions only when the engine is running.
You will need considerably more strength than normal to steer the vehicle if the power steering is
reduced or has failed completely.
Counter steering assistance
Counter steering assistance provides the driver with steering assistance in critical driving situations.
Additional steering forces assist the driver when counter steering
Progressive steering
Depending on the vehicle equipment level, progressive steering can adjust the steering response in a
driving situation. Progressive steering functions only when the engine is running.
In urban traffic, less steering input is required when parking, manoeuvring, or turning sharply.
When driving on country roads or on the motorway, the progressive steering provides a more
sporty, direct steering response, and a dynamic feel.
WARNING
If the power steering is not working, the steering wheel is difficult to turn, which makes it difficult to
steer the vehicle.
Depending on the vehicle equipment level, the power steering functions only when the engine is
running.
Never allow the vehicle to roll if the engine is switched off.
Never remove the vehicle key from the ignition if the vehicle is in motion. The steering column lock
may be activated and it will no longer be possible to steer the vehicle.
WARNING
In conjunction with the ESC, counter steering assistance provides the driver with assistance when
steering in critical driving situations. The driver must steer the vehicle at all times. Counter steering
assistance does not steer the vehicle.
NOTICE
When the vehicle is towed, the ignition must be switched on to prevent the steering wheel from
locking, and so that the turn signals, horn, wipers and window washer system can be used.
Troubleshooting
Steering requires increased force
Page 230 of 502
to free the vehicle.
When you cannot move forwards
Carefully dig out all the wheels and check that no other parts of the vehicle are stuck in the sand.
Select reverse gear.
Reverse in your own tracks with gentle use of the accelerator.
If this does not help, place brushwood, foot mats or sacking directly in front of the wheels to
increase grip
Rocking the vehicle free
Never allow the wheels to spin for long periods as this will cause the vehicle to sink deeper
Switch off TCS Brake support systems
Position the steering wheel so that it is facing straight ahead.
Reverse until the point where the wheels just start to spin.
Immediately select first gear and drive forwards until the wheels start to spin again.
Repeat driving back and forth until you have enough momentum to free yourself.
Switch the TCS on after the rocking free procedure is completed Brake support systems
Use the Offroad driving profile.
WARNING
No one must stand either in front or behind the vehicle, particularly if you are attempting to free a
stuck vehicle.
Spinning wheels can propel stones, brushwood, pieces of wood or other objects that are in front or
behind the wheels at enormous speed and cause potentially fatal injury.
People standing in front of or behind the vehicle could be run over if the stuck vehicle starts to move
suddenly.
After offroad driving
First read and observe the introductoryinformation and safety warnings
Checklist
Clean the turn signals, lighting system, the number plate and all windows.
Page 256 of 502
When switched on, the Blind Spot Monitor is active from a speed of approx. 15 km/h (9 mph).
In the following driving situations, the yellow indicator lamp will light up in the corresponding
exterior mirror: Fig. 124
If your vehicle is being overtaken.
When overtaking another vehicle with a speed difference of up to approximately 10 km/h (6 mph).
No display will be shown if the takeover manoeuvre is much faster.
If a vehicle is detected in the blind spot and the turn signal is additionally activated in the direction
of the detected vehicle
In vehicles with the lane keeping system, the yellow indicator lamp will flash even if you do not
activate the turn signal when leaving your lane, provided that the lane keeping system is switched on
(Blind Spot Monitor Plus). The driver is warned by a corrective steering intervention when changing
lanes during a possible critical situation (information level, warning level). This also occurs when the
turn signal is activated for the corresponding direction. If the steering intervention is overridden by
the driver, the steering wheel vibrates to give an additional warning.
The quicker another vehicle approaches, the earlier there is a corresponding display in the exterior
mirror.
Automatic deactivation
The radar sensors for the Blind Spot Monitor will switch off automatically if, for example, the system
detects that a radar sensor is continuously covered. This can be caused by a layer of ice or snow in
front of the radar sensor, for example.
A text message will be shown on the instrument cluster display.
If the Blind Spot Monitor has been automatically deactivated, the system cannot be activated until
the ignition has been switched off and back on again.
The Blind Spot Monitor is automatically deactivated and cannot be activated when the factory-fitted
towing bracket is electrically connected to a trailer or similar Trailer towing
electrically connected to the vehicle and the driver pulls away, a text message appears in the
instrument cluster display to inform the driver that the Blind Spot Monitor has been deactivated.
The Blind Spot Monitor will be automatically activated again when the trailer has been unhitched
from the vehicle. This applies if the function was previously activated. The Blind Spot Monitor must
be deactivated manually if you tow a trailer using a towing bracket that was not fitted at the factory.
Troubleshooting
First read and observe the introductoryinformation and safety warnings
Blind Spot Monitor is not working
The indicator lamp lights up yellow.
Go to a qualified workshop.
Page 272 of 502
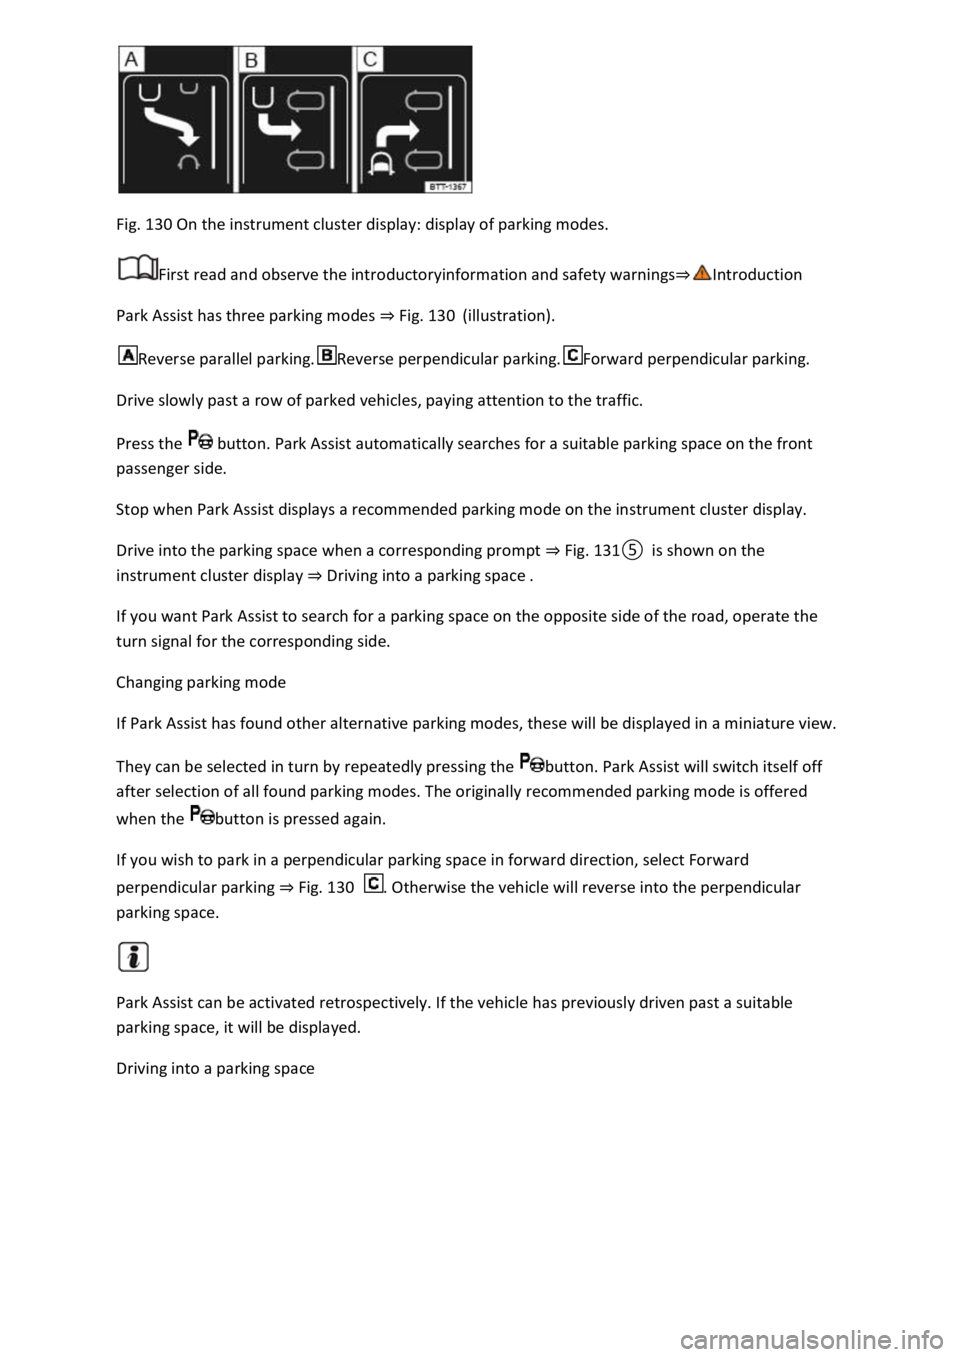
Fig. 130 On the instrument cluster display: display of parking modes.
First read and observe the introductoryinformation and safety warnings
Park Assist has three parking modes Fig. 130(illustration).
Reverse parallel parking.Reverse perpendicular parking.Forward perpendicular parking.
Drive slowly past a row of parked vehicles, paying attention to the traffic.
Press the button. Park Assist automatically searches for a suitable parking space on the front
passenger side.
Stop when Park Assist displays a recommended parking mode on the instrument cluster display.
Drive into the parking space when a corresponding prompt Fig.
Driving into a parking space
If you want Park Assist to search for a parking space on the opposite side of the road, operate the
turn signal for the corresponding side.
Changing parking mode
If Park Assist has found other alternative parking modes, these will be displayed in a miniature view.
They can be selected in turn by repeatedly pressing the button. Park Assist will switch itself off
after selection of all found parking modes. The originally recommended parking mode is offered
when the button is pressed again.
If you wish to park in a perpendicular parking space in forward direction, select Forward
perpendicular parking Fig. 130. Otherwise the vehicle will reverse into the perpendicular
parking space.
Park Assist can be activated retrospectively. If the vehicle has previously driven past a suitable
parking space, it will be displayed.
Driving into a parking space
Page 274 of 502
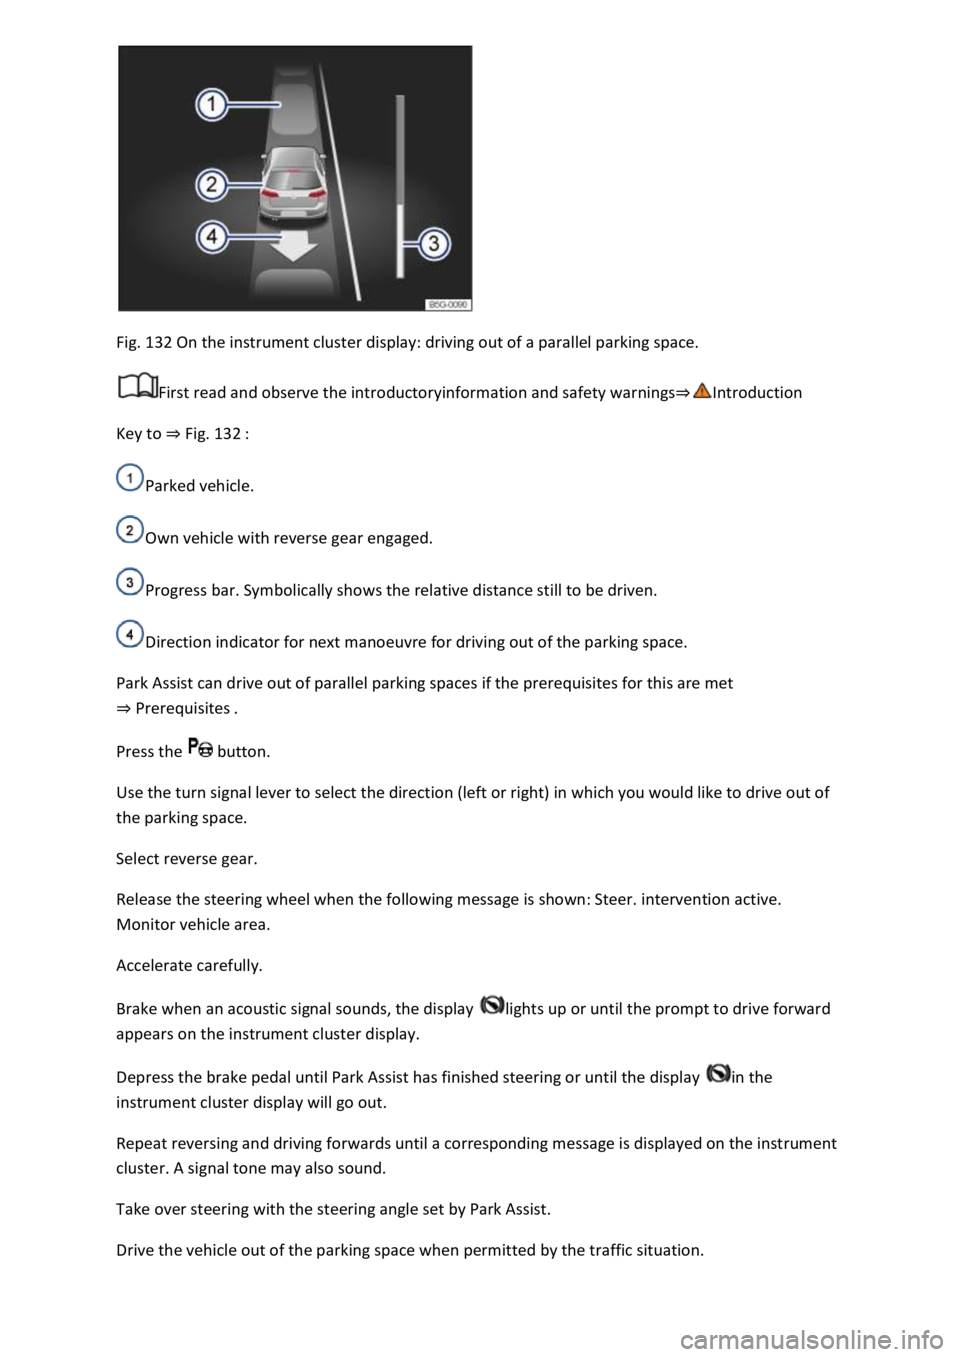
Fig. 132 On the instrument cluster display: driving out of a parallel parking space.
First read and observe the introductoryinformation and safety warnings
Key to Fig. 132
Parked vehicle.
Own vehicle with reverse gear engaged.
Progress bar. Symbolically shows the relative distance still to be driven.
Direction indicator for next manoeuvre for driving out of the parking space.
Park Assist can drive out of parallel parking spaces if the prerequisites for this are met
Prerequisites
Press the button.
Use the turn signal lever to select the direction (left or right) in which you would like to drive out of
the parking space.
Select reverse gear.
Release the steering wheel when the following message is shown: Steer. intervention active.
Monitor vehicle area.
Accelerate carefully.
Brake when an acoustic signal sounds, the display lights up or until the prompt to drive forward
appears on the instrument cluster display.
Depress the brake pedal until Park Assist has finished steering or until the display in the
instrument cluster display will go out.
Repeat reversing and driving forwards until a corresponding message is displayed on the instrument
cluster. A signal tone may also sound.
Take over steering with the steering angle set by Park Assist.
Drive the vehicle out of the parking space when permitted by the traffic situation.
Page 310 of 502
Only use a towing bracket which has been approved by Volkswagen for your vehicle type. Always
check and observe the data provided by the towing bracket manufacturer.
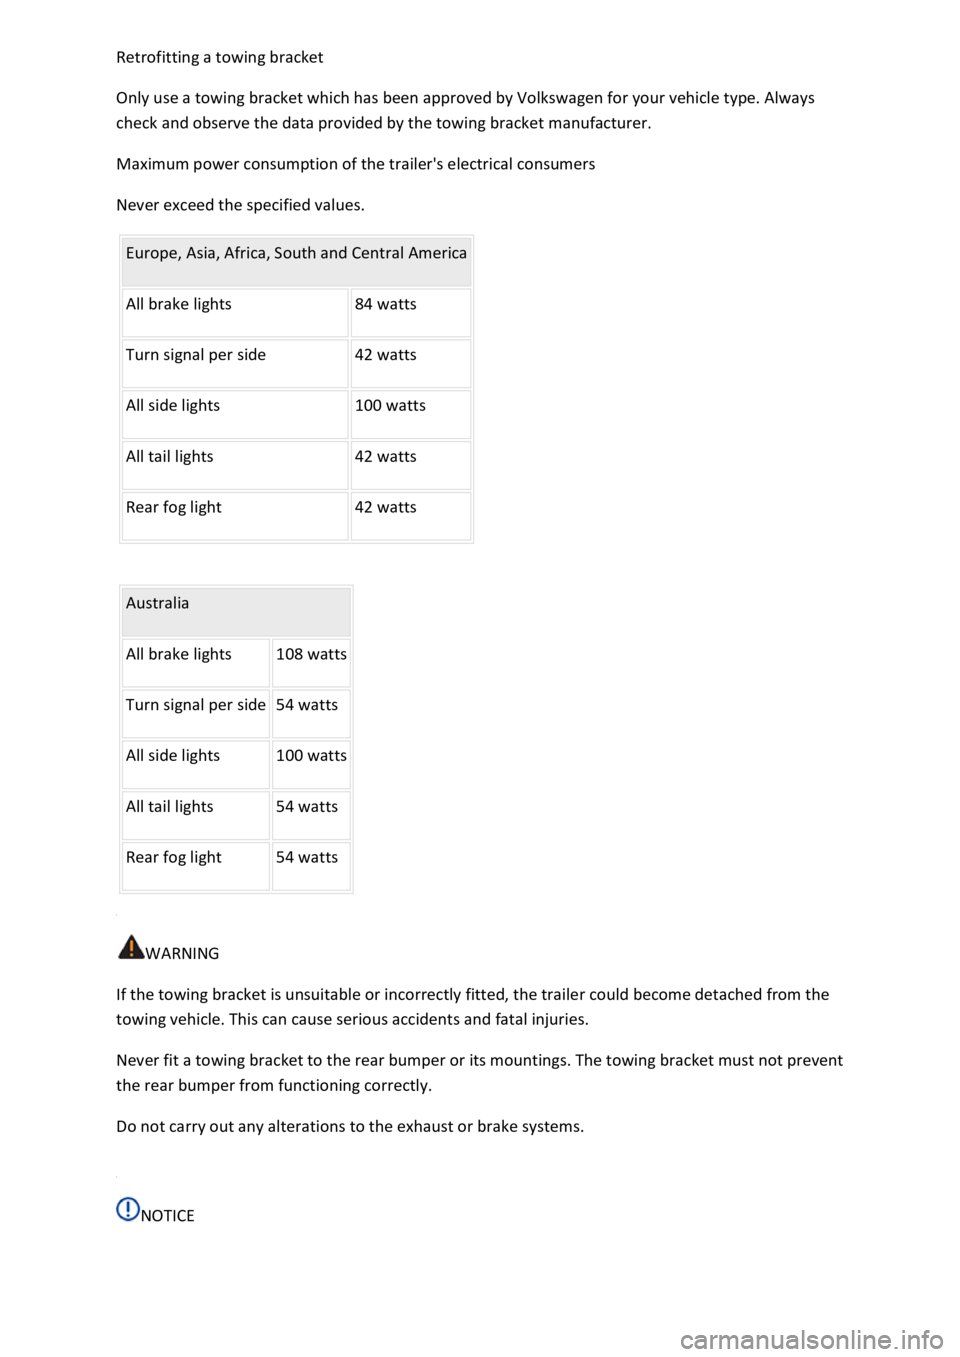
Maximum power consumption of the trailer's electrical consumers
Never exceed the specified values.
Europe, Asia, Africa, South and Central America
All brake lights 84 watts
Turn signal per side 42 watts
All side lights 100 watts
All tail lights 42 watts
Rear fog light 42 watts
Australia
All brake lights 108 watts
Turn signal per side 54 watts
All side lights 100 watts
All tail lights 54 watts
Rear fog light 54 watts
WARNING
If the towing bracket is unsuitable or incorrectly fitted, the trailer could become detached from the
towing vehicle. This can cause serious accidents and fatal injuries.
Never fit a towing bracket to the rear bumper or its mountings. The towing bracket must not prevent
the rear bumper from functioning correctly.
Do not carry out any alterations to the exhaust or brake systems.
NOTICE
Page 315 of 502
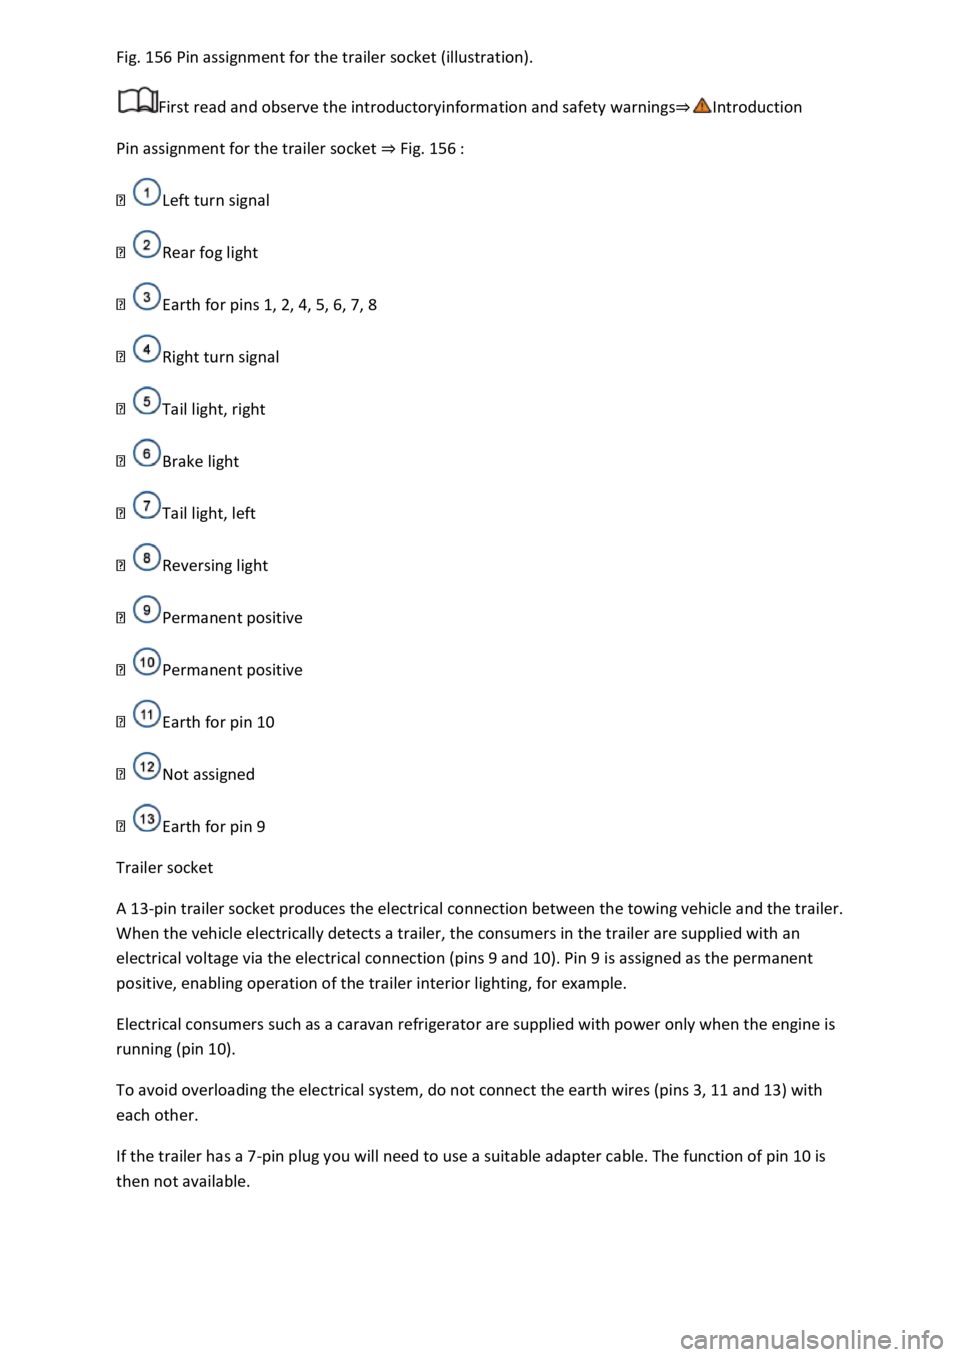
156 Pin assignment for the trailer socket (illustration).
First read and observe the introductoryinformation and safety warnings
Pin assignment for the trailer socket Fig. 156
Left turn signal
Rear fog light
Earth for pins 1, 2, 4, 5, 6, 7, 8
Right turn signal
Tail light, right
Brake light
Tail light, left
Reversing light
Permanent positive
Permanent positive
Earth for pin 10
Not assigned
Earth for pin 9
Trailer socket
A 13-pin trailer socket produces the electrical connection between the towing vehicle and the trailer.
When the vehicle electrically detects a trailer, the consumers in the trailer are supplied with an
electrical voltage via the electrical connection (pins 9 and 10). Pin 9 is assigned as the permanent
positive, enabling operation of the trailer interior lighting, for example.
Electrical consumers such as a caravan refrigerator are supplied with power only when the engine is
running (pin 10).
To avoid overloading the electrical system, do not connect the earth wires (pins 3, 11 and 13) with
each other.
If the trailer has a 7-pin plug you will need to use a suitable adapter cable. The function of pin 10 is
then not available.
Page 338 of 502

Damaged or dirty wiper blades can scratch the window glass.
can damage the graphite coating of the wiper blades during cleaning.
Wax deposits from car washes on the windscreen and rear window can cause the wiper blades to
rub. Remove wax residue using a special cleaning product or cleaning cloths.
Changing bulbs
Introduction
This chapter contains information on the followingsubjects:
Checklist
Changing bulbs in the front headlights (halogen bulbs)
Changing the bulbs in the headlights (lights with LED technology)
Changing the front turn signal bulbs
Changing bulbs in the front bumper
Changing bulbs in the tail light clusters (LED l
Changing bulbs in the number plate light (LED lights)
Troubleshooting
Changing the vehicle bulbs requires a certain amount of technical skill. Volkswagen therefore
recommends having bulbs replaced by a qualified workshop if you are uncertain. The work must be
performed by an expert if other vehicle parts around the affected bulbs need to be removed.
Volkswagen recommends having bulbs replaced by a Volkswagen dealership.
You should keep a box with spare light bulbs for the lights that ensure the vehicle is roadworthy in
the vehicle at all times. Spare bulbs are available from Volkswagen dealerships. In some countries it
is a legal requirement to have these spare bulbs in the vehicle.
It may be illegal to drive with defective lights of the exterior lighting.
Information on indicator and warning lamps can be found in the troubleshooting section at the end
of the chapter Troubleshooting
LED lights on the vehicle
The exterior lighting may feature LEDs: Owners cannot replace the LEDs themselves. If some LEDs
fail, this may be an indication that more elements are on the point of failure. In this case, have the
lights checked and replaced if necessary at a qualified workshop.