2019 VAUXHALL MOKKA X all wheel drive
[x] Cancel search: all wheel drivePage 41 of 253

Seats, restraints39Horizontal adjustment
To adjust horizontally, pull the head
restraint forwards. It engages in three
positions.
To return to its rearmost position, pull fully forwards and release.
Head restraints on rear seats
Height adjustment
Pull the head restraint upwards.
To move down, press the catch (1)
and push the head restraint
downwards.
Removal
Raise head restraint to its full height.
Press the catches (1) and (2) at the
same time.
Pull up the head restraint.
Front seats
Seat position9 Warning
Only drive with the seat correctly
adjusted.
9 Danger
Do not sit closer than 25 cm to the
steering wheel, to permit safe
airbag deployment.
9 Warning
Never adjust seats while driving as
they could move uncontrollably.
9 Warning
Never store any objects under the
seats.
Page 42 of 253

40Seats, restraints
● Sit with buttocks as far backagainst the backrest as possible.
Adjust the distance between the
seat and the pedals so that legs
are slightly angled when fully
pressing the pedals. Slide the
front passenger seat as far back
as possible.
● Set seat height high enough to have a clear field of vision on all
sides and of all display
instruments. There should be at
least one hand of clearance
between head and the
headlining. Your thighs should
rest lightly on the seat without
pressing into it.
● Sit with shoulders as far back against the backrest as possible.
Set the backrest rake so that it is possible to easily reach the
steering wheel with arms slightly
bent. Maintain contact between
shoulders and the backrest when
turning the steering wheel. Do
not tilt the backrest too far back.
We recommend a maximum rake of approx. 25°.
● Adjust seat and steering wheel in
a way that the wrist rests on top
of the steering wheel while the
arm is fully extended and
shoulders on the backrest.
● Adjust the steering wheel 3 76.
● Adjust the head restraint 3 38.
● Adjust the height of the seat belt 3 44.
● Adjust the thigh support so that there is a space approx. two
fingers wide between the edge of the seat and the hollow of the
knee.
● Adjust the lumbar support so that
it supports the natural shape of
the spine.Seat adjustment
Drive only with engaged seats and backrests.
Longitudinal adjustment
Pull handle, slide seat, release
handle. Try to move the seat back and forth to ensure that the seat is locked
in place.
Page 62 of 253

60StorageCentre console storage
Push down the button and slide coverbackwards.
Rear carrier system
Rear carrier system for three
bicycles
The rear carrier system (Flex-Fix
system) allows one bicycle to be attached to an extendable carrier
integrated into the vehicle floor. It is
possible to attach two further bicycles
on an adapter. The transportation of
other objects is not permitted.
The maximum load of the rear carrier
system is 60 kg with attached adapter and 30 kg without attached adapter.This allows the attachment of an
electrically-powered bicycle to the
rear carrier system. The maximum
load per bicycle on the adapter is
20 kg.
The wheelbase of a bicycle must not
exceed 1.15 m. Otherwise the secure
fastening of a bicycle is not possible.
If not in use, the rear carrier system
must be slid back into the vehicle
floor.
There must not be any objects on the
bicycles that could become loose
during transportation.Caution
If the rear carrier system is
extended and the vehicle is fully
loaded, the ground clearance will
be reduced.
Drive carefully whenever the road
has a steep inclination or when
driving over a ramp, bump, etc.
Page 78 of 253

76Instruments and controlsControlsSteering wheel adjustment
Unlock lever, adjust steering wheel,
then engage lever and ensure it is
fully locked.
Do not adjust steering wheel unless
vehicle is stationary and steering
wheel lock has been released.
Steering wheel controls
Cruise control and speed limiter are
operated via the controls on the left
side of the steering wheel.
Additionally, forward collision alert
can be set by using the controls on the
left side of the steering wheel.
Infotainment system can be operated
via the controls on the right side of the
steering wheel.
Driver assistance systems 3 154.
Further information is available in the
Infotainment manual.
Heated steering wheel
Activate heating by pressing *.
Activation is indicated by the LED in
the button.
Heating is operational when the
engine is running.
Page 86 of 253

84Instruments and controlsUplevel instrument cluster
Select Info page Q by pressing Menu.
Choose page Trip A or Trip B by
turning adjuster wheel on the turn
signal lever.
Each trip odometer page can be reset separately by pressing SET/CLR on
the turn signal lever for a few seconds
on the respective menu.
Driver Information Centre 3 96.
Tachometer
Displays the engine speed.
Drive in a low engine speed range for each gear as much as possible.
Caution
If the needle is in the red warning
zone, the maximum permitted
engine speed is exceeded. Engine at risk.
Fuel gauge
Displays the level in the fuel or gas
tank depending on the operation mode.
The arrow indicates the vehicle side
where the fuel filler flap is located.
Control indicator Y illuminates if the
level in the tank is low. Refuel
immediately if it flashes.
During liquid gas operation, the
system automatically switches over to
petrol operation when gas tanks are
empty 3 85.
Never run fuel tank dry.
Page 89 of 253

Instruments and controls87
The remaining oil life duration menu
is displayed in the Driver Information
Centre 3 96.
On Midlevel display select the
Option ? Menu by pressing
MENU on the turn signal lever. Turn
the adjuster wheel to select the
Remaining Oil Life page.
On Uplevel display select the Info Q
Menu by pressing MENU on the turn
signal lever. Turn the adjuster wheel
to select Oil Life page.
Remaining oil life duration is indicated
in percentage.
ResetPress SET/CLR on turn signal lever
for several seconds to reset. The
engine oil life page must be active.
The ignition must be switched on but
engine not running.
The system must be reset every time
the engine oil is changed to allow
proper functionality. Seek the
assistance of a workshop.
Next service A message appears in the Driver
Information Centre, when
maintenance of the vehicle is
required. Have maintenance workcarried out by a workshop within one week or 300 miles, whichever occursfirst.
Service information 3 220.
Control indicators
The control indicators described are
not present in all vehicles. The
description applies to all instrument
versions. Depending on the
equipment, the position of the control indicators may vary. When the
ignition is switched on, most control
indicators will illuminate briefly as a
functionality test.
The control indicator colours mean:red:danger, important reminderyellow:warning, information, faultgreen:confirmation of activationblue:confirmation of activationwhite:confirmation of activation
Control indicators in the
instrument cluster
Depending on the version, two
instrument clusters are available:
Page 100 of 253
98Instruments and controlsSelecting menus and functions
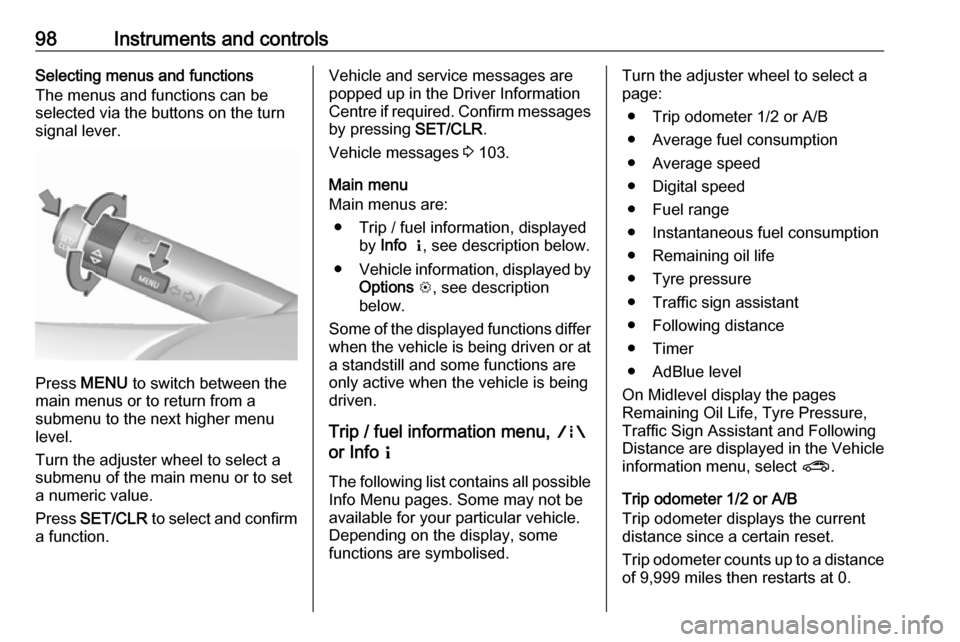
The menus and functions can be
selected via the buttons on the turn signal lever.
Press MENU to switch between the
main menus or to return from a
submenu to the next higher menu
level.
Turn the adjuster wheel to select a
submenu of the main menu or to set
a numeric value.
Press SET/CLR to select and confirm
a function.
Vehicle and service messages are
popped up in the Driver Information
Centre if required. Confirm messages
by pressing SET/CLR.
Vehicle messages 3 103.
Main menu
Main menus are:
● Trip / fuel information, displayed by Info Q , see description below.
● Vehicle information, displayed by
Options L, see description
below.
Some of the displayed functions differ when the vehicle is being driven or at
a standstill and some functions are
only active when the vehicle is being
driven.
Trip / fuel information menu, ;
or Info Q
The following list contains all possible Info Menu pages. Some may not be
available for your particular vehicle.
Depending on the display, some
functions are symbolised.Turn the adjuster wheel to select a
page:
● Trip odometer 1/2 or A/B
● Average fuel consumption
● Average speed
● Digital speed
● Fuel range
● Instantaneous fuel consumption
● Remaining oil life
● Tyre pressure
● Traffic sign assistant
● Following distance
● Timer
● AdBlue level
On Midlevel display the pages
Remaining Oil Life, Tyre Pressure,
Traffic Sign Assistant and Following
Distance are displayed in the Vehicle information menu, select ?.
Trip odometer 1/2 or A/B
Trip odometer displays the current
distance since a certain reset.
Trip odometer counts up to a distance
of 9,999 miles then restarts at 0.
Page 102 of 253
100Instruments and controlsDuring sporadic driving conditions,
the engine will activate the heated
rear window automatically to increase
the engine load. In this event, the
heated rear window is indicated as
one of the top consumers, without
activation by the driver.
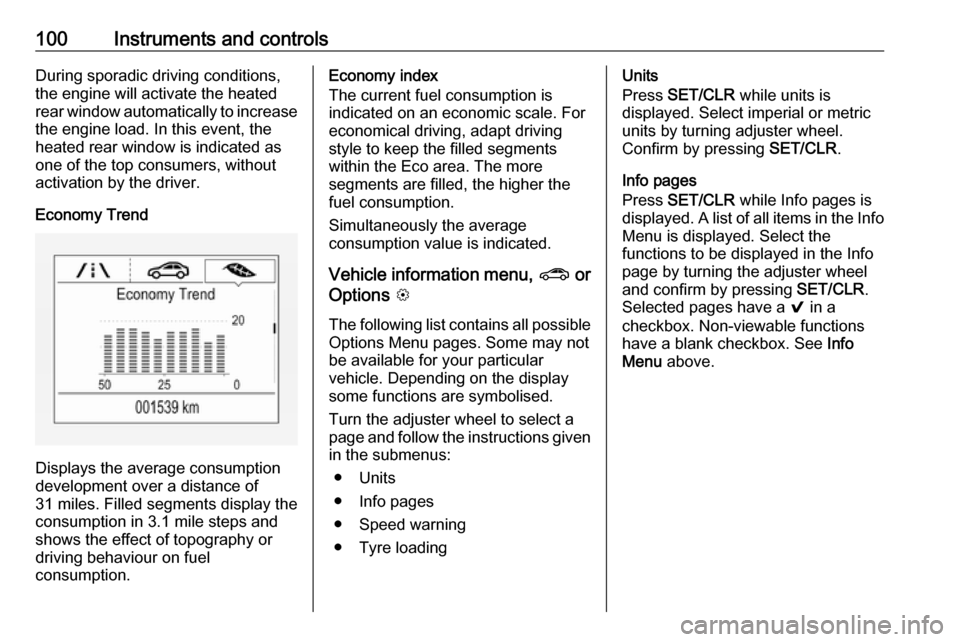
Economy Trend
Displays the average consumption
development over a distance of
31 miles. Filled segments display the
consumption in 3.1 mile steps and
shows the effect of topography or
driving behaviour on fuel
consumption.
Economy index
The current fuel consumption is
indicated on an economic scale. For
economical driving, adapt driving
style to keep the filled segments
within the Eco area. The more
segments are filled, the higher the
fuel consumption.
Simultaneously the average
consumption value is indicated.
Vehicle information menu, ? or
Options L
The following list contains all possible
Options Menu pages. Some may not
be available for your particular
vehicle. Depending on the display
some functions are symbolised.
Turn the adjuster wheel to select a
page and follow the instructions given in the submenus:
● Units
● Info pages
● Speed warning
● Tyre loadingUnits
Press SET/CLR while units is
displayed. Select imperial or metric units by turning adjuster wheel.
Confirm by pressing SET/CLR.
Info pages
Press SET/CLR while Info pages is
displayed. A list of all items in the Info
Menu is displayed. Select the
functions to be displayed in the Info
page by turning the adjuster wheel
and confirm by pressing SET/CLR.
Selected pages have a 9 in a
checkbox. Non-viewable functions
have a blank checkbox. See Info
Menu above.