2019 TOYOTA SUPRA clock
[x] Cancel search: clockPage 35 of 456
35
2
Supra Owner's Manual2-1. QUICK REFERENCE
QUICK REFERENCE
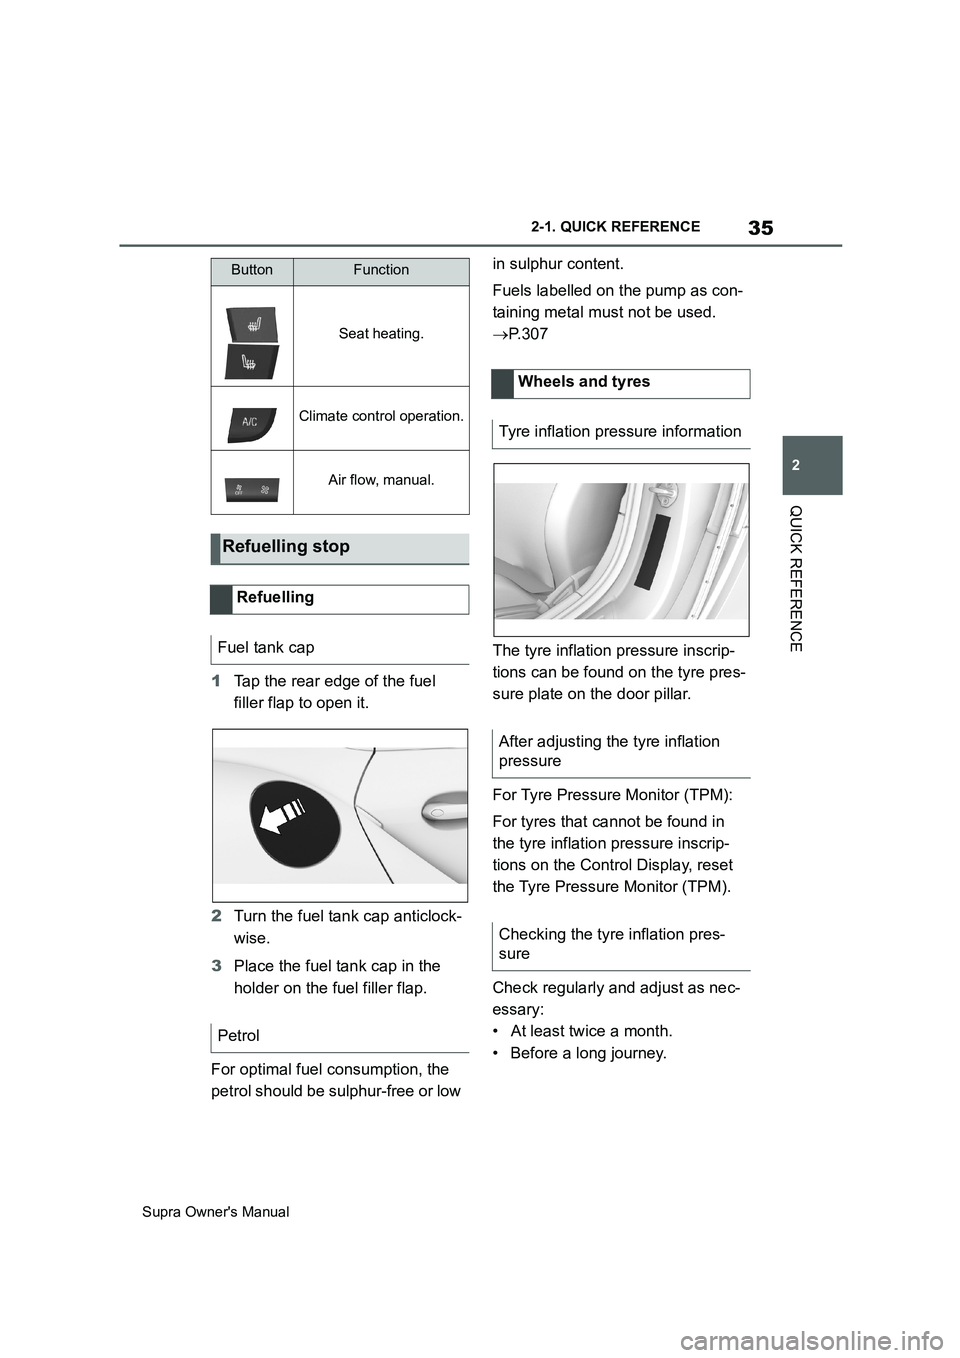
1Tap the rear edge of the fuel
filler flap to open it.
2Turn the fuel tank cap anticlock-
wise.
3Place the fuel tank cap in the
holder on the fuel filler flap.
For optimal fuel consumption, the
petrol should be sulphur-free or low in sulphur content.
Fuels labelled on the pump as con-
taining metal must not be used.
P. 3 0 7
The tyre inflation pressure inscrip-
tions can be found on the tyre pres-
sure plate on the door pillar.
For Tyre Pressure Monitor (TPM):
For tyres that cannot be found in
the tyre inflation pressure inscrip-
tions on the Control Display, reset
the Tyre Pressure Monitor (TPM).
Check regularly and adjust as nec-
essary:
• At least twice a month.
• Before a long journey.
Seat heating.
Climate control operation.
Air flow, manual.
Refuelling stop
Refuelling
Fuel tank cap
Petrol
ButtonFunction
Wheels and tyres
Tyre inflation pressure information
After adjusting the tyre inflation
pressure
Checking the tyre inflation pres-
sure
Page 180 of 456

180
Supra Owner's Manual3-1. CONTROLS
no longer be sufficient.
In a side-on crash, the side airbag
supports the body from the side in
the chest, pelvic and head area.
The knee airbag supports the legs
in the event of a head-on collision.
The curtain shield airbag supports
the head in the event of a side-on
crash.
Airbags are not activated in every
collision, for example in minor acci-
dents and rear-end collisions.
Keep your distance from the
airbags.Always grip the steering wheel
on the steering wheel rim. Place
your hands in the 3 o'clock and 9
o'clock positions to minimise the
risk of injury to hands or arms
when the airbag deploys.
Make sure that the front-seat
passenger is sitting correctly, in
other words with feet or legs in
the footwell, not resting on the
dashboard.
Make sure that vehicle occu-
pants keep their head away from
the side airbag.
Do not position any other per-
sons, pets or objects between
the airbags and persons.
Keep the dashboard and wind-
screen in the area of the passen-
ger's side free, for example do
not attach adhesive foil or covers
and do not fit brackets for navi-
gation devices or mobile tele-
phones.
Do not attach anything to the
airbag covers with adhesive;
never cover them or modify them
in any way.
Do not use the front airbag cover
on the front passenger's side as
a tray.
Covers, seat covers, cushions or
other objects not specifically suit-
able for seats with integral side
airbags must not be fitted to the
front seats.
Do not hang items of clothing for Side airbag
Knee airbag
Curtain shield airbag
Protective effect
General
Notes on achieving optimum
airbag effectiveness
WARNING
If the seat position is wrong or the
deployment area of the airbag is
restricted, the airbag system cannot
provide the intended protection or
may cause additional injuries when it
deploys. There is a danger of injury or
even death. Observe the following to
achieve optimum protective effect.
Page 251 of 456
251
3
Supra Owner's Manual3-1. CONTROLS
CONTROLSPress any button, with the following
exceptions:
Switch off.
Rear window heating.
Seat heating.
Complete system:
The automatic air conditioning
adjusts to the set temperature as
quickly as possible, using maxi-
mum cooling or heating power if
necessary. The temperature is then
maintained.Via Toyota Supra Command:
1"My Vehicle"
2"Vehicle settings"
3"Climate comfort"
4"Temperature adjustment, upper
body"
5Set the desired temperature.
Avoid switching between different
temperature settings in rapid suc-
cession. The automatic air condi-
tioning may not have sufficient time
to establish the temperature
selected.
Interior air is cooled and dried, then
reheated to suit the temperature
setting.
The interior can only be cooled
when drive-ready state is switched
on.
Seat heating, see page
107.
Air flow, manual, see page
253.
Switching on/off
Switching on
Switching off
Press and hold the button.
Te m p e r a t u r e
Principle
ButtonFunctionAdjusting
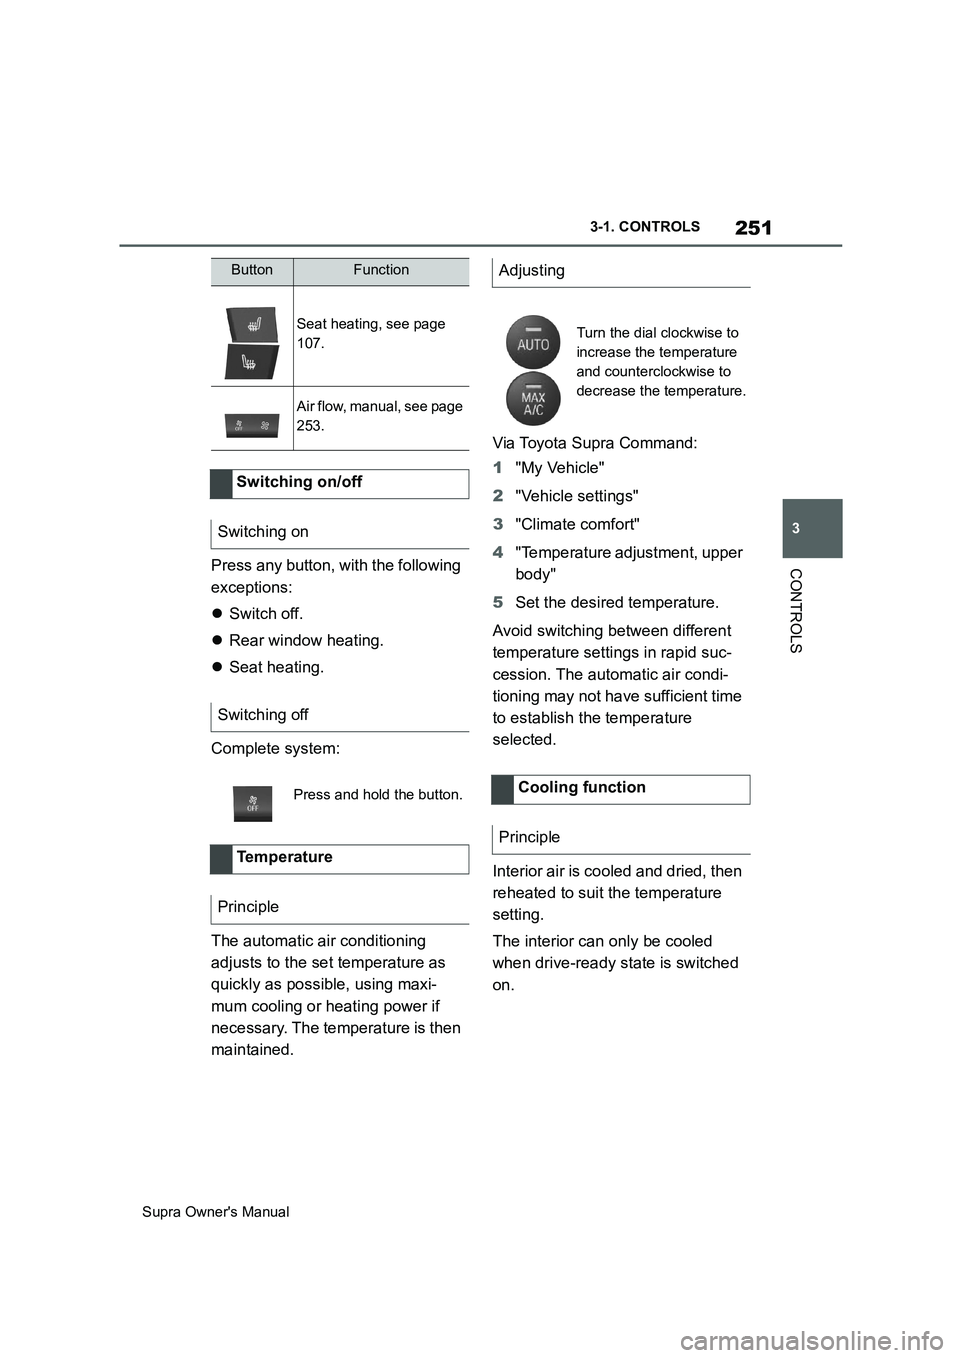
Turn the dial clockwise to
increase the temperature
and counterclockwise to
decrease the temperature.
Cooling function
Principle
Page 277 of 456
277
5
Supra Owner's Manual5-1. MOBILITY
MOBILITY
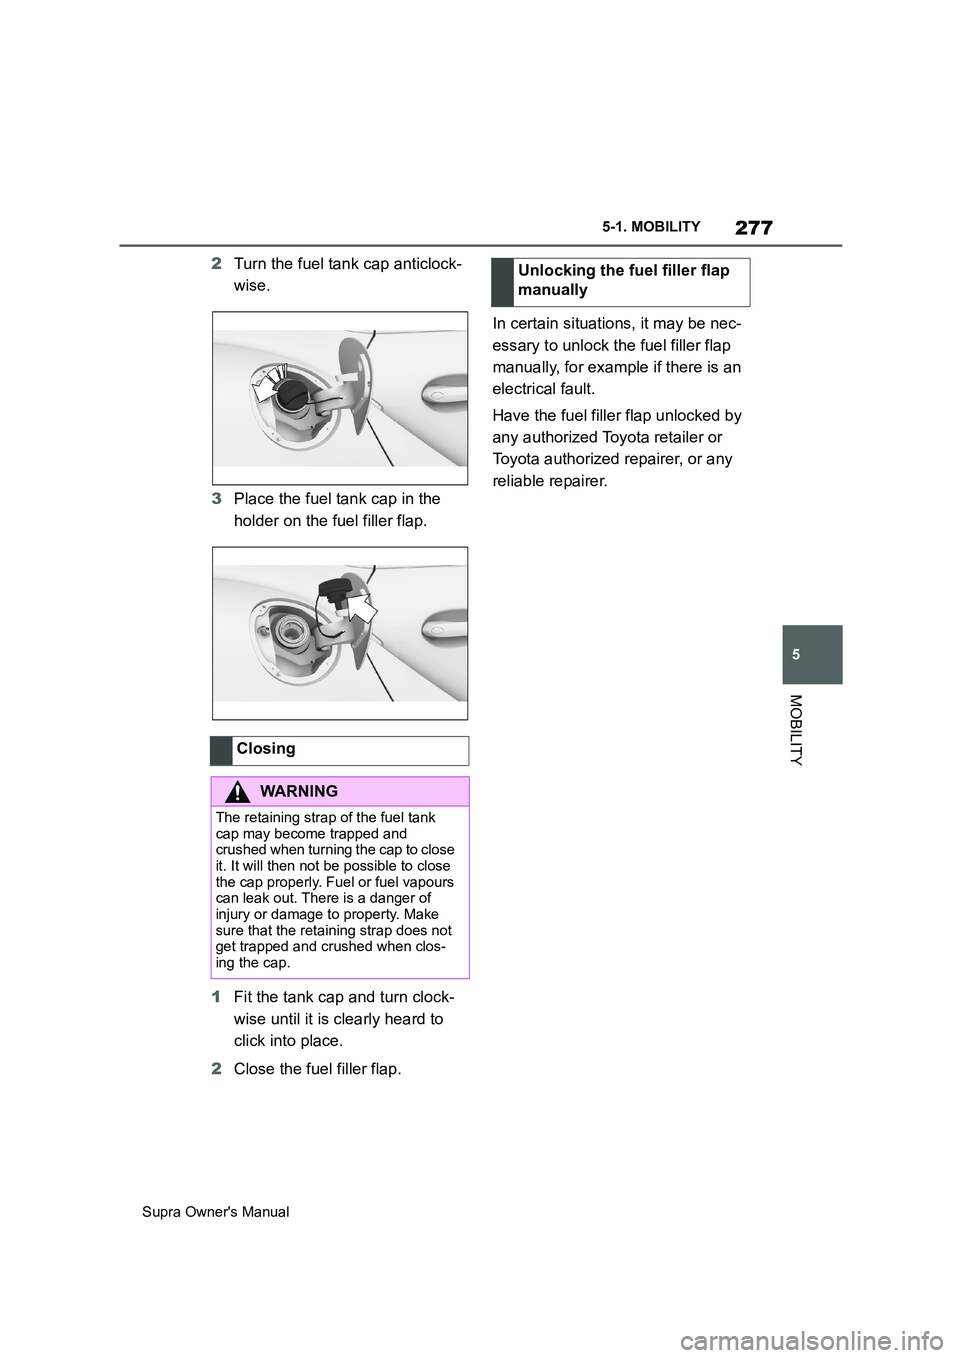
2Turn the fuel tank cap anticlock-
wise.
3Place the fuel tank cap in the
holder on the fuel filler flap.
1Fit the tank cap and turn clock-
wise until it is clearly heard to
click into place.
2Close the fuel filler flap.In certain situations, it may be nec-
essary to unlock the fuel filler flap
manually, for example if there is an
electrical fault.
Have the fuel filler flap unlocked by
any authorized Toyota retailer or
Toyota authorized repairer, or any
reliable repairer.
Closing
WARNING
The retaining strap of the fuel tank
cap may become trapped and
crushed when turning the cap to close
it. It will then not be possible to close
the cap properly. Fuel or fuel vapours
can leak out. There is a danger of
injury or damage to property. Make
sure that the retaining strap does not
get trapped and crushed when clos-
ing the cap.
Unlocking the fuel filler flap
manually
Page 302 of 456
302
Supra Owner's Manual5-1. MOBILITY
closest to the wheel to be
changed.
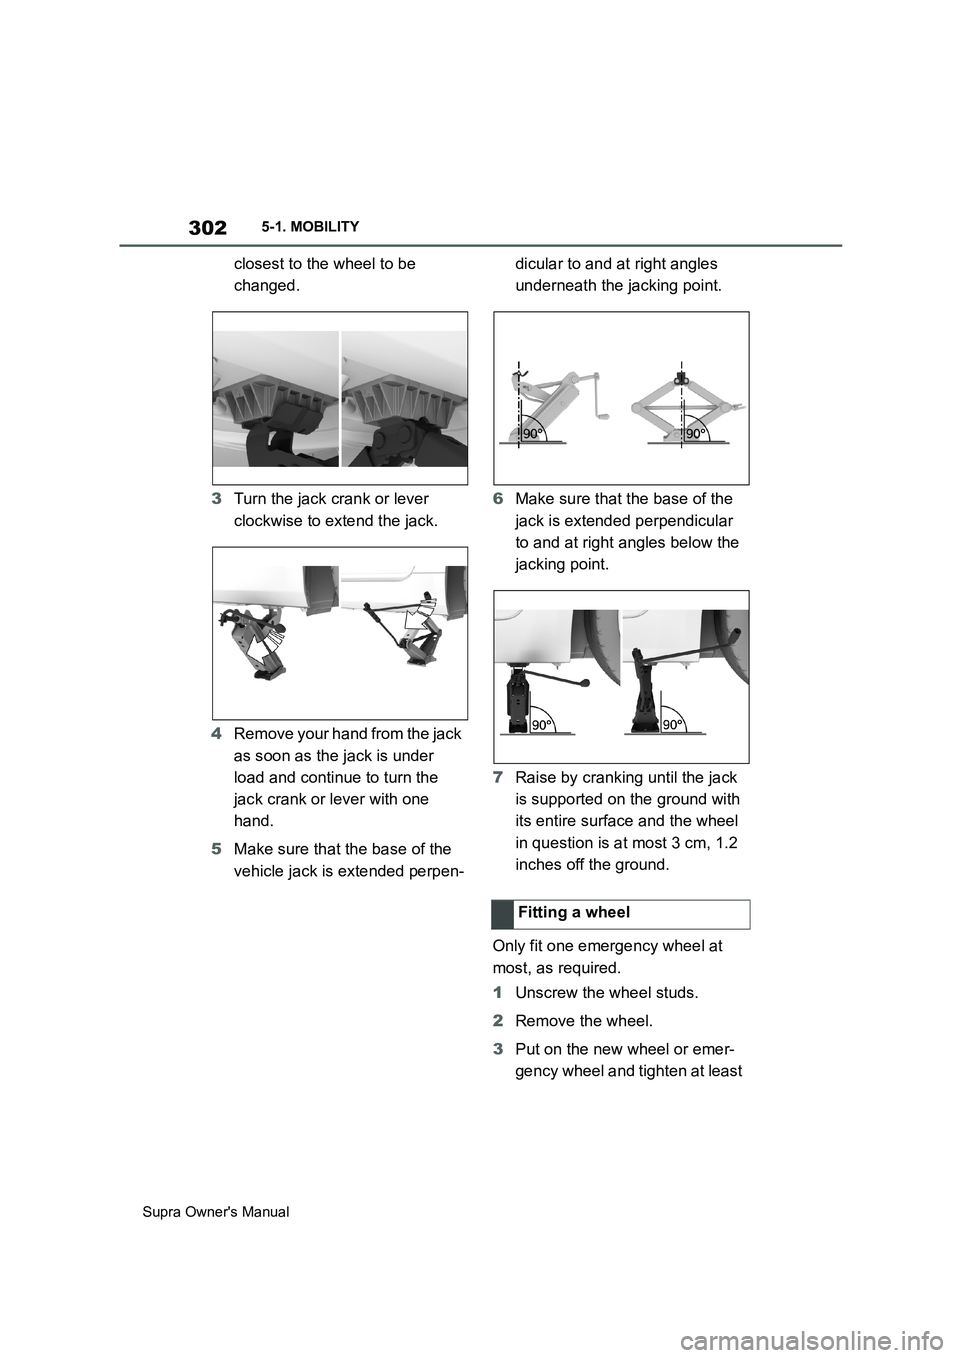
3Turn the jack crank or lever
clockwise to extend the jack.
4Remove your hand from the jack
as soon as the jack is under
load and continue to turn the
jack crank or lever with one
hand.
5Make sure that the base of the
vehicle jack is extended perpen-dicular to and at right angles
underneath the jacking point.
6Make sure that the base of the
jack is extended perpendicular
to and at right angles below the
jacking point.
7Raise by cranking until the jack
is supported on the ground with
its entire surface and the wheel
in question is at most 3 cm, 1.2
inches off the ground.
Only fit one emergency wheel at
most, as required.
1Unscrew the wheel studs.
2Remove the wheel.
3Put on the new wheel or emer-
gency wheel and tighten at least
Fitting a wheel
Page 303 of 456
303
5
Supra Owner's Manual5-1. MOBILITY
MOBILITY
two wheel studs crosswise until
finger-tight.
If non-original light alloy wheels not
from the vehicle manufacturer are fit-
ted, the wheel studs belonging to the
wheels may also have to be used.
4Tighten the remaining wheels
tuds until finger-tight and then
tighten all the wheel studs
crosswise.
5Turn the jack crank anticlock-
wise to retract the jack and
lower the vehicle.
6Remove the jack and stow it
securely.
1Tighten the wheel studs cross-
wise. The tightening torque
is140 Nm, approximately 101 lb
ft.
2Stow the faulty wheel in the
boot, if necessary.
Due to its size, the faulty wheel cannot
be accommodated under the boot floor.
3Check tyre inflation pressure at
the next opportunity and correct
as necessary.
4Reset the Tyre Pressure Monitor
(TPM).
5Check the tight fit of the wheel
studs using a calibrated torque
wrench.
6Drive to the nearest any author-
ized Toyota retailer or Toyota
authorized repairer, or any relia-ble repairer to have the dam-
aged tyre replaced.
In case of a flat tyre, the emergency
wheel can be used as a replace-
ment for the defective tyre. The
emergency wheel is intended for
short-term use until the defective
wheel has been replaced.
Only fit one emergency wheel at
most.
Additionally, regularly check the
tyre inflation pressure of the emer-
gency wheel in the boot and correct
the pressure if necessary. After changing the wheel
Emergency wheel
Principle
General
Safety note
WARNING
The emergency wheel has special
dimensions. When driving with an
emergency wheel, the driving proper-
ties may change, for example
reduced directional stability when
braking, longer braking distance and
modified self-steering behaviour in
the limit range. There is a danger of
accidents. Drive with care and do not
exceed a speed of 80 km/h, 50 mph.
Page 311 of 456
311
5
Supra Owner's Manual5-1. MOBILITY
MOBILITY
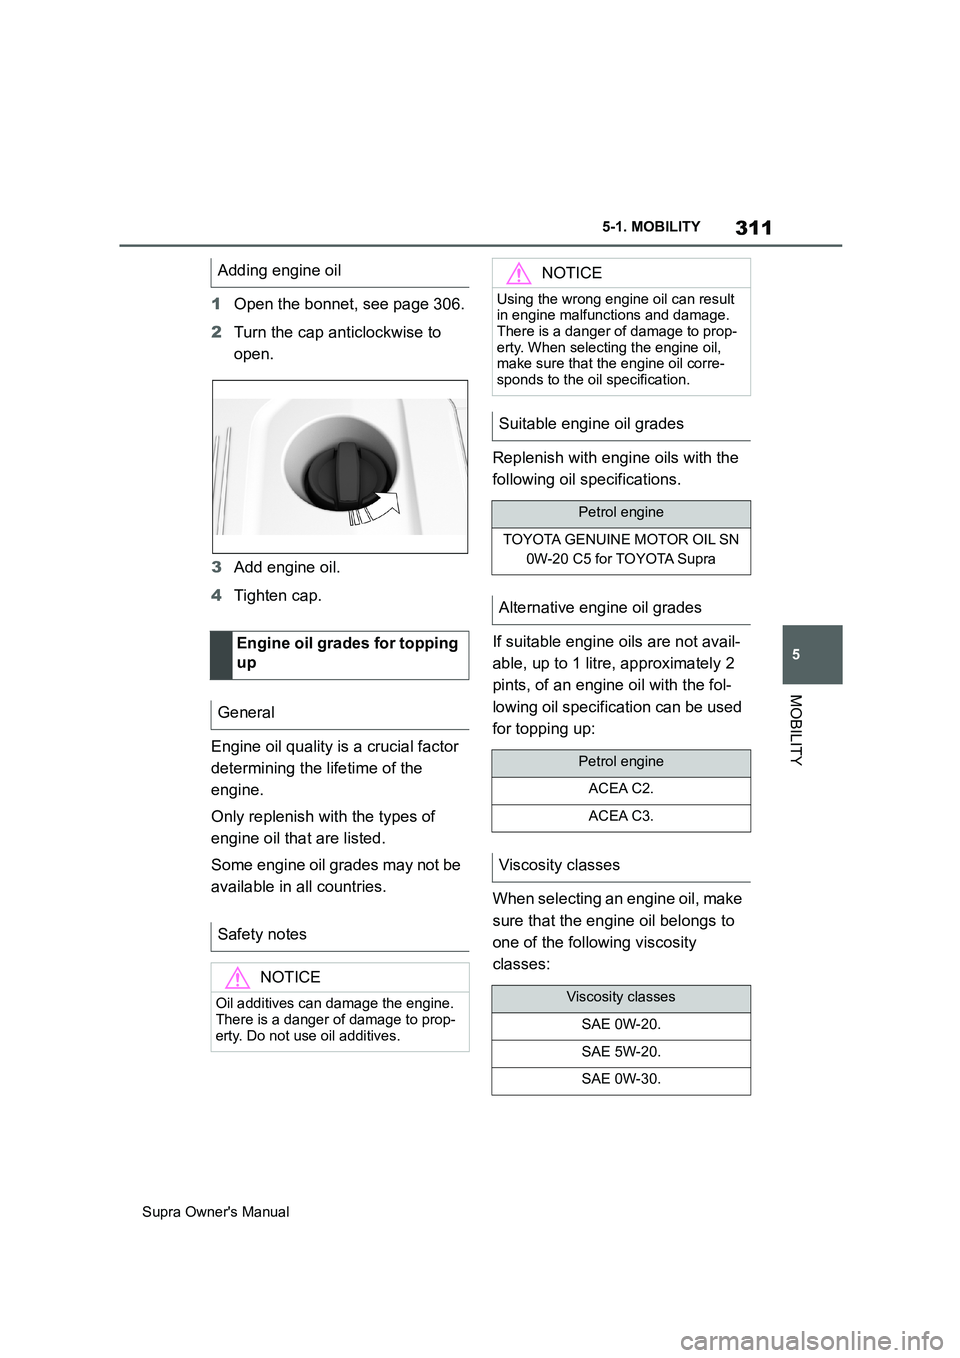
1Open the bonnet, see page 306.
2Turn the cap anticlockwise to
open.
3Add engine oil.
4Tighten cap.
Engine oil quality is a crucial factor
determining the lifetime of the
engine.
Only replenish with the types of
engine oil that are listed.
Some engine oil grades may not be
available in all countries.Replenish with engine oils with the
following oil specifications.
If suitable engine oils are not avail-
able, up to 1 litre, approximately 2
pints, of an engine oil with the fol-
lowing oil specification can be used
for topping up:
When selecting an engine oil, make
sure that the engine oil belongs to
one of the following viscosity
classes: Adding engine oil
Engine oil grades for topping
up
General
Safety notes
NOTICE
Oil additives can damage the engine.
There is a danger of damage to prop-
erty. Do not use oil additives.
NOTICE
Using the wrong engine oil can result
in engine malfunctions and damage.
There is a danger of damage to prop-
erty. When selecting the engine oil,
make sure that the engine oil corre-
sponds to the oil specification.
Suitable engine oil grades
Petrol engine
TOYOTA GENUINE MOTOR OIL SN
0W-20 C5 for TOYOTA Supra
Alternative engine oil grades
Petrol engine
ACEA C2.
ACEA C3.
Viscosity classes
Viscosity classes
SAE 0W-20.
SAE 5W-20.
SAE 0W-30.
Page 313 of 456
313
5
Supra Owner's Manual5-1. MOBILITY
MOBILITY
1Allow the engine to cool down.
2Open the bonnet, see page 306.
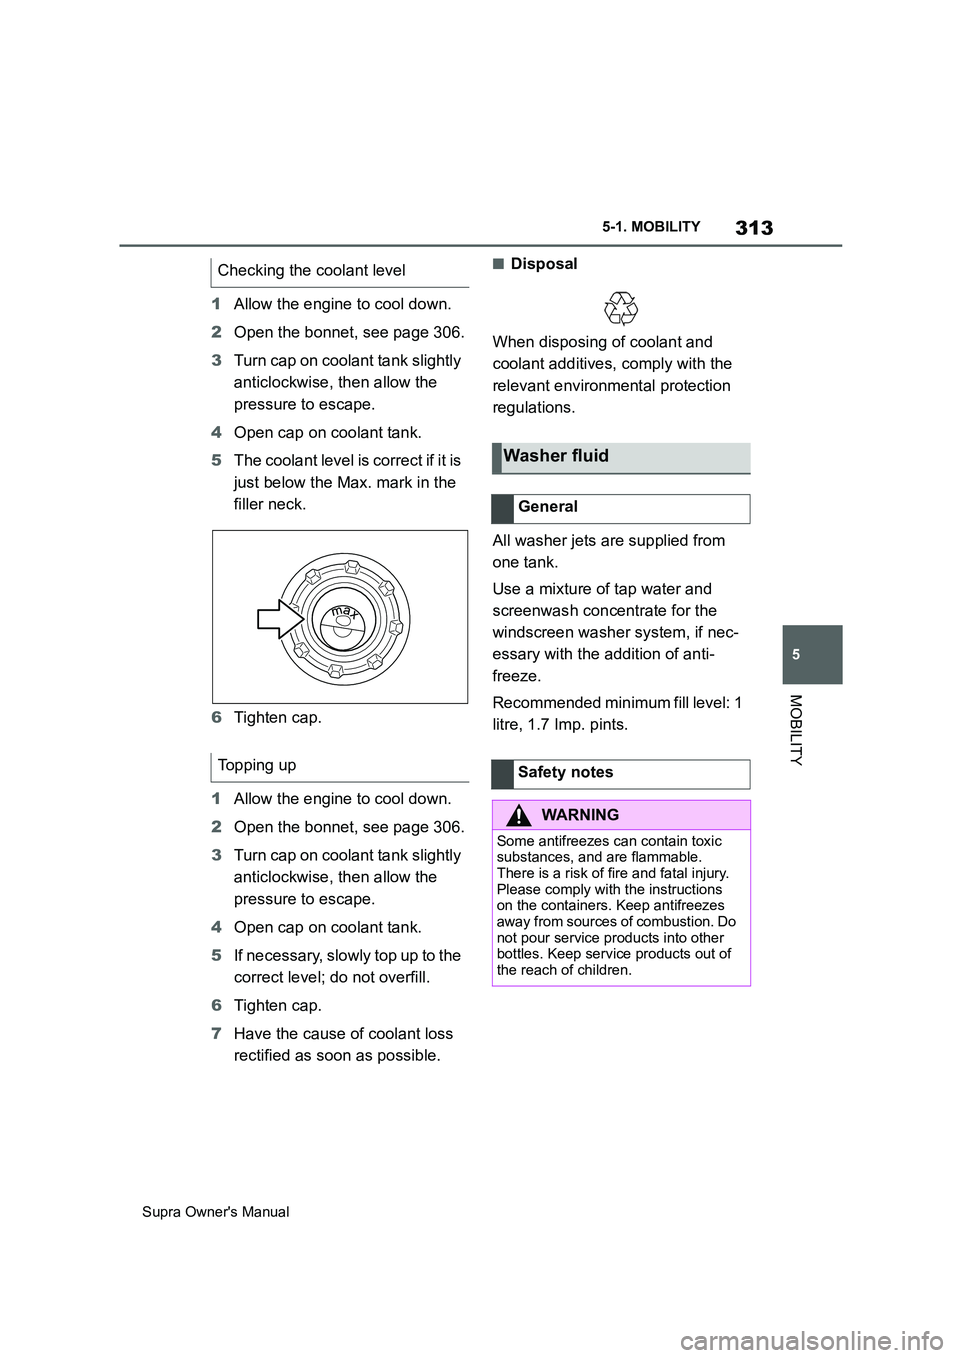
3Turn cap on coolant tank slightly
anticlockwise, then allow the
pressure to escape.
4Open cap on coolant tank.
5The coolant level is correct if it is
just below the Max. mark in the
filler neck.
6Tighten cap.
1Allow the engine to cool down.
2Open the bonnet, see page 306.
3Turn cap on coolant tank slightly
anticlockwise, then allow the
pressure to escape.
4Open cap on coolant tank.
5If necessary, slowly top up to the
correct level; do not overfill.
6Tighten cap.
7Have the cause of coolant loss
rectified as soon as possible.
■Disposal
When disposing of coolant and
coolant additives, comply with the
relevant environmental protection
regulations.
All washer jets are supplied from
one tank.
Use a mixture of tap water and
screenwash concentrate for the
windscreen washer system, if nec-
essary with the addition of anti-
freeze.
Recommended minimum fill level: 1
litre, 1.7 Imp. pints. Checking the coolant level
Topping up
Washer fluid
General
Safety notes
WARNING
Some antifreezes can contain toxic
substances, and are flammable.
There is a risk of fire and fatal injury.
Please comply with the instructions
on the containers. Keep antifreezes
away from sources of combustion. Do
not pour service products into other
bottles. Keep service products out of
the reach of children.