Page 4 of 505

.
.
Driving recommendations 192Starting-switching off the engine, manual key, remote control 195Starting and switching off the engine, 198"Smart Entry & Start System" 198Parking brake 201Hill start assist control (HAC) 2025 -speed manual gearbox 2036 -speed manual gearbox 203Gear shift indicator 204Automatic gearbox 205Electronic gearbox 210Stop & Start 214Head-up display 218Adjustable Speed Limiter (ASL) 220Road Sign Assist 221Speed limiter 225Cruise control 228Adaptive cruise control 232Forward collision warning and Autonomous emergency braking system with Pedestrian Detection 239Lane Departure Alert 245Driver Attention Alert 247Blind spot monitoring system 249Parking sensors 252Reversing camera, interior mirror 254180° rear vision 255Tyre Pressure Warning System (TPWS) 258
Fuel tank 261Diesel misfuel prevention 262Snow chains 264Towing a trailer 265Energy economy mode 266Accessories 267Roof bars / Roof rack 268Changing a wiper blade 269B o nn et 271Diesel engine 272Checking levels 273Checks 276AdBlue® and SCR system (Diesel) 278
Warning triangle (stowing) 282Tool box 282Temporary puncture repair kit 285Changing a wheel 291Changing a bulb 298Changing a fuse 31112 V battery 316To w i n g 3 2 0Running out of fuel (Diesel) 322
Dimensions 323Engines 324Weights 324Identification markings 327
DrivingPractical information
In the event of a breakdown
Technical data
Emergency or assistance 328Toyota Pro Touch with navigation system 331To y o t a P r o To u c h 419Toyota Radio Bluetooth 473
Audio and telematics
Alphabetical index
Contents
Page 8 of 505
 6 8 -71Electric child lock 190Hazard warning lamps 158Tyre Pressure Warning System (TPWS) 258-260Deactivating Stop & Start 216De")
7
Locking - unlocking from inside 64Electric sliding d o o r (s) 6 8 -71Electric child lock 190Hazard warning lamps 158Tyre Pressure Warning System (TPWS) 258-260Deactivating Stop & Start 216Deactivating the DSC/ASR system 161
Adjusting the steering wheel 87Hor n 159
Head-up display 218 -219
Instruments and controls (cont.)
Wiper control 154-156Trip computer 38 - 40
Memorising speeds 220Speed limiter 225 -227Cruise control 228 -231Dynamic cruise control 232-238
Instrument panel 13 -14Warning lamps 15-28Coolant temperature 29Ser vice indicator 29 -31Oil level indicator 32AdBlue® range indicators 33 -35Distance recorder 36Gear efficiency indicator 204Lighting dimmer 37Trip computer 38 - 40Setting the time and date 44Driver Attention Alert 247-248
Electric windows 86Adjusting the electric mirrors 141
Toyota Traction Select 161, 162-163Fuel burner heater/Remote controlled fuel burner heater 137-139Alarm 83-85Adjusting the headlamp beam height 153Lane Departure Alert 245 -246Blind Spot Monitoring System 249 -251Automatic headlamp dipping 151-152
Setting the time and date (touch screen) 44Setting the time and date (audio system) 44Rear vision 255 -257Adjustable Speed Limiter (ASL) 220Road Sign Assist 221-224, 227, 230, 234For ward collision warning 239 -242Autonomous emergency braking 242-244Deactivating Stop & Start 216
Lighting control 144-147Direction indicators 146
.
Over view
Page 42 of 505
41
Use this button to confirm.
Use this button to quit.
Use the buttons on either side of the touch screen for access to the menus, then press the virtual buttons in the touch screen.
Menus
Driving.Allows certain functions to be switched on and off and their settings adjusted.
Telephone.
Radio Media.
Connected navigation.
Settings.Allows configuration of the display and the system.
Connectivity.
Adjust volume/Mute.On/Off.
Touch screen
As a safety measure, the driver must only carry out operations requiring sustained attention with the vehicle stationary.
For more information on the touch screen, refer to the Audio and telematics section.
1
Instruments
Page 45 of 505
44
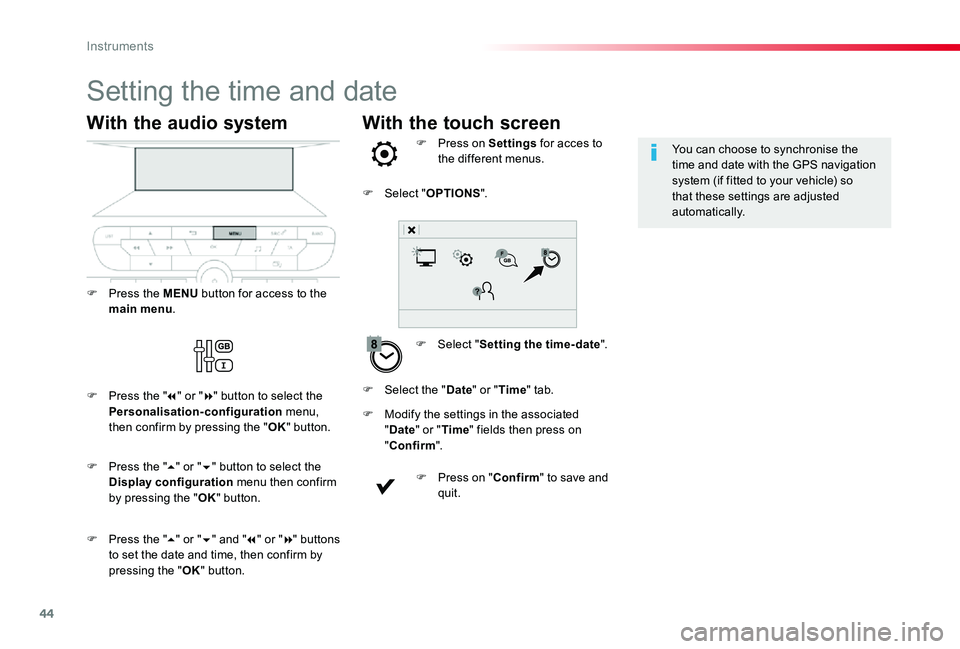
With the touch screen
Setting the time and date
F Select "Setting the time- date".
F Press on Settings for acces to the different menus.
F Modify the settings in the associated "Date" or "Time" fields then press on "Confirm".
F Press on "Confirm" to save and quit.
F Select "OPTIONS".
F Select the "Date" or "Time" tab.
You can choose to synchronise the time and date with the GPS navigation system (if fitted to your vehicle) so that these settings are adjusted automatically.
With the audio system
F Press the MENU button for access to the main menu.
F Press the "7" or "8" button to select the Personalisation-configuration menu, then confirm by pressing the "OK" button.
F Press the "5" or "6" and "7" or "8" buttons to set the date and time, then confirm by pressing the "OK" button.
F Press the "5" or "6" button to select the Display configuration menu then confirm by pressing the "OK" button.
Instruments
Page 78 of 505

77
With the audio system
In the vehicle settings menu, activate/deactivate "Hands-free access".
With the touch screen
In the "Personalisation-Configuration" menu, activate/deactivate "Hands-free access".
Then, if you want automatic locking after closing the door, activate/deactivate "Hands-free access self-locking".
Deactivation
By default, hands-free access is activated.The function can be deactivated in the vehicle configuration menu.
Automatic locking
The vehicle locks itself following the Kick-activated closing of a sliding door.The automatic locking can be deactivated in the vehicle configuration menu.
If your vehicle is not fitted with an alarm, locking is confirmed by fixed illumination of the direction indicators for about two seconds.Depending on version, the door mirrors
fold at the same time.
Operating fault
An audible signal repeated three times indicates a fault with the system.
Contact an authorized Toyota dealer or repairer, or another duly qualified and equipped professional to have the system checked.
2
Access
Page 114 of 505

(depending on version)
USB port
F To connect a 12 V accessory (maximum power: 120 Watts), lift the cover and connect a suitable adaptor.
It allows the connection of a port")
113
12 V accessory socket(s)
(depending on version)
USB port
F To connect a 12 V accessory (maximum power: 120 Watts), lift the cover and connect a suitable adaptor.
It allows the connection of a portable device, such as a digital audio player of the iPod® type or a USB memory stick.It reads the audio files which are transmitted to your audio system and played via the vehicle's speakers.You can manage these files using the steering mounted controls or the audio system.
When a USB port is used, the portable device charges automatically.While charging, a message is displayed if the current consumption of the portable device exceeds the power rating of the port.For more information on using this equipment, refer to the Audio and telematics section.
Obser ve the maximum power rating to avoid damaging your accessory.
The connection of an electrical device not approved by Toyota, such as a USB charger, may adversely affect the operation of vehicle electrical systems, causing faults such as poor telephone reception or inter ference with displays in the screens.
3
Ease of use and comfort
Page 138 of 505

137
Heating
This is an additional and separate system which heats the engine hot water circuit to heat the passenger compartment and improve defrosting.
This indicator lamp is on when if the system is programmed to come on for heating.This indicator lamp flashes while the heating is operating.
Fuel burner heater/Remote controlled fuel burner heater
Ventilation
This system allows ventilation of the passenger compartment to improve the temperature
experienced on entering the vehicle in summer.
Programming
Audio system
F Press on the MENU button to go to the main menu.
F Select "Pre-heat. / Pre-ventil.".
F Select "Heating" to heat the engine and passenger compartment or "Ventilation" to ventilate the passenger compartment.
F Select:- the 1st clock to programme/memorise the time at which the pre-heating temperature will be reached,- the 2nd clock to programme/memorise a second time at which the pre-heating temperature will be reached.
Using these two clocks and depending on the season you can, for example, select one or the other start time.A message in the screen confirms your choice.
F Select "Activation" and if necessary for programming, select "Parameters".
3
Ease of use and comfort
Page 149 of 505
148
Temporarily keeping the dipped beam headlamps on after the vehicle's ignition has been switched off makes the driver's exit easier when the light is poor.
Manual guide-me-home
lighting
F With the ignition off, "flash" the headlamps using the lighting stalk.
F A further "headlamp flash" switches the function off.
Switching off
The manual guide-me-home lighting switches off automatically after a set time.
Automatic guide-me-home
lighting
When the automatic illumination of headlamps function is activated, under low ambient light the dipped beam headlamps come on automatically when the ignition is switched off.
Programming
The activation, deactivation and selection of period the guide-me-home lighting is kept on can be set.
With the audio system
In the "Personalisation-configuration" menu, activate/deactivate "Follow-me-home headlamps".
In the vehicle settings menu, activate/deactivate "Guide-me-home lighting".
With the touch screen
Switching on
Lighting and visibility