2019 TOYOTA PROACE CITY VERSO ECO mode
[x] Cancel search: ECO modePage 21 of 272
21
Instruments
1
► Adjust the brightness by pressing the arrows or moving the slider.
NOTIC E
The brightness can be set differently for day mode and night mode.
Trip computer
Information displayed about the current journey (range, fuel consumption, average speed, etc.).
Information display
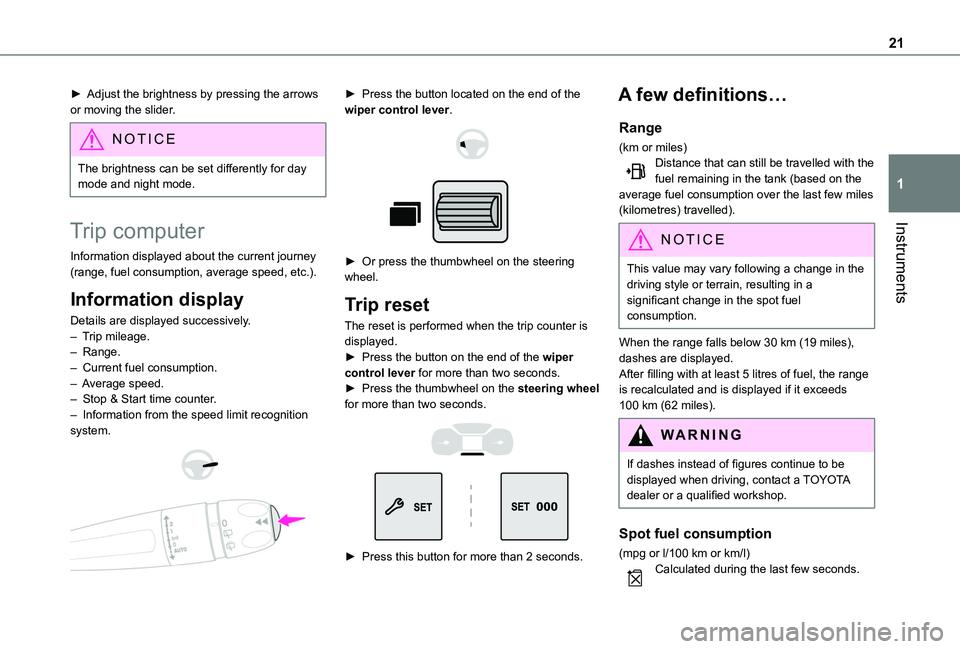
Details are displayed successively.– Trip mileage.– Range.– Current fuel consumption.– Average speed.– Stop & Start time counter.– Information from the speed limit recognition system.
► Press the button located on the end of the wiper control lever.
► Or press the thumbwheel on the steering wheel.
Trip reset
The reset is performed when the trip counter is displayed.► Press the button on the end of the wiper control lever for more than two seconds.► Press the thumbwheel on the steering wheel for more than two seconds.
► Press this button for more than 2 seconds.
A few definitions…
Range
(km or miles)Distance that can still be travelled with the fuel remaining in the tank (based on the average fuel consumption over the last few miles (kilometres) travelled).
NOTIC E
This value may vary following a change in the driving style or terrain, resulting in a significant change in the spot fuel consumption.
When the range falls below 30 km (19 miles), dashes are displayed.After filling with at least 5 litres of fuel, the range is recalculated and is displayed if it exceeds 100 km (62 miles).
WARNI NG
If dashes instead of figures continue to be displayed when driving, contact a TOYOTA dealer or a qualified workshop.
Spot fuel consumption
(mpg or l/100 km or km/l)Calculated during the last few seconds.
Page 22 of 272
22
NOTIC E
This function is only displayed at speeds above 30 km/h (19 mph).
Average fuel consumption
(mpg or l/100 km or km/l)Calculated since the last trip computer reset.
Average speed
(km/h or mph)Calculated since the last trip computer reset.
Distance travelled
(km or miles)Calculated since the last trip computer reset.
Stop & Start time counter
(minutes/seconds or hours/minutes)
If your vehicle is fitted with Stop & Start, a time counter calculates the time spent in STOP mode during a journey.It resets to zero every time the ignition is switched on.
Setting the date and time
Without audio system
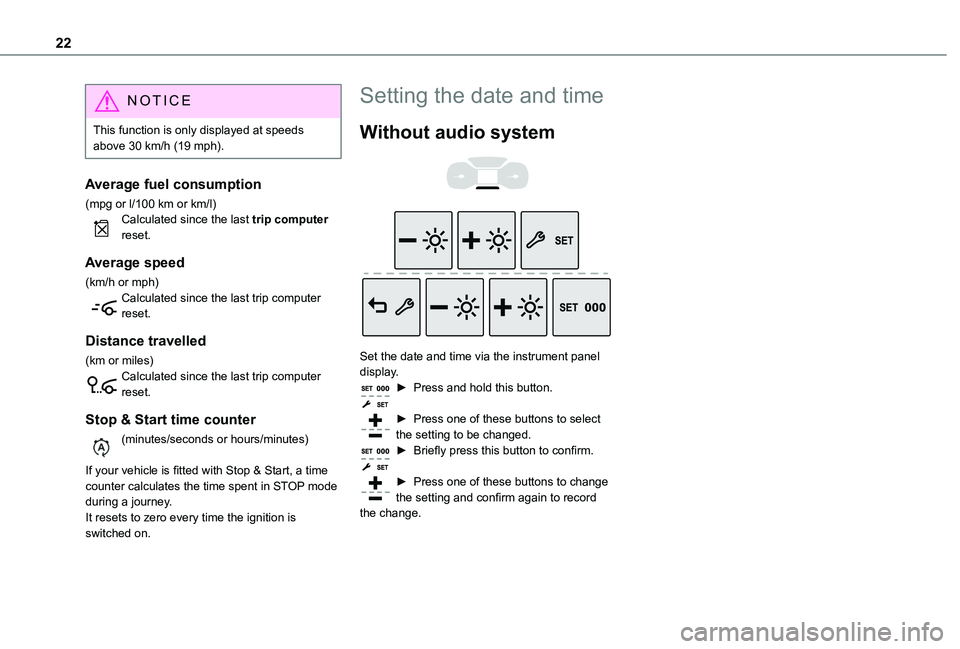
Set the date and time via the instrument panel display.► Press and hold this button.
► Press one of these buttons to select the setting to be changed.► Briefly press this button to confirm.
► Press one of these buttons to change the setting and confirm again to record the change.
Page 24 of 272
24
NOTIC E
If one of the doors or the boot is still open or if the electronic key for the Keyless Entry and Starting system has been left inside the vehicle, central locking will be disabled.However, if the vehicle is fitted with an alarm, it will be activated after 45 seconds.
NOTIC E
If the vehicle is unlocked but the doors or tailgate are not subsequently opened, the vehicle will automatically lock itself again after approximately 30 seconds. If the vehicle is fitted with an alarm, it will also be reactivated automatically.
NOTIC E
Automatic door mirror folding and unfolding can be deactivated by a TOYOTA dealer or a qualified workshop.
WARNI NG
As a safety measure, never leave the vehicle, even for a short time, without taking the
Keyless Entry and Starting system’s electronic key with you.Be aware of the risk of theft of the vehicle if the key is present in one of the defined areas while the vehicle is unlocked.
WARNI NG
To preserve the battery charge in the electronic key and the vehicle's battery, the "hands-free" functions are set to hibernation mode after 21 days without use. To restore these functions, press one of the remote control buttons or start the engine with the electronic key in the reader.For more information on starting with the Keyless Entry and Starting system, refer to the corresponding section.
NOTIC E
Electrical interferenceThe electronic key may not operate if close to certain electronic devices: telephone (switched on or on standby), laptop computer, strong magnetic fields, etc.
Locating the vehicle
This function helps you to spot your vehicle from a distance, with the vehicle locked:
– The direction indicators flash for approximately 10 seconds.– The courtesy lamps come on.► Press this button.
Remote lighting
Briefly pressing this button switches on the lighting remotely (sidelamps, dipped beam headlamps and number plate lamps).Pressing this button again before the end of the timed period cancels remote lighting.
Advice
WARNI NG
Remote controlThe remote control is a sensitive, high-frequency device; avoid handling it in your pocket, due to the risk of unintentionally unlocking the vehicle.Avoid pressing the remote control buttons while out of range of the vehicle, due to the risk of rendering the remote control inoperative. It would then be necessary to reset it.The remote control does not work when the key is in the ignition switch, even when the ignition is switched off.
Page 30 of 272
30
Without Keyless Entry and Starting ‒ Battery type: CR2032 / 3 volts.
With Keyless Entry and Starting ‒ Battery type: CR2032 / 3 volts.
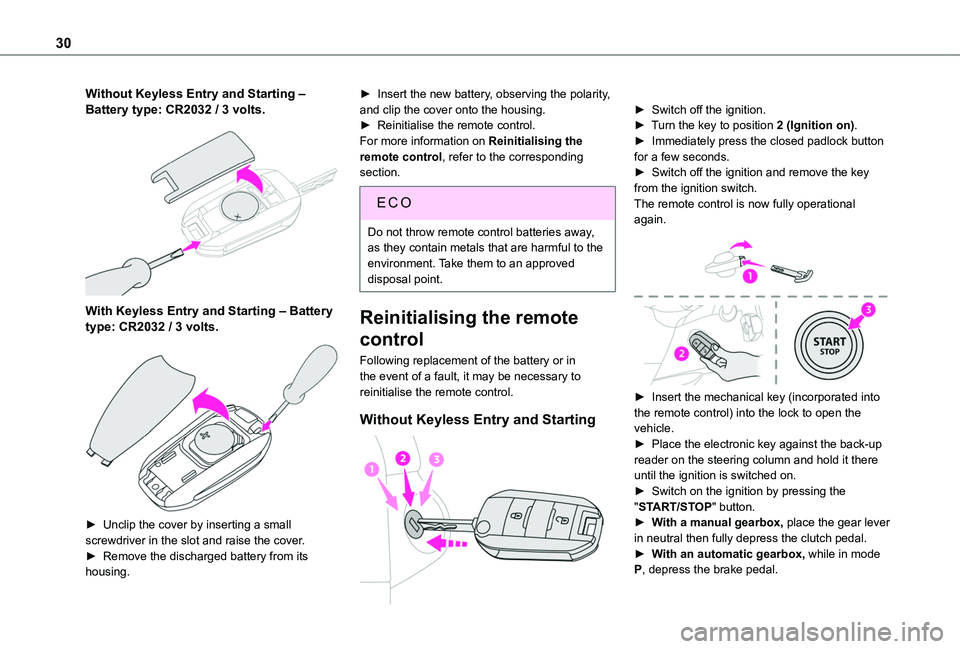
► Unclip the cover by inserting a small screwdriver in the slot and raise the cover.
► Remove the discharged battery from its housing.
► Insert the new battery, observing the polarity, and clip the cover onto the housing.► Reinitialise the remote control.For more information on Reinitialising the remote control, refer to the corresponding section.
EC O
Do not throw remote control batteries away, as they contain metals that are harmful to the environment. Take them to an approved disposal point.
Reinitialising the remote
control
Following replacement of the battery or in the event of a fault, it may be necessary to reinitialise the remote control.
Without Keyless Entry and Starting
► Switch off the ignition.► Turn the key to position 2 (Ignition on).► Immediately press the closed padlock button for a few seconds.► Switch off the ignition and remove the key from the ignition switch.The remote control is now fully operational again.
► Insert the mechanical key (incorporated into the remote control) into the lock to open the vehicle.► Place the electronic key against the back-up
reader on the steering column and hold it there until the ignition is switched on.► Switch on the ignition by pressing the "START/STOP" button.► With a manual gearbox, place the gear lever in neutral then fully depress the clutch pedal.► With an automatic gearbox, while in mode P, depress the brake pedal.
Page 56 of 272
56
NOTIC E
When the engine is cold, the air flow will only increase to its optimum level gradually, to avoid distributing too much cold air.In cold weather, it prioritises the distribution of warm air to the windscreen, the side windows and the footwells only.
Manual mode
If you wish, you can make a different choice from that suggested by the system, by changing a setting. The other functions will still be controlled automatically. The "AUTO" symbol disappears if you change a setting.
Deactivating the system
► Press button 2 "-" until the fan symbol disappears.This disables all functions of the dual-zone automatic air conditioning system.
The temperature is no longer regulated. A slight flow of air can still be felt, due to the forward movement of the vehicle.► Press button 2 "+" to switch the system on again.
Temperature
The driver and front passenger can each set the temperature to suit their preferences.
The value shown on the display is a level of comfort, not a temperature in Celsius or Fahrenheit.► Push button 1 down to decrease the value or up to increase it.
NOTIC E
A setting of around 21 provides optimum comfort. Depending on your requirements, a
setting between 18 and 24 is normal.In addition, we recommend avoiding left/right setting differences of more than 3.
NOTIC E
On entering the vehicle, if the interior temperature is significantly colder or warmer than the comfort value setting, there is no need to alter the value displayed in order to reach the required level of comfort. The system compensates automatically and corrects the temperature difference as quickly as possible.
NOTIC E
For maximum cooling or heating of the passenger compartment, it is possible to
exceed the minimum value 14 or the maximum value 28.► Push button 1 down until "LO" is displayed or up until "HI" is displayed.
"Mono" function
The comfort setting for the passenger side can be indexed to the driver's comfort setting (mono-zone).► Press the corresponding button 8 to activate/deactivate the function.The indicator lamp in the button comes on when the function is activated.The function is deactivated automatically if a passenger uses the temperature control.
Visibility programme
► Press the “visibility” button 7 to demist or defrost the windscreen and side windows as quickly as possible. The system automatically manages the air conditioning, air flow and air intake, and provides
optimum distribution towards the windscreen and side windows.► Press the “visibility” button 7 again to stop the programme.Or► Press the “AUTO” button 6 to return to the automatic comfort programme.
Page 60 of 272
60
Programming
With Bluetooth® audio system
► Press the MENU button to access the main menu. ► Select "Pre-heat. / Pre-ventil.".► Select "Activation" and, if necessary, for programming, “Parameters".► Select "Heating" to heat the engine and passenger compartment or "Ventilation" to ventilate the passenger compartment.
► Select:• the first clock to set/save the time at which the pre-heating temperature will be reached,• the second clock to set/save a second time at which the pre-heating temperature will be reached,
N OTIC E
Using these two clocks and depending on the season you can, for example, select one or the other start time.A message on the screen confirms your choice.
With TOYOTA Connect Radio
Press Connect-App to display the main page.Then press "Programmable heating/ventilation".► Select the "Status" tab to activate/deactivate the system.► Select the "Other settings" tab to choose the "Heating" mode, to heat the engine and passenger compartment, or "Ventilation" to ventilate the passenger compartment.► Then set/save the time at which the preheating temperature will be reached for each selection.Press this button to save.
With TOYOTA Connect Nav
► Press the "Applications" menu.
► Press the "Vehicle Apps" tab.► Press "Temperature programming".
► Press the "Status" tab to activate/deactivate the system.► Press the "Parameters" tab to select "Heating" mode to heat the engine and passenger compartment or "Ventilation" mode to ventilate the passenger compartment.► Then set/save the activation time for each selection.► Press "OK" to confirm.
NOTIC E
You must allow at least 60 minutes between programming operations.
Long range remote control
(Depending on version.)This enables you to switch the heating in the passenger compartment on or off from a distance.The remote control has a range of about 1 km (0.6 miles) in open country.
On
► Pressing and holding this button starts the heating immediately (confirmed by the green indicator lamp coming on briefly).
Page 63 of 272
63
Lighting and visibility
4
Lighting control lever
Main lighting
Automatic illumination of lamps/daytime running lampsSidelamps only
Dipped or main beam headlamps
NOTIC E
Operation of the selected lighting is confirmed by the illumination of the corresponding indicator lamp.
NOTIC E
In some weather conditions (e.g. low temperature or humidity), the presence of misting on the internal surface of the glass of the headlamps and rear lamps is normal; it
disappears after the lamps have been on for a few minutes.
Headlamp dipping
Pull the lever to switch between dipped and main beam headlamps.In "AUTO" and sidelamps modes, the driver can switch on the main beam headlamps temporarily ("headlamp flash") by maintaining a pull on the lever.
Foglamps selection ring
Rear foglamps
They operate with the sidelamps on.
► Rotate the ring forwards to switch them on and backwards to switch them off.When the lighting is switched off automatically ("AUTO" position), the foglamps and the dipped beam headlamps will remain on.
With front and rear foglamps
They operate with the dipped beam headlamps on, in manual or auto mode.Turn and release the ring:► once forwards to switch on the front foglamps and then a second time for the rear foglamps.► once backwards to switch off the rear foglamps and then a second time for the front foglamps.If the lighting is switched off automatically ("AUTO" position) or the dipped beam headlamps are switched off manually, the foglamps and sidelamps will remain on.► Turn the ring backwards to switch the foglamps off; the sidelamps will then switch off.
Page 73 of 272
73
Safety
5
The indicator lamp flashes when the vehicle data is sent, and then remains lit when communication is established.
WARNI NG
If an impact is detected by the airbag control unit, an emergency call is made automatically, independently of the deployment of any airbags.
NOTIC E
‘Localised Emergency Call’ is a service that can be accessed free of charge.
System operation
– Upon switching on the ignition, if the indicator lamp lights up red, then green, and then goes out: the system is operating correctly.– If the indicator lamp is fixed red: system malfunction– If the indicator lamp flashes red: replace the emergency battery. In the latter two cases, emergency and assistance call services may not work.Contact a dealer or a qualified repairer as soon as possible.
NOTIC E
The system fault does not prevent the vehicle from being driven.
NOTIC E
Data processingAll processing of personal information by the "Localised Emergency Call" system (PE112) complies with the framework for protection of personal information established by Regulation 2016/679 (GDPR) and Directive 2002/58/EC of the European Parliament and the Council, and in particular, seeks to protect the vital interests of the data subject, in accordance with Article 6.1, paragraph d) of Regulation 2016/679.Personal information processing is strictly limited to the management of the "Localised Emergency Call" system used with the “112” European single emergency call number.
The "Localised Emergency Call" system is able to collect and process only the following data relating to the vehicle: chassis number, type (passenger vehicle or light commercial vehicle), fuel type or power source, most recent three locations and direction of travel,
and a timestamped log file recording the automatic activation of the system.The recipients of the processed data are the emergency call handling centres designated by the relevant national authorities in the territory in which they are located, enabling priority reception and handling of calls to the “112” emergency number.
NOTIC E
Data storageData contained in the system’s memory is not accessible from outside the system until a call is made. The system is not traceable and is not continuously monitored in its normal operating mode. The data in the system's internal memory is automatically and continuously erased. Only the vehicle’s three most recent locations are stored.When an emergency call is triggered, the data log is stored for no more than 13 hours.
NOTIC E
Access to dataYou have the right to access the data and, if
necessary, submit a request to rectify, erase or restrict the processing of any personal information not processed in accordance with the provisions of Regulation 2016/679