2019 TOYOTA LAND CRUISER warning lights
[x] Cancel search: warning lightsPage 411 of 624
LC200_OM_OM60Q99U_(U)
4115-3. Using the storage features
5
Interior features
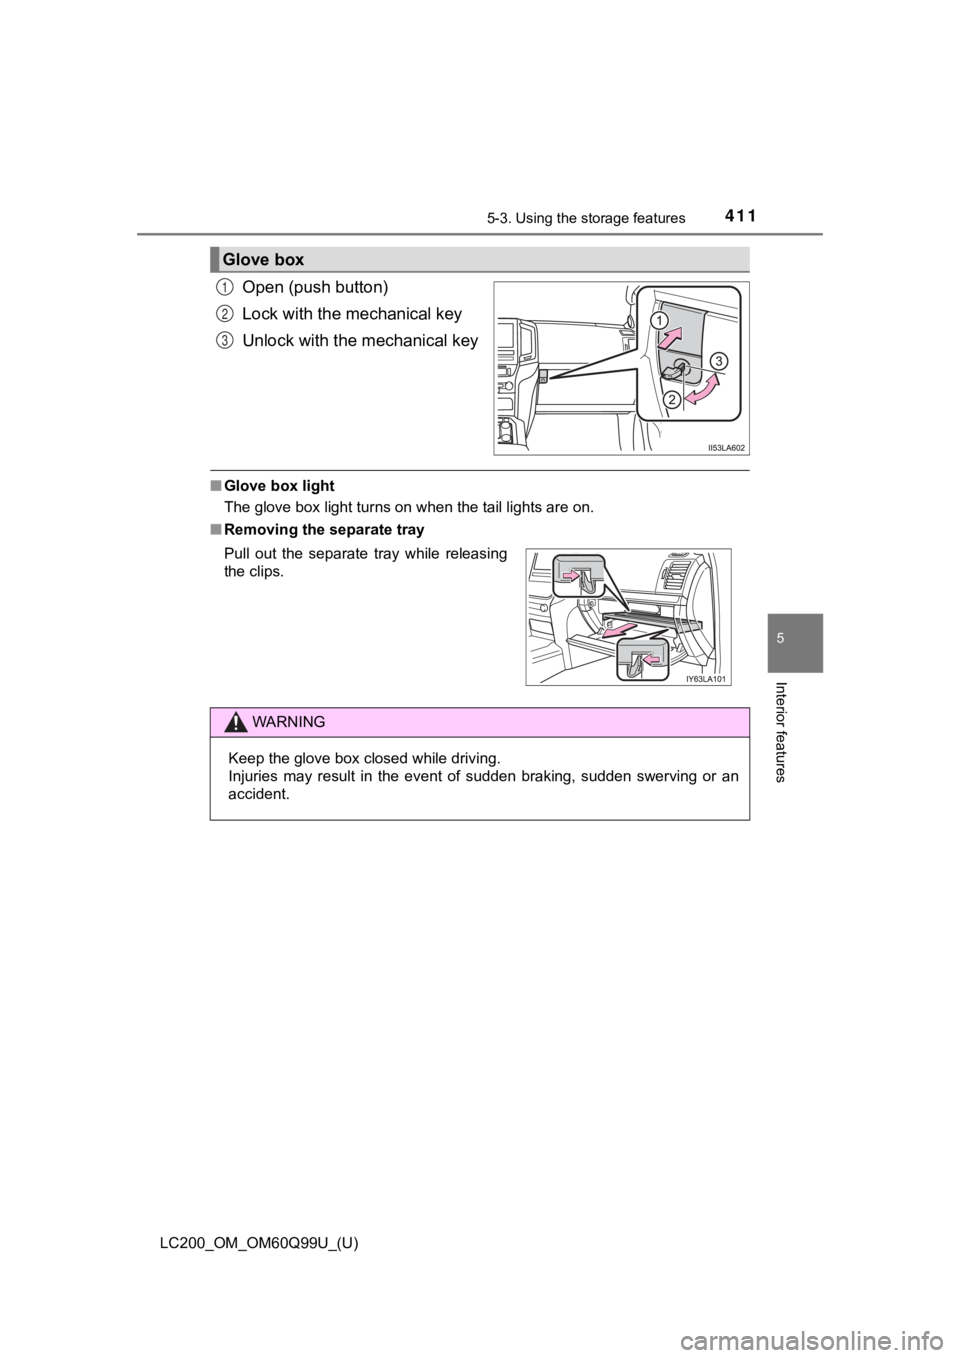
Open (push button)
Lock with the mechanical key
Unlock with the mechanical key
■Glove box light
The glove box light turns on when the tail lights are on.
■ Removing the separate tray
Glove box
1
2
3
Pull out the separate tray while releasing
the clips.
WARNING
Keep the glove box closed while driving.
Injuries may result in the event of sudden braking, sudden swer ving or an
accident.
Page 494 of 624
494
LC200_OM_OM60Q99U_(U)
6-3. Do-it-yourself maintenance
■After a fuse is replaced
●If the lights do not turn on even after the fuse has been repla ced, a bulb may
need replacement. ( P. 497)
● If the replaced fuse blows again, have the vehicle inspected by your Toyota
dealer.
■ If there is an overload in a circuit
The fuses are designed to blow, protecting the wiring harness f rom damage.
■ When replacing light bulbs
Toyota recommends that you use genuine Toyota products designed for this
vehicle. Because certain bulbs are connected to circuits designed to prevent
overload, non-genuine parts or parts not designed for this vehicle may be
unusable.
WARNING
■ To prevent system breakdowns and vehicle fire
Observe the following precautions.
Failure to do so may cause damage to the vehicle, and possibly a fire or
injury.
● Never use a fuse of a higher amperage rating than indicated, or use any
other object in place of a fuse.
● Always use a genuine Toyota fuse or equivalent.
Never replace a fuse with a wire, even as a temporary fix.
● Do not modify the fuses or the fuse boxes.
NOTICE
■Before replacing fuses
Have the cause of electrical overload determined and repaired b y your
Toyota dealer, as soon as possible.
Page 507 of 624
LC200_OM_OM60Q99U_(U)
5076-3. Do-it-yourself maintenance
6
Maintenance and care
WARNING
■Replacing light bulbs
● Turn off the headlights. Do not attempt to replace the bulb imm ediately
after turning off the headlights.
The bulbs become very hot and may cause burns.
● Do not touch the glass portion of the light bulb with bare hand s. When it is
unavoidable to hold the glass portion, use and hold with a clea n dry cloth
to avoid getting moisture and oils on the bulb.
Also, if the bulb is scratched or dropped, it may blow out or crack.
● Fully install light bulbs and any parts used to secure them. Fa ilure to do so
may result in heat damage, fire, or water entering the headligh t unit. This
may damage the headlights or cause condensation to build up on the lens.
● Do not attempt to repair or disassemble light bulbs, connectors , electric
circuits or component parts.
Doing so may result in death or serious injury due to electric shock.
■ To prevent damage or fire
● Make sure bulbs are fully seated and locked.
● Check the wattage of the bulb before installing to prevent heat damage.
Page 527 of 624
5277-2. Steps to take in an emergency
LC200_OM_OM60Q99U_(U)
7
When trouble arises
■Warning buzzer
In some cases, the buzzer may not be heard due to being in a no isy location
or audio sound.
WARNING
■ If both the ABS and the brake s ystem warning lights remain on
Stop your vehicle in a safe place immediately and contact your To y o t a
dealer. The vehicle will become extremely unstable during braki ng, and the
ABS system may fail, which could cause an accident resulting in death or
serious injury.
■
If the tire pressure warning light comes on
Be sure to observe the following precautions. Failure to do so could
cause loss of vehicle control and result in death or serious injury.
●Stop your vehicle in a safe place as soon as possible. Adjust t he tire
inflation pressure immediately.
●If the tire pressure warning light comes on even after tire inf lation pres-
sure adjustment, it is probable that you have a flat tire. Chec k the tires.
If the tire is flat, change to the spare tire and have the flat tire repaired
by the nearest Toyota dealer.
●Avoid abrupt maneuvering and braking. If the vehicle tires dete riorate,
you could lose control of the steering wheel or the brakes.
■If a blowout or sudden air leakage should occur
The tire pressure warning system may not activate immediately.
Page 531 of 624
5317-2. Steps to take in an emergency
LC200_OM_OM60Q99U_(U)
7
When trouble arises
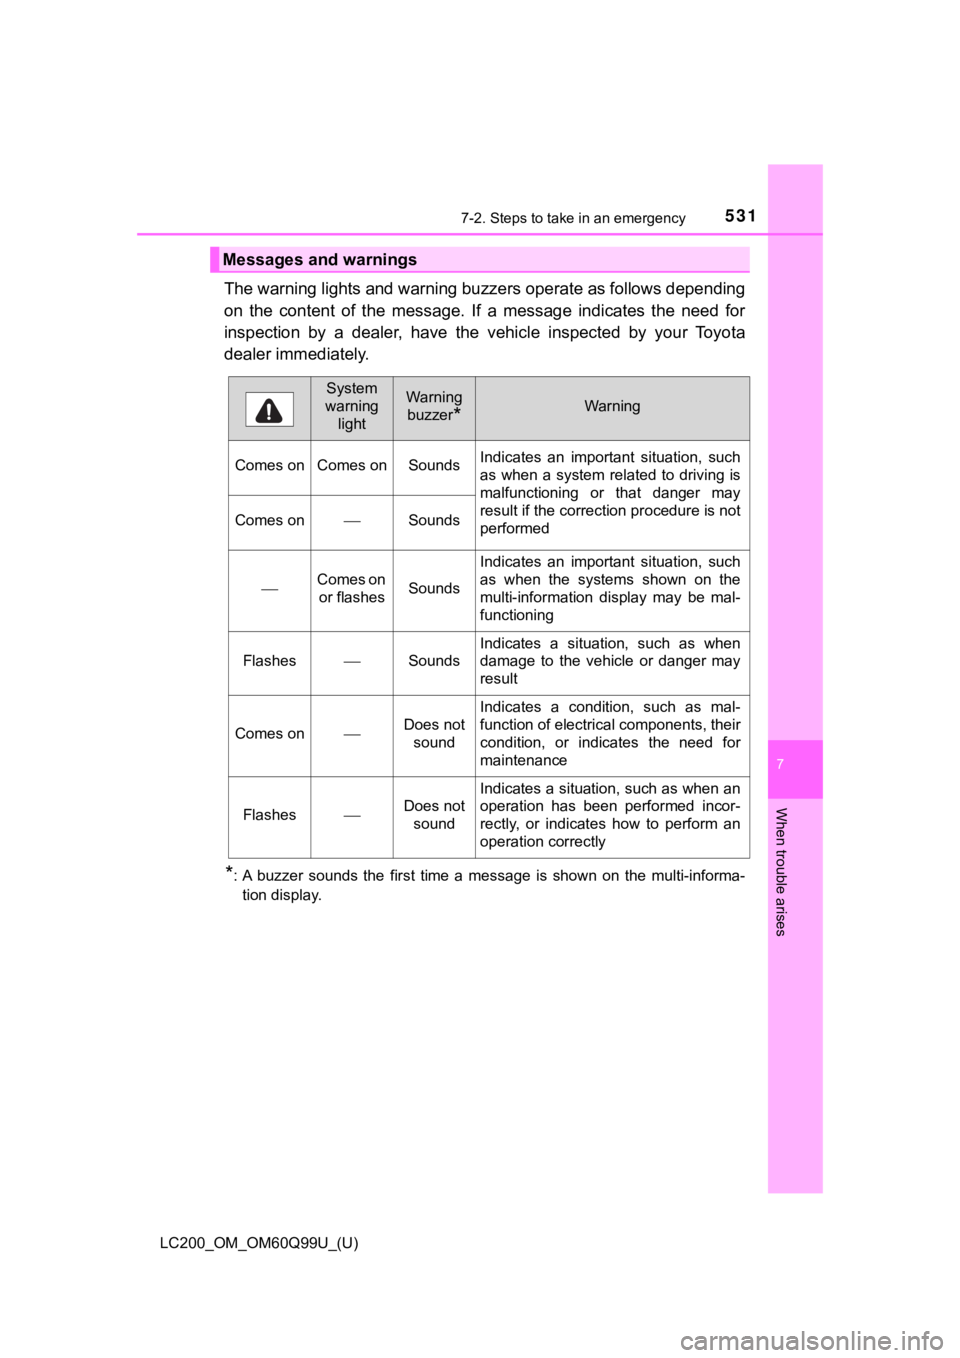
The warning lights and warning buzzers operate as follows depending
on the content of the message. If a message indicates the need for
inspection by a dealer, have the vehicle inspected by your Toyota
dealer immediately.
*: A buzzer sounds the first time a message is shown on the multi -informa-
tion display.
Messages and warnings
System
warning lightWarning
buzzer
*Warning
Comes on Comes on Sounds Indicates an important situation, such
as when a system related to driving is
malfunctioning or that danger may
result if the correction procedure is not
performed
Comes onSounds
Comes on
or flashesSounds
Indicates an important situation, such
as when the systems shown on the
multi-information display may be mal-
functioning
FlashesSounds
Indicates a situation, such as when
damage to the vehicle or danger may
result
Comes onDoes not sound
Indicates a condition, such as mal-
function of electrical components, their
condition, or indicates the need for
maintenance
FlashesDoes not sound
Indicates a situation, such as when an
operation has been performed incor-
rectly, or indicates how to perform an
operation correctly
Page 532 of 624

5327-2. Steps to take in an emergency
LC200_OM_OM60Q99U_(U)
■System warning lights
The master warning light does not come on or flash in the follo wing case.
Instead, a separate system warning light will come on along wit h a message
or image shown on the multi-information display.
● Indicates that the PCS (Pre-Collision System) is not currently functional
The PCS warning light flashes or illuminates. ( P. 522)
● Indicates that a door is not fully closed while the vehicle is stopped.
The Open door warning light comes on. ( P. 523)
■ If “See Owner’s Manual” is shown
●If “Smart key System Malfunction” is shown, this may be a malfunction.
Immediately have the vehicle inspected by your Toyota dealer.
● If “Transmission Fluid Temp High” is shown, it indicates that t he automatic
transmission fluid temperature is too high.
Immediately stop the vehicle in a safe place, shift the shift lever to P and
wait until the warning message and light go off. If the warning message and
light go off, you may start the vehicle again. If the warning m essage and
light do not go off, contact your Toyota dealer.
■ If “Shift to P Before Exiting Vehicle” is shown
Message is displayed when the driver’s door is opened without t urning the
engine switch to off with the shift lever in any position other than P.
Shift the shift lever to P.
■ If “Power Turned Off to Save Battery” is shown
Power was turned off due to the automatic power off function.
Next time when starting the engine, increase the engine speed s lightly and
maintain that level for approximately 5 minutes to recharge the battery.
■ When a message that indicates the need for the shift lever oper ation is
shown
To prevent the shift lever from being operated incorrectly or t he vehicle from
moving unexpectedly, a message that requires shifting the shift lever may be
shown on the multi-information display. In that case, follow th e instruction of
the message and shift the shift lever.
■ When “Headlight System Malfuncti on Visit Your Dealer” is displayed on
the multi-information display
The following systems may be malfunctioning. Have the vehicle inspected by
your Toyota dealer.
● The LED headlight system
● The automatic headlight leveling system
● Automatic High Beam (if equipped)
Page 555 of 624
5557-2. Steps to take in an emergency
LC200_OM_OM60Q99U_(U)
7
When trouble arises
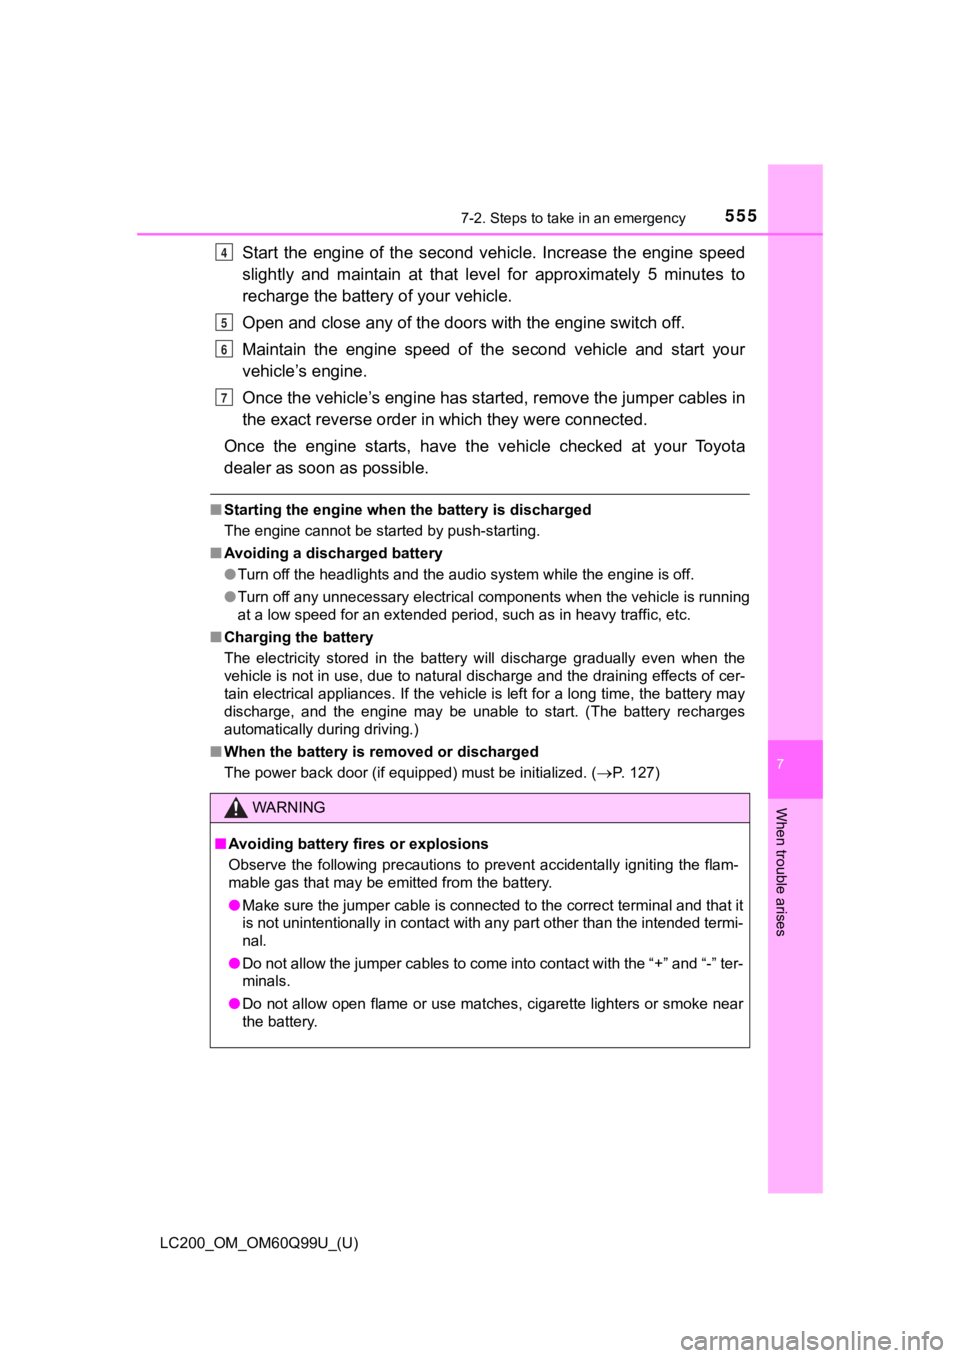
Start the engine of the second vehicle. Increase the engine speed
slightly and maintain at that lev el for approximately 5 minutes to
recharge the batter y of your vehicle.
Open and close any of the doors with the engine switch off.
Maintain the engine speed of the second vehicle and start your
vehicle’s engine.
Once the vehicle’s engine has st arted, remove the jumper cables in
the exact reverse order in which they were connected.
Once the engine starts, have the vehicle checked at your Toyota
dealer as soon as possible.
■ Starting the engine when t he battery is discharged
The engine cannot be started by push-starting.
■ Avoiding a discharged battery
●Turn off the headlights and the audio system while the engine is off.
● Turn off any unnecessary electrical components when the vehicle is running
at a low speed for an extended period, such as in heavy traffic , etc.
■ Charging the battery
The electricity stored in the battery will discharge gradually even when the
vehicle is not in use, due to natural discharge and the draining effects of cer-
tain electrical appliances. If the vehicle is left for a long t ime, the battery may
discharge, and the engine may be unable to start. (The battery recharges
automatically during driving.)
■ When the battery is removed or discharged
The power back door (if equipped) must be initialized. (
P. 127)
WARNING
■Avoiding battery fires or explosions
Observe the following precautions to prevent accidentally ignit ing the flam-
mable gas that may be emitted from the battery.
● Make sure the jumper cable is connected to the correct terminal and that it
is not unintentionally in contact with any part other than the intended termi-
nal.
● Do not allow the jumper cables to come into contact with the “+ ” and “-” ter-
minals.
● Do not allow open flame or use matches, cigarette lighters or smoke near
the battery.
4
5
6
7
Page 607 of 624
607Alphabetical index
LC200_OM_OM60Q99U_(U)
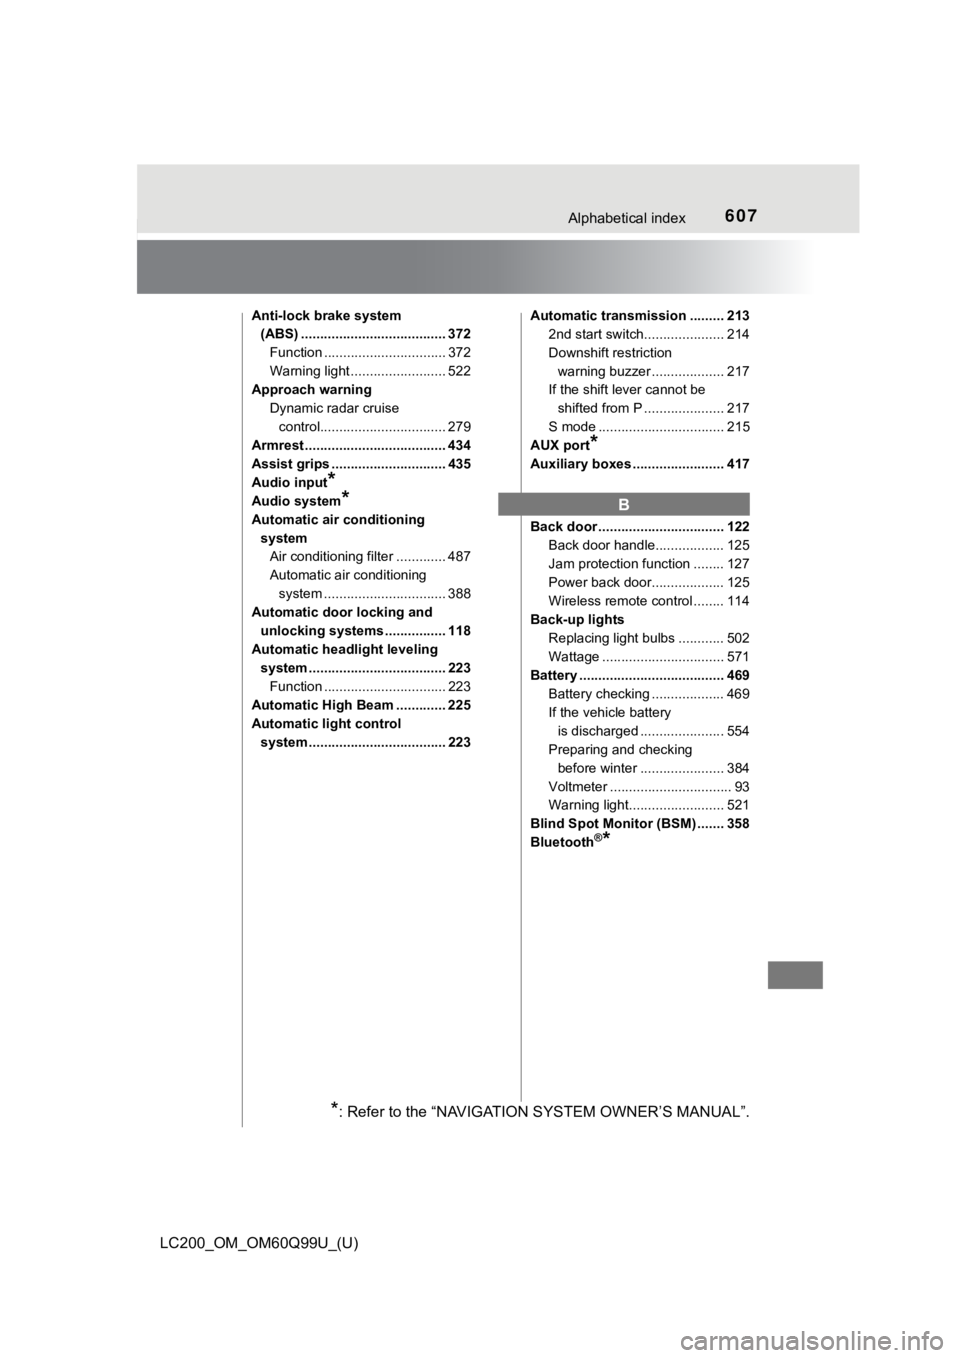
Anti-lock brake system (ABS) ...................................... 372
Function ................................ 372
Warning light ......................... 522
Approach warning
Dynamic radar cruise control................................. 279
Armrest ..................................... 434
Assist grips .............................. 435
Audio input
*
Audio system*
Automatic air conditioning
system Air conditioning filter ............. 487
Automatic air conditioning
system ......... ....................... 388
Automatic door locking and
unlocking systems ................ 118
Automatic headli ght leveling
system .................................... 223
Function ................................ 223
Automatic High Beam ............. 225
Automatic light control system .................................... 223 Automatic transmission ......... 213
2nd start switch..................... 214
Downshift restriction
warning buzzer ................... 217
If the shift lever cannot be
shifted from P ..................... 217
S mode ................................. 215
AUX port
*
Auxiliary boxes ........................ 417
Back door ................................. 122
Back door handle.................. 125
Jam protection function ........ 127
Power back door................... 125
Wireless remote control ........ 114
Back-up lights
Replacing light bulbs ............ 502
Wattage ................................ 571
Battery ...................................... 469
Battery checking ................... 469
If the vehicle battery is discharged ...................... 554
Preparing and checking before winter ...................... 384
Voltmeter ................................ 93
Warning light......................... 521
Blind Spot Monitor (BSM) ....... 358
Bluetooth
®*
B
*: Refer to the “NAVIGATION SYSTEM OWNER’S MANUAL”.