2019 Peugeot Partner Bonnet
[x] Cancel search: BonnetPage 6 of 312

4
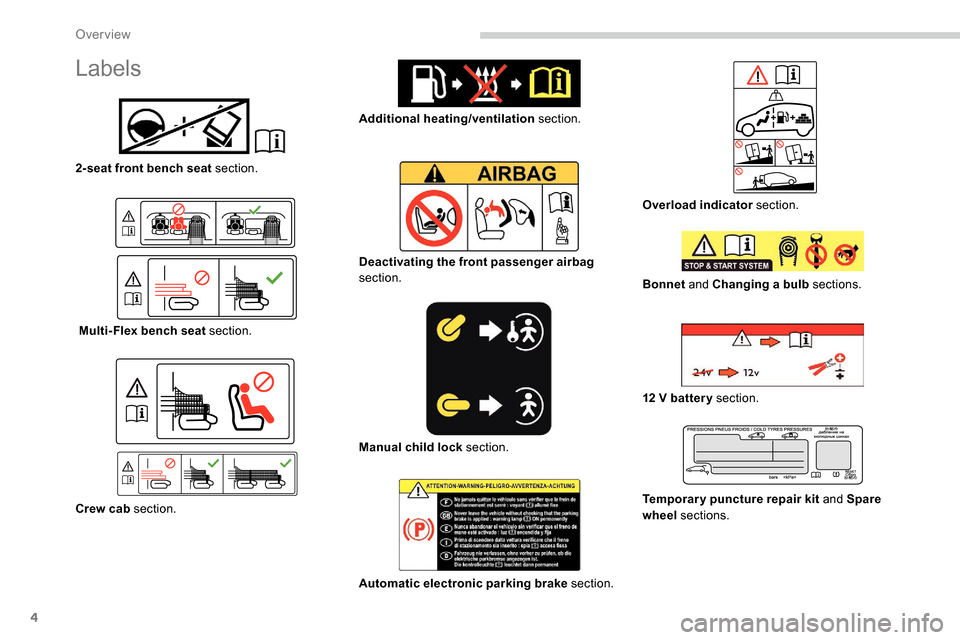
Labels
2-seat front bench seat section.
Multi-Flex bench seat section.
Crew cab section. Additional heating/ventilation
section.
Deactivating the front passenger airbag
section.
Manual child lock section.
Automatic electronic parking brake section.Overload indicator
section.
Bonnet and Changing a bulb sections.
12
V batter y section.
Temporary puncture repair kit and Spare
wheel sections.
Over view
Page 7 of 312

5
Instruments and controls3
Horn
4
Instrument panel
5
Alarm
Courtesy lamp
Interior rear view mirror or
screen for reproduction of
the Surround Rear Vision
Emergency and assistance call buttons
6
Monochrome screen with audio system
Touch screen with
PEUGEOT Connect Radio
or PEUGEOT Connect Nav
7
USB port
8
Heating
Manual air conditioning
Dual-zone automatic air conditioning
Front demisting – defrosting
Rear screen demisting – defrosting
1
Bonnet release
2
Dashboard fuses
9
Automatic electronic parking brake
"START/STOP" button
10
Gearbox
11
12 V socket
12
230 V accessory socket
13
Glove box
USB port (inside the glove box)
14
Storage compartment
15
Deactivation of the front
passenger airbag (on the
side of the glove box, with
the door opened)
.
Over view
Page 55 of 312

53
Self-protection function
The system checks for the disconnection
of any of its components.
The alarm is triggered if the battery,
button or siren wiring is disconnected or
damaged.
For all work on the alarm system, contact
a PEUGEOT dealer or a qualified
workshop.
Interior volumetric
If your vehicle is fitted with Additional
Heating/Ventilation, volumetric monitoring
is not compatible with this system.
For more information on Additional
Heating/Ventilation, refer to the
corresponding section. (without partition)
Anti-tilt monitoring
(with partition)
The system only checks the variation in volume
inside the cab .
The alarm is triggered if anyone breaks a
window or enters the cab .
It will not be triggered if someone enters the
loading area. The system checks for any variation in the
volume in the passenger compartment.
The alarm is triggered if anyone breaks a
window, enters the passenger compartment or
moves inside the vehicle. The system checks for any change in the
attitude of the vehicle.
The alarm is triggered if the vehicle is lifted or
moved.
When the vehicle is parked, the alarm will
not be triggered if the vehicle is knocked.
Locking the vehicle with full
alarm system
Activation
F Switch off the engine and exit the vehicle.
F L ock the vehicle using the remote control or
the "
K
eyless Entry and Starting" system.
The monitoring system is active: the red
indicator lamp in the button flashes every
second and the direction indicators come on for
about 2
seconds.
Following an instruction to lock the
vehicle, the exterior perimeter monitoring
is activated after 5
seconds and the
interior volumetric and anti-tilt monitoring
after 45
seconds.
Exterior perimeter
The system checks whether the vehicle is opened.
The alarm is triggered if anyone tries to open one of
the doors or the bonnet.
Alarm
System which protects and provides a deterrent
against theft and break-ins.
2
Access
Page 56 of 312

54
If an opening (door, boot or bonnet) is not
closed properly, the vehicle is not locked
but the exterior perimeter monitoring will
be activated after 45 seconds at the same
time as the interior volumetric and anti-tilt
monitoring.Locking the vehicle
with exterior perimeter
monitoring only
Deactivate the interior volumetric and anti-tilt
monitoring to avoid unwanted triggering of the
alarm in certain cases such as:
-
l
eaving a pet in the vehicle,
-
l
eaving a window or sunroof partially open,
-
w
ashing your vehicle,
-
c
hanging a wheel,
-
h
aving your vehicle towed,
-
t
ransport by ship.
Triggering of the alarm
This is indicated by sounding of the siren
and flashing of the direction indicators for
30
seconds.
Depending on the country of sale, certain
monitoring functions remain active until the alarm
has been triggered eleven times consecutively.
When the vehicle is unlocked using the remote
control or the "
K
eyless Entry and Starting"
system, rapid flashing of the red indicator lamp
in the button informs you that the alarm was
triggered during your absence. When the ignition
is switched on, the flashing stops immediately.
Deactivation
F Press the unlocking button on the remote control.
or
F
U
nlock the vehicle with the Keyless Entry
and Starting system.
The monitoring system is deactivated: the
indicator lamp in the button goes off and the
direction indicators flash for about 2
seconds.
When the vehicle automatically locks
itself again (as happens if a door or the
boot is not opened within 30
seconds of
unlocking), the monitoring system is also
reactivated automatically.
Deactivating the interior
volumetric and anti-tilt
monitoring
F Switch off the ignition and within 10 s econds
press the alarm button until its red indicator
lamp is on fixed.
F
G
et out of the vehicle.
F
I
mmediately lock the vehicle using the
remote control or the "Keyless Entry and
Starting" system.
Only the exterior perimeter monitoring is
activated; the red indicator lamp in the button
flashes every second.
To be taken into account, the deactivation
must be carried out every time the ignition
is switched off.
Reactivating the interior
volumetric and anti-tilt monitoring
F Deactivate the perimeter monitoring by unlocking the vehicle with the remote
control or the Keyless Entry and Starting
system.
The indicator lamp in the button goes off.
F
R
eactivate all monitoring by locking the
vehicle with the remote control or the
Keyless Entry and Starting system.
The red indicator lamp in the button once again
flashes every second.
Access
Page 134 of 312

132
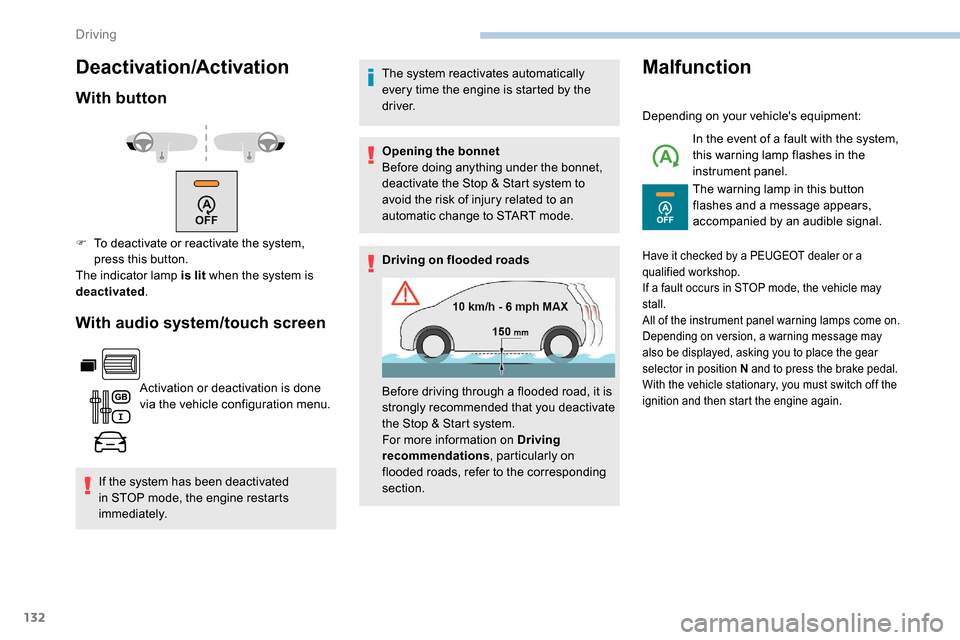
Deactivation/Activation
With button
With audio system/touch screen
Activation or deactivation is done
via the vehicle configuration menu.
If the system has been deactivated
in STOP mode, the engine restarts
immediately. The system reactivates automatically
every time the engine is started by the
driver.
Opening the bonnet
Before doing anything under the bonnet,
deactivate the Stop & Start system to
avoid the risk of injury related to an
automatic change to START mode.
Driving on flooded roads
Malfunction
Depending on your vehicle's equipment:
In the event of a fault with the system,
this warning lamp flashes in the
instrument panel.
The warning lamp in this button
flashes and a message appears,
accompanied by an audible signal.
F
T
o deactivate or reactivate the system,
press this button.
The indicator lamp is lit when the system is
deactivated .
Before driving through a flooded road, it is
strongly recommended that you deactivate
the Stop & Start system.
For more information on Driving
recommendations, particularly on
flooded roads, refer to the corresponding
section.
Have it checked by a PEUGEOT dealer or a
qualified workshop.
If a fault occurs in STOP mode, the vehicle may
stall.
All of the instrument panel warning lamps come on.
Depending on version, a warning message may
also be displayed, asking you to place the gear
selector in position N and to press the brake pedal.
With the vehicle stationary, you must switch off the
ignition and then start the engine again.
Driving
Page 162 of 312

160
After three first level alerts, the system triggers
a further alert with the message "Dangerous
driving: take a break ", accompanied by a
more pronounced audible signal.
In certain driving conditions (poor road
sur face or strong winds), the system may
give alerts irrespective of the driver's level
of vigilance.
The following situations may interfere with
the operation of the system or prevent it
from working:
-
p
oor visibility (inadequate lighting of
the roadway, falling snow, heavy rain,
dense fog, etc.),
-
d
azzle (headlamps of an oncoming
vehicle, low sun, reflections on a damp
road, leaving a tunnel, alternating
shade and light, etc.),
-
w
indscreen area located in front of the
camera: dirty, misted, frost-covered,
snow-covered, damaged or covered by
a s t i c ke r,
-
lan
e markings absent, worn, concealed
(snow, mud) or multiple (roadworks,
e t c .),
-
c
lose to the vehicle ahead (lane
markings not detected),
-
r
oads that are narrow, winding, etc. Clean the windscreen regularly,
particularly the area in front of the camera.
The internal sur face of the windscreen can
also become misted around the camera.
In humid and cold weather, demist the
windscreen regularly.
Do not allow snow to accumulate on the
bonnet or roof of the vehicle as this could
obstruct the detection camera.
Parking sensors
This function is a manoeuvring aid which
cannot, in any circumstances, replace the
need for vigilance on the part of the driver.
The driver must remain attentive and stay
in control of their vehicle.
They must always check the vehicle’s
surroundings before undertaking a
manoeuvre.
During the entire manoeuvre, the driver
must ensure that the space remains clear.
Using sensors located in the bumper, this
function warns of the proximity of obstacles
(e.g. pedestrian, vehicle, tree, barrier) entering
their field of detection.
Rear parking sensors
The system is switched on by engaging reverse
g e a r.
This is confirmed by an audible signal.
The system is switched off when you come out
of reverse gear.
Audible assistance
The function signals the presence of obstacles
present both within the sensors’ detection
zone and in the vehicle path defined by the
orientation of the steering wheel.
Driving
Page 179 of 312

177
Load reduction mode
System which manages the use of certain
functions according to the level of charge
remaining in the battery.
When the vehicle is being driven, the load
reduction function temporarily deactivates
certain functions, such as air conditioning,
heated rear screen, etc.
The deactivated functions are reactivated
automatically as soon as conditions permit.
Roof bars/Roof rack
Recommendations
Distribute the load uniformly, taking care
to avoid overloading one of the sides.
Arrange the heaviest part of the load as
close as possible to the roof.
Secure the load firmly.
Drive gently: the vehicle will be more
susceptible to the effects of side winds
and its stability may be affected.
Regularly check the security and tight
fastening of the roof bars and racks, at
least before each trip.As a safety measure and to avoid
damaging the roof, it is essential to use
the roof bars and racks approved for your
vehicle.
Obser ve the instructions on fitting and use
contained in the guide supplied with the
roof bars and racks. In the event of loading (
not exceeding
40 cm in height) on the roof, do not
exceed the following loads:
-
T
ransverse bars on longitudinal bars:
80 kg
.
-
T
wo transverse bars bolted to the roof:
100
kg
.
-
T
hree transverse bars bolted to the
roof: 15 0
kg
.
-
A
n aluminium rack: 120
kg
.
-
A s
teel rack: 115
k g
.
If the height exceeds 40 cm, adapt the
speed of the vehicle to the profile of the
road to avoid damaging the roof bars
or the roof rack and the fixings on the
vehicle.
Be sure to refer to national legislation in
order to comply with the regulations for
transporting objects which are longer than
the vehicle. To fit the transverse roof bars or a roof rack,
use the fixing points provided for this purpose:
F
R
emove the fixing covers installed on the
vehicle.
F
P
ut each fixing in place and lock them on
the roof one by one.
F
E
nsure that the roof bars or the roof rack
are correctly fitted (by shaking them).
The bars are suitable for each fixing point.
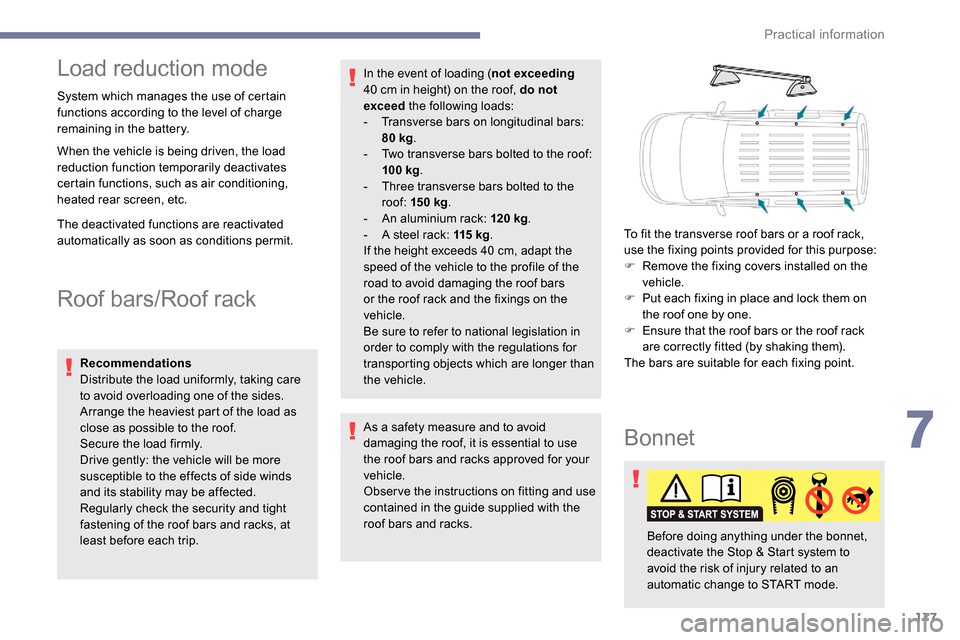
Bonnet
Before doing anything under the bonnet,
deactivate the Stop & Start system to
avoid the risk of injury related to an
automatic change to START mode.
7
Practical information
Page 180 of 312

178
Engines
Petrol
Diesel
The location of the interior bonnet release
lever prevents opening of the bonnet when
the left-hand front door is shut.
When the engine is hot, handle the
exterior safety catch and the stay with
care (risk of burns), using the protected
area.
When the bonnet is open, take care not to
damage the safety catch.
Do not open the bonnet under very windy
conditions.
The cooling fan may star t after
switching off the engine: take care
with articles and clothing that might be
caught by the fan blades.
Opening
F Open the left-hand front door.F
P
ull the release lever, located at the bottom
of the door aperture, towards you.
F
L
ift the safety catch and raise the bonnet.
F
U
nclip the stay
from its housing
and place it in the
support slot to hold
the bonnet open.
Closing
F Take the stay out of the support slot.
F C lip the stay in its housing.
F
L
ower the bonnet and release it near the
end of its travel.
F
P
ull on the bonnet to check that it is fully
latched.
Because of the presence of electrical
equipment under the bonnet, it is
recommended that exposure to water
(rain, washing, etc.) be limited. These engines are examples provided as a
guide.
The locations of the dipstick and engine oil filler
cap may vary.
1.
Screenwash fluid reservoir.
2. Engine coolant reservoir.
3. Brake fluid reser voir.
4. Battery.
5. Fusebox.
6. A i r f i l t e r.
7. Engine oil dipstick.
8. Engine oil filler cap.
Practical information