2019 Peugeot Expert Can let
[x] Cancel search: Can letPage 35 of 324
33
Unlocking/Complete or
selective unlocking
What is the purpose of
complete or selective
unlocking?
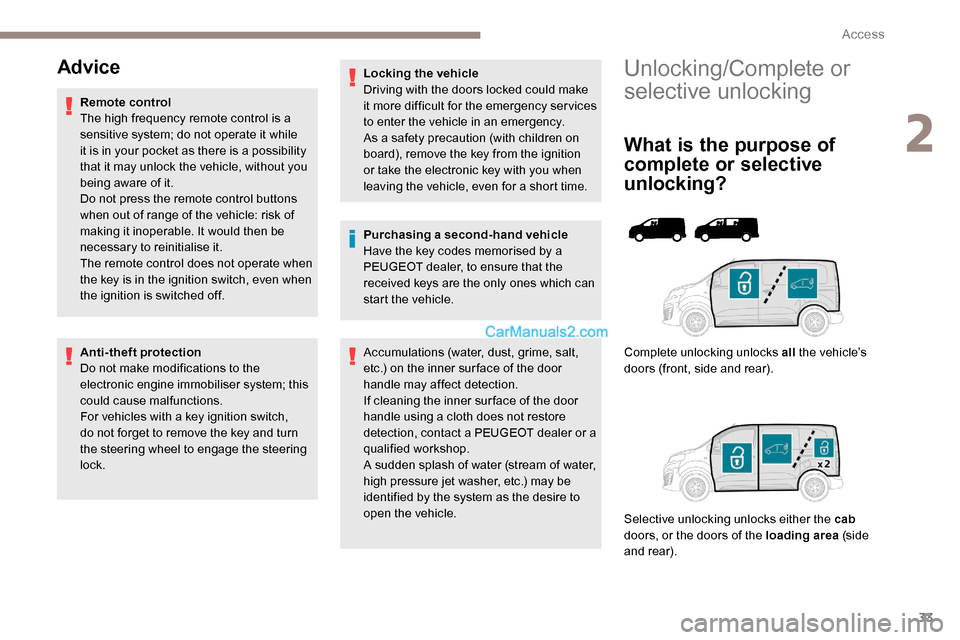
Complete unlocking unlocks all the vehicle’s
doors (front, side and rear).
Selective unlocking unlocks either the cab
doors, or the doors of the loading area (side
and rear).
Advice
Remote control
The high frequency remote control is a
sensitive system; do not operate it while
it is in your pocket as there is a possibility
that it may unlock the vehicle, without you
being aware of it.
Do not press the remote control buttons
when out of range of the vehicle: risk of
making it inoperable. It would then be
necessary to reinitialise it.
The remote control does not operate when
the key is in the ignition switch, even when
the ignition is switched off.
Anti-theft protection
Do not make modifications to the
electronic engine immobiliser system; this
could cause malfunctions.
For vehicles with a key ignition switch,
do not forget to remove the key and turn
the steering wheel to engage the steering
lock. Locking the vehicle
Driving with the doors locked could make
it more difficult for the emergency ser vices
to enter the vehicle in an emergency.
As a safety precaution (with children on
board), remove the key from the ignition
or take the electronic key with you when
leaving the vehicle, even for a short time.
Purchasing a second-hand vehicle
Have the key codes memorised by a
PEUGEOT dealer, to ensure that the
received keys are the only ones which can
start the vehicle.
Accumulations (water, dust, grime, salt,
etc.) on the inner sur face of the door
handle may affect detection.
If cleaning the inner sur face of the door
handle using a cloth does not restore
detection, contact a PEUGEOT dealer or a
qualified workshop.
A sudden splash of water (stream of water,
high pressure jet washer, etc.) may be
identified by the system as the desire to
open the vehicle.
2
Access
Page 36 of 324
34
The separation of the cab and loading
area unlocking is a security measure.
It is used to prevent access to the part
of the vehicle in which the driver is not
present.
Activation/Deactivation
By default, selectivity between cab and
loading area is activated.
Unlocking/Complete
unlocking
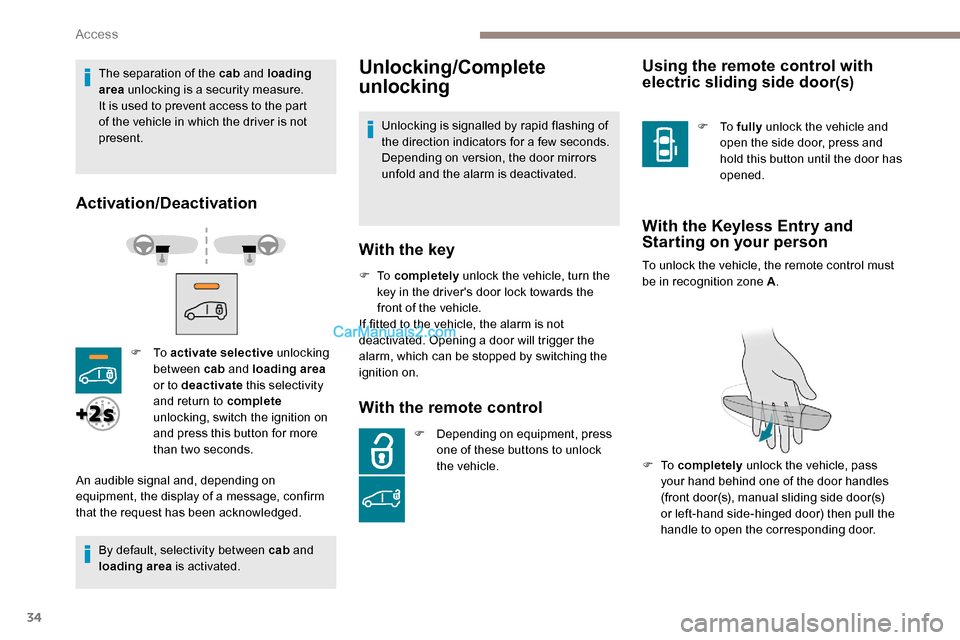
F To activate selective unlocking
between cab and loading area
or to deactivate this selectivity
and return to complete
unlocking, switch the ignition on
and press this button for more
than two seconds.
An audible signal and, depending on
equipment, the display of a message, confirm
that the request has been acknowledged. Unlocking is signalled by rapid flashing of
the direction indicators for a few seconds.
Depending on version, the door mirrors
unfold and the alarm is deactivated.
With the key
F To
completely unlock the vehicle, turn the
key in the driver's door lock towards the
front of the vehicle.
If fitted to the vehicle, the alarm is not
deactivated. Opening a door will trigger the
alarm, which can be stopped by switching the
ignition on.
With the remote control
F Depending on equipment, press one of these buttons to unlock
the vehicle.
Using the remote control with
electric sliding side door(s)
F To fully unlock the vehicle and
open the side door, press and
hold this button until the door has
opened.
With the Keyless Entry and
Starting on your person
To unlock the vehicle, the remote control must
be in recognition zone A .
F
To completely unlock the vehicle, pass
your hand behind one of the door handles
(front door(s), manual sliding side door(s)
or left-hand side-hinged door) then pull the
handle to open the corresponding door.
Access
Page 40 of 324
38
With electric sliding side door(s)
F With the Keyless Entry and Starting on your person, to completely lock the vehicle
press on the markings of one of the front
door handles.
With tailgate
Back-up procedures
Lost keys, remote control,
electronic key
Visit a PEUGEOT dealer with the vehicle's
registration certificate, a personal identification
document and, if possible, the label bearing the
key code.
The PEUGEOT dealer will be able to retrieve
the key code and the transponder code
required to order a new key.
Total unlocking/locking of
the vehicle with the key
Use these procedures in the following cases:
- r emote control cell battery flat,
-
r
emote control fault,
-
v
ehicle in an area subject to strong
electromagnetic interference.
In the first case, you can also replace the
remote control cell battery.
In the second case, you can also reinitialise the
remote control.
Refer to the corresponding sections.
F
W
ith the Keyless Entry and Starting on your
person, to completely lock the vehicle,
press the tailgate locking control.
F
T
o deadlock the vehicle, press the control
again within five seconds .
F
I
nsert the key in the door lock.
F
T
urn the key towards the front /rear to lock /
unlock the vehicle.
With the Keyless Entry and
Starting on your person
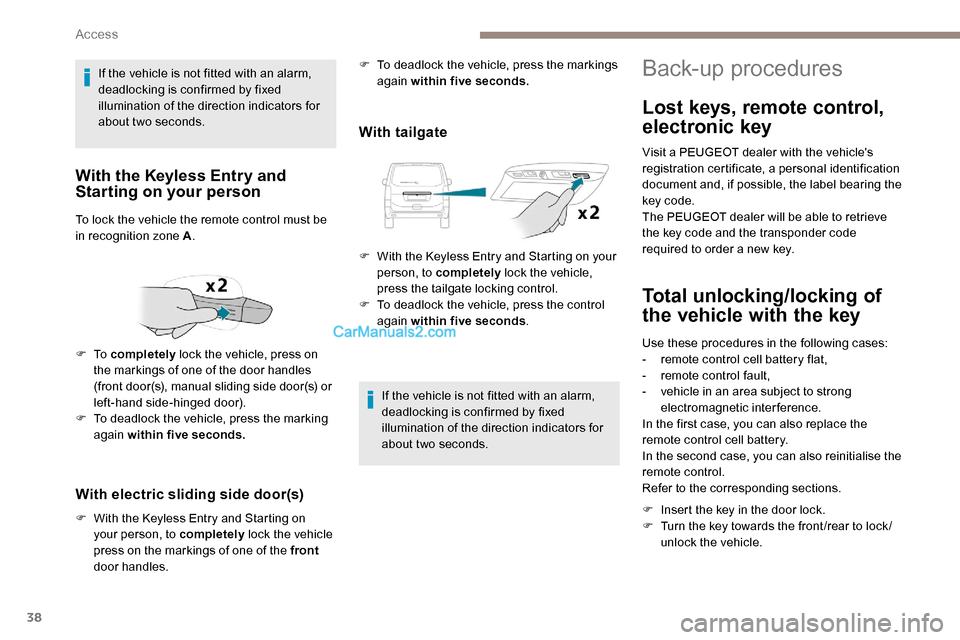
To lock the vehicle the remote control must be
in recognition zone A .
F
To completely lock the vehicle, press on
the markings of one of the door handles
(front door(s), manual sliding side door(s) or
left-hand side-hinged door).
F
T
o deadlock the vehicle, press the marking
again within five seconds. If the vehicle is not fitted with an alarm,
deadlocking is confirmed by fixed
illumination of the direction indicators for
about two seconds.
If the vehicle is not fitted with an alarm,
deadlocking is confirmed by fixed
illumination of the direction indicators for
about two seconds.
F
T
o deadlock the vehicle, press the markings
again within five seconds.
Access
Page 49 of 324
47
Reinitialising electric doors
If electrical operations no longer work:
F
F
ully close the door(s) manually .
F
F
ully open the door(s) electrically .
F
C
lose the door(s) electrically .
On completion of this procedure, electric
operation of the doors is restored.
However, if a problem persists following this
procedure, contact a PEUGEOT dealer or a
qualified workshop.
On a steep slope
It is possible to open and close the doors
electrically on slopes of up to a 20% gradient.
If the vehicle is on a slope, with the front of the
vehicle facing up the slope, open the door with
care. The door may open more quickly due to
the incline. On a steep slope, guide the side door manually
to help it to close.
If your vehicle is on a slope, with the front of the
vehicle facing down the slope, the door may not
stay open and may close violently
with the risk
of injury.
In the case of a steep slope, the door
may be driven by its own weight and
as a consequence may open or close
violently .
There would not be time for action at the
electric controls to take effect.
There would not be time for the
obstacle detection system to react.
Take care not to leave the vehicle on a
steep slope with the door(s) open without
supervision. If this advice is not followed,
injuries or damage may occur if a person
or an object is trapped or caught.
Hands-free sliding side
d o o r (s)
Opening/Closing
The automatic locking after closing the
door can be programmed in the vehicle
configuration menu.
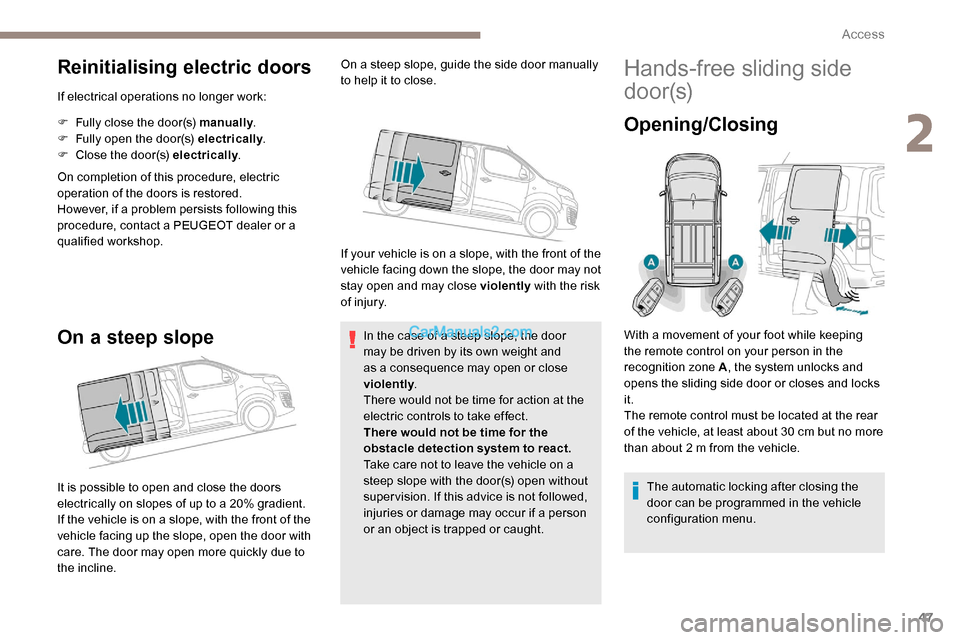
With a movement of your foot while keeping
the remote control on your person in the
recognition zone A
, the system unlocks and
opens the sliding side door or closes and locks
it.
The remote control must be located at the rear
of the vehicle, at least about 30 cm but no more
than about 2 m from the vehicle.
2
Access
Page 55 of 324
53
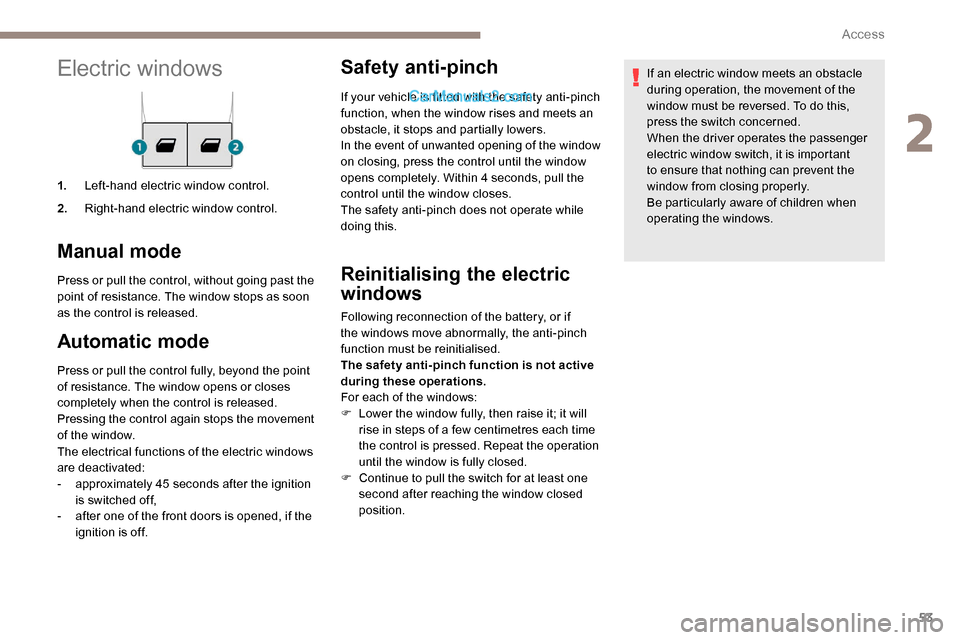
Electric windows
1.Left-hand electric window control.
2. Right-hand electric window control.
Manual mode
Press or pull the control, without going past the
point of resistance. The window stops as soon
as the control is released.
Automatic mode
Press or pull the control fully, beyond the point
of resistance. The window opens or closes
completely when the control is released.
Pressing the control again stops the movement
of the window.
The electrical functions of the electric windows
are deactivated:
-
a
pproximately 45 seconds after the ignition
is switched off,
-
a
fter one of the front doors is opened, if the
ignition is off.
Safety anti-pinch
If your vehicle is fitted with the safety anti-pinch
function, when the window rises and meets an
obstacle, it stops and partially lowers.
In the event of unwanted opening of the window
on closing, press the control until the window
opens completely. Within 4 seconds, pull the
control until the window closes.
The safety anti-pinch does not operate while
doing this.
Reinitialising the electric
windows
Following reconnection of the battery, or if
the windows move abnormally, the anti-pinch
function must be reinitialised.
The safety anti-pinch function is not active
during these operations.
For each of the windows:
F
L
ower the window fully, then raise it; it will
rise in steps of a few centimetres each time
the control is pressed. Repeat the operation
until the window is fully closed.
F
C
ontinue to pull the switch for at least one
second after reaching the window closed
position. If an electric window meets an obstacle
during operation, the movement of the
window must be reversed. To do this,
press the switch concerned.
When the driver operates the passenger
electric window switch, it is important
to ensure that nothing can prevent the
window from closing properly.
Be particularly aware of children when
operating the windows.
2
Access
Page 106 of 324

104
Windscreen and headlamp
wash
Switching on
Give a short downwards push to the
control stalk.
A wiping cycle confirms that the
instruction has been accepted.
This indicator lamp comes on in the
instrument panel and a message is
displayed.
Switching off
Give the control stalk a brief push
downwards or shift the control stalk
to a different position (Int, 1 or 2).
This indicator lamp goes off in the
instrument panel and a message is
displayed.
The automatic rain sensitive windscreen
wipers must be reactivated by pushing the
control stalk downwards, if the ignition has
been off for more than one minute.
Operating fault
If a fault occurs with the automatic windscreen
wipers, the wipers will operate in intermittent
mode.
Have it checked by a PEUGEOT dealer or a
qualified workshop. Do not cover the rain sensor, linked with
the sunshine sensor and located in the
top of the windscreen behind the rear view
m i r r o r.
Switch off the automatic windscreen
wipers when using an automatic car wash.
In winter, it is advisable to wait until
the windscreen is completely clear of
ice before activating the automatic rain
sensitive wipers.
Rear wiper
Of f.
Intermittent wipe.
Wash-wipe (set duration).
Reverse gear
When reverse gear is engaged, the rear wiper
will come into operation automatically if the
windscreen wipers are operating.
Activation/Deactivation
With audio system or touch
screen
The system is activated or
deactivated via the vehicle
configuration menu.
This system is activated by default.
If a significant accumulation of snow or ice
is present, or when using a bicycle carrier
on the tailgate, deactivate the automatic
rear wiper.
F
P
ull the wiper control stalk towards you.
Lighting and visibility
Page 132 of 324

130
Recommended ISOFIX
child seats
Also consult the user guides from the child
seat’s manufacturer to find out how to
install and remove the seat.
Locations for ISOFIX child
seats
In accordance with European regulations, the
table indicates the options for installing ISOFIX
child seats on the vehicle seats fitted with
ISOFIX mountings.
In the case of universal and semi-universal
ISOFIX child seats, the ISOFIX size category,
determined by a letter from A to G, is indicated
on the child seat next to the ISOFIX logo.
"RÖMER Baby- Safe Plus and its ISOFIX
base"
(size category: E )
Group 0+: from bir th to 13 kg
Installed rearward facing using an ISOFIX base which is attached to rings A .
The base has a support leg, height-
adjustable, which rests on the vehicle's floor. This child seat can also be secured with a
seat belt. In this case, only the shell is used and attached to the vehicle seat using the three-point seat belt. "
RÖMER Duo Plus ISOFIX "
(size category: B1 )
Group 1: from 9 to 18kg
Installed only in the forward facing position.
Is attached to rings A and ring B , referred to
as TOP TETHER, using an upper strap.
Three seat body angles: sitting, reclining, lying down.
This child seat can also be used on seats not equipped with ISOFIX mountings. In
this case, it must be secured to the vehicle's seat by the three-point seat belt. Adjust the
position of the vehicle's front seat so that the child's feet are not touching the backrest.
Safety
Page 163 of 324
161
Speed displayOperating limitsMemorising the speed
setting
For more information on the Speed
limiter, Cruise control or Adaptive
cruise control , refer to the corresponding
sections.
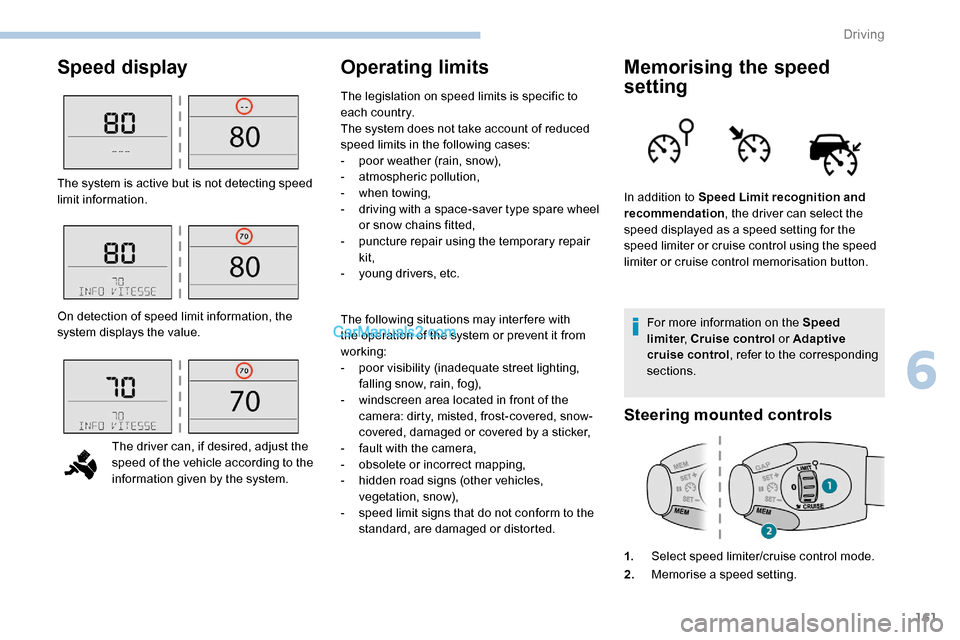
Steering mounted controls
1. Select speed limiter/cruise control mode.
2. Memorise a speed setting.
The system is active but is not detecting speed
limit information.
On detection of speed limit information, the
system displays the value.
The driver can, if desired, adjust the
speed of the vehicle according to the
information given by the system. The following situations may interfere with
the operation of the system or prevent it from
working:
-
p
oor visibility (inadequate street lighting,
falling snow, rain, fog),
-
w
indscreen area located in front of the
camera: dirty, misted, frost-covered, snow-
covered, damaged or covered by a sticker,
-
f
ault with the camera,
-
o
bsolete or incorrect mapping,
-
h
idden road signs (other vehicles,
vegetation, snow),
-
s
peed limit signs that do not conform to the
standard, are damaged or distorted. In addition to Speed Limit recognition and
recommendation
, the driver can select the
speed displayed as a speed setting for the
speed limiter or cruise control using the speed
limiter or cruise control memorisation button.
The legislation on speed limits is specific to
each country.
The system does not take account of reduced
speed limits in the following cases:
-
p
oor weather (rain, snow),
-
a
tmospheric pollution,
-
w
hen towing,
-
d
riving with a space-saver type spare wheel
or snow chains fitted,
-
p
uncture repair using the temporary repair
kit,
-
y
oung drivers, etc.
6
Driving