2019 Peugeot Expert Wiper
[x] Cancel search: WiperPage 4 of 324

2
.
.
Instrument Panel 9
W arning and indicator lamps 1 0
Indicators
23
Distance recorders
2
7
Lighting dimmer
2
7
Trip computer
2
8
Setting the time and date
2
9
Electronic key with remote control function
and built-in key,
3
1
Unlocking/Complete or selective unlocking
3
3
Back-up procedures
3
8
Central locking / unlocking
4
1
Electric sliding side door(s)
4
3
General recommendations
for the sliding side doors
4
5
Hands-free sliding side door(s)
4
7
Side-hinged rear doors
4
9
Tailgate
5
0
Tailgate rear screen
5
0
Alarm
51
Electric windows
5
3Correct driving position
5
4
Front seats
5
4
2-seat front bench seat
5
6
Steering wheel adjustment
5
8
Mirrors 59
Moduwork
6
0
Precautions for the seats and bench seats
6
3
Fixed one-piece bench seat 6 4
Fixed rear seat and bench seat 6 6
Rear seat and bench seat on rails 6 8
Individual rear seat(s) on rails
7
1
Crew cab, fixed
7
3
Crew cab, folding
7
4
Interior fittings
7
5
Loading area fittings
7
9
Seating area fittings
8
1
Panoramic sunroof
8
2
Retractable sliding table
8
3
Heating and Ventilation
8
6
Heating
87
Manual air conditioning
8
7
Dual-zone automatic air conditioning
8
8
Recirculation of interior air
9
0
Front demisting - defrosting
9
0
Rear screen and/or door mirrors
demisting - defrosting
9
1
Rear heating - air conditioning
9
2
Additional Heating / Ventilation
9
2
Courtesy lamp(s)
9
5Lighting control stalk
9
7
Direction indicators
9
8
Daytime running lamps/Sidelamps
9
9
Automatic illumination of headlamps
9
9
Guide-me-home and welcome lighting
9
9
Cornering lighting
1
00
Automatic headlamp dipping
1
01
Manual headlamp beam height adjustment 1 02
Interior ambient lighting 1 02
Wiper control stalk 1 03
Automatic wiping
1
04
Changing a wiper blade
1
06
General safety recommendations
1
07
Hazard warning lamps
1
08
Emergency or assistance call
1
08
Audible warning
1
09
Electronic stability control (ESC)
1
09
Advanced Grip Control
1
12
Seat belts
1
13
Airbags
117
Child seats
1
20
Deactivating the front passenger airbag
1
22
ISOFIX child seats
1
29
Manual child lock
1
36
Electric child lock
1
36
Child lock on rear windows
1
37
Over view
Instruments
Access Ease of use and comfort
Safety
Lighting and visibility
Instruments and controls 4
L abels 5
Eco-driving
Contents
Page 6 of 324

4
Instruments and controls
Depending on the vehicle's equipment,
the storage compartments may be open
or closed. This configuration is shown for
illustrative purposes.
Steering mounted controls
1.Glove box
Deactivation of the front passenger airbag
(inside the glove box)
2. 12 V accessory socket (120 W)
Obser ve the maximum power rating to
avoid damaging the accessory 3.
USB socket
4. JACK socket
5. Instrument panel
6. Storage compartments
Cup or can holder
7. Cooled glove box (if the vehicle is so
equipped)
Via a ventilation nozzle, if opened, engine
running and air conditioning on
8. Upper glove box
9. 220 V accessory socket (150 W, if the
vehicle is so equipped)
Obser ve the maximum power rating to
avoid damaging the accessory.
10. Horn
11. Courtesy lamp
Warning lamp display for seat belts and
front passenger airbag
Interior rear view mirror
Surveillance mirror
Emergency and assistance call buttons
12 . Heating
Manual air conditioning
Dual-zone automatic air conditioning
Front demisting - defrosting
Rear screen demisting – defrosting
13. "START/STOP" button
14 . Gearbox
15. Monochrome screen with audio system
Touch screen with PEUGEOT Connect
Radio or PEUGEOT Connect Nav 16.
Bonnet release
17. Dashboard fuses
18. Head-up display
1. External lighting/direction indicator
controls
2. Wiper/screenwash/trip computer controls
3. Audio system adjustment controls
(depending on version)
Over view
Page 30 of 324

28
With touch screen
The brightness can be adjusted differently
for day mode and night mode.
F
I
n the Settings
menu, select " Brightness".
Or select " OPTIONS", "Screen configuration "
then " Brightness ".
F
A
djust the brightness by pressing the
arrows or moving the slider.
Trip computer
Information displayed about the current journey
(range, fuel consumption, average speed, etc.).
Display of information
To display the various trip computer tabs in
succession:
With steering mounted controls
F Press the knob on the steering wheel .
F
P
ress this button, located on the end of the
wiper control stalk .
On the instrument panel
F Press this button. The current information is then displayed:
-
t
he range,
-
t
he current fuel consumption,
-
t
he Stop & Start time counter,
-
t
he trip "
1" followed (depending on version)
by trip " 2" with: the average speed, the
average fuel consumption and the distance
travelled for each trip.
Tr i p s " 1" and " 2" are independent but their use
is identical.
For example, trip " 1" can be used for daily
figures and trip " 2" for monthly figures.
Reset trip
The reset is per formed when the trip is
displayed.
F
P
ress the button located on the end of
the wiper control stalk for more than
2
seconds.
Instruments
Page 93 of 324

91
Dual-zone automatic air
conditioning
F Press this button to demist or defrost the windscreen and side
windows as quickly as possible.
The system automatically manages the air
conditioning, air flow and air intake, and
provides optimum distribution towards the
windscreen and side windows. F
T
o turn it off, press this button
again or press “ AUTO”.
The system is reactivated with the values prior
to the deactivation.
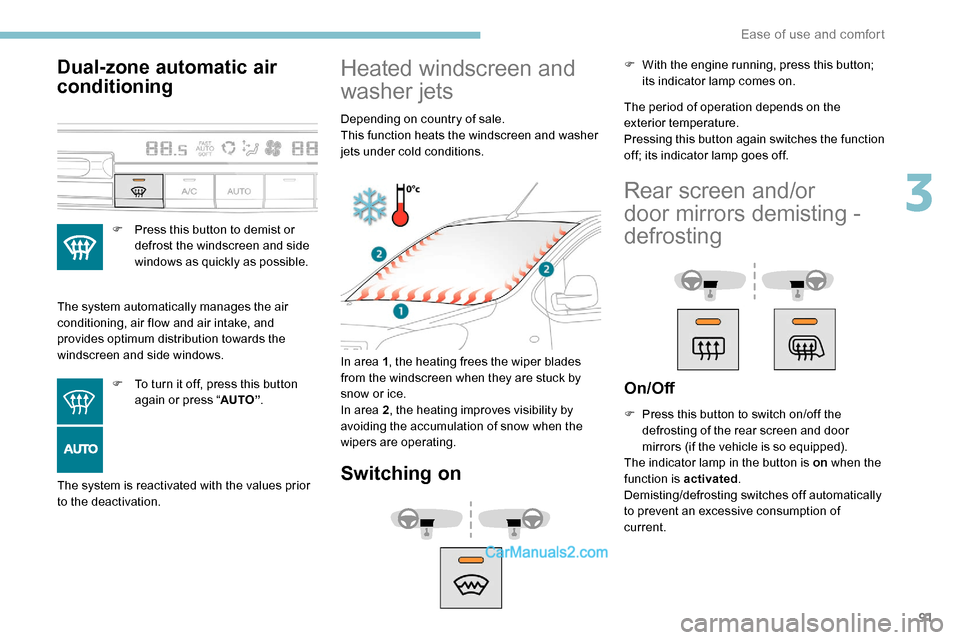
Heated windscreen and
washer jets
Depending on country of sale.
This function heats the windscreen and washer
jets under cold conditions.
In area 1 , the heating frees the wiper blades
from the windscreen when they are stuck by
snow or ice.
In area 2 , the heating improves visibility by
avoiding the accumulation of snow when the
wipers are operating.
Switching on
The period of operation depends on the
exterior temperature.
Pressing this button again switches the function
off; its indicator lamp goes off. F
W
ith the engine running, press this button;
its indicator lamp comes on.
Rear screen and/or
door mirrors demisting -
defrosting
On/Off
F Press this button to switch on/off the defrosting of the rear screen and door
mirrors (if the vehicle is so equipped).
The indicator lamp in the button is on when the
function is activated .
Demisting/defrosting switches off automatically
to prevent an excessive consumption of
current.
3
Ease of use and comfort
Page 101 of 324

99
Daytime running lamps/
Sidelamps
If the vehicle is so equipped, they come on
automatically when the engine is started, when
the lighting control stalk is in position "0" or
" AUTO ".
Automatic headlamp
illumination
When a low level of ambient light is detected
by a sunshine sensor, the number plate
lamps,
sidelamps and dipped beam headlamps
are switched on automatically, without any F
T
urn the ring to the "AUTO"
position. When
the function is activated, a message is
displayed.
F
T
urn the ring to another position
.
Deactivation of the function is accompanied
by the display of a message.
Malfunction
In the event of a malfunction of
the sunshine sensor, the lighting
comes on and this warning lamp is
displayed in the instrument panel,
accompanied by an audible signal
and/or a message.
Contact a PEUGEOT dealer or a qualified
workshop.
In fog or snow, the sunshine sensor may
detect sufficient light. In this case, the
lighting will not come on automatically.
Do not cover the sunshine sensor,
integrated with the rain sensor and located
at the top of the windscreen behind the
rear view mirror; the associated functions
would no longer be controlled.
Guide-me-home and
welcome lightingaction on the part of the driver. They can also
come on if rain is detected, at the same time as
the automatic rain sensitive wipers.
As soon as the brightness returns to a
sufficient level or after the windscreen wipers
are switched off, the lamps are switched off
automatically.
Guide-me-home lighting
Manual
Switching on/off
F W ith the ignition off, "flash" the headlamps
using the lighting control stalk to switch the
function on/off.
Manual guide-me-home lighting goes off
automatically at the end of a given period of
time.
Automatic
With the "Automatic headlamp illumination"
function activated (lighting control stalk
in the " AUTO" position), when the light is
poor, the dipped beam headlamps come on
automatically when the ignition is switched off.
With the ring in the " AUTO" position, when the
light is poor, the dipped beam headlamps come
on automatically when the ignition is switched
of f.
4
Lighting and visibility
Page 105 of 324

103
Wiper control stalk
Programming
Your vehicle may also include some functions
that can be activated/deactivated:In wintry conditions, remove snow, ice or
frost present on the windscreen, around
the wiper arms and blades and the
windscreen seal, before operating the
wipers.
Do not operate the wipers on a dry
windscreen. Under extremely hot or cold
conditions, ensure that the wiper blades
are not stuck to the windscreen before
operating the wipers.
Manual controls
The wipers are controlled directly by the driver.
With manual wiping (intermittent)
With AUTO wiping
- automatic windscreen wipers,
- rear wiping on engaging reverse gear.
Front wipers
Raise or lower the control to the desired
position to change the wiping speed.
Fast wiping (heavy rain).
Normal wiping (moderate rain).
Intermittent wiping (proportional to
the speed of the vehicle).
Of f. Single wipe (press down or pull
the stalk briefly towards you, then
release).
or Automatic wiping (press
down, then release).
Single wipe (pull the stalk
briefly towards you).
Automatic windscreen
wiping
The windscreen wipers operate automatically
once rain is detected (sensor behind the
rear view mirror), adapting their speed to the
intensity of the rain, without any action on the
part of the driver.
4
Lighting and visibility
Page 106 of 324

104
Windscreen and headlamp
wash
Switching on
Give a short downwards push to the
control stalk.
A wiping cycle confirms that the
instruction has been accepted.
This indicator lamp comes on in the
instrument panel and a message is
displayed.
Switching off
Give the control stalk a brief push
downwards or shift the control stalk
to a different position (Int, 1 or 2).
This indicator lamp goes off in the
instrument panel and a message is
displayed.
The automatic rain sensitive windscreen
wipers must be reactivated by pushing the
control stalk downwards, if the ignition has
been off for more than one minute.
Operating fault
If a fault occurs with the automatic windscreen
wipers, the wipers will operate in intermittent
mode.
Have it checked by a PEUGEOT dealer or a
qualified workshop. Do not cover the rain sensor, linked with
the sunshine sensor and located in the
top of the windscreen behind the rear view
m i r r o r.
Switch off the automatic windscreen
wipers when using an automatic car wash.
In winter, it is advisable to wait until
the windscreen is completely clear of
ice before activating the automatic rain
sensitive wipers.
Rear wiper
Of f.
Intermittent wipe.
Wash-wipe (set duration).
Reverse gear
When reverse gear is engaged, the rear wiper
will come into operation automatically if the
windscreen wipers are operating.
Activation/Deactivation
With audio system or touch
screen
The system is activated or
deactivated via the vehicle
configuration menu.
This system is activated by default.
If a significant accumulation of snow or ice
is present, or when using a bicycle carrier
on the tailgate, deactivate the automatic
rear wiper.
F
P
ull the wiper control stalk towards you.
Lighting and visibility
Page 107 of 324

105
The screenwash then the windscreen wipers
operate for a pre-determined time.
The headlamp washers only operate when
the dipped beam headlamps are on and the
vehicle is moving.
With daytime running lamps on, to activate the
headlamp wash, position the lighting control
stalk in the dipped beam headlamps position.
On vehicles fitted with automatic air
conditioning, any action on the windscreen
wash control results in temporary closing
of the air intake to avoid odours inside the
passenger compartment.
Screenwash/headlamp wash
level low
For vehicles fitted with headlamp
washers, when the fluid reservoir
low level is reached, this warning
lamp comes on in the instrument
panel, accompanied by an audible
signal and a message.
It comes on when the ignition is switched on,
or every time the stalk is operated, until the
reservoir is refilled.
Next time you stop, refill the screenwash/
headlamp wash reservoir.
Special position of the
windscreen wipers
This maintenance position is used for cleaning
or replacement of the wiper blades. It can also
be useful, in winter (ice, snow), to release the
wiper blades from the windscreen.
To maintain the effectiveness of the flat
wiper blades, it is advisable to:
-
h
andle them with care,
-
c
lean them regularly using soapy
water,
-
a
void using them to retain cardboard
on the windscreen,
-
r
eplace them at the first signs of wear.
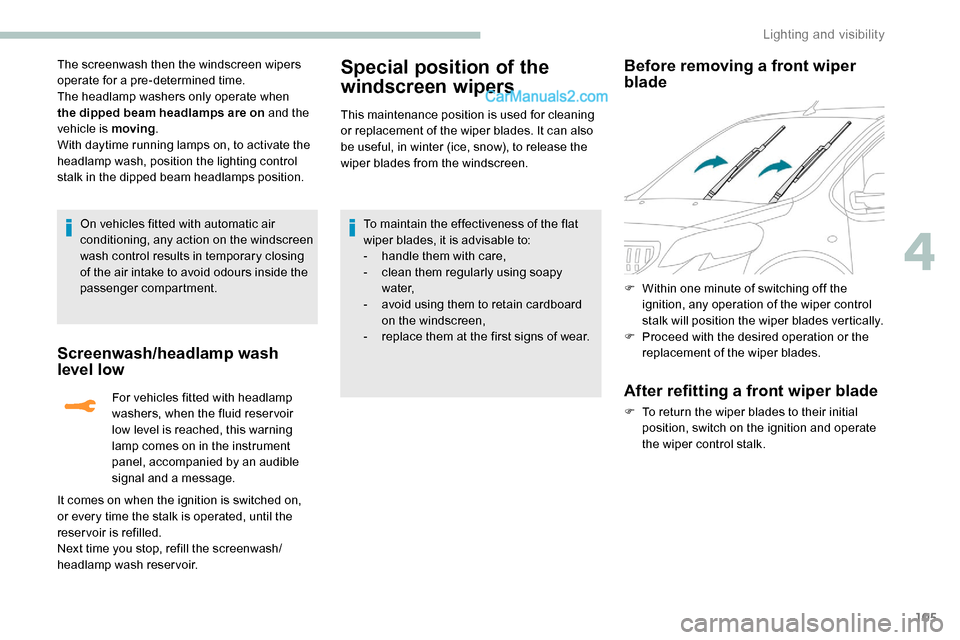
Before removing a front wiper
blade
F Within one minute of switching off the ignition, any operation of the wiper control
stalk will position the wiper blades vertically.
F
P
roceed with the desired operation or the
replacement of the wiper blades.
After refitting a front wiper blade
F To return the wiper blades to their initial position, switch on the ignition and operate
the wiper control stalk.
4
Lighting and visibility