2019 Peugeot 508 camera
[x] Cancel search: cameraPage 11 of 320

9
As a safety measure, these adjustments
must be carried out with the vehicle
stationary.
Choosing a display colour
This depends on the ambience activated by the
i- Cockpit® Amplify function.
Depending on version, it can be selected in the
setting of a profile in the Settings menu of the
touch screen.
The possible choices are:
F
"Relax ": grey,
F
"Boost ": red,
F
"Normal " (no ambience activated): blue.
For more information on the i-Cockpit®
Amplify function , refer to the corresponding
section.
Choice of display mode
To modify the display mode of the instrument
panel:
F
T
urn the knob located to the left of the
steering wheel to display and scroll through
the different modes on the right-hand side
of the instrument panel.
F
O
nce the selected display mode appears,
press on the knob to validate.
If the knob is not moved, the selected display
mode is automatically applied after a few
moments.
Each mode corresponds to the type of
information displayed in the instrument panel.
-
"
DIALS": standard display of the analogue
and digital speedometers, the rev counter,
the fuel gauge, the engine coolant
temperature indicator and the total distance
recorder.
-
"
NAVIGATION": standard display,
additionally showing the current navigation
information (map and navigation
instructions).
-
"
DRIVING": standard display, additionally
showing the current driving aid systems
information.
-
"
NIGHT VISION": standard display,
additionally showing the display of the
infrared camera image (associated with the
Night Vision function). - "
MINIMAL": minimal display with digital
speedometer and the total distance
recorder and, in the event of a warning
only, the fuel gauge and the engine coolant
temperature indicator.
-
"
PERSONAL": minimal display and
possibility of selecting optional information
to be displayed in the customisable areas
on the left and right.
To enter settings for the "PERSONAL"
display mode and select the information to
be displayed in the customisable areas of the
instrument panel:
With 8" touch screen F
Press Settings in the upper
banner of the touch screen.
F
Sel
ect "Configuration ".
F
Sel
ect "Instrument panel
personalisation ".
1
Instruments
Page 73 of 320

71
In wintry conditions, remove all snow or
ice on the camera on the windscreen
before moving off.
Other wise, this can affect the function
of the equipment associated with the
camera.
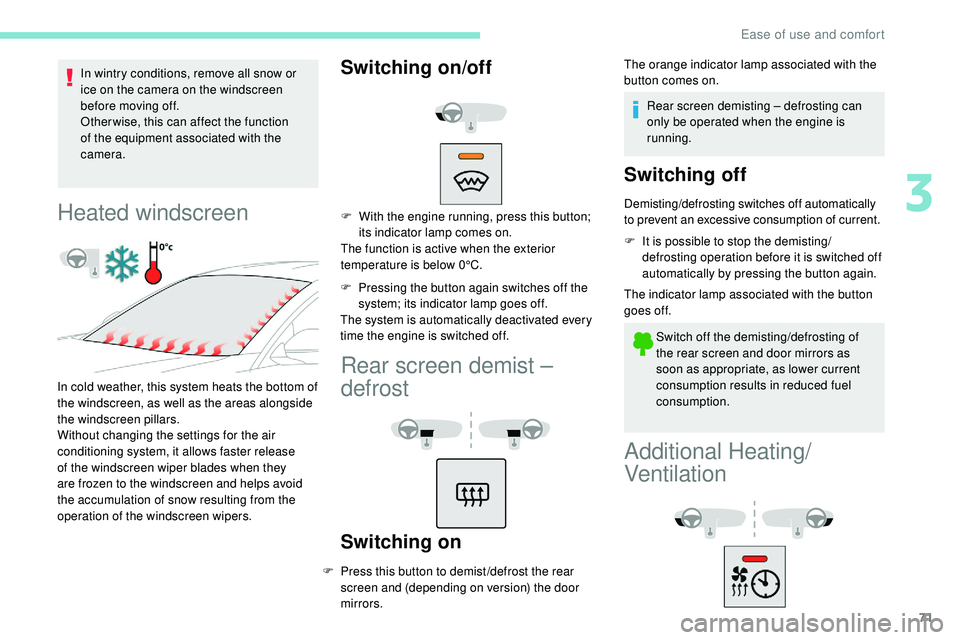
Heated windscreen
In cold weather, this system heats the bottom of
the windscreen, as well as the areas alongside
the windscreen pillars.
Without changing the settings for the air
conditioning system, it allows faster release
of the windscreen wiper blades when they
are frozen to the windscreen and helps avoid
the accumulation of snow resulting from the
operation of the windscreen wipers.
Switching on/off
F With the engine running, press this button; its indicator lamp comes on.
The function is active when the exterior
temperature is below 0°C.
F
P
ressing the button again switches off the
system; its indicator lamp goes off.
The system is automatically deactivated every
time the engine is switched off.
Rear screen demist –
defrost
Switching on
F Press this button to demist /defrost the rear screen and (depending on version) the door
mirrors. The orange indicator lamp associated with the
button comes on.
Rear screen demisting – defrosting can
only be operated when the engine is
running.
Switching off
Demisting/defrosting switches off automatically
to prevent an excessive consumption of current.
F
I
t is possible to stop the demisting/
defrosting operation before it is switched off
automatically by pressing the button again.
The indicator lamp associated with the button
goes off.
Switch off the demisting/defrosting of
the rear screen and door mirrors as
soon as appropriate, as lower current
consumption results in reduced fuel
consumption.
Additional Heating/
Ventilation
3
Ease of use and comfort
Page 92 of 320

90
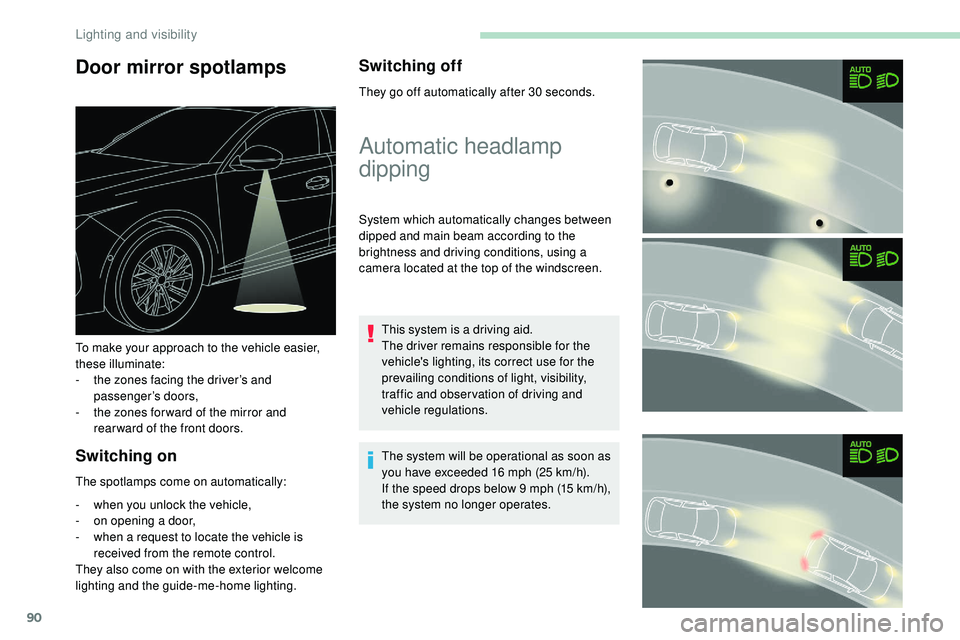
Door mirror spotlamps
Switching on
The spotlamps come on automatically:
-
w
hen you unlock the vehicle,
-
o
n opening a door,
-
w
hen a request to locate the vehicle is
received from the remote control.
They also come on with the exterior welcome
lighting and the guide-me-home lighting.
Switching off
They go off automatically after 30 seconds.
To make your approach to the vehicle easier,
these illuminate:
-
t
he zones facing the driver’s and
passenger’s doors,
-
t
he zones for ward of the mirror and
rear ward of the front doors.
Automatic headlamp
dipping
System which automatically changes between
dipped and main beam according to the
brightness and driving conditions, using a
camera located at the top of the windscreen.
This system is a driving aid.
The driver remains responsible for the
vehicle's lighting, its correct use for the
prevailing conditions of light, visibility,
traffic and obser vation of driving and
vehicle regulations.
The system will be operational as soon as
you have exceeded 16 mph (25
km/h).
If the speed drops below 9 mph (15
km/h),
the system no longer operates.
Lighting and visibility
Page 93 of 320

91
Activation/Deactivation
F Turn the lighting control stalk ring to the "AUTO " position.
Activation and deactivation are done
via the Driving/Vehicle menu of the
touch screen.
The state of the system stays in memory when
switching off the ignition.
Operation Pause
If the situation requires a change of headlamp
beam, the driver can take over at any time.
F
A
"headlamp flash" pauses the function:
-
i
f the "AUTO" and "Dipped beam"
indicator lamps were on, the system
changes to main beam,
-
i
f the "AUTO" and "Main beam" indicator
lamps were on, the system changes to
dipped beam.
To reactivate the system, flash the headlamps
again. The system may suffer inter ference or not
work correctly:
-
u
nder poor visibility conditions (snow,
heavy rain, etc.),
-
i
f the windscreen is dirty, misted or
obscured (by a sticker, etc.) in front of
the camera,
-
i
f the vehicle is facing highly reflective
signs.
When the system detects thick fog, it
temporarily deactivates the function.
The system is not able to detect:
-
r
oad users that do not have their own
lighting, such as pedestrians,
-
v
ehicles whose lighting is obscured
(for example: vehicles running behind
a safety barrier on a motor way),
-
v
ehicles at the top or bottom of a
steep slope, on winding roads, on
crossroads.
If the ambient light level is sufficient and/or if
the traffic conditions do not allow illumination of
the main beam headlamps: -
d
ipped beam is maintained,
these indicator lamps come on in
the instrument panel. If the ambient light level is very low and the
traffic conditions permit:
-
m
ain beam comes on
automatically: these indicator
lamps come on in the instrument
panel.
When the system detects thick fog, it
temporarily deactivates the function.
As soon as the vehicle leaves the area of thick
fog, the function reactivates automatically.
This indicator lamp goes off while the
function is deactivated.
4
Lighting and visibility
Page 94 of 320

92
Clean the windscreen regularly,
particularly the area in front of the camera.
The internal sur face of the windscreen can
also become misted around the camera.
In humid and cold weather, demist the
windscreen regularly.
Do not allow snow to accumulate on the
bonnet or roof of the vehicle as this could
conceal the detection camera.
Static cornering lighting
Activation/Deactivation
The function is activated and
deactivated in the Driving/Vehicle
menu of the touch screen.
Switching on
This system operates from a certain angle of
rotation of the steering wheel.
Switching off
The system does not operate:
- b elow a certain angle of rotation of the
steering wheel,
-
a
bove 56 mph (90 km/h),
-
w
hen reverse gear is engaged.
Night Vision
Using an infrared camera at the front of the
vehicle, the system identifies and signals the
presence of pedestrians and animals in the
driver’s field of vision, in low exterior light
conditions.
For the permanent display of the image from
the infrared camera in the instrument panel,
select the "Night Vision" display mode by
turning the knob located to the left of the
steering wheel. Once the conditions are met,
an alert is triggered when there is a risk of
collision. Night Vision is a driving aid system that
cannot, under any circumstances, replace
the personal assessment of night-time
visibility and traffic conditions.
In some conditions, the contrasts in
temperature are insufficient and the
system may not detect all dangers or,
conversely, it may give false warnings
(e.g. engines of lorries parked on the edge
of the road).
Conditions for operation
With the dipped or main beam headlamps on,
this function allows headlamps to illuminate
the inside of a bend using light-emitting diodes
(LEDs).
The speed of the vehicle must be less than 56
mph (90 km/h).
This function is only available with the "Full
LED" technology headlamps. If the "Night Vision" display mode has not been
selected, the alert is triggered in the form of a
temporary window displayed in the instrument
panel.
The function is available with the engine
running and in STOP mode of Stop & Start.
The light conditions must be very poor. The
dipped beam headlamps must be switched on
and maintained in good working order.
The temperature detection range is between
-30°C and +30°C.
The speed of the vehicle must be less than
99
mph (160 km/h).
The camera detection range is between 15
m
(for pedestrians) and 200
m, depending on
visibility conditions.
Lighting and visibility
Page 95 of 320

93
Animals less than 0.50 m tall are not detected.
T he instrument panel must be in "Night Vision"
display mode for the infrared camera image to
be displayed constantly.
The constant display disappears upon
switching off the ignition or if the conditions are
not met.
Operation
Activation/deactivation of the function
is done in the Driving/Vehicle menu
of the touch screen.
If all the operating conditions are
met, this indicator lamp comes on in
green: the display in the instrument
panel (with "Night Vision" mode
selected) and triggering of alerts are
available.
If certain operating conditions (speed
or temperature) are not met, the
indicator lamp comes on in orange:
only the display in the instrument
panel is available (in "Night Vision"
m o d e).
Whilst the exterior light is too bright
or the dipped beam headlamps have
not been switched on, the alerts are
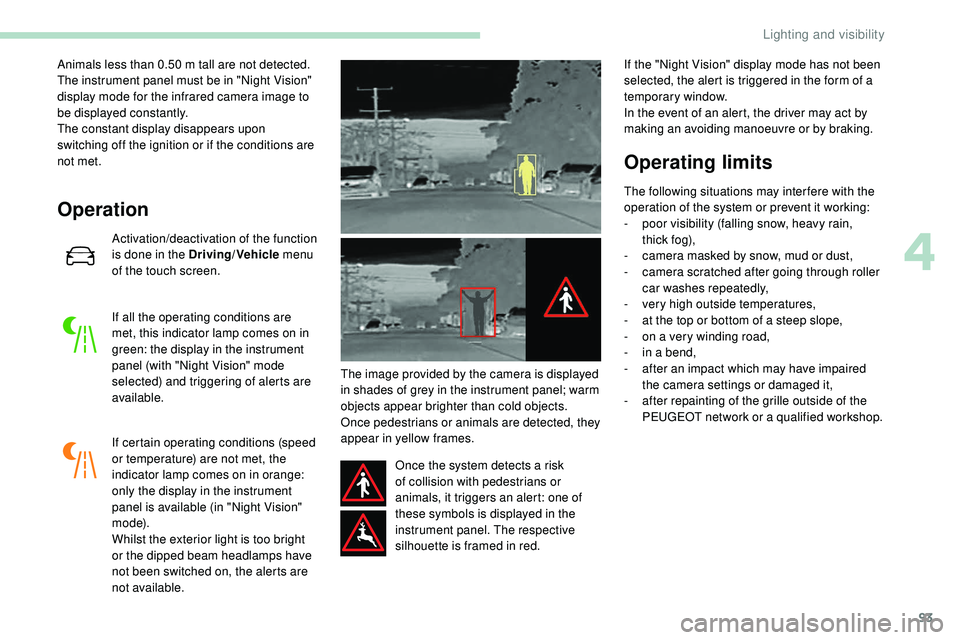
not available. The image provided by the camera is displayed
in shades of grey in the instrument panel; warm
objects appear brighter than cold objects.
Once pedestrians or animals are detected, they
appear in yellow frames.
Once the system detects a risk
of collision with pedestrians or
animals, it triggers an alert: one of
these symbols is displayed in the
instrument panel. The respective
silhouette is framed in red. If the "Night Vision" display mode has not been
selected, the alert is triggered in the form of a
temporary window.
In the event of an alert, the driver may act by
making an avoiding manoeuvre or by braking.
Operating limits
The following situations may inter fere with the
operation of the system or prevent it working:
-
p
oor visibility (falling snow, heavy rain,
t hi c k
fo g),
-
c
amera masked by snow, mud or dust,
-
c
amera scratched after going through roller
car washes repeatedly,
-
v
ery high outside temperatures,
-
a
t the top or bottom of a steep slope,
-
o
n a very winding road,
-
i
n a bend,
-
a
fter an impact which may have impaired
the camera settings or damaged it,
-
a
fter repainting of the grille outside of the
PEUGEOT network or a qualified workshop.
4
Lighting and visibility
Page 96 of 320

94
Recommendations on care
The infrared camera has a wash nozzle
connected to the vehicle’s front screenwash
system.
This nozzle operates every 5th use of the
screenwash.
Regularly check that the camera is clean.
In bad weather, or in wintry conditions, ensure
that the camera is not covered with mud, ice
or snow.
Malfunction
An orange warning lamp coming on
whilst all the operating conditions
have been met, accompanied by
a message, indicates a system
malfunction.
Contact a PEUGEOT dealer or a qualified
workshop.
Wiper control stalk
Programming
You can activate automatic wiping for the front
wipers.
On the SW, you can also configure rear wiping
on engaging reverse gear. In wintry conditions, remove snow, ice or
frost present on the windscreen, around
the wiper arms and blades and the
windscreen seal, before operating the
wipers.
Do not operate the wipers on a dry
windscreen. Under extremely hot or cold
conditions, ensure that the wiper blades
are not stuck to the windscreen before
operating the wipers.
Windscreen wipers
After switching off the ignition, a slight
movement of the windscreen wipers being
stored under the bonnet may occur.
Each time the ignition has been switched
off for more than a minute, regardless of
the previous wiper control stalk position,
it is necessary to reactivate the wiping by
operating the control.
Automatic (proportional to the
intensity of the rain).
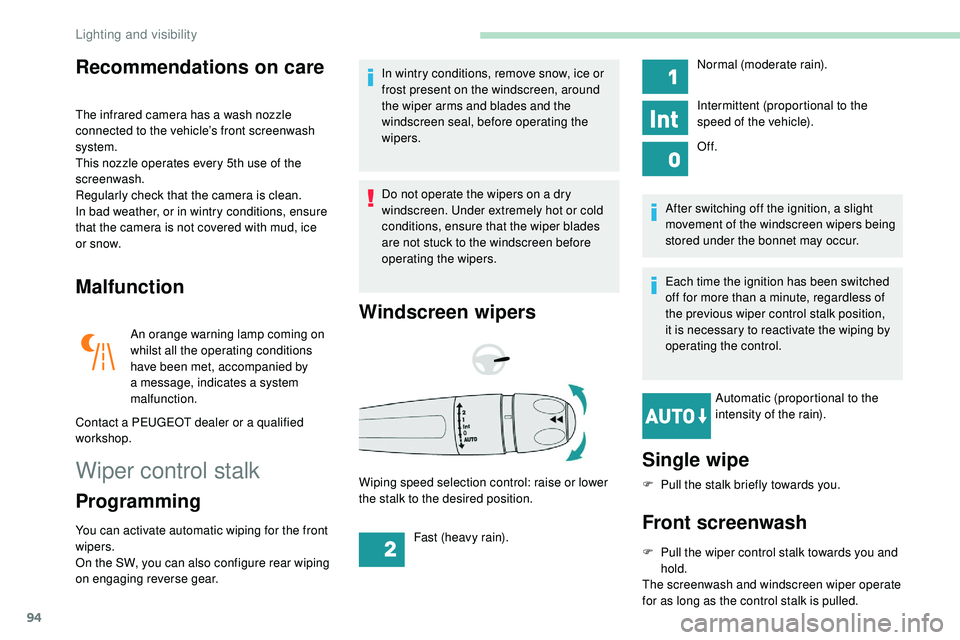
Wiping speed selection control: raise or lower
the stalk to the desired position.
Single wipe
F Pull the stalk briefly towards you.
Front screenwash
F Pull the wiper control stalk towards you and hold.
The screenwash and windscreen wiper operate
for as long as the control stalk is pulled. Normal (moderate rain).
Intermittent (proportional to the
speed of the vehicle).
Of f.
Fast (heavy rain).
Lighting and visibility
Page 144 of 320

142
The function is reinitialised with the
vehicle stationary via the Driving/
Vehicle menu of the touch screen.
F
I
n this menu, select the " Vehicle settings"
tab.
F
I
n the page, select the "
Under-inflation
initialisation " function.
F
Sel
ect " Ye s" to confirm.
The reinitialisation is confirmed by the display
of a message and an audible signal.
Malfunction
In this case, under-inflation monitoring of the
tyres is no longer assured.
Have the system checked by a PEUGEOT
dealer or a qualified workshop.
Before doing anything to the system,
the pressures of the four tyres must be
checked and the system reinitialised.
The flashing and then fixed illumination of the
under-inflation warning lamp accompanied
by illumination of the Ser vice warning lamp
indicates a fault with the system.
A message appears, accompanied by an
audible signal.
-
S
peed limit signs detected by the camera.
-
S
peed limit details from the navigation
system mapping.
This system displays the maximum authorised
speed in the instrument panel, according to
the speed limits in the country in which you are
driving, using:
Speed Limit recognition
and recommendation
This function is a driving aid that cannot,
in any circumstances, replace the driver’s
own vigilance nor compliance with the
highway code.
The actual signs always take priority over
those suggested by the system.
The signs must comply with the Vienna
Convention on road signs.
Sign detected
Suggested speed
(calculated)
Entry into built-
up area
Example: Without PEUGEOT
Connect Nav
30 mph or 50
km/h
(depending on the units
of the instrument panel)
With PEUGEOT
Connect Nav
Display of the speed in
force in the country in
which you are driving.
Entry into
intersection zone
Example: Without PEUGEOT
Connect Nav
10 mph or 20
km/h
(depending on the units
of the instrument panel)
With PEUGEOT
Connect Nav
Display of the speed in
force in the country in
which you are driving.
It is necessary to update your navigation
mapping regularly in order to receive
accurate information on speed limits from
the system.
-
C
ertain road signs detected by the camera
(e.g. entering a built-up area).
Driving