2019 NISSAN TITAN sensor
[x] Cancel search: sensorPage 428 of 682

TIRE PRESSURE MONITORING
SYSTEM (TPMS)
This vehicle is equipped with TPMS. It moni-
tors tire pressure of all tires except the
spare. When the low tire pressure warning
light is lit on vehicles equipped with a trip
computer (if so equipped), and the Tire
Pressure Low — Add Air warning appears in
the vehicle information display (if so
equipped), one or more of your tires is sig-
nificantly under-inflated. If equipped, the
system also displays pressure of all tires
(except the spare tire) on the display screen
by sending a signal from a sensor that is
installed in each wheel. If the vehicle is be-
ing driven with low tire pressure, the TPMS
will activate and warn you of it by the low
tire pressure warning light. This system will
activate only when the vehicle is driven at
speeds above 16 mph (25 km/h). For addi-
tional information, refer to “Warning lights,
indicator lights and audible reminders” in
the “Instruments and controls” section and
“Tire Pressure Monitoring System (TPMS)” in
the “Starting and driving” section of this
manual.
WARNING
∙ Radio waves could adversely affectelectric medical equipment. Those
who use a pacemaker should contact
the electric medical equipment
manufacturer for the possible influ-
ences before use.
∙ If the low tire pressure warning light illuminates while driving, avoid sud-
den steering maneuvers or abrupt
braking, reduce vehicle speed, pull off
the road to a safe location and stop
the vehicle as soon as possible. Driv-
ing with under-inflated tires may per-
manently damage the tires and in-
crease the likelihood of tire failure.
Serious vehicle damage could occur
and may lead to an accident and could
result in serious personal injury.
Check the tire pressure for all four
tires. Adjust the tire pressure to the
recommended COLD tire pressure
shown on the Tire and Loading Infor-
mation label to turn the low tire pres-
sure warning light OFF. If the light still illuminates while driving af ter adjust-
ing the tire pressure, a tire may be flat
or the TPMS may be malfunctioning. If
you have a flat tire, replace it with a
spare tire as soon as possible, If no tire
is flat and all tires are properly in-
flated, have the vehicle checked. It is
recommended that you visit a NISSAN
dealer for this service
∙ When replacing a wheel without the TPMS such as the spare tire, TPMS will
not function and the low tire pressure
warning light will flash for approxi-
mately one minute. The light will re-
main on af ter one minute. Have your
tires replaced and/or TPMS system
reset as soon as possible. It is recom-
mended that you visit a NISSAN dealer
for these services.
∙ Replacing tires with those not origi- nally specified by NISSAN could affect
the proper operation of the TPMS.
∙ Do not inject any tire liquid or aerosol tire sealant into the tires, as this may
cause a malfunction of the tire pres-
sure sensors.
FLAT TIRE
In case of emergency6-3
Page 449 of 682
TIRE DRESSINGS
NISSAN does not recommend the use of
tire dressings. Tire manufacturers apply a
coating to the tires to help reduce discolor-
ation of the rubber. If a tire dressing is ap-
plied to the tires, it may react with the coat-
ing and form a compound. This compound
may come off the tire while driving and
stain the vehicle paint.
If you choose to use a tire dressing, take the
following precautions:∙ Use a water-based tire dressing. The coating on the tire dissolves more easily
than with an oil-based tire dressing.
∙ Apply a light coat of tire dressing to help prevent it from entering the tire
tread/grooves (where it would be diffi-
cult to remove).
∙ Wipe off excess tire dressing using a dry towel. Make sure the tire dressing is
completely removed from the tire
tread/grooves.
∙ Allow the tire dressing to dry as recom- mended by the tire dressing manufac-
turer. Occasionally remove loose dust from the
interior trim, plastic parts and seats using a
vacuum cleaner or sof t bristled brush. Wipe
the vinyl and leather surfaces (if so
equipped) with a clean, sof t cloth damp-
ened in mild soap solution, then wipe clean
with a dry, sof t cloth.
Regular care and cleaning is required in
order to maintain the appearance of the
leather (if so equipped).
Before using any fabric protector, read the
manufacturer’s recommendations. Some
fabric protectors contain chemicals that
may stain or bleach the seat material.
Use a cloth dampened only with water to
clean the meter and gauge lens.
WARNING
Do not use water or acidic cleaners (hot
steam cleaners) on the seat. This can
damage the seat or occupant classifi-
cation sensor (if so equipped). This can
also affect the operation of the air bag
system and result in serious personal
injury.
CAUTION
∙ Never use benzine, thinner or any
similar material.
∙ Small dirt particles can be abrasive and damaging to leather surfaces
and should be removed promptly. Do
not use saddle soap, car waxes, pol-
ishes, oils, cleaning fluids, solvents,
detergents or ammonia-based clean-
ers as they may damage the leather’s
natural finish.
∙ Never use fabric protectors unless recommended by the manufacturer.
∙ Do not use glass or plastic cleaner on meter or gauge lens covers. It may
damage the lens cover.
AIR FRESHENERS
Most air fresheners use a solvent that
could affect the vehicle interior. If you use
an air freshener, take the following precau-
tions:
∙ Hanging-type air fresheners can cause permanent discoloration when they
contact vehicle interior surfaces. Place
the air freshener in a location that al-
lows it to hang free and not contact an
interior surface.
CLEANING INTERIOR
7-4Appearance and care
Page 471 of 682
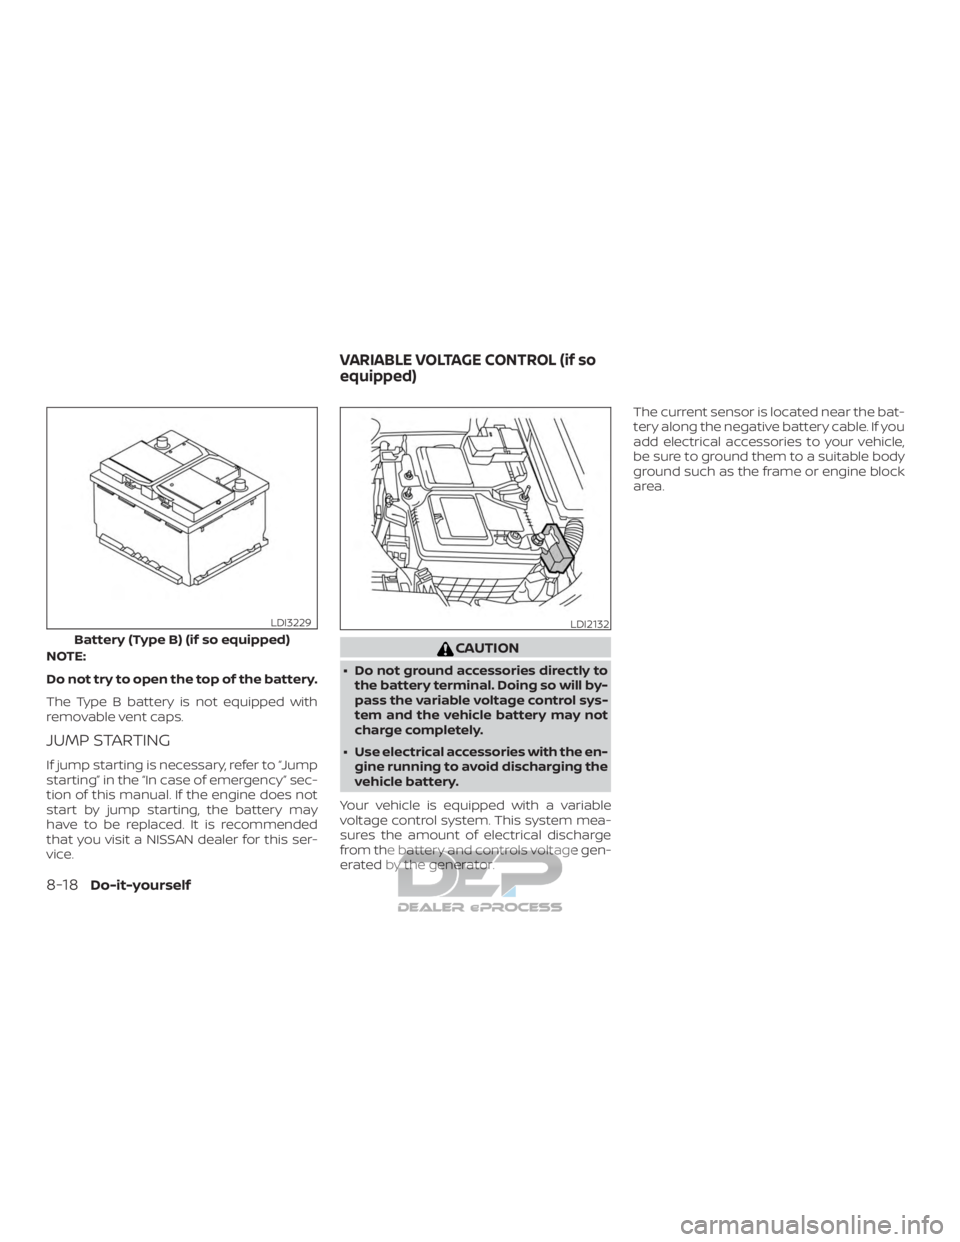
NOTE:
Do not try to open the top of the battery.
The Type B battery is not equipped with
removable vent caps.
JUMP STARTING
If jump starting is necessary, refer to “Jump
starting” in the “In case of emergency” sec-
tion of this manual. If the engine does not
start by jump starting, the battery may
have to be replaced. It is recommended
that you visit a NISSAN dealer for this ser-
vice.
CAUTION
∙ Do not ground accessories directly tothe battery terminal. Doing so will by-
pass the variable voltage control sys-
tem and the vehicle battery may not
charge completely.
∙ Use electrical accessories with the en- gine running to avoid discharging the
vehicle battery.
Your vehicle is equipped with a variable
voltage control system. This system mea-
sures the amount of electrical discharge
from the battery and controls voltage gen-
erated by the generator. The current sensor is located near the bat-
tery along the negative battery cable. If you
add electrical accessories to your vehicle,
be sure to ground them to a suitable body
ground such as the frame or engine block
area.
Battery (Type B) (if so equipped)
LDI3229LDI2132
VARIABLE VOLTAGE CONTROL (if so
equipped)
8-18Do-it-yourself
Page 488 of 682
If you have a flat tire, refer to “Flat tire” in
the “In case of emergency ” section of
this manual.
TIRE PRESSURE
Tire Pressure Monitoring System
(TPMS)
WARNING
Radio waves could adversely af-
fect electric medical equipment.
Those who use a pacemaker
should contact the electric medi-
cal equipment manufacturer for
the possible influences before
use.
This vehicle is equipped with the Tire
Pressure Monitoring System (TPMS).
It monitors tire pressure of all four
tires except the spare. When the low
tire pressure warning light is lit and
the “Tire Pressure Low - Add Air”
warning appears in the vehicle infor-
mation display, one or more of your
tires is significantly under-inflated. If
equipped, the system also displays
pressure of all tires (except the spare tire) on the display screen by send-
ing a signal from a sensor that is
installed in each wheel.
The TPMS will activate only when the
vehicle is driven at speeds above
16 mph (25 km/h). Also, this system
may not detect a sudden drop in tire
pressure (for example a flat tire while
driving).
For additional information, refer to
“Warning lights, indicator lights and
audible reminders” in the “Instru-
ments and controls” section, “Tire
Pressure Monitoring System (TPMS)”
in the “Starting and driving” section,
and “Flat tire” in the “In case of emer-
gency” section of this manual.
Tire inflation pressure
Check the tire pressures (including
the spare) of ten and always prior to
long distance trips. The recom-
mended tire pressure specifications
are shown on the F.M.V.S.S./C.M.V.S.S.
certification label or the Tire and
Loading Information label under the“Cold Tire Pressure” heading. The Tire
and Loading Information label is af-
fixed to the driver side center pillar.
Tire pressures should be checked
regularly because:
∙ Most tires naturally lose air over time.
∙ Tires can lose air suddenly when driven over potholes or other ob-
jects or if the vehicle strikes a
curb while parking.
The tire pressures should be
checked when the tires are cold. The
tires are considered COLD af ter the
vehicle has been parked for 3 or
more hours, or driven less than 1 mile
(1.6 km) at moderate speeds.
The TPMS with Easy-Fill Tire Alert
provides visual and audible signals
outside the vehicle for inflating tires
to the recommended COLD tire
pressure. For additional information,
refer to “TPMS with Easy-Fill Tire
Alert” in the “Starting and driving”
section of this manual.
WHEELS AND TIRES
Do-it-yourself8-35
Page 496 of 682
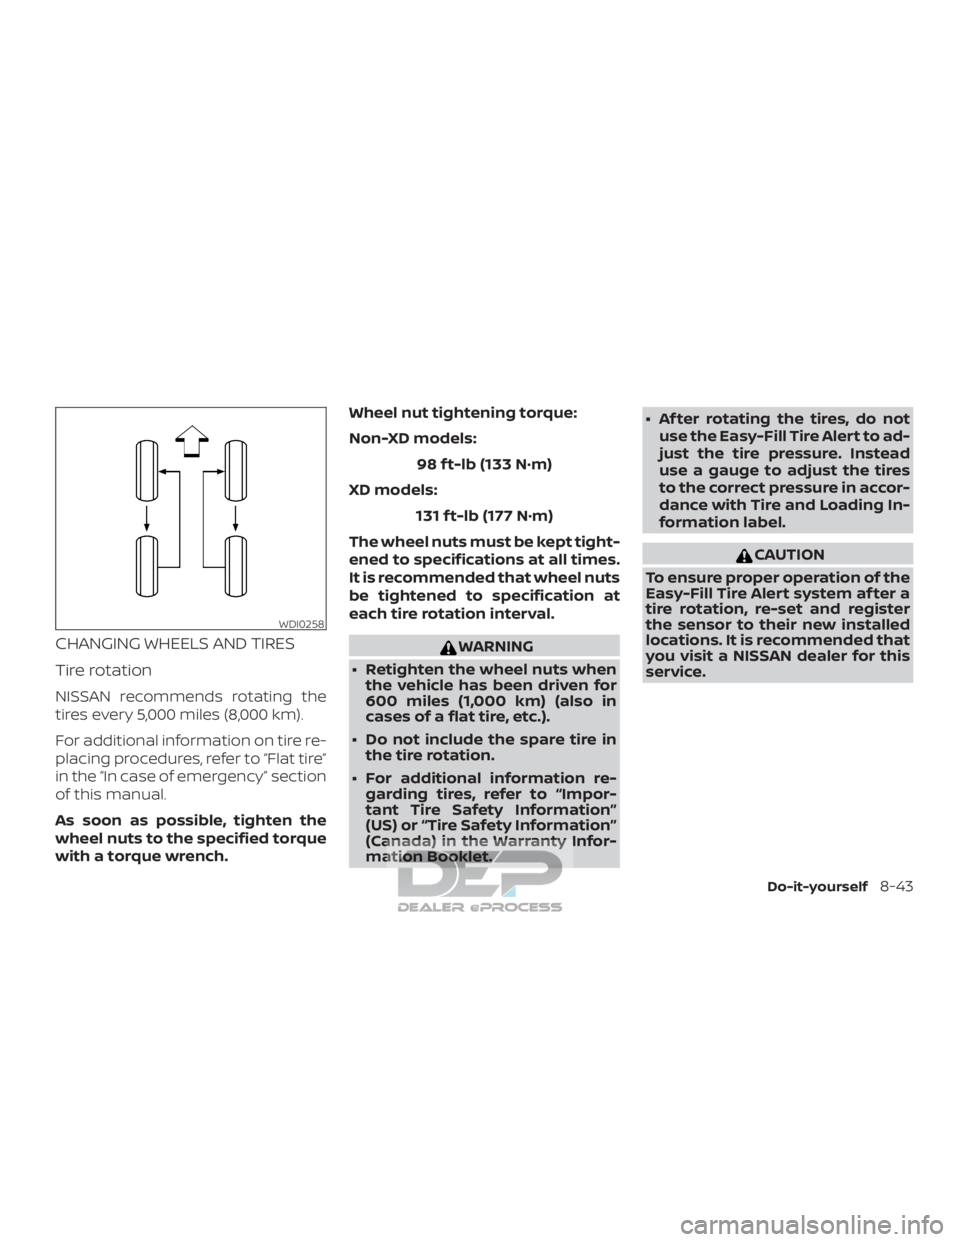
CHANGING WHEELS AND TIRES
Tire rotation
NISSAN recommends rotating the
tires every 5,000 miles (8,000 km).
For additional information on tire re-
placing procedures, refer to “Flat tire”
in the “In case of emergency” section
of this manual.
As soon as possible, tighten the
wheel nuts to the specified torque
with a torque wrench.Wheel nut tightening torque:
Non-XD models:
98 f t-lb (133 N·m)
XD models: 131 f t-lb (177 N·m)
The wheel nuts must be kept tight-
ened to specifications at all times.
It is recommended that wheel nuts
be tightened to specification at
each tire rotation interval.
WARNING
∙ Retighten the wheel nuts when the vehicle has been driven for
600 miles (1,000 km) (also in
cases of a flat tire, etc.).
∙ Do not include the spare tire in the tire rotation.
∙ For additional information re- garding tires, refer to “Impor-
tant Tire Safety Information”
(US) or “Tire Safety Information”
(Canada) in the Warranty Infor-
mation Booklet. ∙ Af ter rotating the tires, do not
use the Easy-Fill Tire Alert to ad-
just the tire pressure. Instead
use a gauge to adjust the tires
to the correct pressure in accor-
dance with Tire and Loading In-
formation label.
CAUTION
To ensure proper operation of the
Easy-Fill Tire Alert system af ter a
tire rotation, re-set and register
the sensor to their new installed
locations. It is recommended that
you visit a NISSAN dealer for this
service.
WDI0258
Do-it-yourself8-43
Page 498 of 682

∙ If your vehicle was originallyequipped with four tires that were the
same size and you are only replacing
two of the four tires, install the new
tires on the rear axle. Placing new tires
on the front axle may cause loss of
vehicle control in some driving condi-
tions and cause an accident and per-
sonal injury.
∙ If the wheels are changed for any rea- son, always replace with wheels
which have the same off-set dimen-
sion. Wheels of a different off-set
could cause premature tire wear, de-
grade vehicle handling characteris-
tics, affect the VDC system and/or in-
terference with the brake discs. Such
interference can lead to decreased
braking efficiency and/or early brake
pad/shoe wear. For additional infor-
mation on wheel-off set dimensions,
refer to “Wheels and tires” in the
“Technical and consumer informa-
tion” section of this manual. ∙ When replacing a wheel without the
TPMS such as the spare tire, the TPMS
will not function and the low tire pres-
sure warning light will flash for ap-
proximately 1 minute. The light will re-
main on af ter 1 minute. Have your
tires replaced and/or TPMS system
reset as soon as possible. It is recom-
mended that you visit a NISSAN dealer
for this service.
∙ Replacing tires with those not origi- nally specified by NISSAN could affect
the proper operation of the TPMS.
∙ The TPMS sensor may be damaged if it is not handled correctly. Be careful
when handling the TPMS sensor.
∙ When replacing the TPMS sensor, the ID registration may be required. Con-
tact a NISSAN dealer for ID
registration.
∙ Do not use a valve stem cap that is not specified by NISSAN. The valve stem
cap may become stuck.
∙ Be sure that the valve stem caps are correctly fitted. Otherwise the valve
may be clogged up with dirt and
cause a malfunction or loss of
pressure. ∙ Do not install a damaged or deformed
wheel or tire even if it has been re-
paired. Such wheels or tires could
have structural damage and could fail
without warning.
∙ The use of retread tires is not recommended.
∙ For additional information regarding tires, refer to “Important Tire Safety
Information” (US) or “Tire Safety Infor-
mation” (Canada) in the Warranty In-
formation Booklet.
Four-wheel drive models
CAUTION
Always use tires of the same type, size,
brand, construction (bias, bias-belted
or radial), and tread pattern on all four
wheels. Failure to do so may result in a
circumference difference between tires
on the front and rear axles which will
cause excessive tire wear and may
damage the transmission, transfer case
and differential gears.
Do-it-yourself8-45
Page 584 of 682
∙ While going downhill, the weight of thetrailer pushing on the tow vehicle may
decrease overall stability. Therefore, to
maintain adequate control, reduce your
speed and shif t to a lower gear. Avoid
long or repeated use of the brakes
when descending a hill, as this reduces
their effectiveness and could cause
overheating. Shif ting to a lower gear in-
stead provides “engine braking” and re-
duces the need to brake as frequently.
∙ If the engine coolant temperature rises to a high temperature, refer to “If your
vehicle overheats” in the “In case of
emergency” section of this owner’s
manual.
∙ Trailer towing requires more fuel than normal circumstances.
∙ Avoid towing a trailer for your vehicle’s first 500 miles (805 km).
∙ For the first 500 miles (805 km) that you do tow, do not drive over 50 mph
(80 km/h).
∙ Have your vehicle serviced more of ten than at intervals specified. For addi-
tional information, refer to “Mainte-
nance schedules” in the “Maintenance
and schedule” section of this manual. ∙ When making a turn, your trailer wheels
will be closer to the inside of the turn
than your vehicle wheels. To compen-
sate for this, make a larger than normal
turning radius during the turn.
∙ Crosswinds and rough roads will ad- versely affect vehicle/trailer handling,
possibly causing vehicle sway. When
being passed by larger vehicles, be pre-
pared for possible changes in cross-
winds that could affect vehicle han-
dling.
Trailer Sway Assist :
To minimize trailer sway, your vehicle may
apply braking to individual wheels based
on input from your vehicle sensors and ve-
hicle speed. Trailer sway control is a func-
tion of the Vehicle Dynamic Control (VDC)
system and is active when the VDC func-
tion is enabled.
CAUTION
If the VDC-OFF switch is on (meaning
VDC system OFF), the Trailer Sway As-
sist is also disabled When Trailer Sway Assist is in operation, the
VDC warning light blinks. When vehicle con-
trol is regained, VDC warning light will turn
OFF.
For additional information about the VDC
system, refer to “Vehicle Dynamic Control
(VDC) OFF switch” in the “Instruments and
controls” section and “Vehicle Dynamic
Control (VDC) system” in the “Starting and
driving” section of this manual.
If Trailer Sway Assist activates, do the fol-
lowing:
1. Take your foot off the accelerator pedal to allow the vehicle to coast and steer
as straight ahead as the road condi-
tions allow. This combination will help
stabilize the vehicle
CAUTION
Do not try to correct trailer sway by
steering or applying the brakes.
2. When the trailer sway stops, gently ap- ply the brakes and pull to the side of the
road in a safe area.
3. Try to rearrange the trailer load so it is balanced. For additional information,
refer to “Pre-towing tips” in this section.
Technical and consumer information10-61
Page 596 of 682
OilCapacities and recommended
fuel/lubricants...............10-2
Changing engine oil ............8-8
Changing engine oil filter .........8-9
Checking engine oil level .........8-7
Engine oil ...................8-7
Engine oil and oil filter
recommendation .............10-7
Engine oil viscosity ............10-8
Outsidemirrors................3-35
Overhead sunglasses holder ........2-77
Overheat Ifyourvehicleoverheats.........6-16
Owner's manual order form ........10-68
Owner's manual/service manual order
information..................10-68
P
Parking Parking brake operation .........5-23
Parking/parkingonhills.........5-55
Parkingbrake..................5-23
Personal lights .................2-89
Power Front seat adjustment ...........1-5
Power door locks ..............3-7
Poweroutlet..........2-67,2-67,2-69
Powerrearwindows...........2-84
Powersteeringfluid............8-12
Power steering system ..........5-55
Powerwindows..............2-83
Rearpowerwindows...........2-84
Powerinverterswitch ............2-63 Poweroutlet............2-67,2-67,2-69
Powersteering.................5-55
Powersteeringfluid..............8-12
Precautions
Maintenance precautions .........8-2
On-pavement and off-road driving
precautions .................5-7
Precautions on booster
seats ........1-26, 1-34, 1-40, 1-44, 1-49
Precautions on child restraints . .1-26, 1-34,
1-40, 1-44, 1-49
Precautions on seat belt usage .....1-15
Precautions on supplemental restraint
system .................1-53, 1-68
Precautions when starting and
driving..................5-2,5-9
Push starting ..................6-16
R
Radio Car phone or CB radio ..........4-89
Rain sensor ...................2-47
Readiness for inspection maintenance
(I/M) test ....................10-67
RearCrossTrafficAlert(RCTA)........5-33
Rear Door Alert .............2-41,2-66
Rearpowerwindows.............2-84
Rearseat.....................1-4
Rear Seat Infotainment (RSI) System . . .4-44
Rearslidingwindow .............2-86
Rear sonar system OFF switch .......2-64
Rearviewmirror................3-33
RearViewMonitor................4-3 Rear window and/or outside mirror
defrosterswitch................2-48
Recommended Fluids
............10-2
Recorders EventData.................10-67
Refrigerant recommendation ........10-8
Registering a vehicle in another
country .....................10-18
Remote Engine Start ..........3-24,5-16
Reporting safety defects (US only) . . . .10-66
S
Safety Child safety rear door lock ........3-10
Child seat belts . .1-26, 1-34, 1-40, 1-44, 1-49
Reporting safety defects (US only) . .10-66
Seat adjustment Front manual seat adjustment ......1-4
Front power seat adjustment ......1-5
Seatback pockets ...............2-72
Seat belt Childsafety.................1-24
Infants and small children ........1-25
InjuredPerson .............. .1-18
L a r
gerchildren.............. .1-25
Precautionsonseatbeltusage.....1-15
Pregnant women .............1-18
Seat belt extenders ............1-23
Seat belt maintenance ..........1-23
Seatbelts................1-15, 7-6
Shoulder belt height adjustment . . . .1-22
Three-pointtypewithretractor.....1-18
Seat belt extenders ..............1-23
Seatbeltwarninglight.........1-18, 2-19
11-5